Perfectly Bundle Nest.js with this Webpack Guide
Posted July 1, 2024

Webpack is a module bundler. Webpack is vividly used on frontend frameworks. However, Webpack is a rich ecosystem of plugins and loaders. It delves into bundling backend applications such as Nest.js. This guide Perfectly explains how to set up a Nest.js app with Webpack.
You’ll learn:
- The core concepts of Webpack and Nest.js.
- Steps in a Nest.js Webpack Build.
- How to adjust Nest.js CLI and
tsconfig.jsonto run Webpack. - Run the Webpack Bundled Nest.js app.
Ready? Now dive in and Bundle Nest.js with this Webpack guide like a pro.
The Core Concepts of Nest.js and Webpack
Nest.js ia a bolieplate code. It has an entry /src/main.ts. This set the Webpack entry point based on its internal dependency graph. Webpack instructs Webpack where to emit the bundle’s Output. For example ./dist/main.js and other generated files.
Here, Webpack will use a set of Nest.js Loaders to transform files. A Loader will essentially preprocess files and can convert TypeScript to JavaScript to let you run your Nest.js bundle. Webpack will, in turn, use powerful Plugins like HtmlWebpackPlugin. This adds advantages to bundle optimization, asset management, and injection of environment variables.
Webpack 4 introduced the concept of modes. There are three possible modes: development, production, and none. The mode setting informs Webpack to use its built-in optimizations accordingly.
The Key Webpack Features
To get the full advantage of using Webpack, Nest.js will use these features:
- You can split your code into bundles. Nest.js will then load these bundles on demand and reduce the size of the initial bundle.
- Tree shaking from dead-code elimination to clean up the final bundle. Webpack will remove any code that isn’t used based on ES6 module syntax (import and export).
- Hot Module Replacement to update modules at runtime without a full page reload.
- Lazy Loading Modules on demand rather than upfront.
- Webpack handles static assets like images and lets Nest.js process these assets with loaders.
Integrate Webpack with Nest.js
Along with this guide, you will need a working Nest.js app. First, ensure you have installed the Nest.js CLI as such:
npm i -g @nestjs/cli
Next, go to your working directory and use the following command to bootstrap the Nest.js starter code:
nest new nest-with-webpack
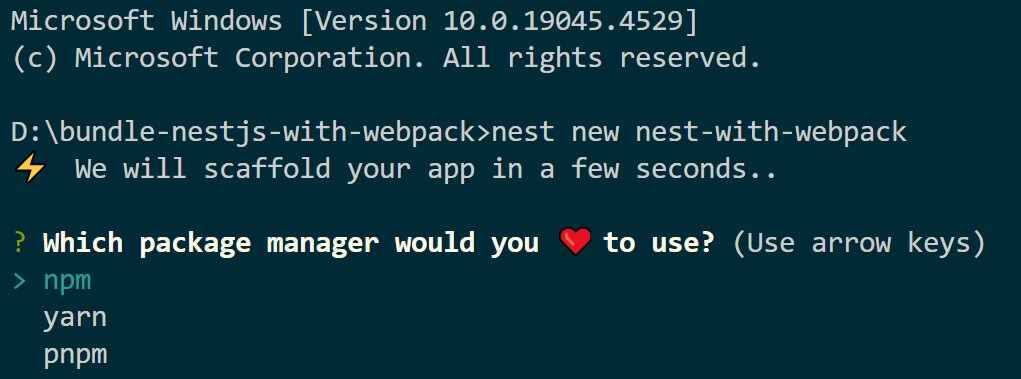
Once you select the package manager of your choice, a new nest-with-webpack directory will be created. CD to this latest application directory:
cd nest-with-webpack
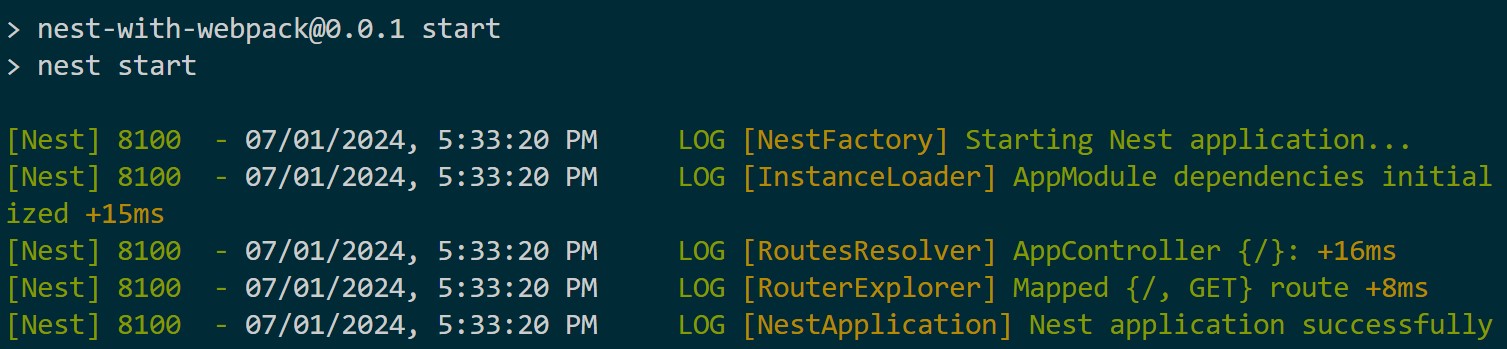
Finally, run the following command to test if the boilerplate code is working. You should get a Nest.js Hello World version on http://localhost:3000/:
npm start
Adding Webpack to Nest.js
Nest.js doesn’t come with Webpack ready. Go ahead and install these required packages:
npm install webpack webpack-node-externals webpack-cli --save-dev webpack-node-externals tsconfig-paths-webpack-plugin nodemon-webpack-plugin uglify-js
Within your nest-with-webpack folder create a webpack.config.js file and configure Webpack with Nest.js as follows:
// Module for handling file paths
const path = require("path");

// Plugin to minify JavaScript
const TerserPlugin = require("terser-webpack-plugin");

// Exclude node_modules from the bundle
const nodeExternals = require("webpack-node-externals");

// Plugin to restart the server on file changes
const NodemonPlugin = require("nodemon-webpack-plugin");

// Plugin to resolve paths from tsconfig
const TsconfigPathsPlugin = require("tsconfig-paths-webpack-plugin");

module.exports = {
    // Set the mode based on the NODE_ENV environment variable
    mode: 'production',

    // Exclude node_modules from the bundle
    externals: nodeExternals(),

    // Target Node.js environment
    target: "node",

    // Base directory for resolving entry points
    context: path.resolve(__dirname, "src"),

    // Entry point of the application
    entry: "./main.ts",

    output: {
        // Output file name
        filename: "server.js",

        // Output directory
        path: path.resolve(__dirname, "dist"),

        // Public URL of the output directory when referenced in a browser
        publicPath: "dist",
 },

    resolve: {
        // Use tsconfig paths plugin to resolve paths
        plugins: [new TsconfigPathsPlugin()],

        // Resolve these extensions
        extensions: [".ts", ".js"],
 },

    module: {
        rules: [
 {
                // Apply this rule to .ts files
                test: /\.ts?$/,

                // Use ts-loader to transpile TypeScript files
                loader: "ts-loader",
 },
 ],
 },

    plugins: [
        new NodemonPlugin({
            // Don't forward stdin to the child process
            stdin: false,

            // Watch these paths for changes
            watch: [path.resolve("./dist"), ".env"],
 }),
 ],

    optimization: {
        // Enable minimization
        minimize: true,

        minimizer: [
            new TerserPlugin({
                // Use UglifyJS for minification
                minify: TerserPlugin.uglifyJsMinify,

                // Use 4 parallel processes for minification
                parallel: 4,
 }),
 ],
 },
};
This Webpack configuration will handle Nest.js with TypeScript support, automatic server restarts on changes, and JavaScript minification.
Running Nest.js with Webpack
Your configuration is ready. You now need the right commands to access Webpack and Nest.js
Go to package.json and add the following command in your script section:
    "build": "webpack",
    "watch": "webpack --watch",
You will have:
npm run watch
npm run watch
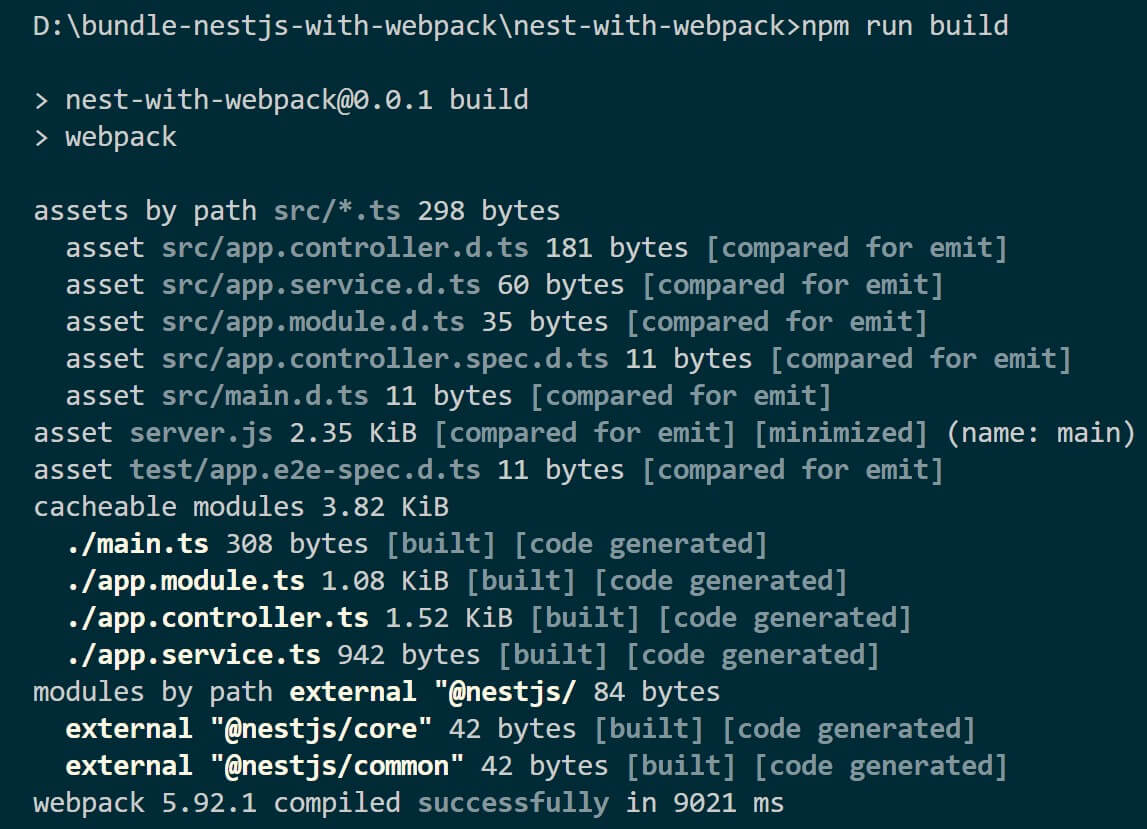
This should be your commands to run and build Nest.js with Webpack.
Conclusion
I hope you can now use Webpack and package a bundle of your Nest.js app. For further details learn How to Set up Nest.js with Vite and esbuild for more Optimized Builds.
Written By: