Flutter CI/CD | Building, Code signing, and Publishing
Posted February 12, 2024

In this article, we will build a Flutter CI/CD application and then deploy it to Google Play Store and App store via code magic.
You will be:
- Creating a sample Flutter Authors App
- Writing relevant test.
- Connecting the Flutter with CI/CD
- Setting up the build cicd workflow on codemagic
- Deploying on codemagic to Google Play store
To Proceed in this article, it is important to have the following:
Setting up the application
-
Proceed to your preferred working directory.
-
In it, initialize a flutter application:
flutter create authors_app -
Proceed to the newly created directory:
cd authors_app -
Start the development server:
flutter run
Creating a sample Flutter Authors App
-
In the lib directory, create a Providers directory.
-
In the Providers directory, create a get_task_provider.dart.
-
In the get_task_provider.dart:
-
Import the required packages:
import 'dart:convert'; import 'package:flutter/foundation.dart'; import 'package:http/http.dart' as http; -
Define a GetTaskProvider class:
class GetTaskProvider extends ChangeNotifier { } -
Define the variables:
String _response = ''; dynamic _list = []; String get getResponse => _response; -
Define a function for getting the authors:
void getAuthors(bool isLocal) async { final response = await http .get(Uri.parse('https://quotable.io/authors')); if (response.statusCode == 200) { _list = jsonDecode(response.body); } else { throw Exception('Failed to load authors'); } } -
Define a function for extracting the response:
dynamic getResponseData() {
    if (_list.isNotEmpty) {
    final data = _list;
    return data['results'] ?? {};
    } else {
    return {};
    }
}
-
-
In the lib directory, create a Screens directory. Inside it, create a home_page.dart file.
-
In the home_page.dart:
-
Import the necessary packages:
import 'package:flutter/material.dart'; import 'package:graphql_app/Providers/get_task_provider.dart'; import 'package:provider/provider.dart'; -
Define the home page stateful widget:
class HomePage extends StatefulWidget { const HomePage({Key? key}) : super(key: key); @override _HomePageState createState() => _HomePageState(); } class _HomePageState extends State<HomePage> { } -
In the _HomePageState fetch the authors and show a list:
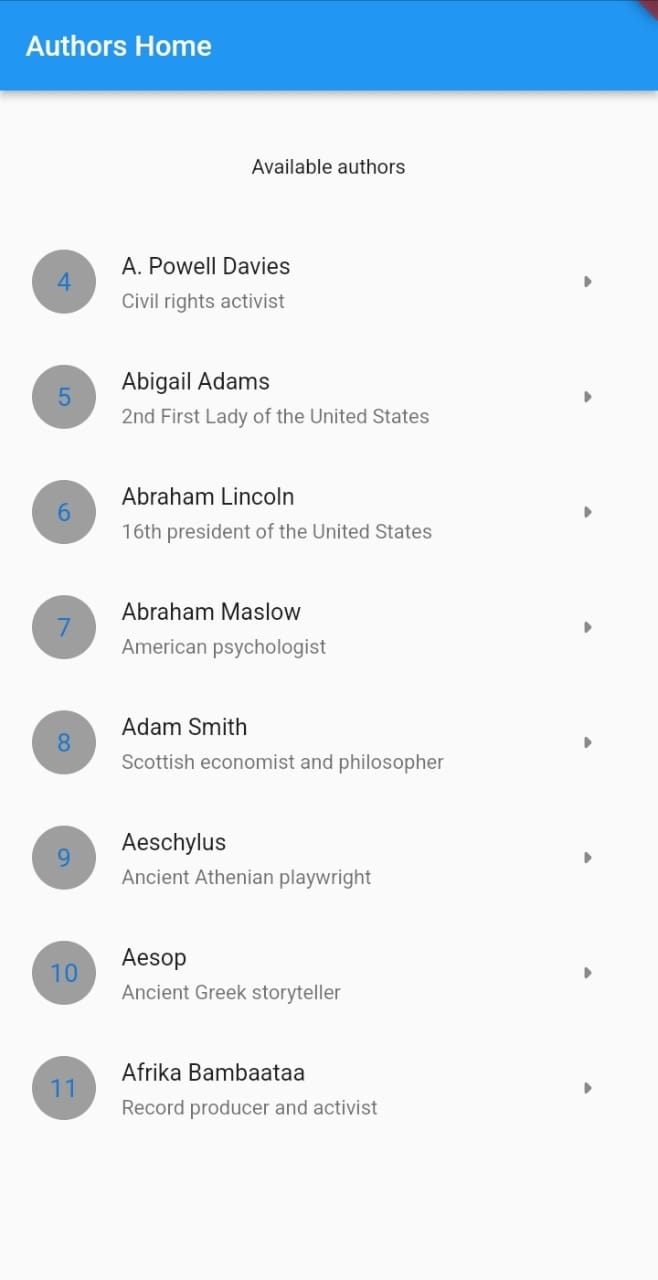
class _HomePageState extends State<HomePage> {
bool isFetched = false;
@override
Widget build(BuildContext context) {
    return Scaffold(
    appBar: AppBar(
        title: const Text('Authors Home'),
    ),
    body: Consumer<GetTaskProvider>(builder: (context, task, child) {
        if (isFetched == false) {
        task.getAuthors(true); // get the authors
        Future.delayed(const Duration(seconds: 3),  () => isFetched = true);
        }
        return RefreshIndicator(
        onRefresh: () {
            task.getAuthors(false);
            return Future.delayed(const Duration(seconds: 3));
        },
        child: CustomScrollView(
            slivers: [
            SliverToBoxAdapter(
                child: Container(
                height: MediaQuery.of(context).size.height,
                padding: const EdgeInsets.all(20),
                child: Column(
                    children: [
                    Container(
                        margin: const EdgeInsets.all(20),
                        child: const Text("Available authors"),
                    ),
                    if (task.getResponseData().isEmpty)
                    const Text('No Author found'),
                    Expanded(
                        child: ListView(
                        children: List.generate(task.getResponseData().length,
                            (index) {
                        final data = task.getResponseData()[index];
                        return ListTile(
                            contentPadding: const EdgeInsets.all(0),
                            title: Text(data['name']),
                            subtitle: Text(data['description']),
                            leading: CircleAvatar(
                            backgroundColor: Colors.grey,
                            child: Text((index + 1).toString()),
                            ),
                            trailing:  Row(
                                mainAxisSize:MainAxisSize.min,
                                children:[
                                IconButton(
                                onPressed: () { // Proceed to the specific author

                                },
                                icon: const Icon(Icons.arrow_right_rounded)),
                                ]
                            )
                        );
                        }),
                    )),
                    const SizedBox(height: 150),
                    ],
                ),
                ),
              )
            ],
        ),
        );
    })
    );
}
}
-
-
In the main.dart:
-
Import the necessary packages:
import 'package:flutter/material.dart'; import 'package:graphql_app/Providers/get_task_provider.dart'; import 'package:graphql_flutter/graphql_flutter.dart'; import 'package:provider/provider.dart'; import 'Screens/home_page.dart'; -
In the build function, return the Provider as below:
return MultiProvider(
providers: [
  ChangeNotifierProvider(create: (_) => GetTaskProvider()),
],
child: MaterialApp(
  home: HomePage(),
  theme: ThemeData(
    primaryColor: Colors.blue,
    primarySwatch: Colors.blue
  )
));
-
-
Ensure that the development server is up and running. Your home page should be simialr to:
Showing a specific author
-
In the lib/Screens directory, create a author_page.dart.
-
In the author_page.dart:
-
Import the necessary dependecies:
import 'package:flutter/material.dart'; -
Define a AuthorPage stateful widget that will accept the positional arguments:
class AuthorPage extends StatefulWidget { final String slug; final String name; final String description; const AuthorPage({required this.slug,required this.name,required this.description,Key ? key }) : super(key: key); @override State<AuthorPage> createState() => _AuthorPageState(); } -
Define a child _AuthorPageState class for showing the author data:
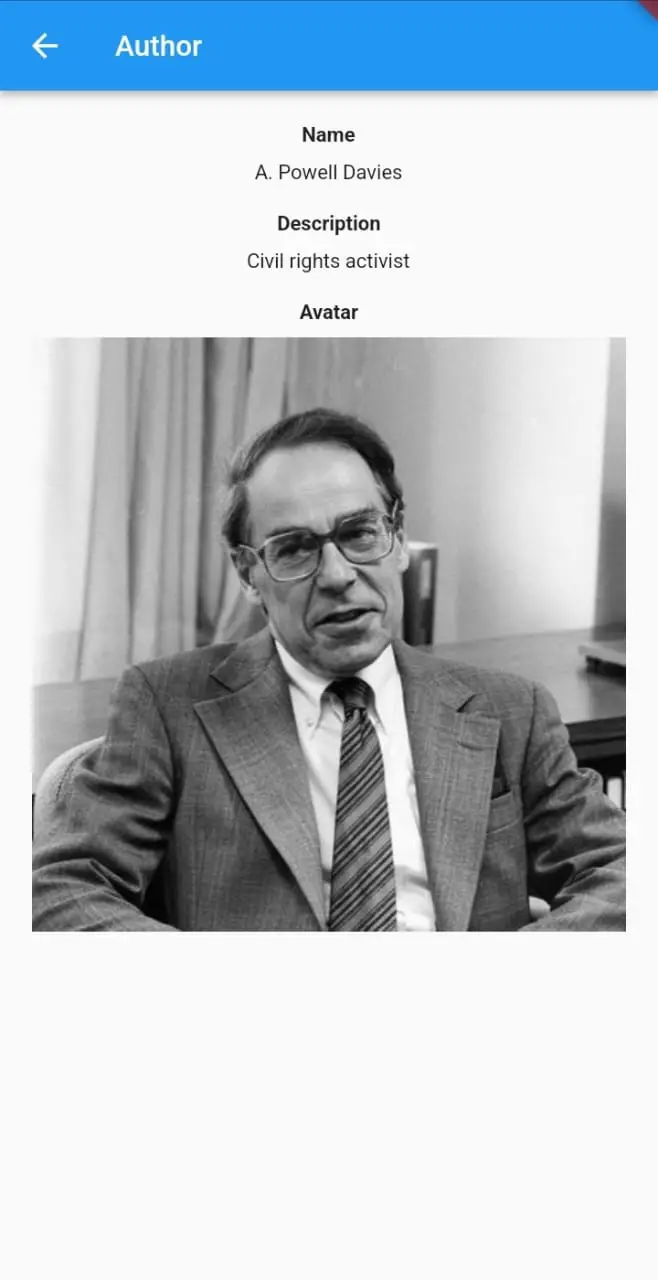
class _AuthorPageState extends State<AuthorPage> {
String name = "";
String description = "";
String avatar = "";

@override
Widget build(BuildContext context) {
    name = widget.name;
    description = widget.description;
    avatar = "https://images.quotable.dev/profile/400/${widget.slug}.jpg";
    return  Scaffold(
    appBar: AppBar(
        title: const Text('Author'),
    ),
    body:  CustomScrollView(
            slivers: [
            SliverToBoxAdapter(
                child: Container(
                height: MediaQuery.of(context).size.height,
                padding: const EdgeInsets.all(20),
                child: Column(
                    children: [
                    Column(
                    children: [
                        const Text("Name",style: TextStyle(fontWeight: FontWeight.bold),),
                        SizedBox(height:MediaQuery.of(context).size.height * 0.01),
                        Text(name)
                    ],
                    ),
                    SizedBox(height:MediaQuery.of(context).size.height * 0.02),
                    Column(
                    children: [
                        const Text("Description",style: TextStyle(fontWeight: FontWeight.bold)),
                        SizedBox(height:MediaQuery.of(context).size.height * 0.01),
                        Text(description)
                    ],
                    ),
                    SizedBox(height:MediaQuery.of(context).size.height * 0.02),
                    Column(
                    children: [
                        const Text("Avatar",style: TextStyle(fontWeight: FontWeight.bold)),
                        SizedBox(height:MediaQuery.of(context).size.height * 0.01),
                        Image.network(avatar)
                    ],
                    ),
                    SizedBox(height:MediaQuery.of(context).size.height * 0.02),
                    ],
                )
                )
            )])
    );
}
}
-
-
In the lib/Screens/home_page.dart file:
-
Import the authors page file:
import 'package:graphql_app/Screens/author_page.dart'; -
On the Post card, once the trailing icon navigate to the authors page:
onPressed: () {// Navigate to the authors page
Navigator.push(
context,
    MaterialPageRoute(builder: (context) =>  AuthorPage(
        slug:data['slug'],
        name:data['name'],
        description:data['description'],
    )),
);
},
-
-
Ensure that the development server is running and click on any post. The resulting page should be similar to:
Writing relevant test.
-
In the project directory, install the test dependency:
flutter pub get test -
In the lib directory, create a test.dart file.
-
test.dart:
-
Import the necessary packages:
import 'dart:convert'; import 'package:flutter/material.dart'; import 'package:flutter_test/flutter_test.dart'; import 'package:http/http.dart' as http; -
Define the main function:
void main(){ } -
In the main(), define a test widget that displays an author from the Author API:
testWidgets('QuoteWidget displays an author from Author API',
    (WidgetTester tester) async {
    // Fetch data from the author API
    final response =
        await http.get(Uri.parse('https://quotable.io/authors'));
    final data = jsonDecode(response.body);
    final name = data['results'][0]['name'];


    // Build the QuoteWidget with the fetched data
    await tester.pumpWidget(
    MaterialApp(
        home: Scaffold(
        body: Text( name),
        ),
    ),
    );

    // Verify that the quote is displayed correctly
    expect(find.text(name), findsOneWidget);
});
-
-
Run the test:
flutter test lib/test.dart
Connecting the application on codemagic
-
To connect to codemagic, ensure you have published your code on GitHub.
-
Login or sign up on codemagic.
-
Once you have your account, the next step is to set up a build workflow for deployment.
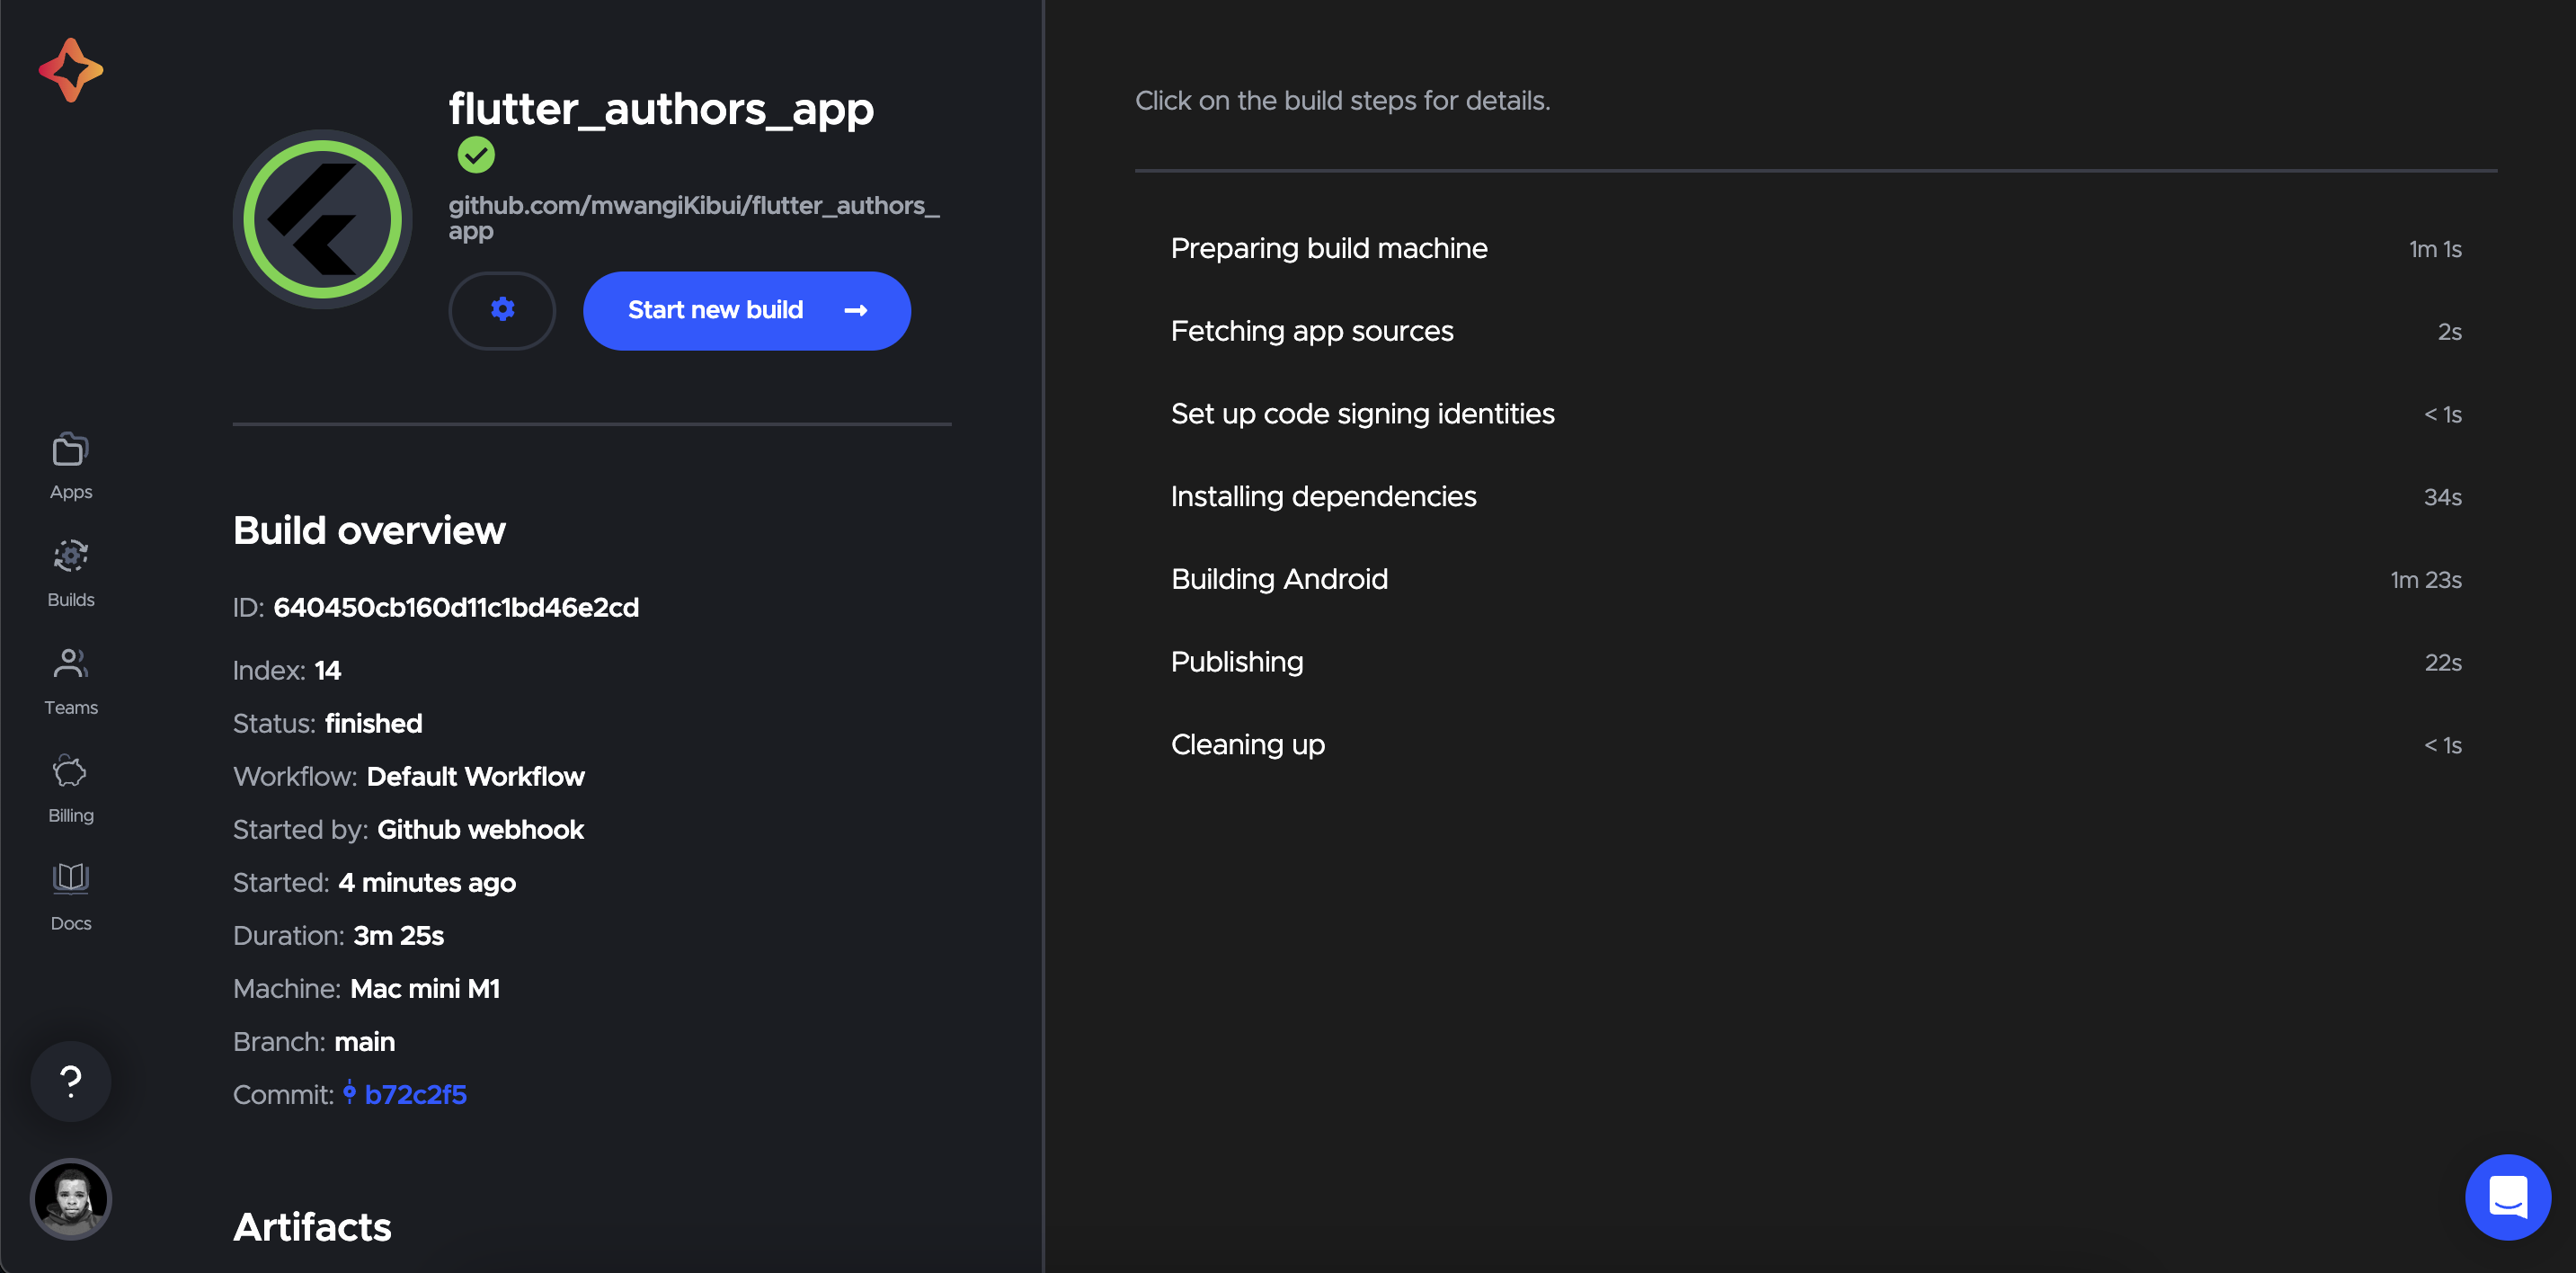
Setting up the build workflow on codemagic
-
To continue, ensure you have connected your Google Play Store account with codemagic by following this guide.
-
To set up a build workflow, click on Create new workflow.
-
Select Android on the platforms.
-
On the Build Triggers section, select Trigger on push.
-
On the Build section, select the Flutter version and ensure you have selected the release mode.
-
On the Distribution, enable Android code signing, upload your keystore, enter the password and the alias.
-
On the second tab, enable Google Play Publishing, Upload the Credentials.json file, On the Track section, select Production.
-
Click on Save changes and then Start new build.
Deploying on codemagic to Google Play store
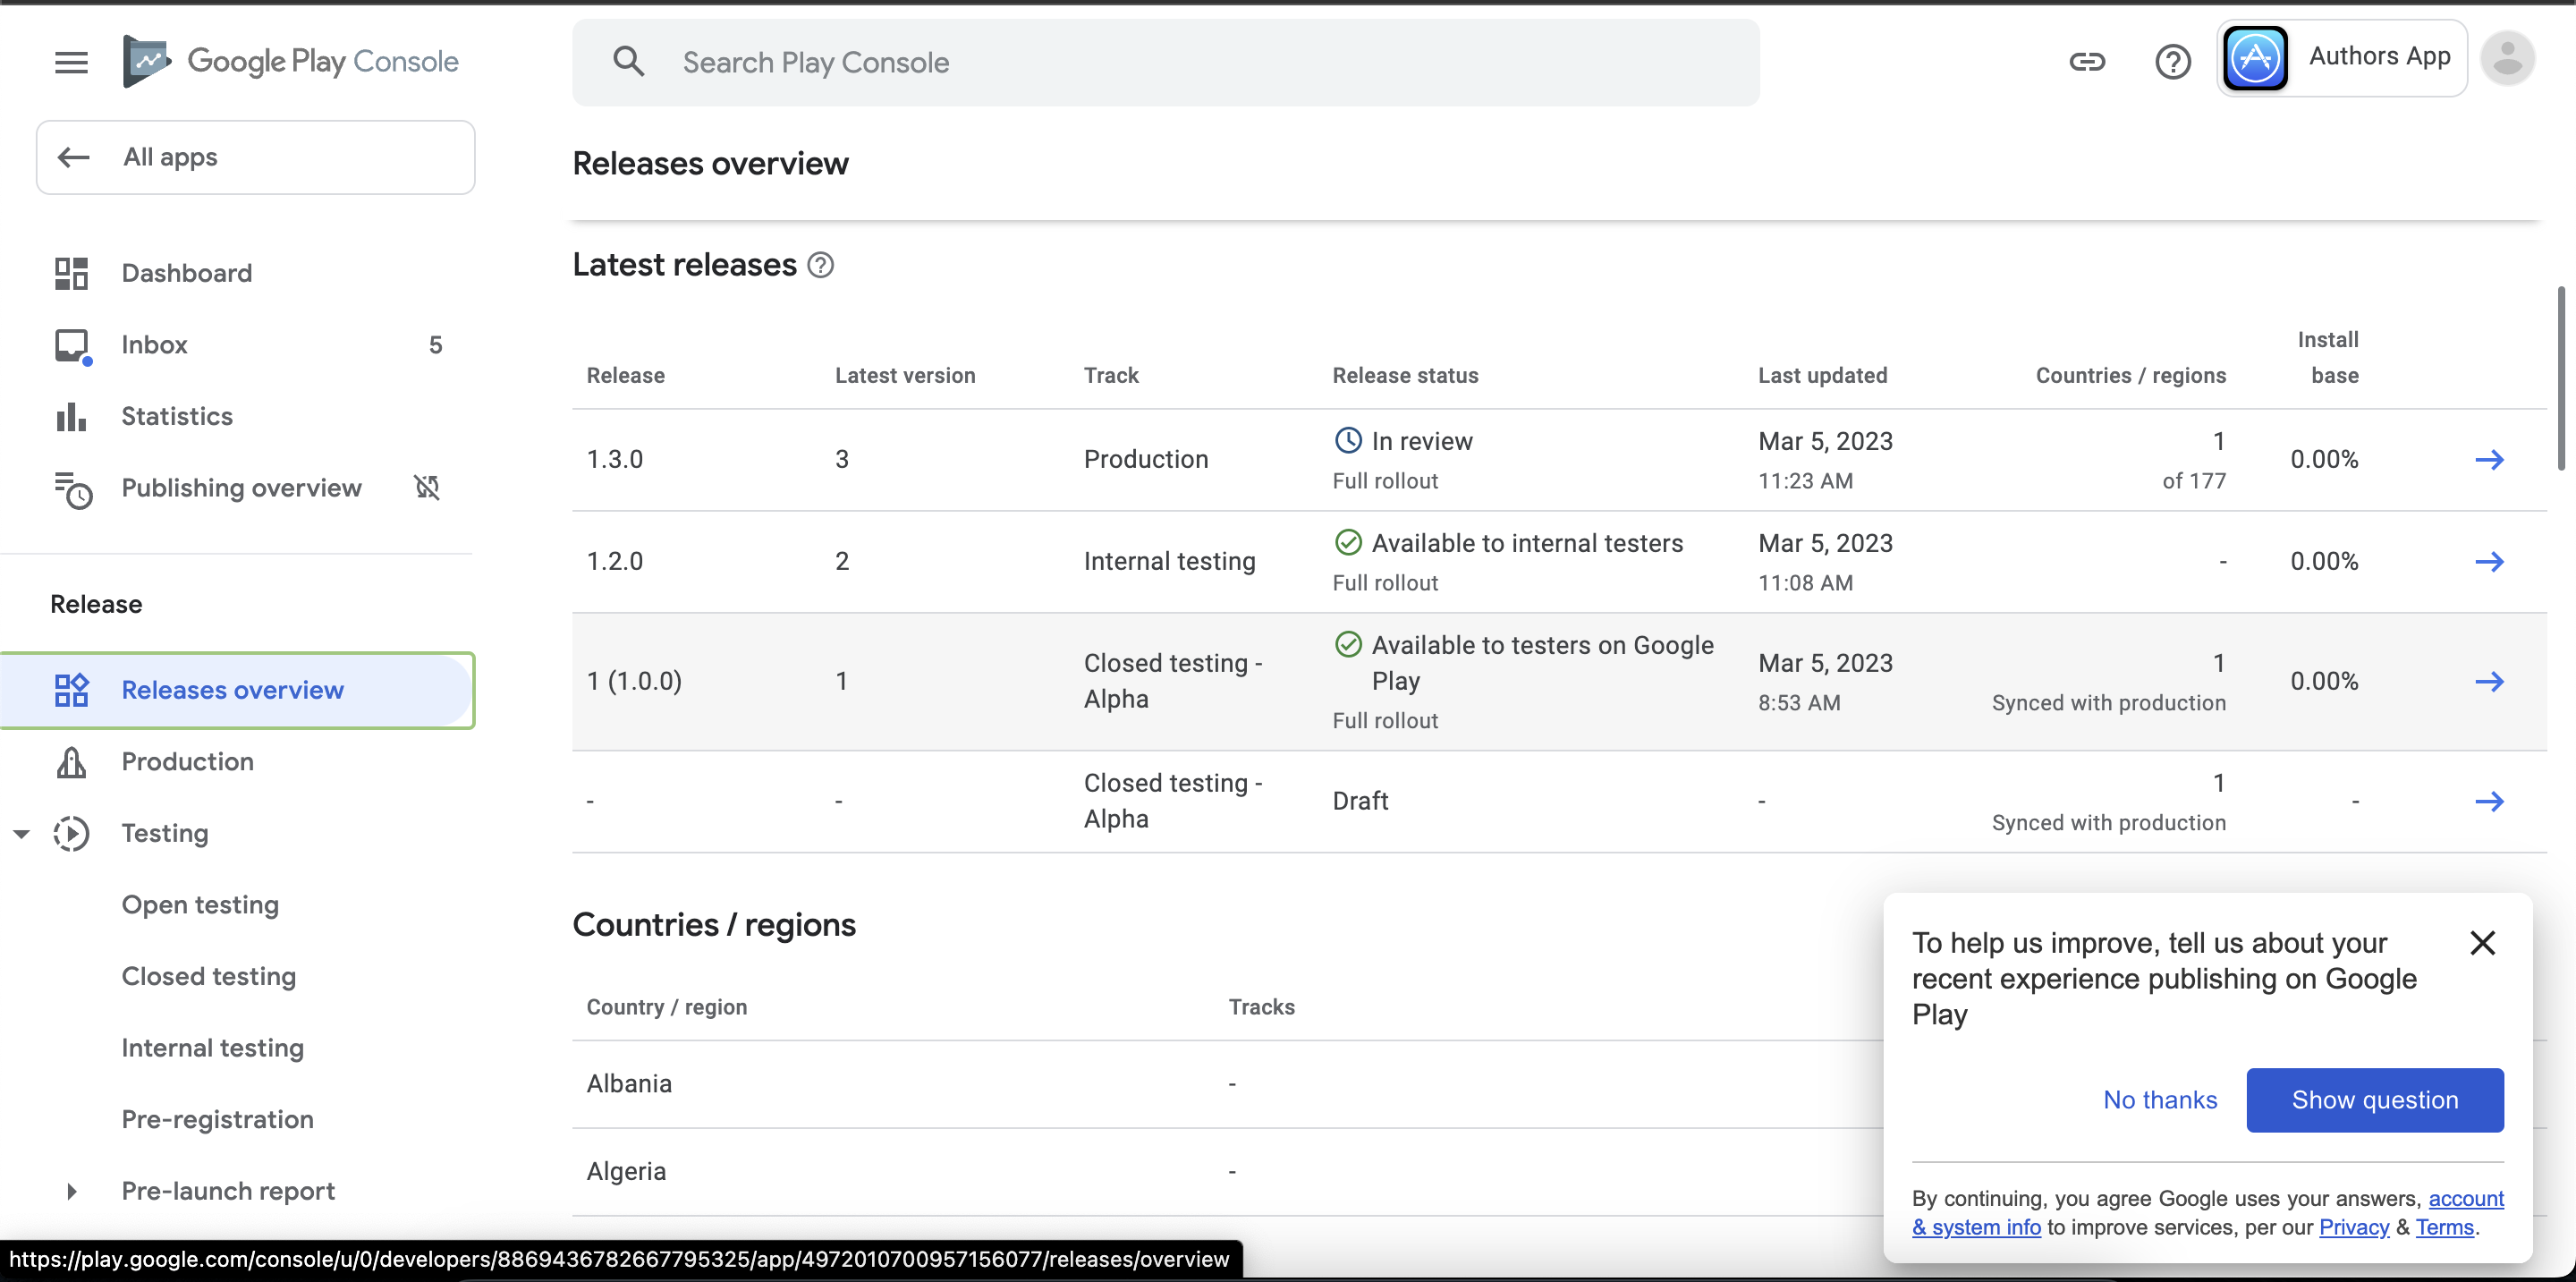
- Once you do a push to the branch, a deployment will be started automatically.
- On your Playstore, the request will be received and queued for review:
Written By: