Install Single Node K3s on Ubuntu 20.04|22.04 Step-by-Step
Posted November 14, 2023

K3s is a production-ready and lightweight Kubernetes distribution. K3s has simplified setting up Kubernetes clusters on any machine, such as Ubuntu. So, dive into this guide and learn the step-by-step process of Installing and configuring K3s on Ubuntu 20.04 and 22.04 LTS.
In summary, you will cover the following major K3s Ubuntu configurations:
- The step-by-step process provisions a single-node cluster on Ubuntu.
- Deploying any application using Kubectl, K3s, and your Ubuntu server.
- Using K3s and Ubuntu with Traefik Dashboard.
- Running K3s and Ubuntu with HTTPS using Traefik and Let’s Encrypt
- Managing your K3s Ubuntu resources.
- Accessing K3s Ubuntu cluster with Kubernetes dashboard via a web browser.
- Uninstall k3s (if needed).
Prerequisites
Installing K3s on Ubuntu 20.04|22.04 is a hands-on guide. So, ensure you have the following system requirements:
- Ensure you have Ubuntu installed on the machine you intend to set up the k3s cluster.
- The minimum system requirements for k3s installation is 1 vCPU (More for better performance), at least 1 GB RAM, and 20 GB of free disk space.
- Have root access to your Ubuntu server to run K3s commands with sudo privileges.
Step 1: Update your System Packages
Before running K3s installation commands, ensure your Ubuntu server is up to date, and that installed packages are to their latest versions. Use the following command:
sudo apt update
Ubuntu will then apply changes needed to update the packages using the following command:
sudo apt upgrade -y
You can follow up with a reboot command on your machine to complete these update processes:
sudo reboot
Step 2: A Single-node K3S Cluster Installation Process using Ubuntu
Are you ready for the fun part? Let’s get K3s up and running using the following command:
curl -sfL https://get.k3s.io | sh -
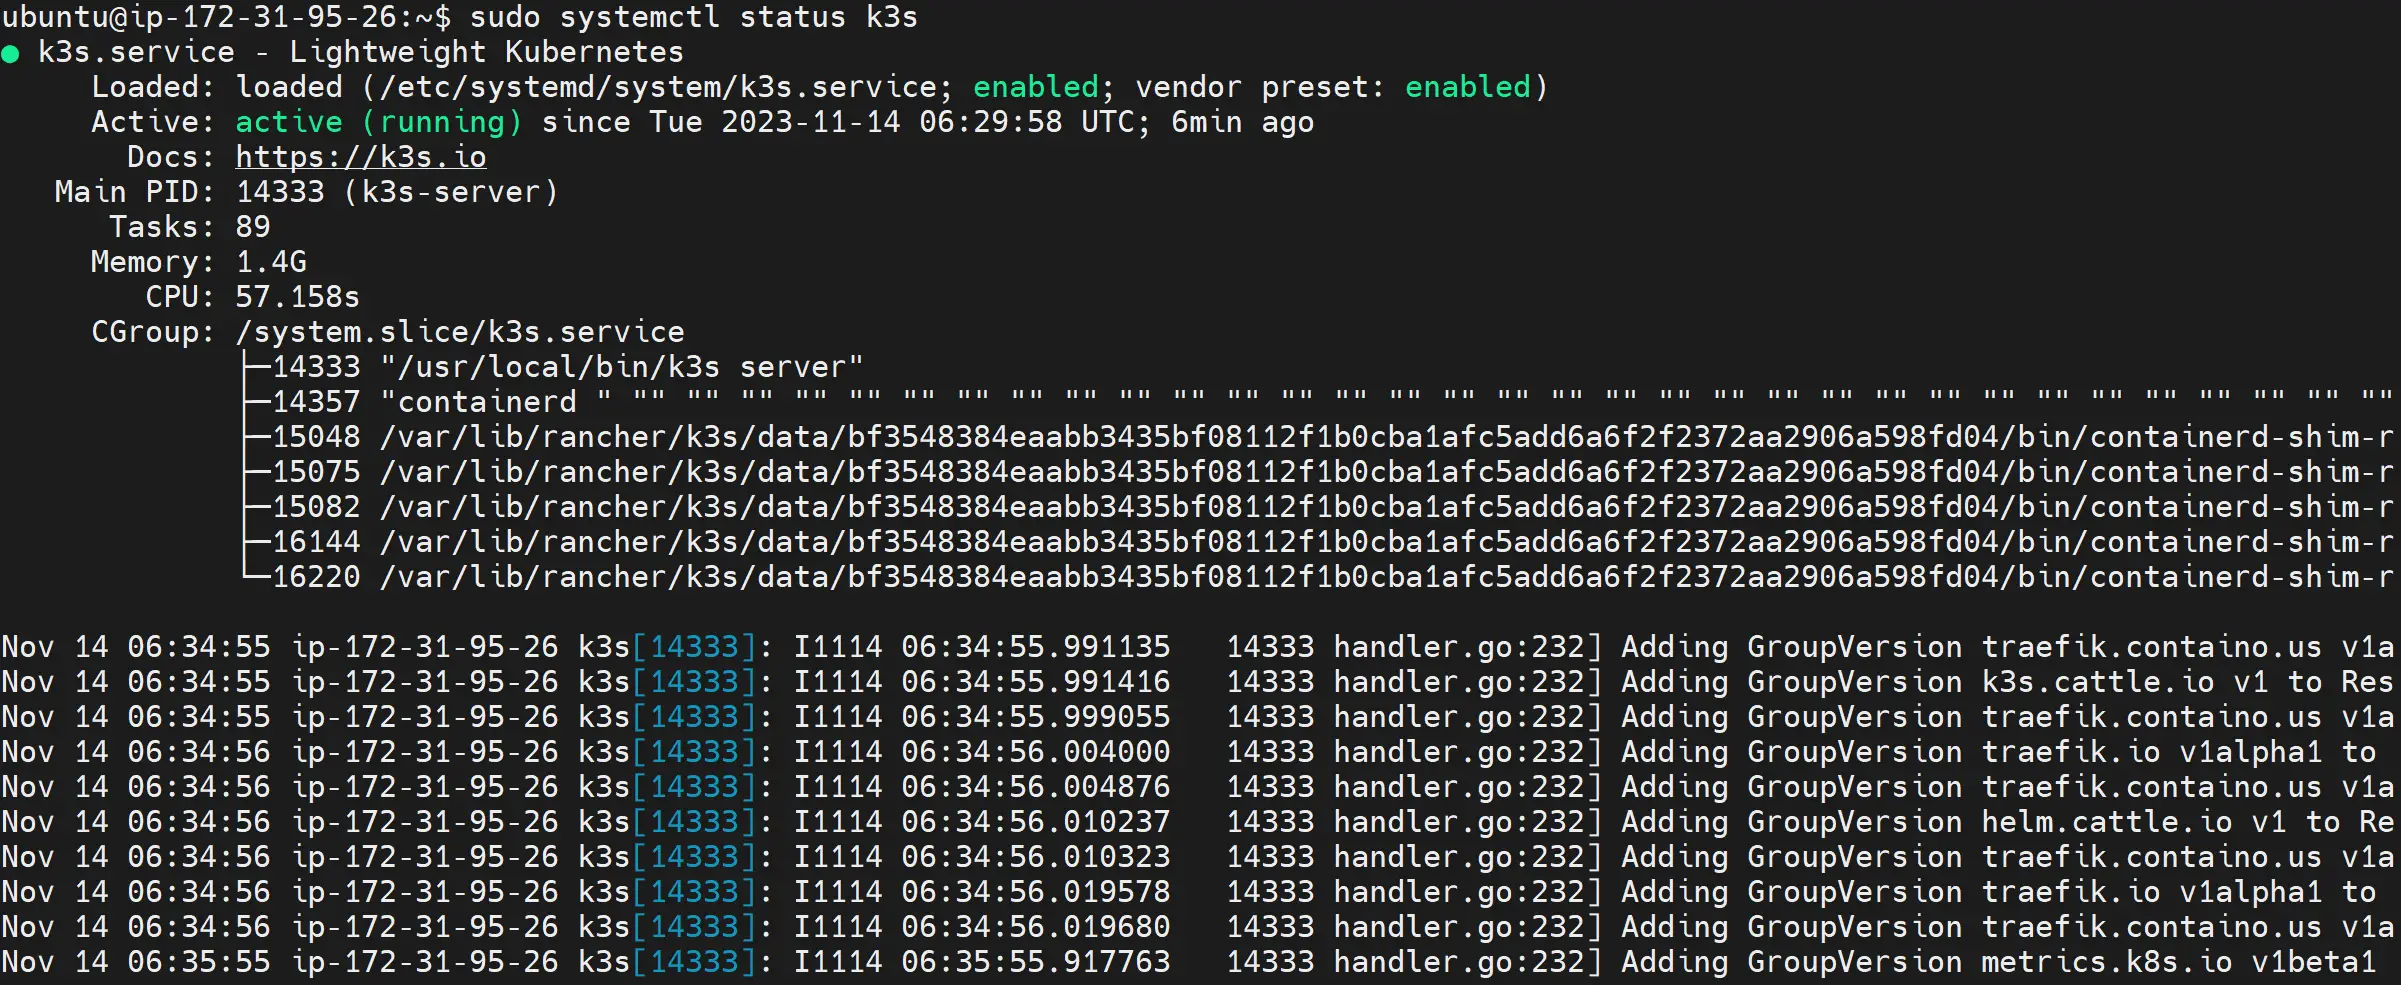
Running the above command will automatically start and run a single-node K3S cluster as such:

You can indeed confirm if K3s is perfectly running using the following command:
sudo systemctl status k3s
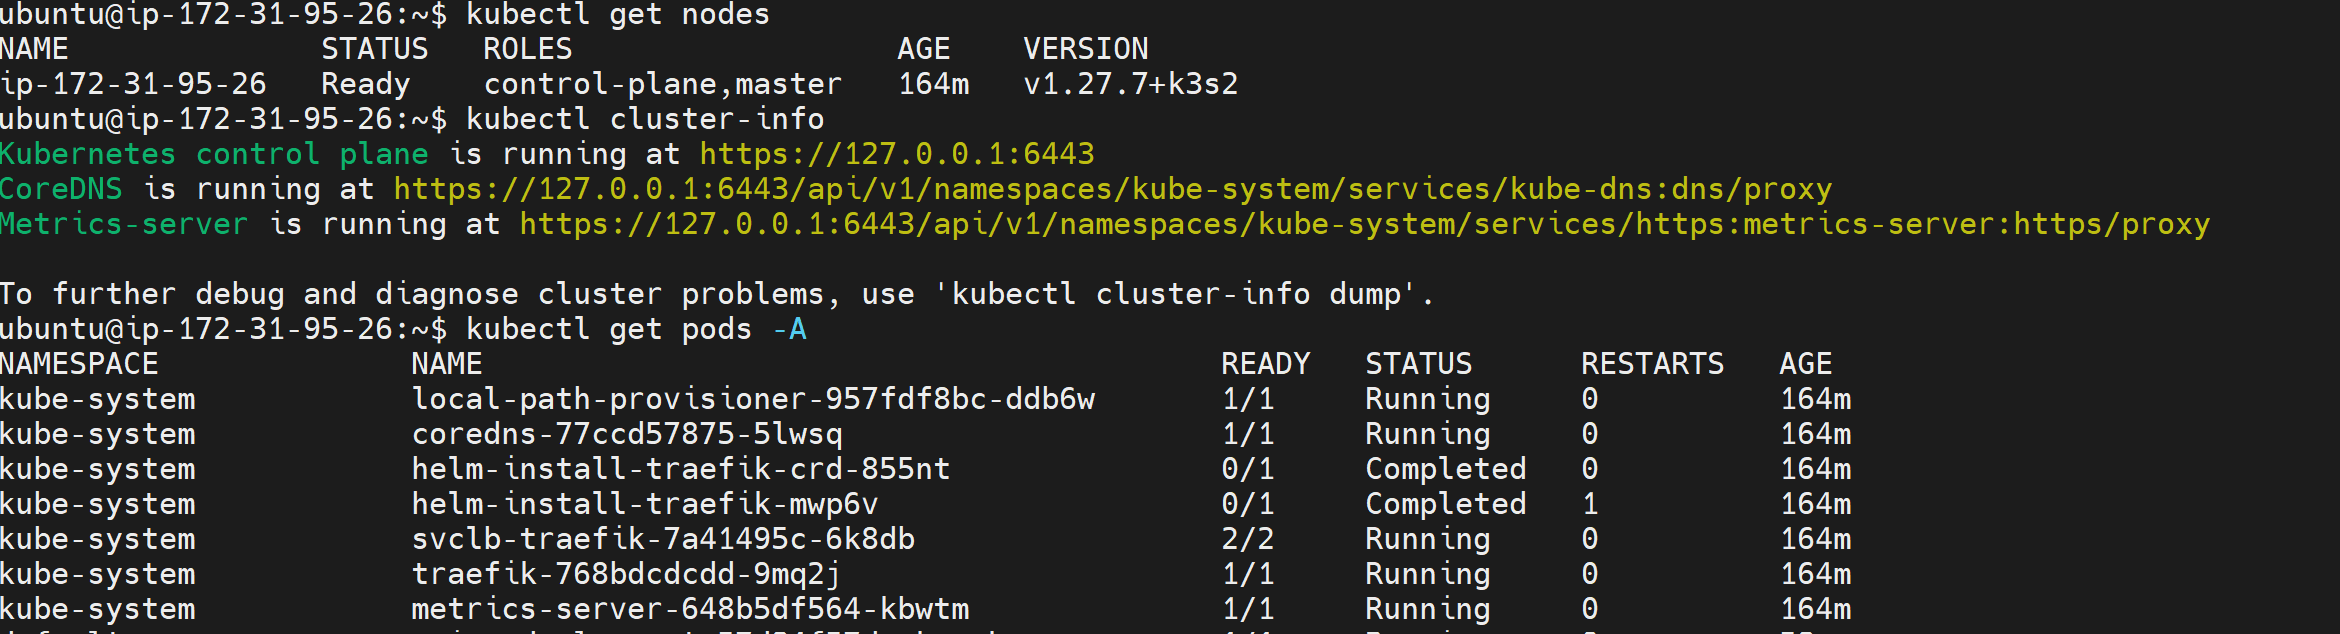
Step 3: Verify the k3s cluster is running properly
To leave no doubts that k3s cluster is running properly, check the status of k3s services using the following commands:
kubectl get nodes
kubectl cluster-info
kubectl get pods -A
Step 3: Troubleshooting K3s Ubuntu Installation Errors (If Any)
If running the above commands gave you an error, then let’s solve it right away before checking the next step. The main error that will occur is as follows:

This means your server lacks permissions to access /etc/rancher/k3s/k3s.yaml file and contains K3s configurations.
To resolve the error, elevate permissions to this file using the following command:
sudo chmod 644 /etc/rancher/k3s/k3s.yaml
You might have to reboot your machine your machine here. Alternatively, you can reinstall K3s on Ubuntu and add K3S_KUBECONFIG_MODE with 644 permissions as follows:
curl -sfL https://get.k3s.io | K3S_KUBECONFIG_MODE="644" sh -s -
Now you can rerun K3s check status commands, and your cluster should be ready;
kubectl get nodes
kubectl cluster-info

If this didn’t work, check this Solving unable to read, etc rancher k3s yaml K3S Error guide for further troubleshooting commands.
Step 4: Deploying Any Application Using Kubectl, K3s, And Your Ubuntu server
With your single-node K3s cluster ready, let’s deploy and run an application on K3s.
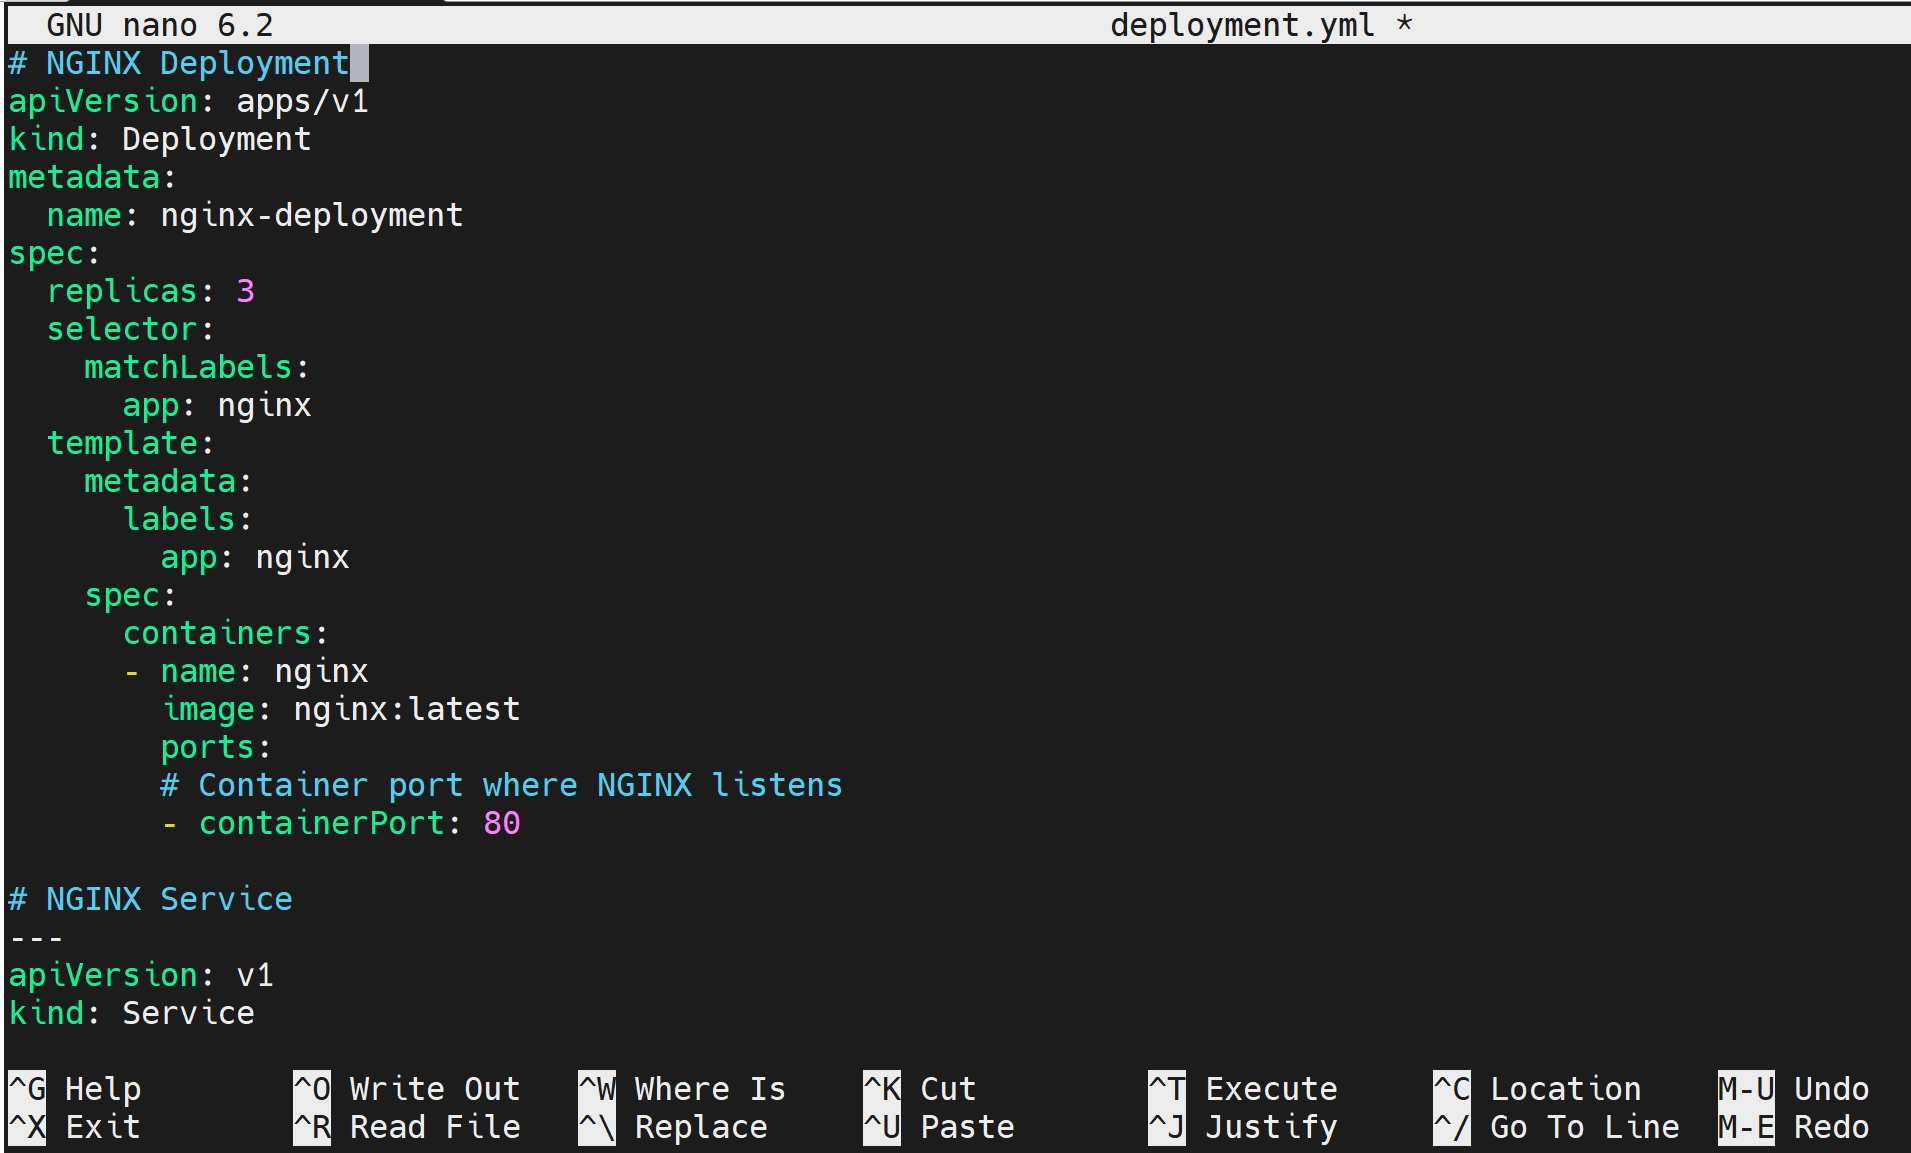
Your typical application deployment will use a .yml file containing deployment service and load balancer configurations.
In this demo, let’s run an NGINX server on K3s. In this case, I have created a deployment.yml file and added deployment, service, and Ingress to expose the application as follows:
Create your file as follows:
nano deployment.yml
Then add the following configurations and save your file:
# NGINX Deployment
apiVersion: apps/v1
kind: Deployment
metadata:
  name: nginx-deployment
spec:
  replicas: 3
  selector:
    matchLabels:
      app: nginx
  template:
    metadata:
      labels:
        app: nginx
    spec:
      containers:
      - name: nginx
        image: nginx:latest
        ports:
        # Container port where NGINX listens
        - containerPort: 80

# NGINX Service
---
apiVersion: v1
kind: Service
metadata:
  labels:
    app: nginx
  name: nginx-service
spec:
  ports:
    - name: http
      port: 80
      protocol: TCP
      # Expose port 80 on the service
      targetPort: 80
  selector:
  # Link this service to pods with the label app=nginx
    app: nginx

# NGINX Ingress
---
apiVersion: networking.k8s.io/v1
kind: Ingress
metadata:
  name: nginx-ingress
spec:
  rules:
    - http:
        paths:
          - path: /
            pathType: Prefix
            # Redirect traffic to service on port 80
            backend:
              service:
                name: nginx-service
                port:
                  number: 80
Now, you will use kubectl to deploy the application. So run the following command:
kubectl apply -f deployment.yml

And if you run the following command, your app should be ready and exposed:
kubectl get svc nginx-service

To check if the installed K3s Ubuntu cluster is running your app correctly, open your server IP and confirm the app is running as expected:
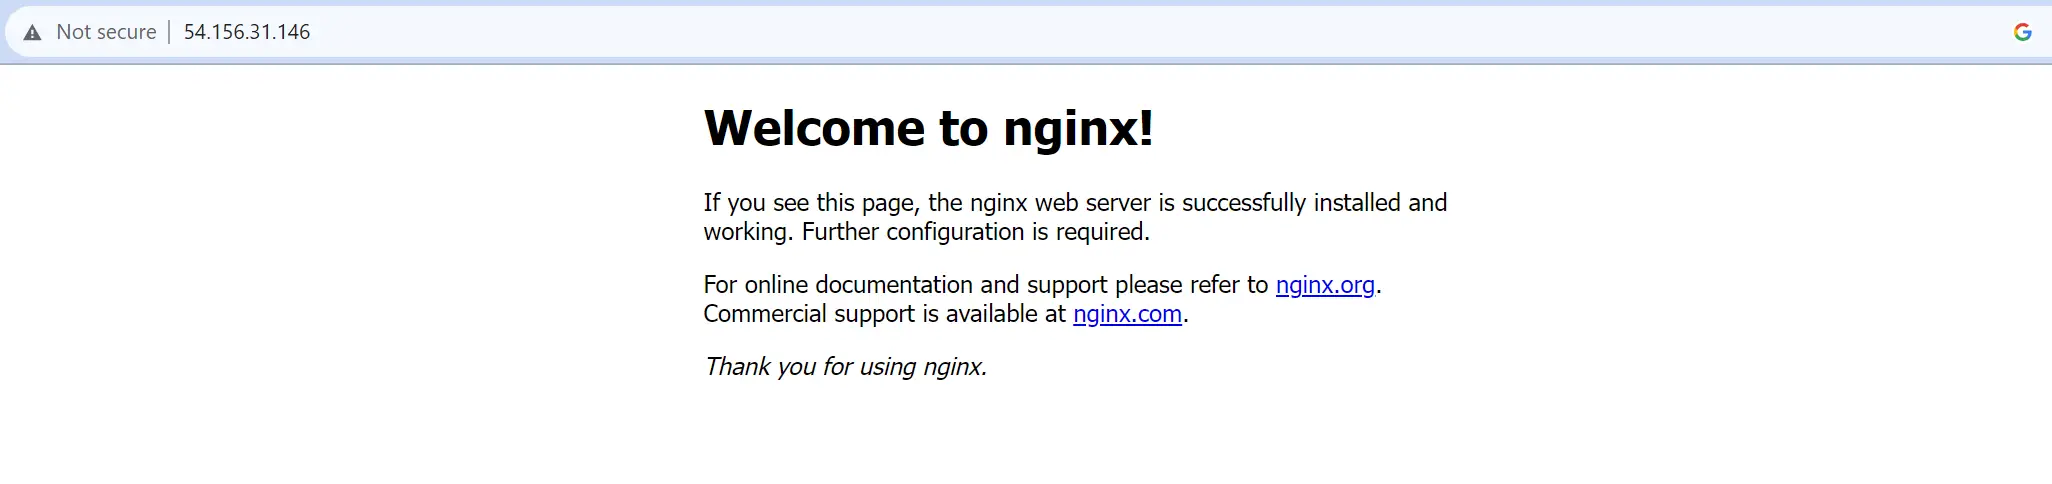
If you are on a local machine, use http://localhost:80/ OR curl and run the following command:
curl <Your-Ubuntu-System-IP-Address>:80
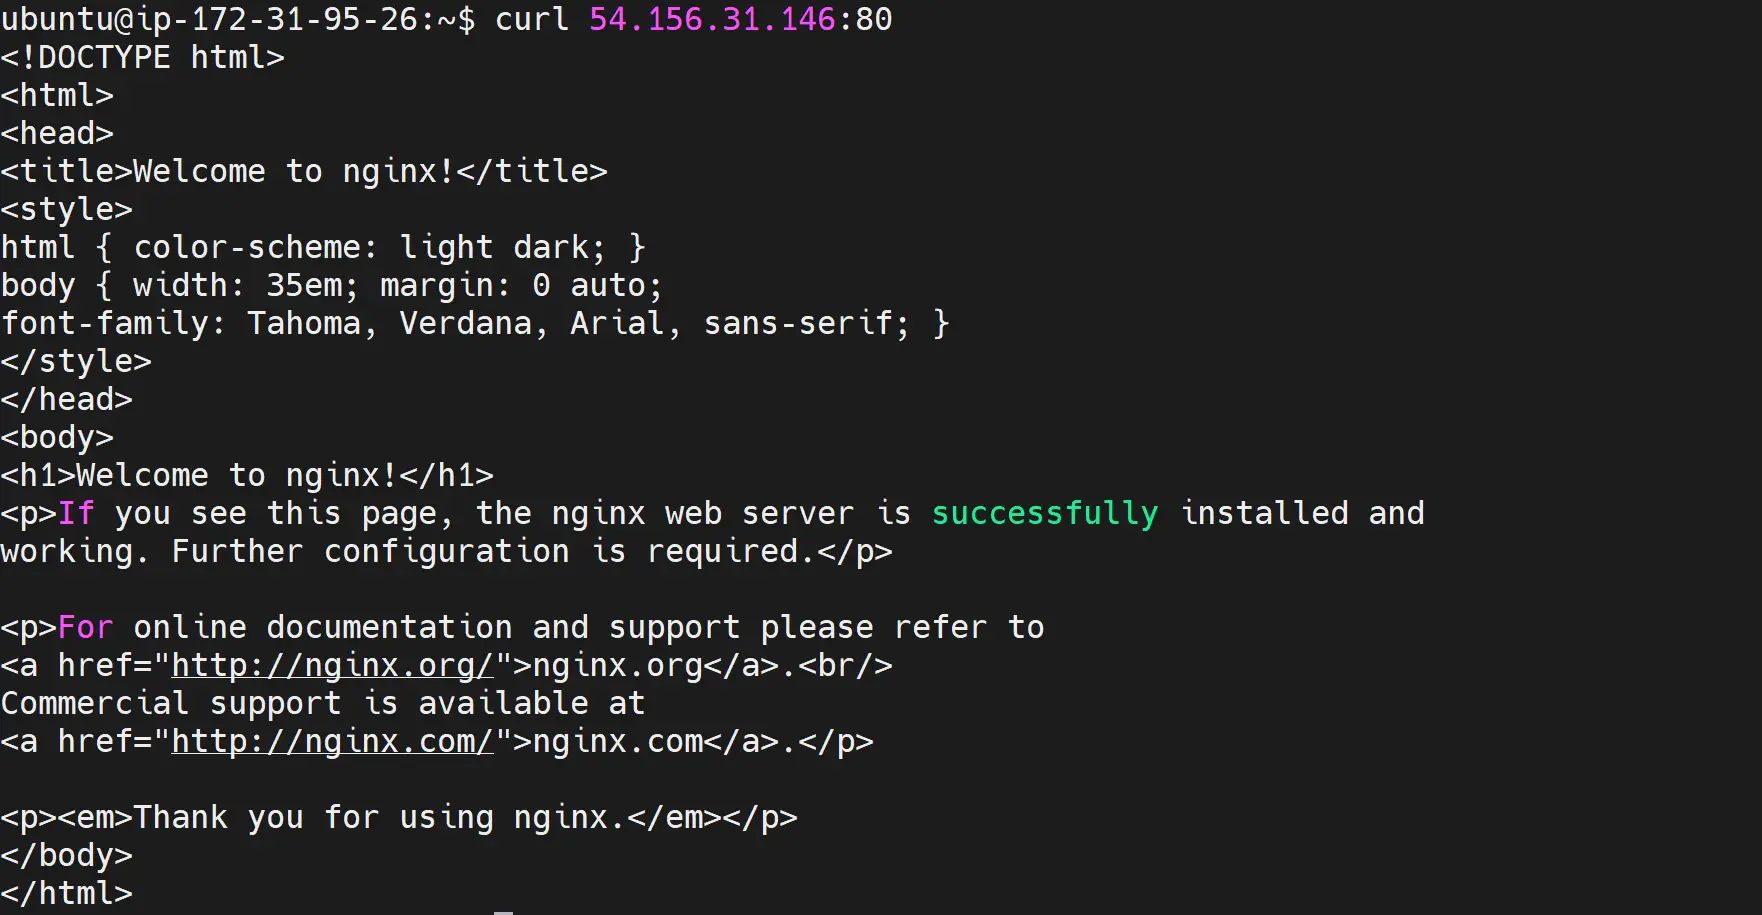
You have now successfully deployed your app to a K3s cluster.
Step 5: Accessing K3s Ubuntu Cluster with Kubernetes Dashboard via a Web Browser
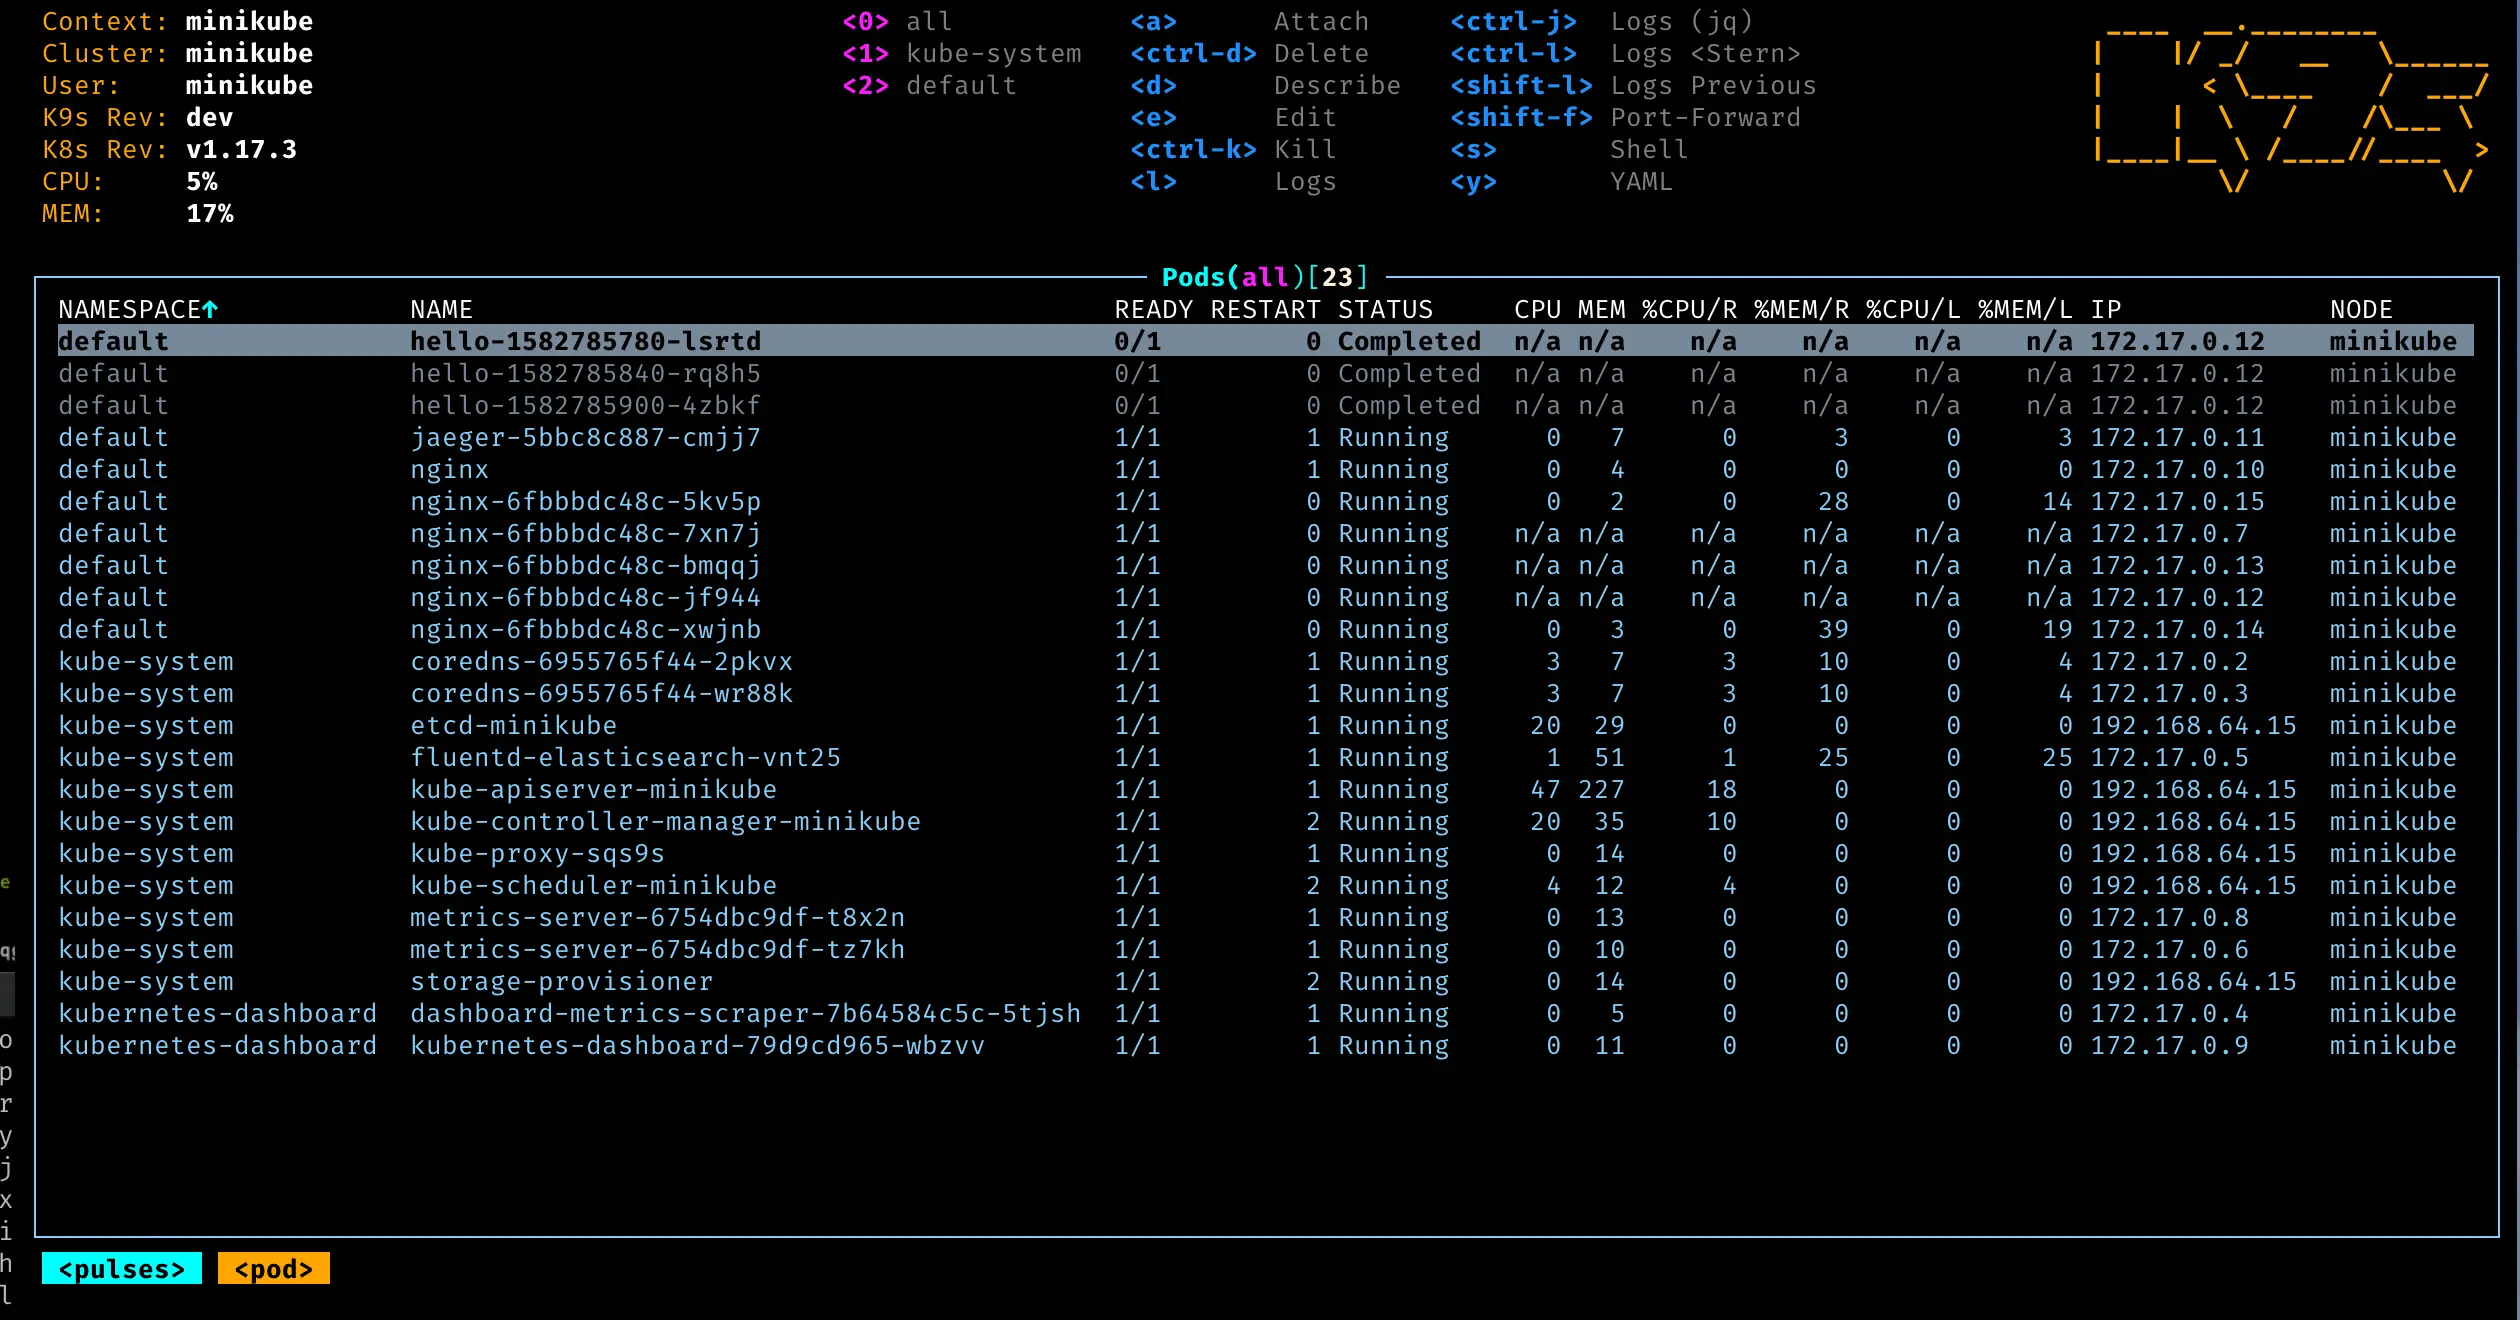
To manage and monitor your cluster, you need to access a dashboard. I’m not a big fan of the Kubernetes dashboard. I love using K9s, and I recommend it as well.
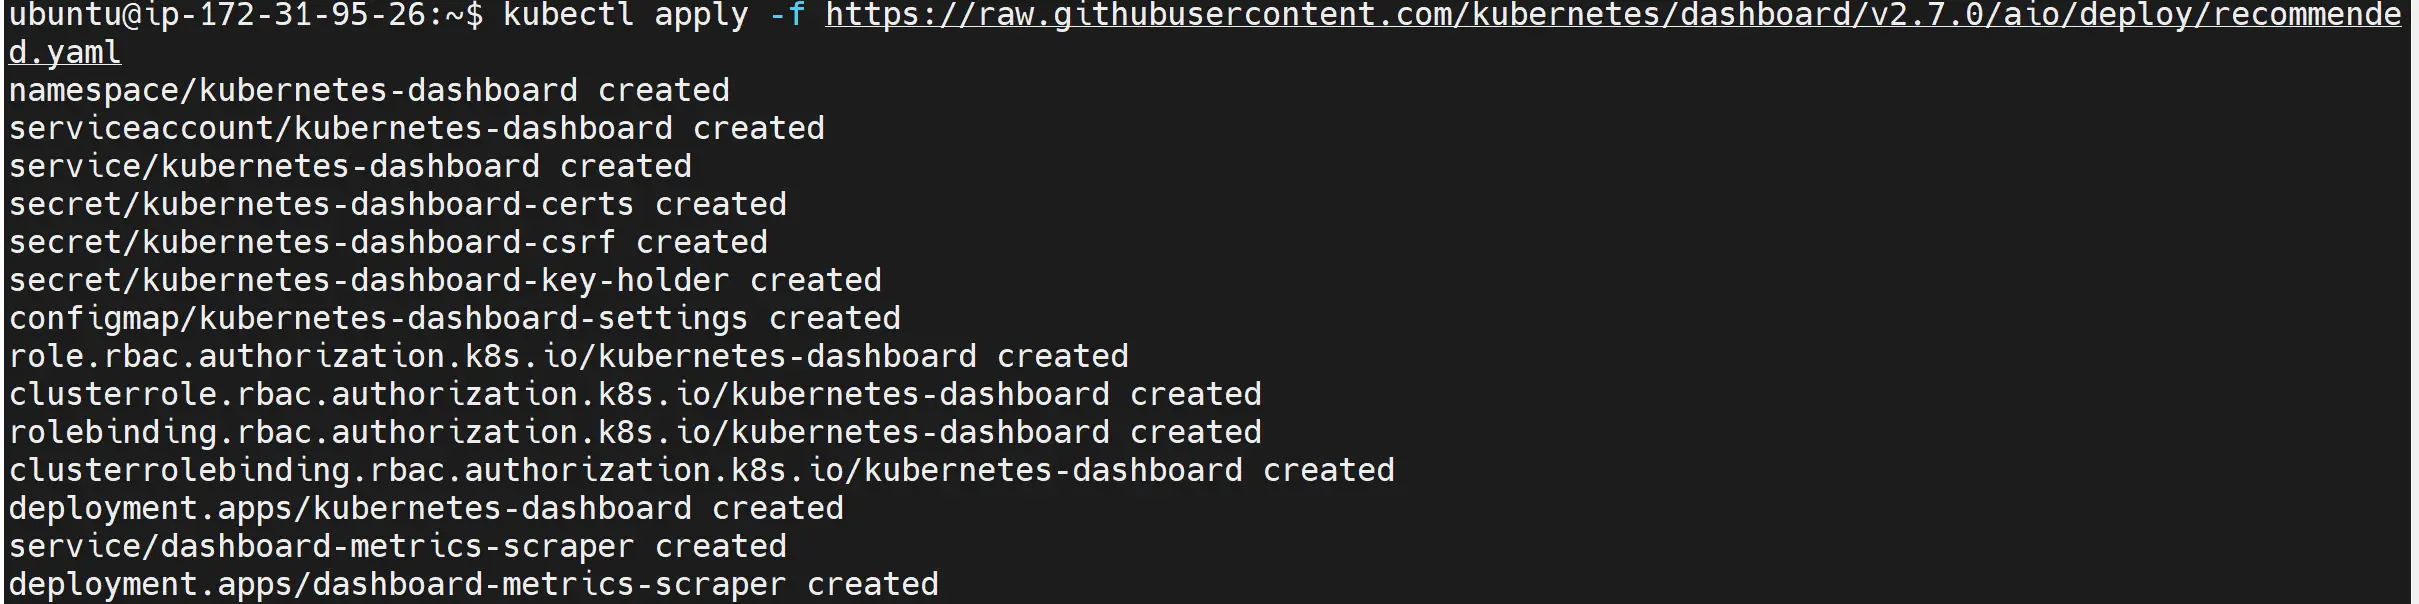
If you are looking to use Kubernetes dashboard,
kubectl apply -f https://raw.githubusercontent.com/kubernetes/dashboard/v2.7.0/aio/deploy/recommended.yaml

kubectl patch svc kubernetes-dashboard --type='json' -p '[{"op":"replace","path":"/spec/type","value":"NodePort"}]' -n kubernetes-dashboard
Confirm Kubernetes dashboard pods are running using the following command:
kubectl get pods -n kubernetes-dashboard
kubectl get svc -n kubernetes-dashboard

Create a new file kubernetes-dashboard.yml:
nano kubernetes-dashboard.yml
This file should contain the following configurations:
# ServiceAccount Definition
apiVersion: v1
kind: ServiceAccount
metadata:
  name: admin-user  # Name of the service account
  namespace: kube-system  # Namespace in which the service account exists

# ClusterRoleBinding Definition
---
apiVersion: rbac.authorization.k8s.io/v1
kind: ClusterRoleBinding
metadata:
  name: admin-user  # Name of the cluster role binding
roleRef:
  apiGroup: rbac.authorization.k8s.io
  kind: ClusterRole
  name: cluster-admin  # Name of the cluster role
subjects:
- kind: ServiceAccount
  name: admin-user  # Name of the service account
  namespace: kube-system  # Namespace in which the service account exists

Apply the changes:
kubectl create -f kubernetes-dashboard.yml
Generate the access tokens:
kubectl -n kube-system create token admin-user
Finally, access your Kubernetes dashboard on https://<Ubuntu-IP-Address>:dashboardNodePort
Step 6: Using K3s and Ubuntu with Traefik Dashboard
Your installed K3s Ubuntu cluster comes packed with a Traefik v2 dashboard. This means you don’t have to use the Kubernetes dashboard unless you want to. On your Ubuntu K3s cluster, run the following command:
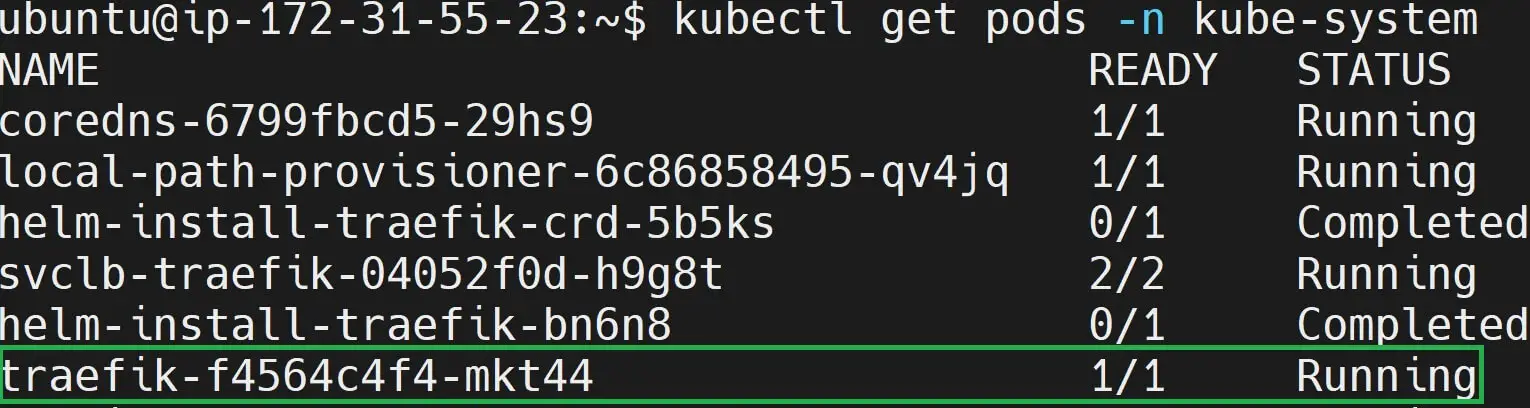
kubectl get pods -n kube-system
In this case, your k3s kube-system namespace will have a running Traefik pod as such:
This means you will need to expose this pod so your Ubuntu machine can serve you with Traefik as your K3s Dashboard as follows:
kubectl port-forward traefik-f4564c4f4-mkt44 -n kube-system 9000:9000
This may fail to work. K3s save all Traefik configurations on the /var/lib/rancher/k3s/server/manifests/traefik.yaml file. This is where you need to enable your Traefik dashboard. However According to the k3s docs, You will need to create a custom file /var/lib/rancher/k3s/server/manifests/traefik-config.yaml and K3s will pick it up, and your k3s’ traefik config.
Let’s access the above path and add the Traefik dashboard. You need to note the above path will need elevated permissions or you will get a Permission denied message. Use the following command:
sudo su -
Change directory to /var/lib/rancher/k3s/server/manifests:
cd /var/lib/rancher/k3s/server/manifests
If you ls this path traefik.yaml file should be available:
root@ip-172-31-55-23:~# cd /var/lib/rancher/k3s/server/manifests
root@ip-172-31-55-23:/var/lib/rancher/k3s/server/manifests# ls
ccm.yaml      local-storage.yaml  rolebindings.yaml  traefik.yaml
coredns.yaml metrics-server runtimes.yaml
Now, create a traefik-config.yaml file within the same path:
nano traefik-config.yaml
This file will use Helm and run K3s with the Traefik dashboard as such:
apiVersion: helm.cattle.io/v1
kind: HelmChartConfig
metadata:
  name: traefik
  namespace: kube-system
spec:
  valuesContent: |-
    # Define configurations for Traefik Helm chart
    dashboard:
      enabled: true  # Enable Traefik dashboard for monitoring and management
    ports:
      traefik:
        expose: true  # Expose Traefik port
        # This is not recommended for production
        # I will use it only for local traefik dashboards
    logs:
      access:
        enabled: true  # Enable access logs for Traefik
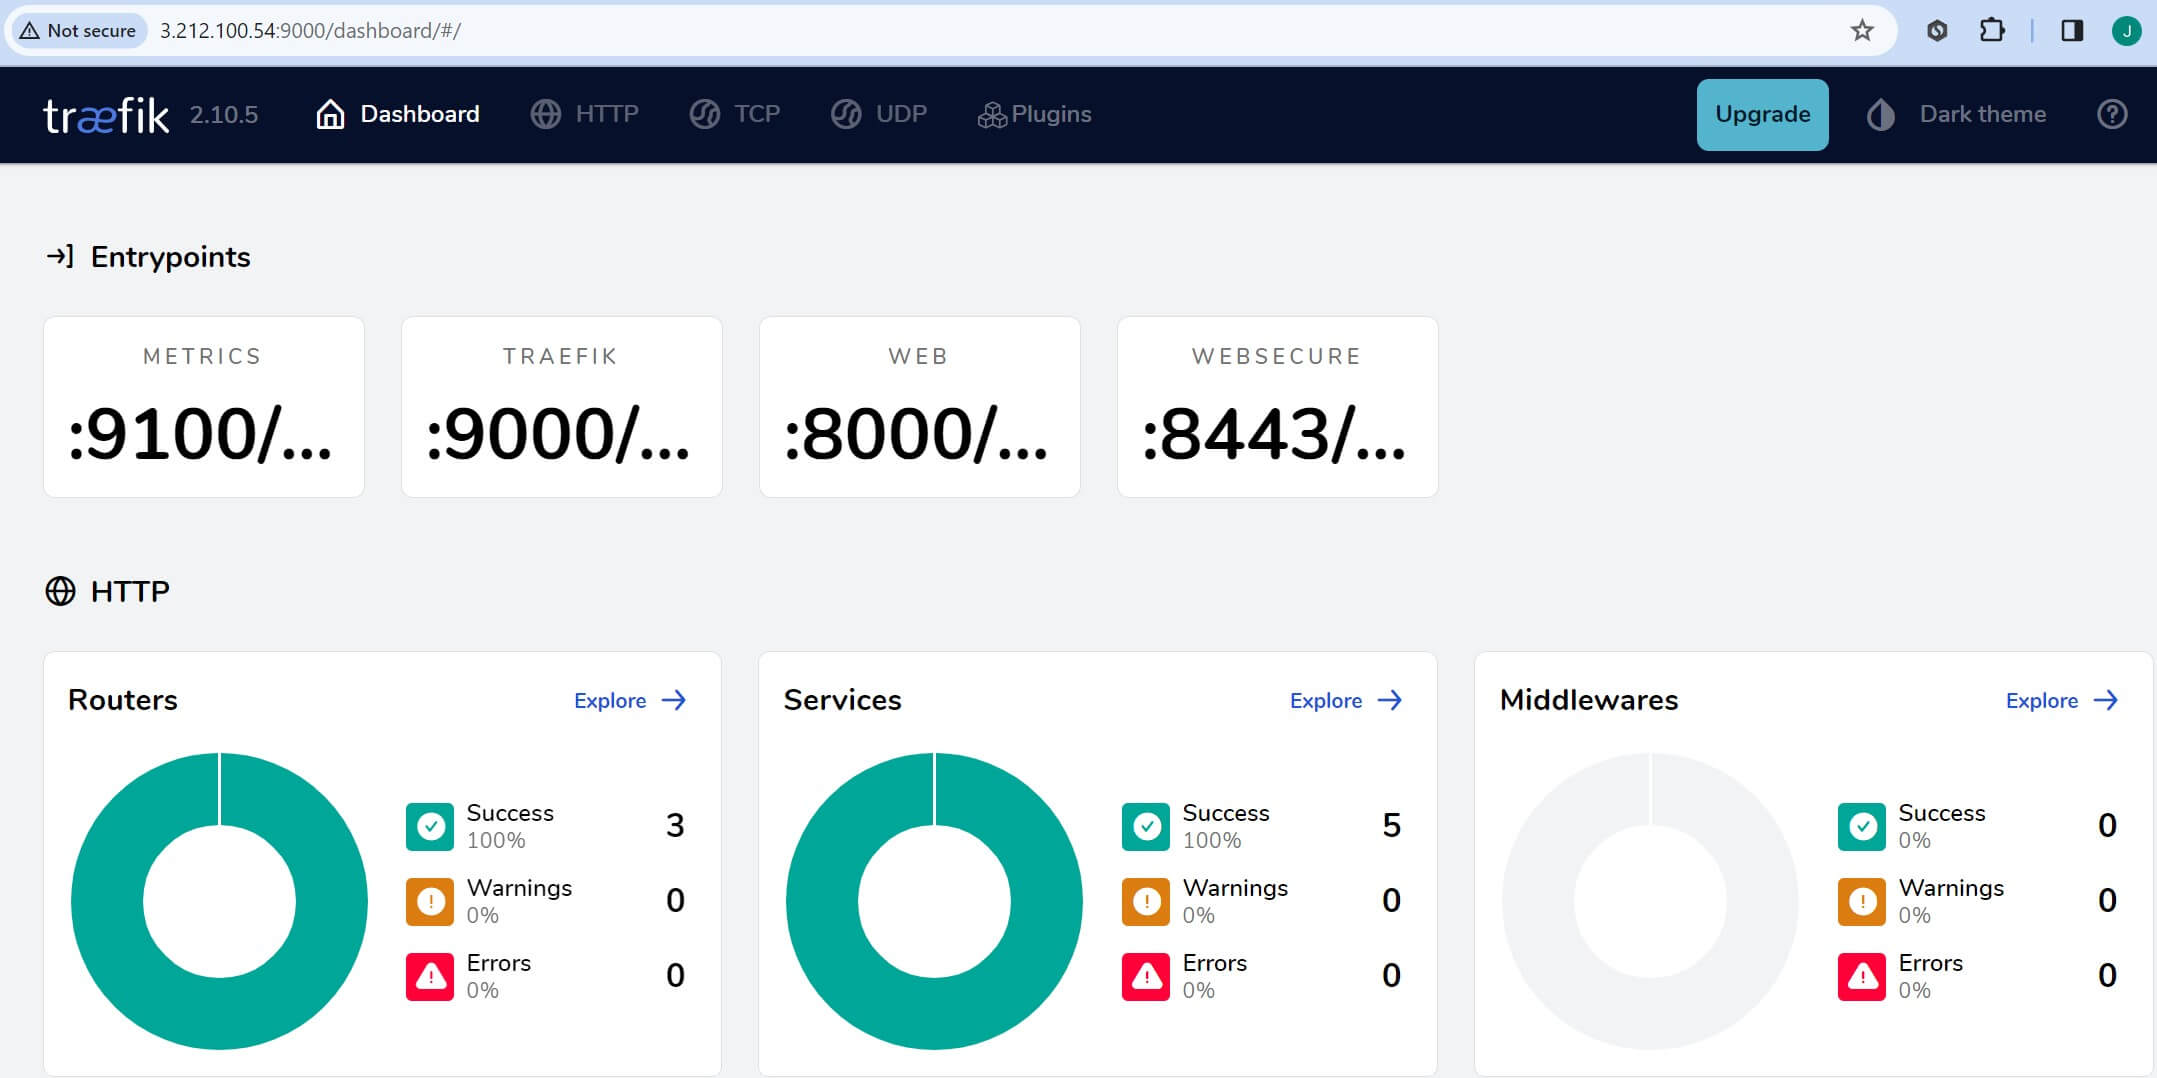
You should be able to use http://traefik.localhost/dashboard or http://localhost:9000/dashboard/ (do not forget to add the last /) to access Traefik k3s cluster within Ubuntu as such:
Step 7: Managing k3s Services on Ubuntu
Start/stop/restart k3s services using the command:
sudo systemctl start k3s
sudo systemctl stop k3s
sudo systemctl restart k3s
Any commands such as checking pods, services, and deployments should work just like you would on an actual Kubernetes cluster.
Step 8: Running K3s and Ubuntu with HTTPS using Traefik and Let’s Encrypt
Let’s say you are running a K3s cluster using an Ubuntu server. At the same time, you want to access your cluster using HTTPS. K3s will allow you to use Traefik to handle and redirect traffic and let Ubuntu access to K3s Let’s Encrypt HTTPS certificates.
Let’s in this step run a K3s Ubuntu cluster with HTTPS using Traefik and Let’s Encrypt.
To use this step:
- Ensure you have a working domain name.
- The domain name must point to the Ubuntu IP address server running your K3s Cluster. Make sure you add an A record:

- Go ahead and create a new namespace to hold K3s Let’s Encrypt records:
kubectl create namespace cert-manager
- Next, download K3s Ubuntu cert-manager and Let’s Encrypt files:
kubectl apply -f https://github.com/cert-manager/cert-manager/releases/download/v1.13.1/cert-manager.yaml
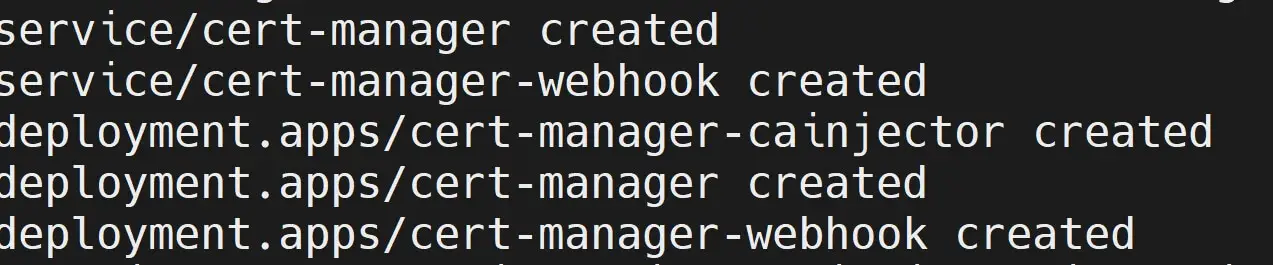
- Ensure the K3s Ubuntu cert-manage pods are running:
root# kubectl get pods --namespace cert-manager
NAME                                       READY   STATUS    RESTARTS   AGE
cert-manager-cainjector-65c7bff89d-zj4rv   1/1     Running   0          119s
cert-manager-cbcf9668d-svkp2               1/1     Running   0          119s
cert-manager-webhook-594cb9799b-dhnr7      1/1     Running   0          119s
- Next, create a
certs.ymlthat should get Let’s Encrypt and Traefik using Ingress controller ready:
apiVersion: cert-manager.io/v1
kind: ClusterIssuer
metadata:
  name: letsencrypt-certificate
  # namespace must be cert-manager as such
  namespace: cert-manager
spec:
  acme:
    server: https://acme-v02.api.letsencrypt.org/directory  # Let's Encrypt ACME server URL
    email: [email protected]  # Email address for Let's Encrypt notifications
    privateKeySecretRef:
      name: example.letsencrypt.key.tls  # Name of the Kubernetes secret storing Let's Encrypt private key
    solvers:
    - selector: {}  # Use all eligible ingresses to solve ACME challenges
      http01:
        ingress:
          class: traefik  # Use Traefik ingress controller to handle HTTP01 challenges
- Run Kubectl apply to deploy the above sample K3s certificate:
kubectl apply -f certs.yml
- Now, ensure the cert-manager is ready:
kubectl get cert-manager

NAME                                                    READY   AGE
clusterissuer.cert-manager.io/letsencrypt-certificate   True    75s
- This example will include nginx deployment based on how you did on Step 4: Deploying Any Application Using Kubectl, K3s, And Your Ubuntu server. But now you will need to let the Nginx Ingress controller know you are using a let’s encrypt ClusterIssuer and direct traffic to a domain name as follows:
You will only edit the deployment.yml Ingress section as follows:
# NGINX Ingress
---
apiVersion: networking.k8s.io/v1
kind: Ingress
metadata:
  name: nginx-ingress
  annotations:
    kubernetes.io/ingress.class: traefik  # Use Traefik as the Ingress controller
    cert-manager.io/cluster-issuer: letsencrypt-certificate  # Use Let's Encrypt TLS certificates ClusterIssuer
spec:
  tls:
    - secretName: example.letsencrypt.key.tls  # Secret containing the TLS key and certificate for your_domain_name
      hosts:
        - your_domain_name
  rules:
  - host: your_domain_name  # Ingress rule Host
    http:
      paths:
      - path: /  # Path configuration
        pathType: Prefix
        backend:
          service:
            name: nginx-service  # Name of your nginx service
            port:
              number: 80  # Port number exposing nginx service
- Redeploy your Changes:
kubectl apply -f deployment.yml
- Check the Ingress controller and ensure the host is your domain name:
kubectl get ingress

NAME                        CLASS    HOSTS             ADDRESS        PORTS     AGE
nginx-ingress               <none>   thriveread.site   172.31.55.23   80, 443   16s
cm-acme-http-solver-st724   <none>   thriveread.site   172.31.55.23   80        14s
- This means your cert-manager is ready to serve a K3s Ubuntu cluster with HTTPS as such:
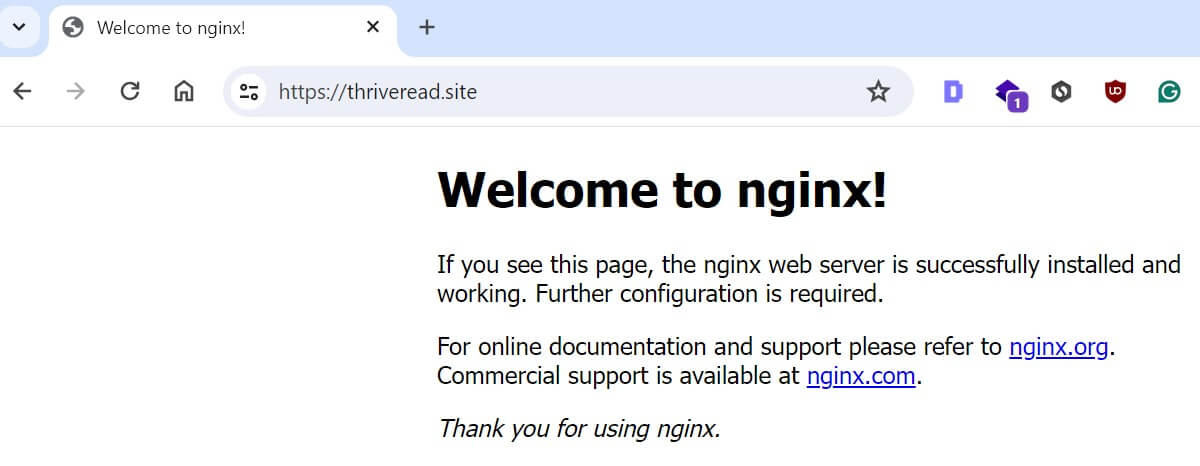
And there you have a secure K3s cluster running within the Ubuntu server.
Step 9: Uninstall k3s (if needed)
To uninstall k3s, use the provided uninstall
/usr/local/bin/k3s-uninstall.sh
Conclusion
In this guide, you have comfortably learned all the steps you need to install and run K3s on 20.04|22.04 LTS step-by-step.
In summary, you learned:
- The step-by-step process provisions a single-node cluster on Ubuntu.
- Deploying any application using Kubectl, K3s, and your Ubuntu server.
- Managing your K3s Ubuntu resources.
- Accessing K3s Ubuntu cluster with Kubernetes dashboard via a web browser.
- Uninstall k3s (if needed).
Written By: