Guide To Running Production K3s Cluster On AWS EC2
Posted September 20, 2023

Are you looking for a self-hosted K3s cluster? This K3s AWS guide teaches how to run K3s on AWS EC2. You will create an EC2 instance and run a single node K3s cluster on AWS.
A self-hosted K3s allows you to run Kubernetes on bare metal while applying principles of smaller, low-resource workloads. Oh, and you get authority over your control plane. It’s kind of escaping the managed Kubernetes black box. K3s justify the server cost of a small company developing a product.
Ready? Dive and set up K3 on AWS EC2.
Setting Up a K3s AWS EC2 Instance
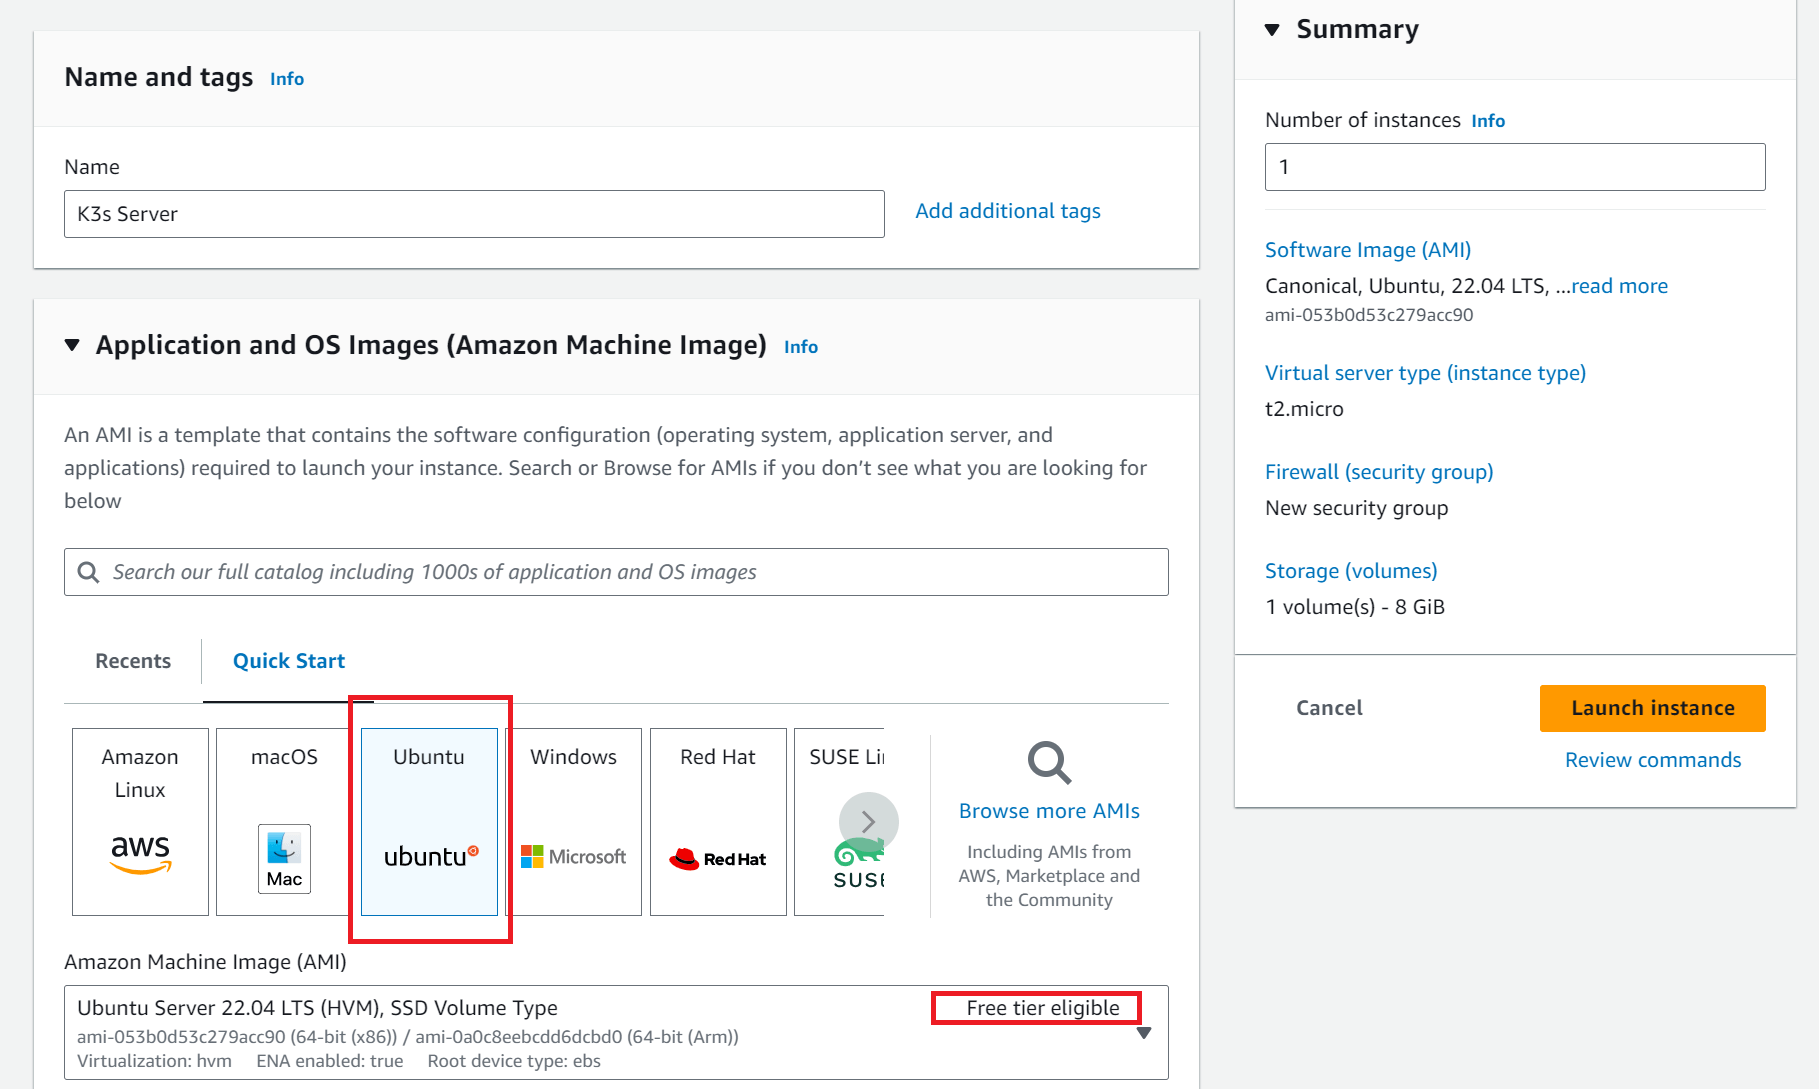
EC2 is like your typical computer hosted on the cloud. The first thing is to choose which OS distribution you are good at working with. This demo uses an Ubuntu machine. Follow along as follows:
Create your instance using Ubuntu. Remember to always check you are using Free tier eligible services; in this case, the t2.micro and t3.micro server types will be fine:

To access the instance on a secure SSH client, create an SSH key and assign it to this EC2:

Are you planning to expose this EC2 to the public and mainly use a domain name to access the K3s cluster running on AWS? Set your networking so the cluster can allow HTTP and HTTPS traffic from the internet:

Launch your instance if you have these settings ready.
Creating an Elasing K3S AWS EC2 IP Address
Your EC2 will be exposed to the internet. If it reboots, it will get assigned a new IP address. You don’t want this to happen. Traffic must point to a stable IP address.
Go to Elastic IPs:

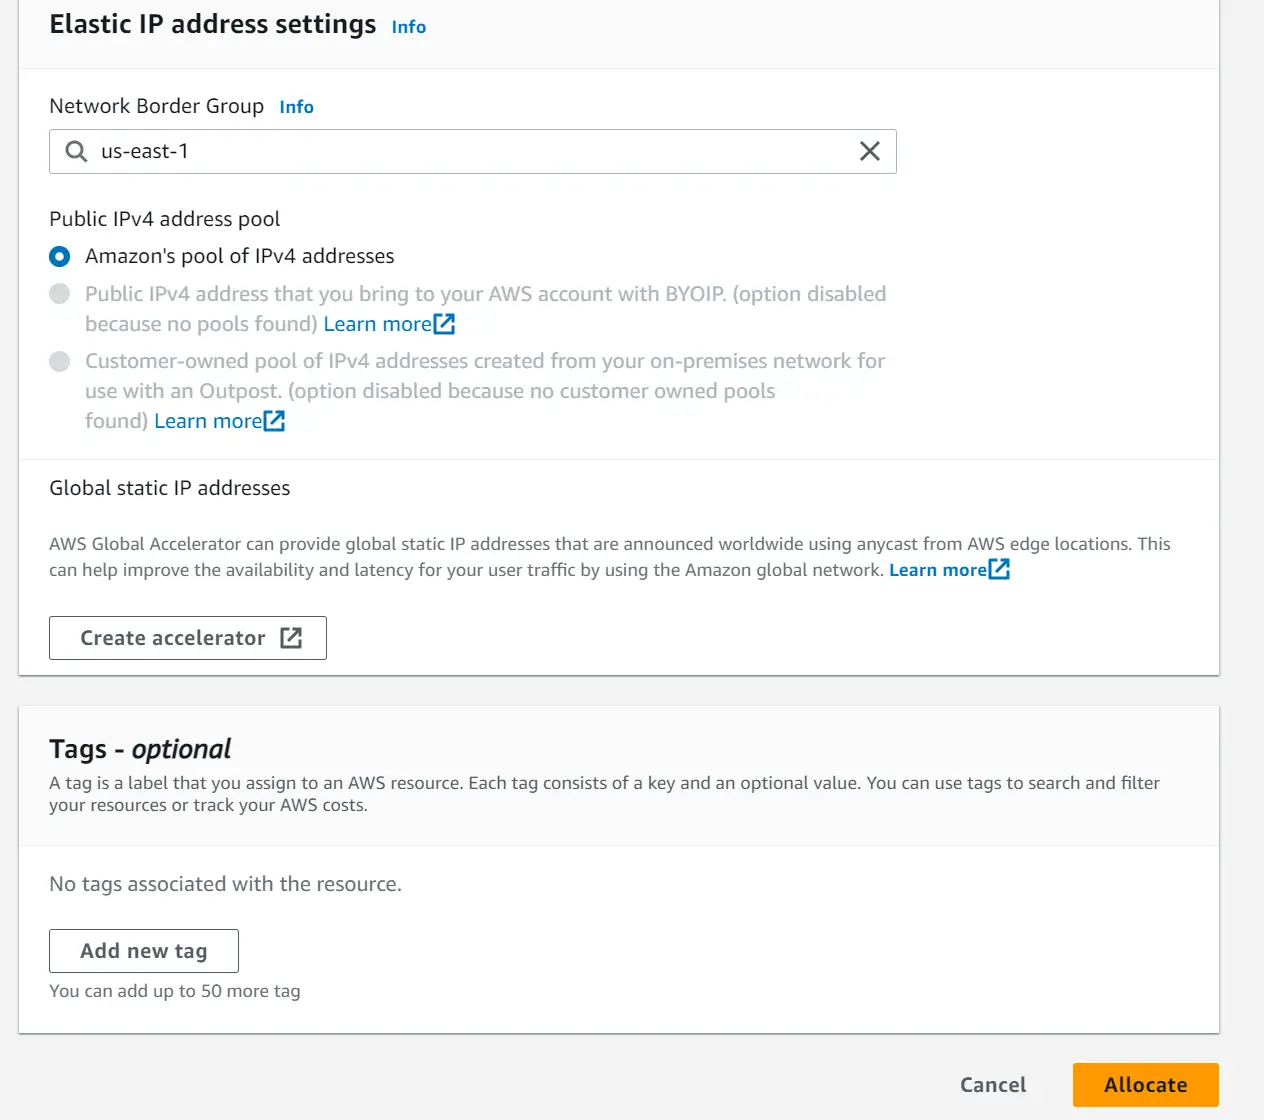
Allocate Elastic IP address as follows:

You don’t need to edit these settings further. Click Allocate to proceed to the created Elastic IP address.
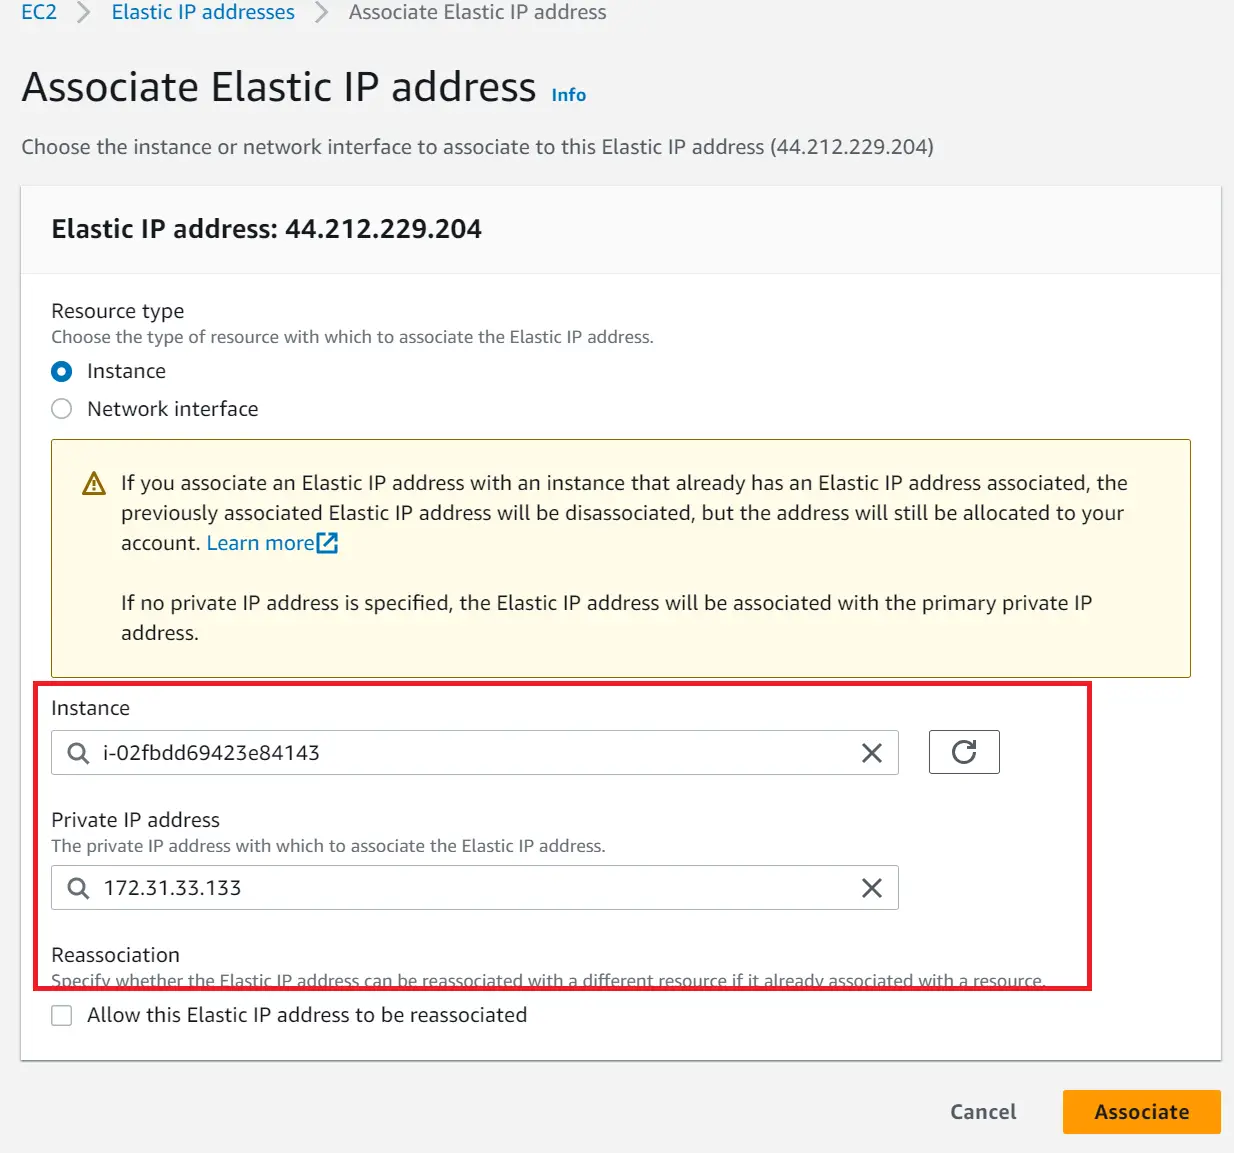
Your instance will be assigned to this IP. But you need to Select the IP, and on Actions, you will Associate Elastic IP Address.

You will select your Instance and Private IP address to finally Associate the IP

The instance is running and ready to configure K3s AWS EC2 :

Accesing AWS EC2 On SSH
To run a command for setting up K3s on AWS EC2, you must access the EC2 instance in a terminal.
One way is to use the key pair you generate using FTP to SSH to your instance. If you have knowledge using this option, go ahead and use it.
However, to make this simple, you can use an online AWS-based SSH client as follows:
- Select your instance and navigate to Connect:

- Select Connect using EC2 instance Connect:

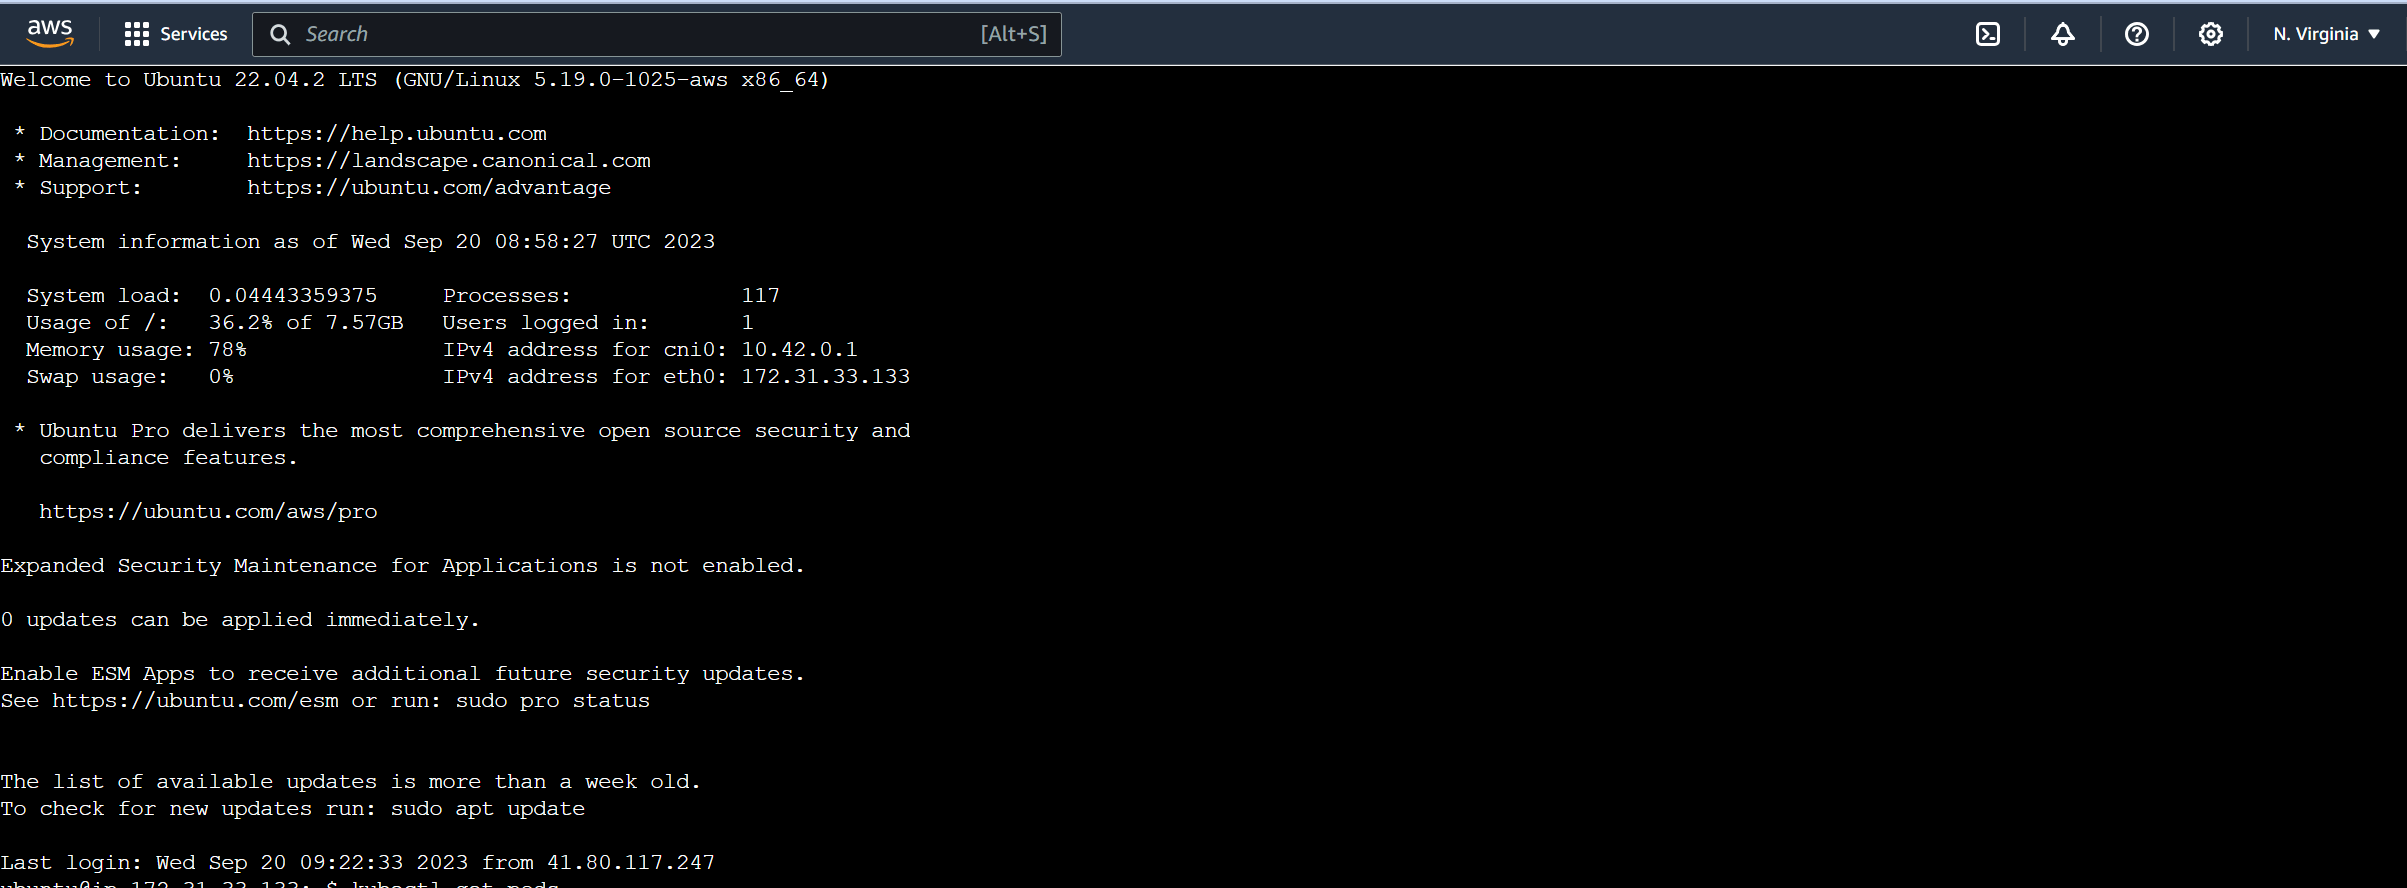
- A terminal will be launched on your browser that you can use to run the commands:

Installing K3s On AWS EC2
K3s get up and running with a single command. The following is the basic installation command K3s provided on K3s docs:
curl -sfL https://get.k3s.io | sh -

Now run the following commands to check if the K3s server is working:
kubectl get nodes
# Or
kubectl cluster-info

If you have an error, as follows:

Go to this guide and learn Solving WARN[0003] Unable to read /etc/rancher/k3s/k3s.yaml Error.
As a side note, the following command works best to solve this error:
curl -sfL https://get.k3s.io | sh -s - --write-kubeconfig-mode 644
A Quick Note For k3s AWS EC2 for production: If you are running this setup from a production purpose, I have included the following command. I have added a
--tls-sanas Configuration Value to add hostnames or IPv4/IPv6 addresses to the K3s installation. This is not a must-use setup. However, if you want to use a TLS cert, you need to install K3s with your IPv4 address as a subject in the following commandyour_server_ipvalue:
curl -sfL https://get.k3s.io | INSTALL_K3S_EXEC="--tls-san your_server_ip" sh -
Running K3s Kubernetes Cluster on AWS EC2
That’s all you need as far as installing K3s is required. So, let’s get an application up and running on this server.
To make it simple, I have created a simple static web app using React and dockerized to DockerHub.
Here is how I create a dockerized DockerHub image. If you want to follow along with React, ensure Node.js is set up in your local machine.
First, create your application. Install the application with the following command:
npx create-react-app my-react-app
Now change the directory to the created application application:
cd my-react-app
I will go ahead and edit a single file here. Navigate to the /src/App.js file and add the following line:
<p>
    Welcome to the K3 Kubernetes Cluster on AWS EC2
</p>
Start React with the command:
npm start
Open the app using http://localhost:3000/ on your browser. You should be served the same application that will run on the K3s cluster inside your AWS EC2:

Dockerize the application
Now, you must ensure you have a Dockerfile to build an image for your specific application.
In your my-react-app directory, create a Dockerfile and add the following instructions:
FROM node:19-alpine
WORKDIR /app
COPY package.json ./
COPY package-lock.json ./
RUN npm install
COPY ./ ./
CMD ["npm", "start"]
Note: there are better Dockerfiles you can create than this one. This example is for a demo to let you have an application started. So, optimize your Dockerfile for a production-ready grade.
K3s on AWS EC2 will access this image. Simply saying, AWS EC2 is a cloud service. To access your image, you must also host it on the internet. DockerHub is the right place to do that.
Let’s build the image and store its artifacts in DockerHub:
In your Dockerfile root directory, run the following commands:
- Login to Docker Hub:
docker login
Add DockerHub username and password. If you don’t have them, head to DockerHub and create an account.
- Build your image using the DockerHub username
docker build -t your_dockerhub_username/my-react-app .

- Push and publish the image to DockerHub:
docker push your_dockerhub_username/my-react-app:latest
Creating K3s Kubernetes Cluster on AWS EC2
To run this application, let’s create the K3s Kubernetes Cluster on AWS EC2.
In your EC2 ssh terminal, create a Kubernetes deployment file:
nano deployment.yml
And the following K3s deployment Configuration to this deployment.yml and save it:
apiVersion: apps/v1
kind: Deployment
metadata:
  name: react-deployment
  labels:
    app: react-app
spec:
  replicas: 1
  selector:
    matchLabels:
      app: react-app
  template:
    metadata:
      labels:
        app: react-app
    spec:
      containers:
        - name: react-app
          image: your_dockerhub_username/my-react-app
          imagePullPolicy: Always
          ports:
            - containerPort: 3000
---
apiVersion: v1
kind: Service
metadata:
  labels:
    app: react-app-service
  name: react-app-service
  namespace: default
spec:
  ports:
    - name: 3000-3000
      port: 3000
      protocol: TCP
      targetPort: 3000
  selector:
    app: react-app
  sessionAffinity: None
  type: ClusterIP
status:
  loadBalancer: {}
---
apiVersion: networking.k8s.io/v1
kind: Ingress
metadata:
  name: react-app-ingress
  annotations:
    ingress.kubernetes.io/ssl-redirect: "false"
spec:
  rules:
    - http:
        paths:
          - path: /
            pathType: Prefix
            backend:
              service:
                name: react-app-service
                port:
                  number: 3000
In this deployment.yml:
- You have the deployment to run the application image on
image: your_dockerhub_username/my-react-app. So makeyour_dockerhub_usernamereflect your DockerHub username. - The service to expose the application on a
ClusterIP - Traefik to run Ingress as a load-balancer, routing the traffic to the service and exposing the application.
Deploying K3s AWS EC2 Cluster
You have all the files ready. Let’s get the cluster up and running. Execute the following command:
kubectl apply -f deployment.yml

To confirm the cluster is running, check its pod status:
kubectl get pods

If you get an error here, such as Unable to connect to the server: net/http: TLS handshake timeout. It means your AWS EC2 Instance doesn’t have enough resources. Consider creating your instance with a larger Instance type. However, remember to delete it if you use it for test purposes to avoid additional AWS charges on your card.
The pod is running. To test this deployment, open your EC2 Elastic IP address on the browser. For example, here, I was using 44.212.229.204. This should serve me the application on the browser as follows:

Adding Domain name
If you want your newly deployed cluster to run on the domain name instead of an IP address, you can add a record to your DOMAIN HOST in the DNS RECORD poting to your EC2 Ipv4 address as follows:
The following is an example of adding a DNS record to Namecheap DNS:

You can add your server IP using DNS services such as Cloudflare for more advanced DNS settings.
Wrapping Up
Did you get a stack? Leave us a comment, and we will solve any problem you experience setting up K3s on your AWS EC2 instance. And if you have more related topics to K3s on AWS EC2, add them to your comment.
Thank you for more happy K3s topics.


