Run k3s Kubernetes in Production with a GitHub Actions CICD
Posted September 21, 2023

Do you want to run K3s on production? This guide will help you set up a production Ready K3s cluster and add a domain name and a GitHub Actions CICD pipeline to a live K3s cluster.
So, embark on this journey and create a production K3s cluster. To make it fun, you will add a CICD pipeline using GitHub Actions and automate your cluster deployments. Here is a summary of what you will learn:
- Build a static web app.
- Run the application with Docker.
- Publish Docker image to DockerHub.
- Create a production self-hosted K3s cluster.
- Run k3s single node on production.
- Configure Traefik Ingress for your K3s cluster.
- Create a CICD pipeline.
- Automate production deployments to GitHub Actions.
- Add Domain Name to access your application.
Preparing a Production Ready K3s Cluster
Going into this guide, you must have a running self-hosted server. This guide shows you how to Run the Production K3s Cluster On AWS EC2.
Once your server/cloud machine is ready, use an SSH client to access it and run the commands in this guide. (I used an Ubuntu 22.04 server)
The first step is to install K3s on your cloud-hosted machine. A good command to run K3s on production is as follows:
Note: Remember to replace
your_server_ipwith your server IPv4 address before running this command.
curl -sfL https://get.k3s.io | INSTALL_K3S_EXEC="--tls-san your_server_ip" sh -
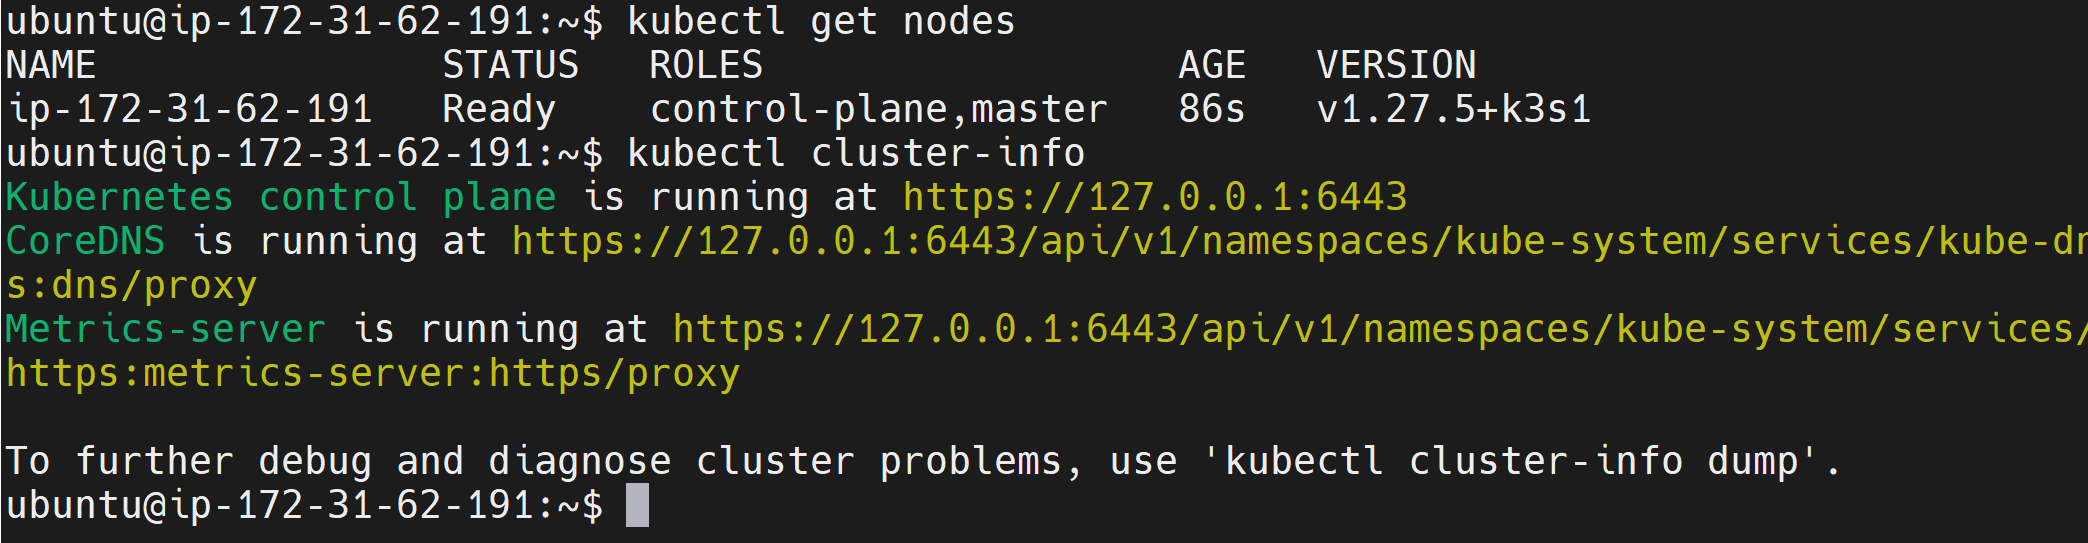
kubectl get nodes
# Or
kubectl cluster-info
If by any chance you encounter an error running the above command, for example:

Consider checking this comprehensive WARN[0003] Unable to read /etc/rancher/k3s/k3s.yaml Error. Alternatively, reinstall your k3s cluster using the following command:
Remember to replace
your_server_ipwith your server public IPv4 address before running this command.
curl -sfL https://get.k3s.io | INSTALL_K3S_EXEC="--tls-san your_server_ip" sh -s - --write-kubeconfig-mode 644
Preparing Your Production-ready K3s Application
k3s is up and running. Let’s prepare the application the k3s server will use to create a cluster.
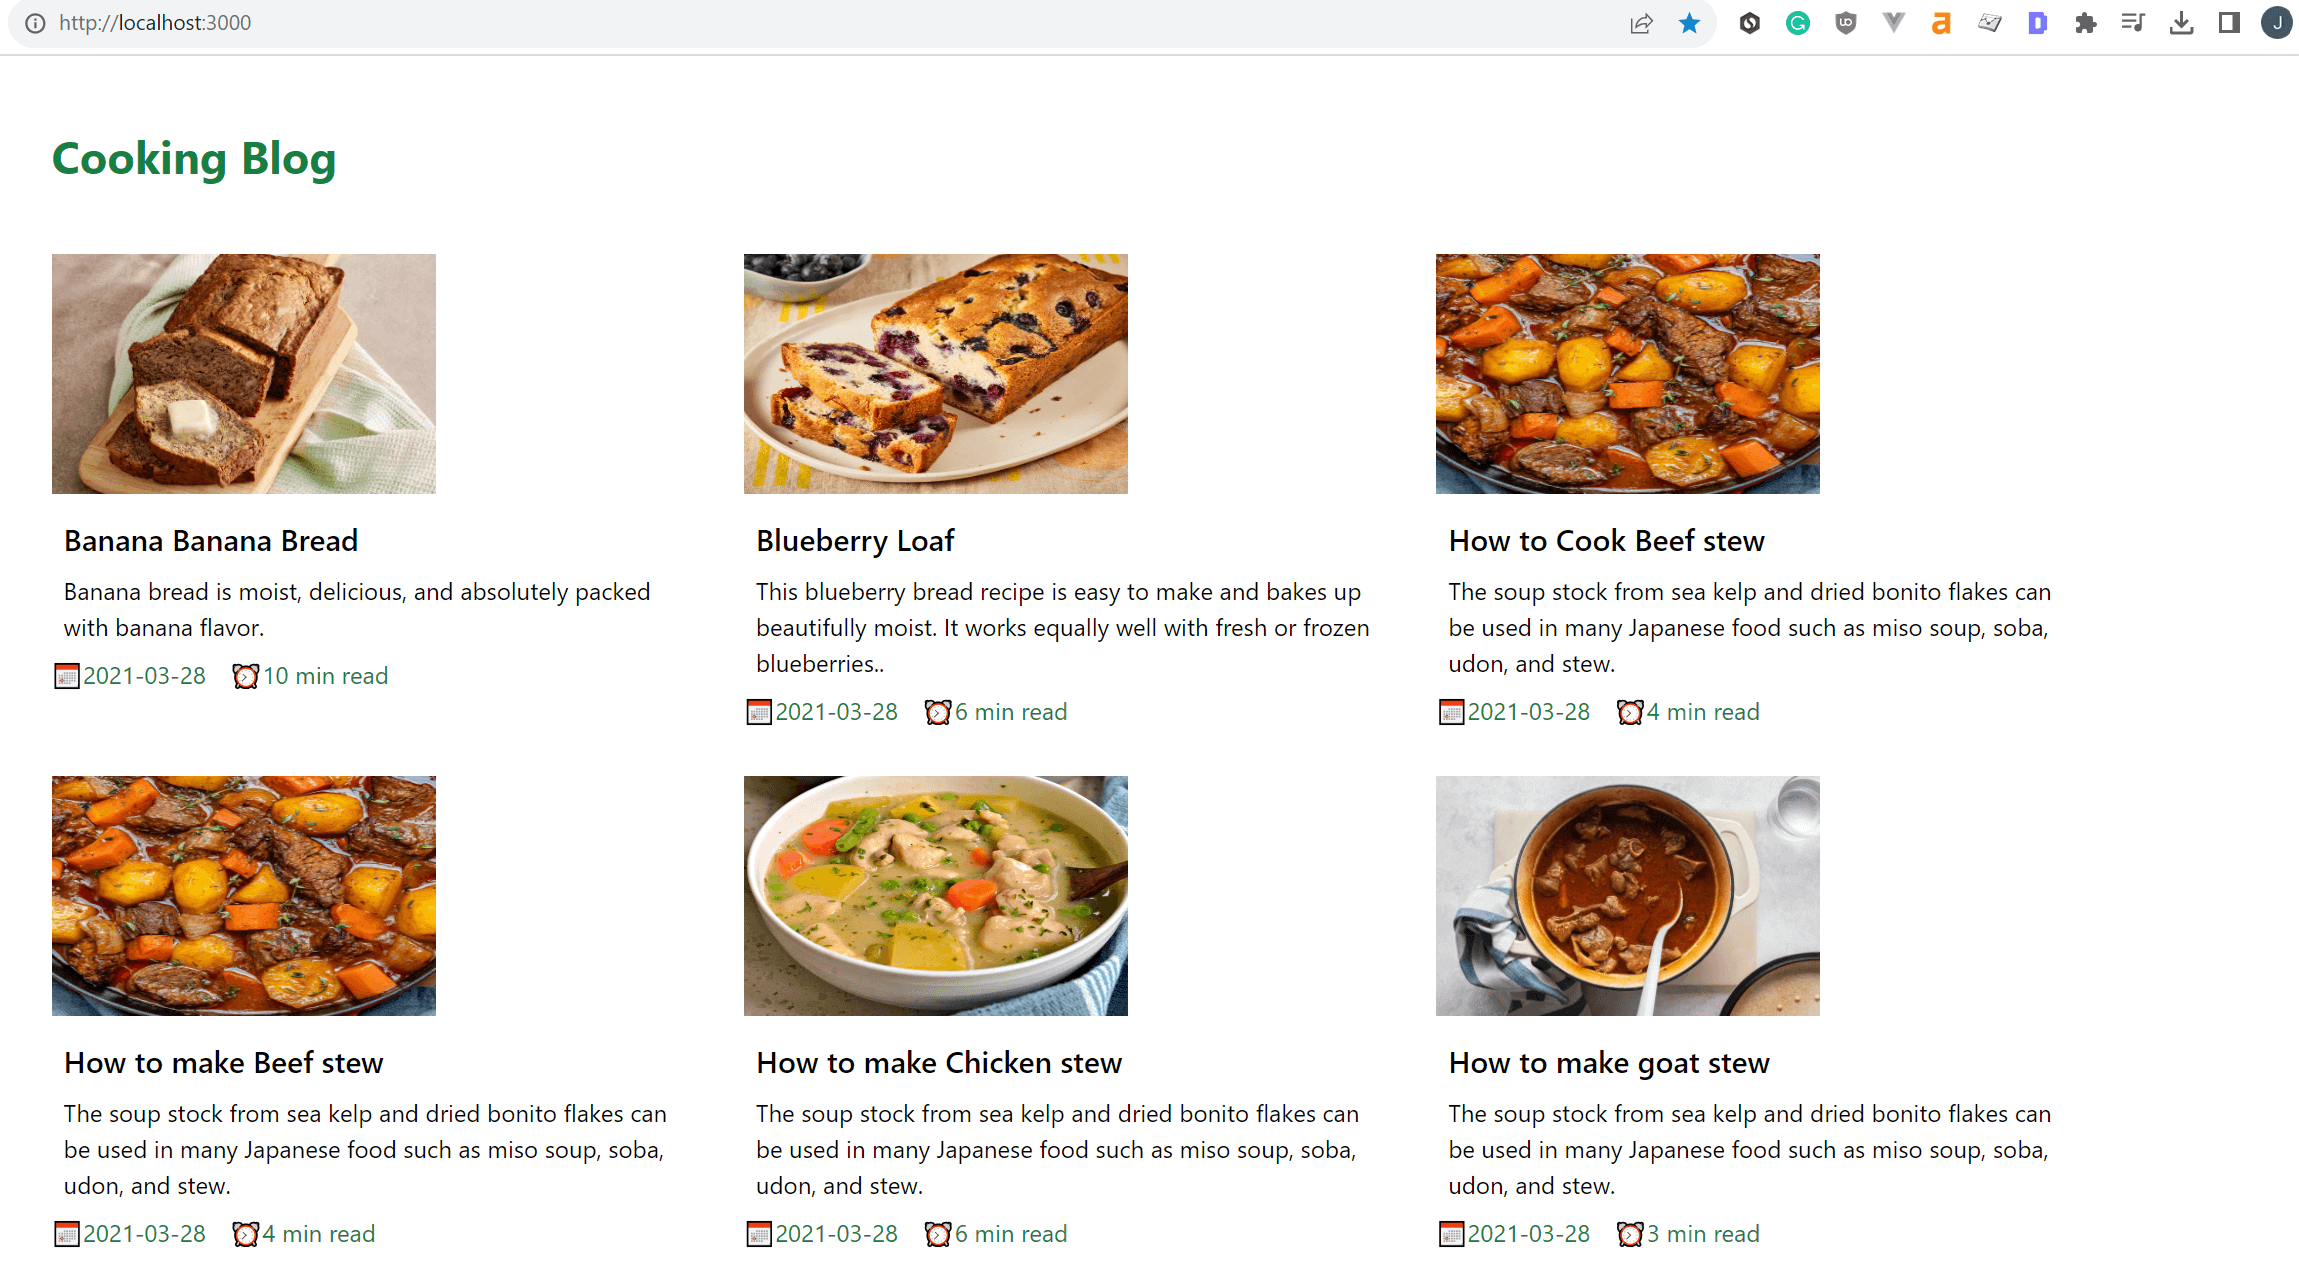
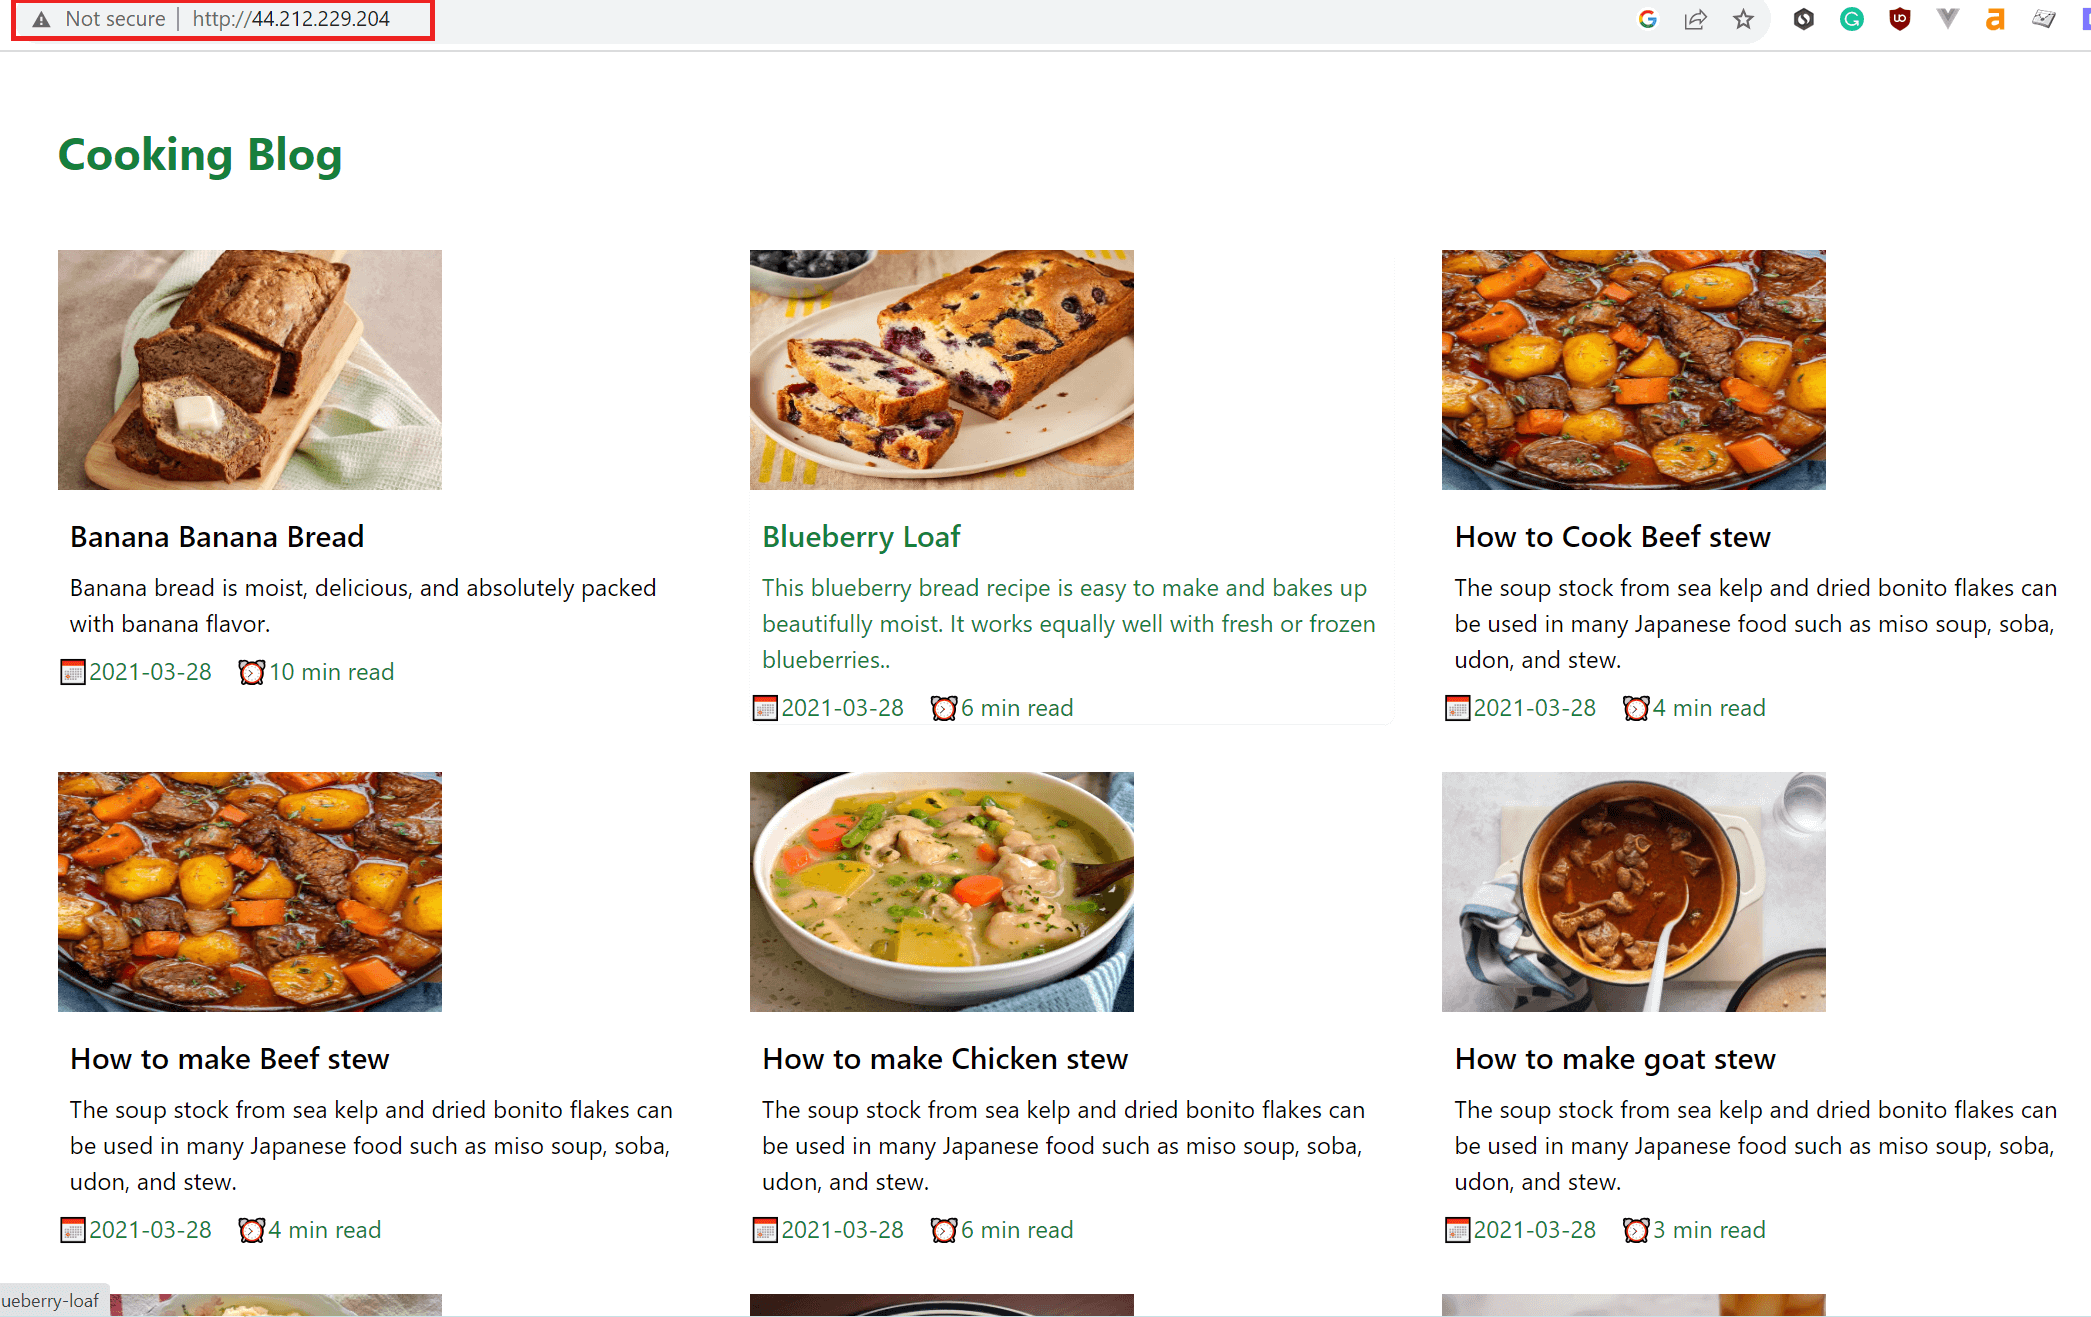
As for this guide, I will run a static NEXT.JS blog application. And you can use any application of your choice and move along. However, I recommend running the same application to understand the process well.
Go ahead and run the following command to clone the application I’m using:
git clone https://github.com/kimkimani/Nextjs_mdx_blog_app.git
Change the directory to the newly created directory:
cd Nextjs_mdx_blog_app
To test the application, run:
npm i
Then, start the application using the following command.
npm run dev
The app will be ready on http://localhost:3000 as follows:
Let’s get this app on K3s and live on production. But first, you need a Dockerfile to build the image to DockerHub.
Running the Application with Docker
You will create a Dockerfile and root directory of the Nextjs_mdx_blog_app folder. It will contain the following instructions:
# base image
FROM node:19-alpine
# Set the working directory
WORKDIR /app
# Copy package.json and package-lock.json
COPY package*.json ./
# Install all dependencies
RUN npm install
# Copy the rest of the application files
COPY . .
# Build the Next.js application for production
RUN npm run build
# Expose the port that the application will run on
EXPOSE 3000
# Start the application
CMD ["npm", "start"]
To build your image, ensure your DockerHub account is ready. Run docker login to log in. Then, build the image as follows:
docker build -t your_dockerhub_username/nextjs-app .
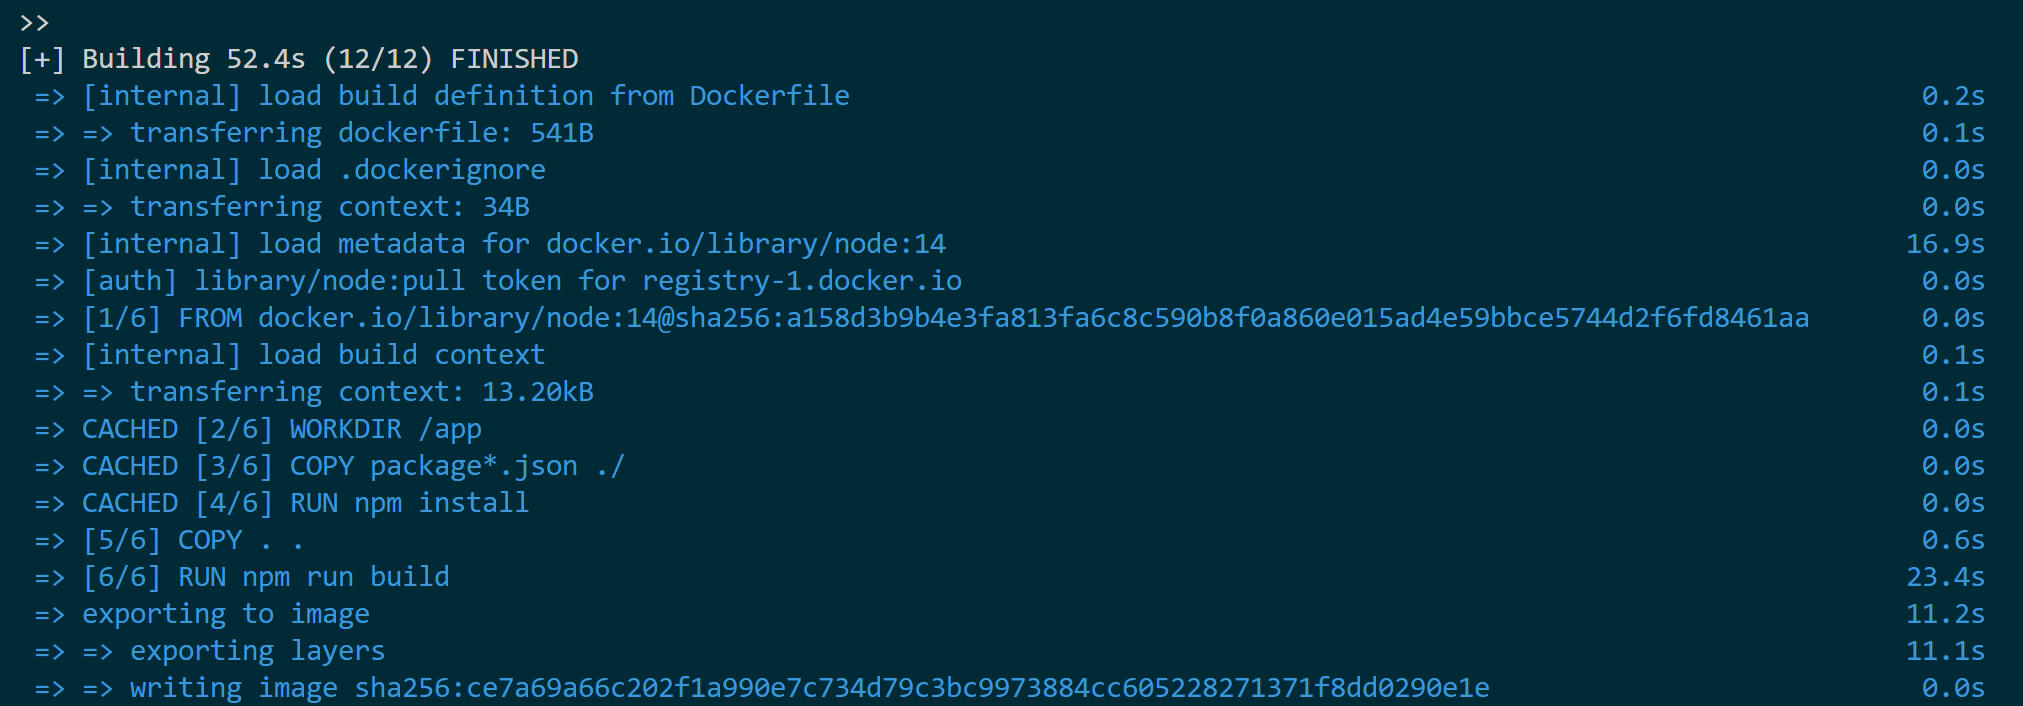
Finally, push this image to your DockerHub repository:
docker push your_dockerhub_username/nextjs-app:latest
When Running K3 on production, your cluster will access this image using the URL your_dockerhub_username/nextjs-app.
Creating a Production Self-hosted K3s Cluster
Like K8s, K3s Kubernetes distribution uses the same yml configurations to create deployments and services. Currently, K3s is light, and you can spin in on the bare metal of any server.
Using the above dockerized Next.js app, create a deployment to run the application as follows:
- First, create your deployment file on your cloud server:
nano deployment.yml
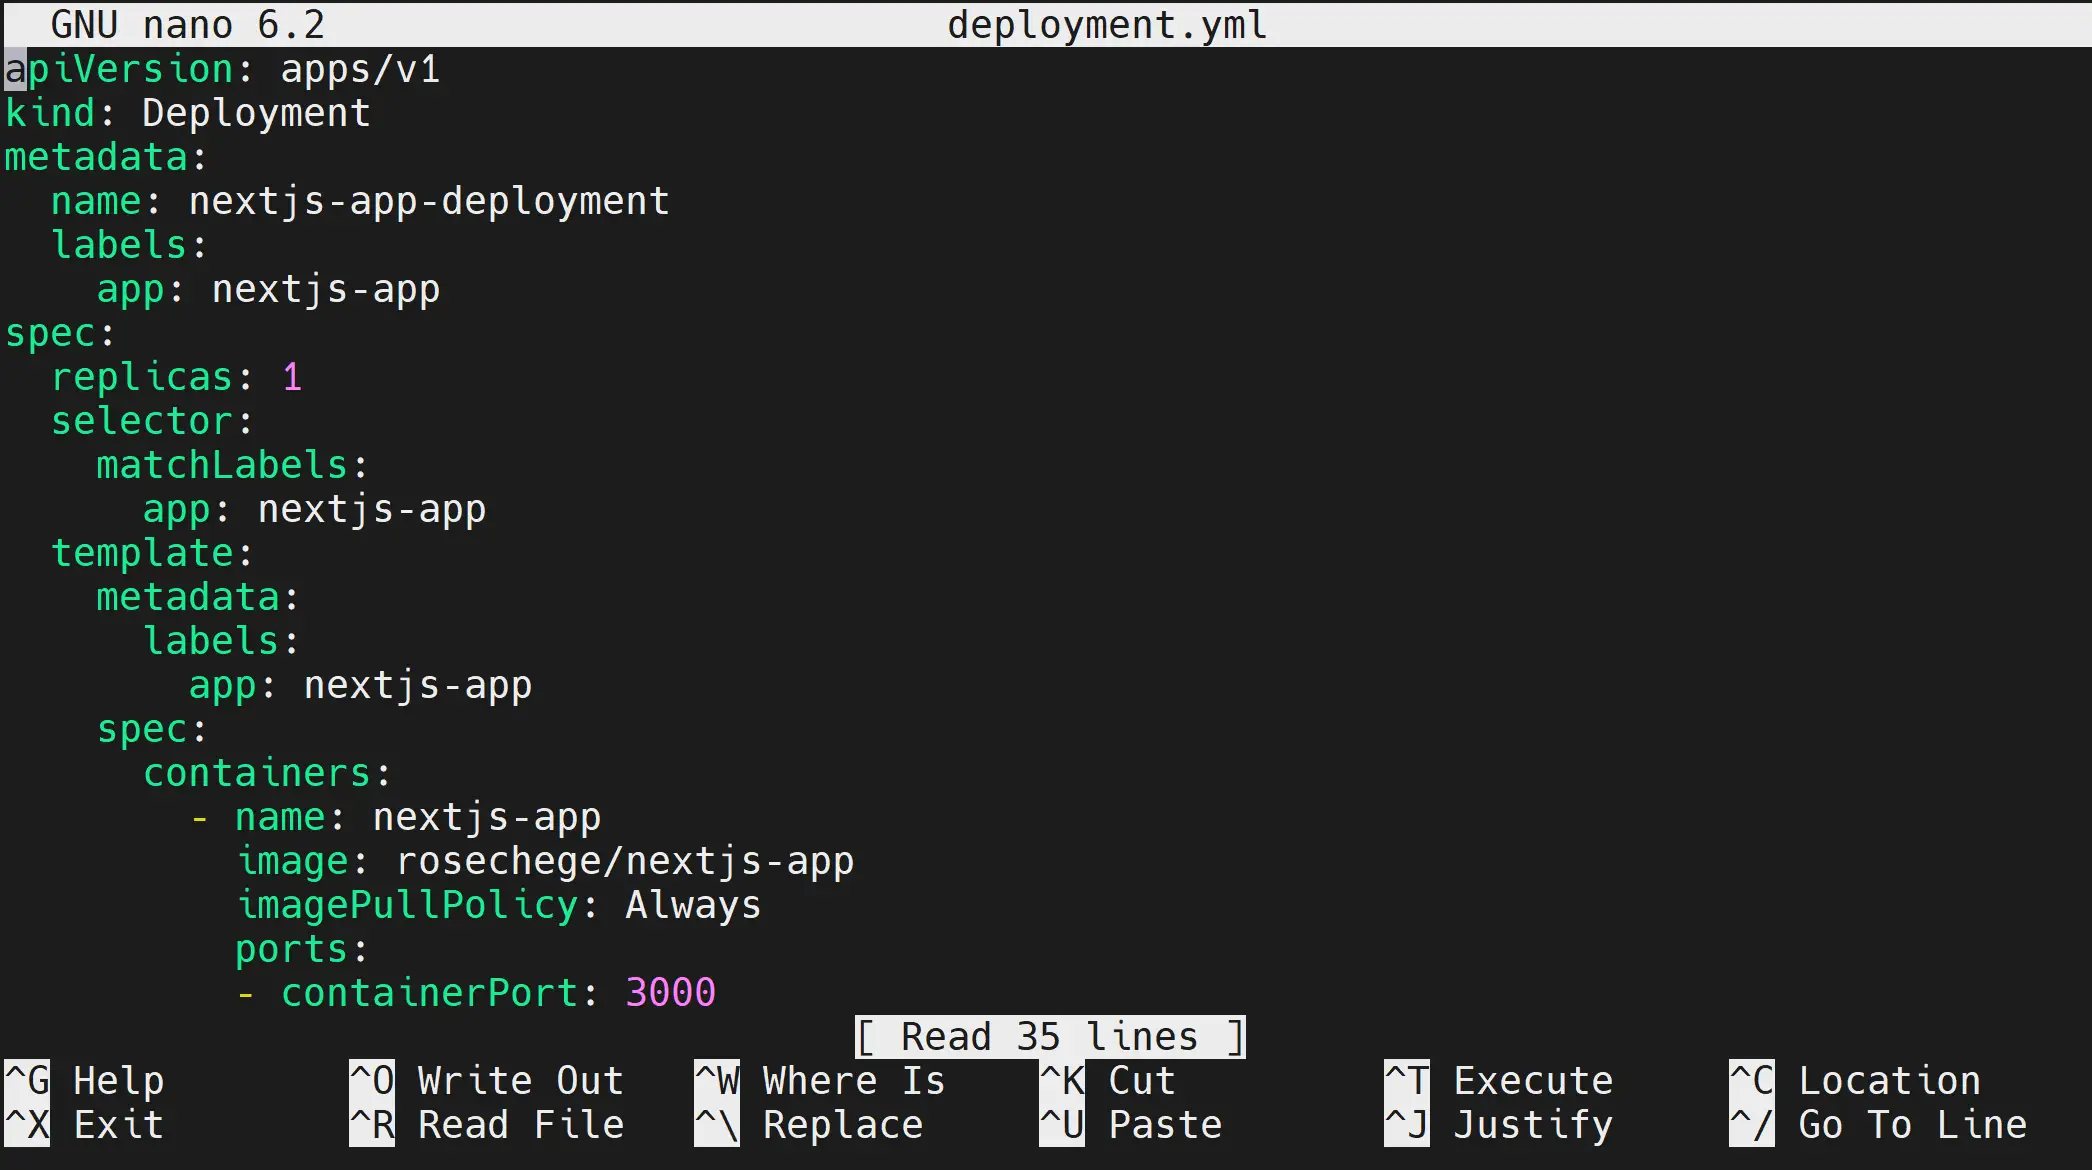
- Add your deployment manifest as follows:
apiVersion: apps/v1
kind: Deployment
metadata:
  name: nextjs-app-deployment
  labels:
    app: nextjs-app
spec:
  replicas: 1
  selector:
    matchLabels:
      app: nextjs-app
  template:
    metadata:
      labels:
        app: nextjs-app
    spec:
      containers:
        - name: nextjs-app
          image: your_dockerhub_username/nextjs-app
          imagePullPolicy: Always
          ports:
          - containerPort: 3000
          livenessProbe:
            httpGet:
              path: /
              port: 3000
            periodSeconds: 5
            initialDelaySeconds: 5
          readinessProbe:
            httpGet:
              path: /
              port: 3000
            periodSeconds: 10
            initialDelaySeconds: 5
---
- Remember to change the file before exiting your editor.
This manifest will deploy your application:
- Using one pod instance.
- Exposing your app to port 3000 as you specify in the
Dockerfile. - Execute your image hosted on the docker hub as
your_dockerhub_username/nextjs-app. - Create the livenessProbe and readinessProbe to monitor container traffic.
Creating the Deployment Service
To expose the application, you create a service file as follows:
nano service.yml
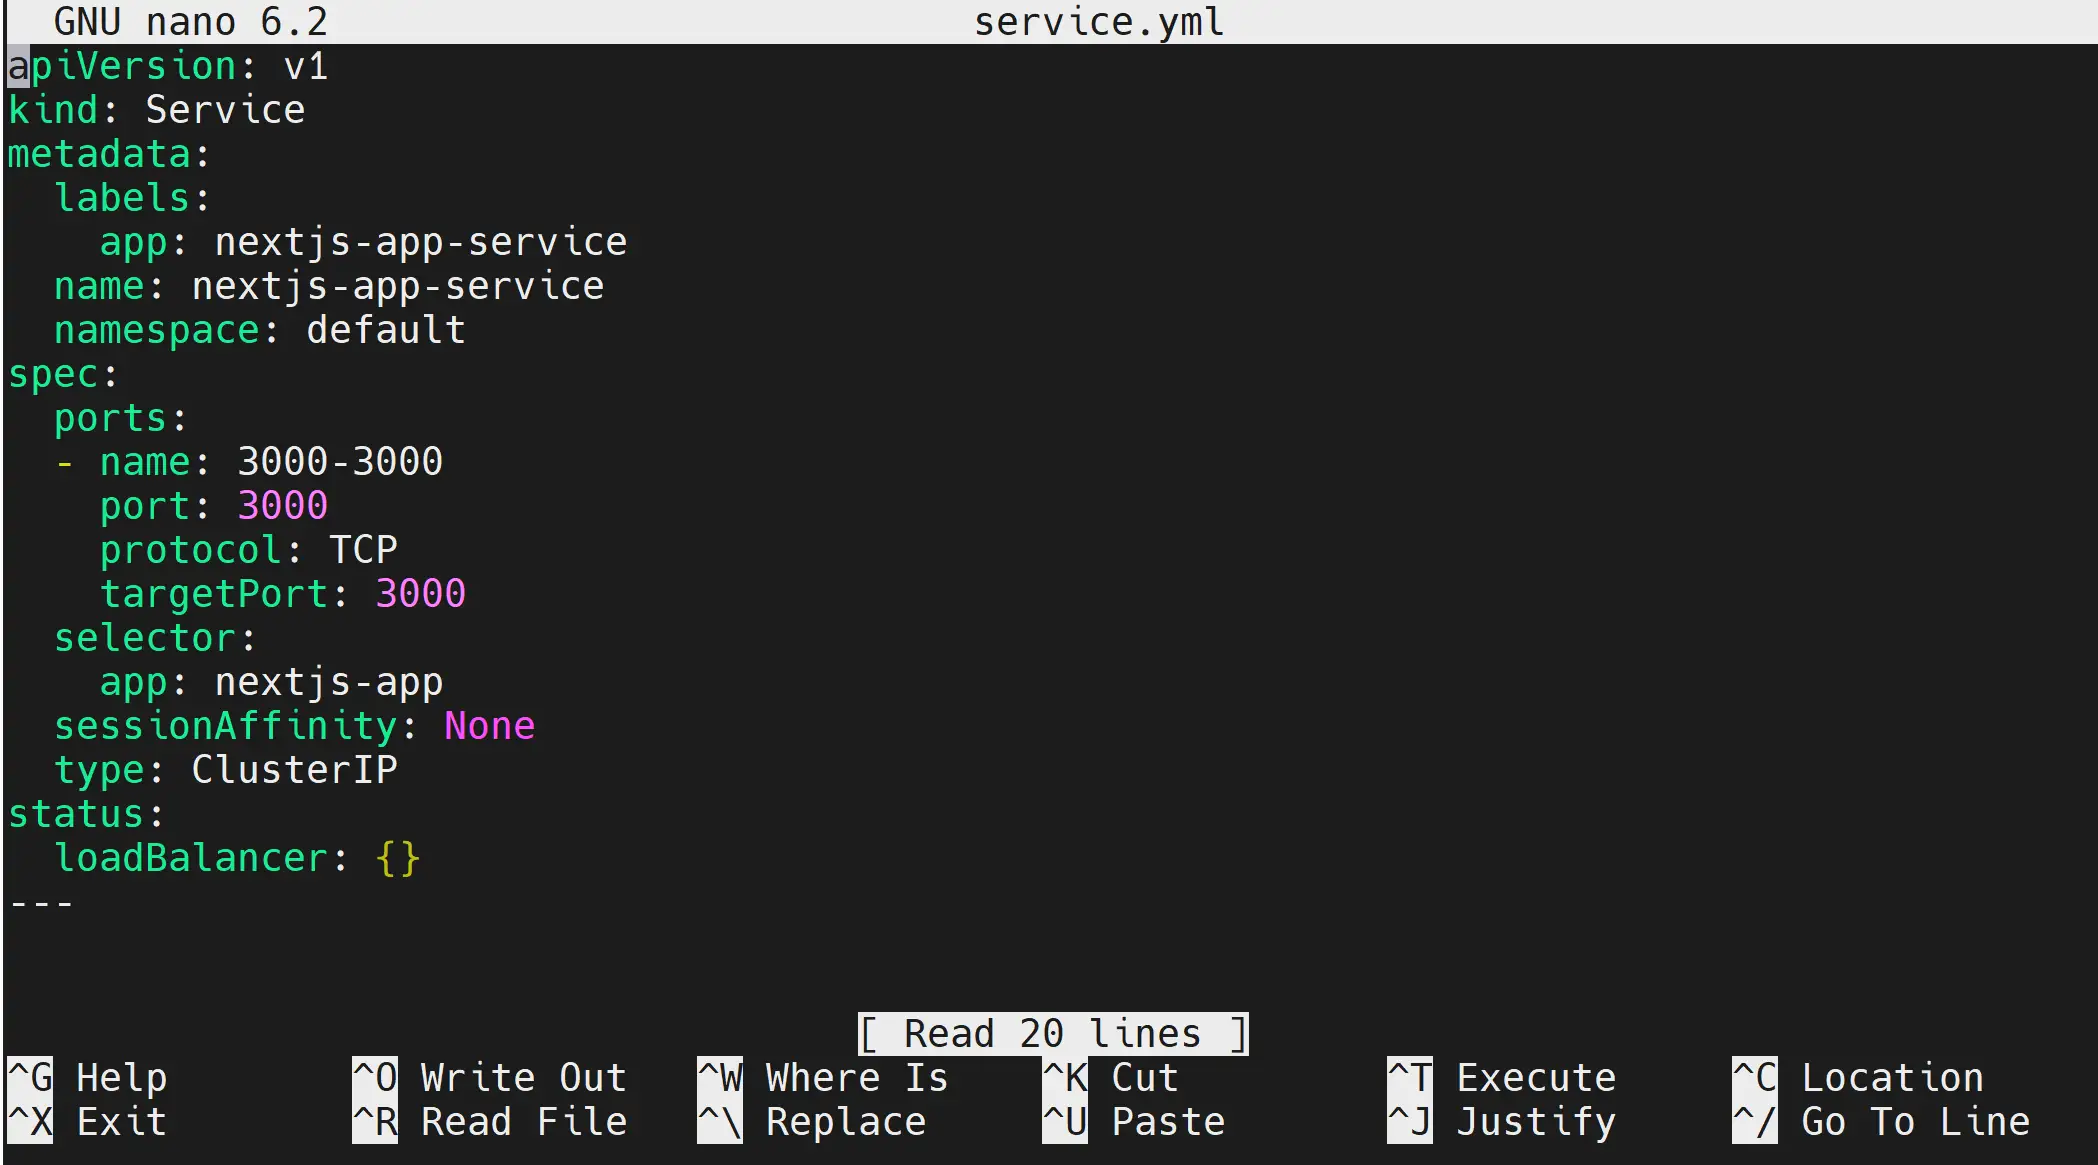
Your service.yml will expose nextjs-app-deployment to ClusterIP as follows:
apiVersion: v1
kind: Service
metadata:
  labels:
    app: nextjs-app-service
  name: nextjs-app-service
  namespace: default
spec:
  ports:
  - name: 3000-3000
    port: 3000
    protocol: TCP
    targetPort: 3000
  selector:
    app: nextjs-app
  sessionAffinity: None
  type: ClusterIP
status:
  loadBalancer: {}
---
Save the file and exit.
Creating k3s Production Traefik Ingress Example
Traefik ingress acts as a load balancer and API gateway to your application, exposing the running pod to the Internet. So, create a Traefik file as follows.
nano traefik.yml
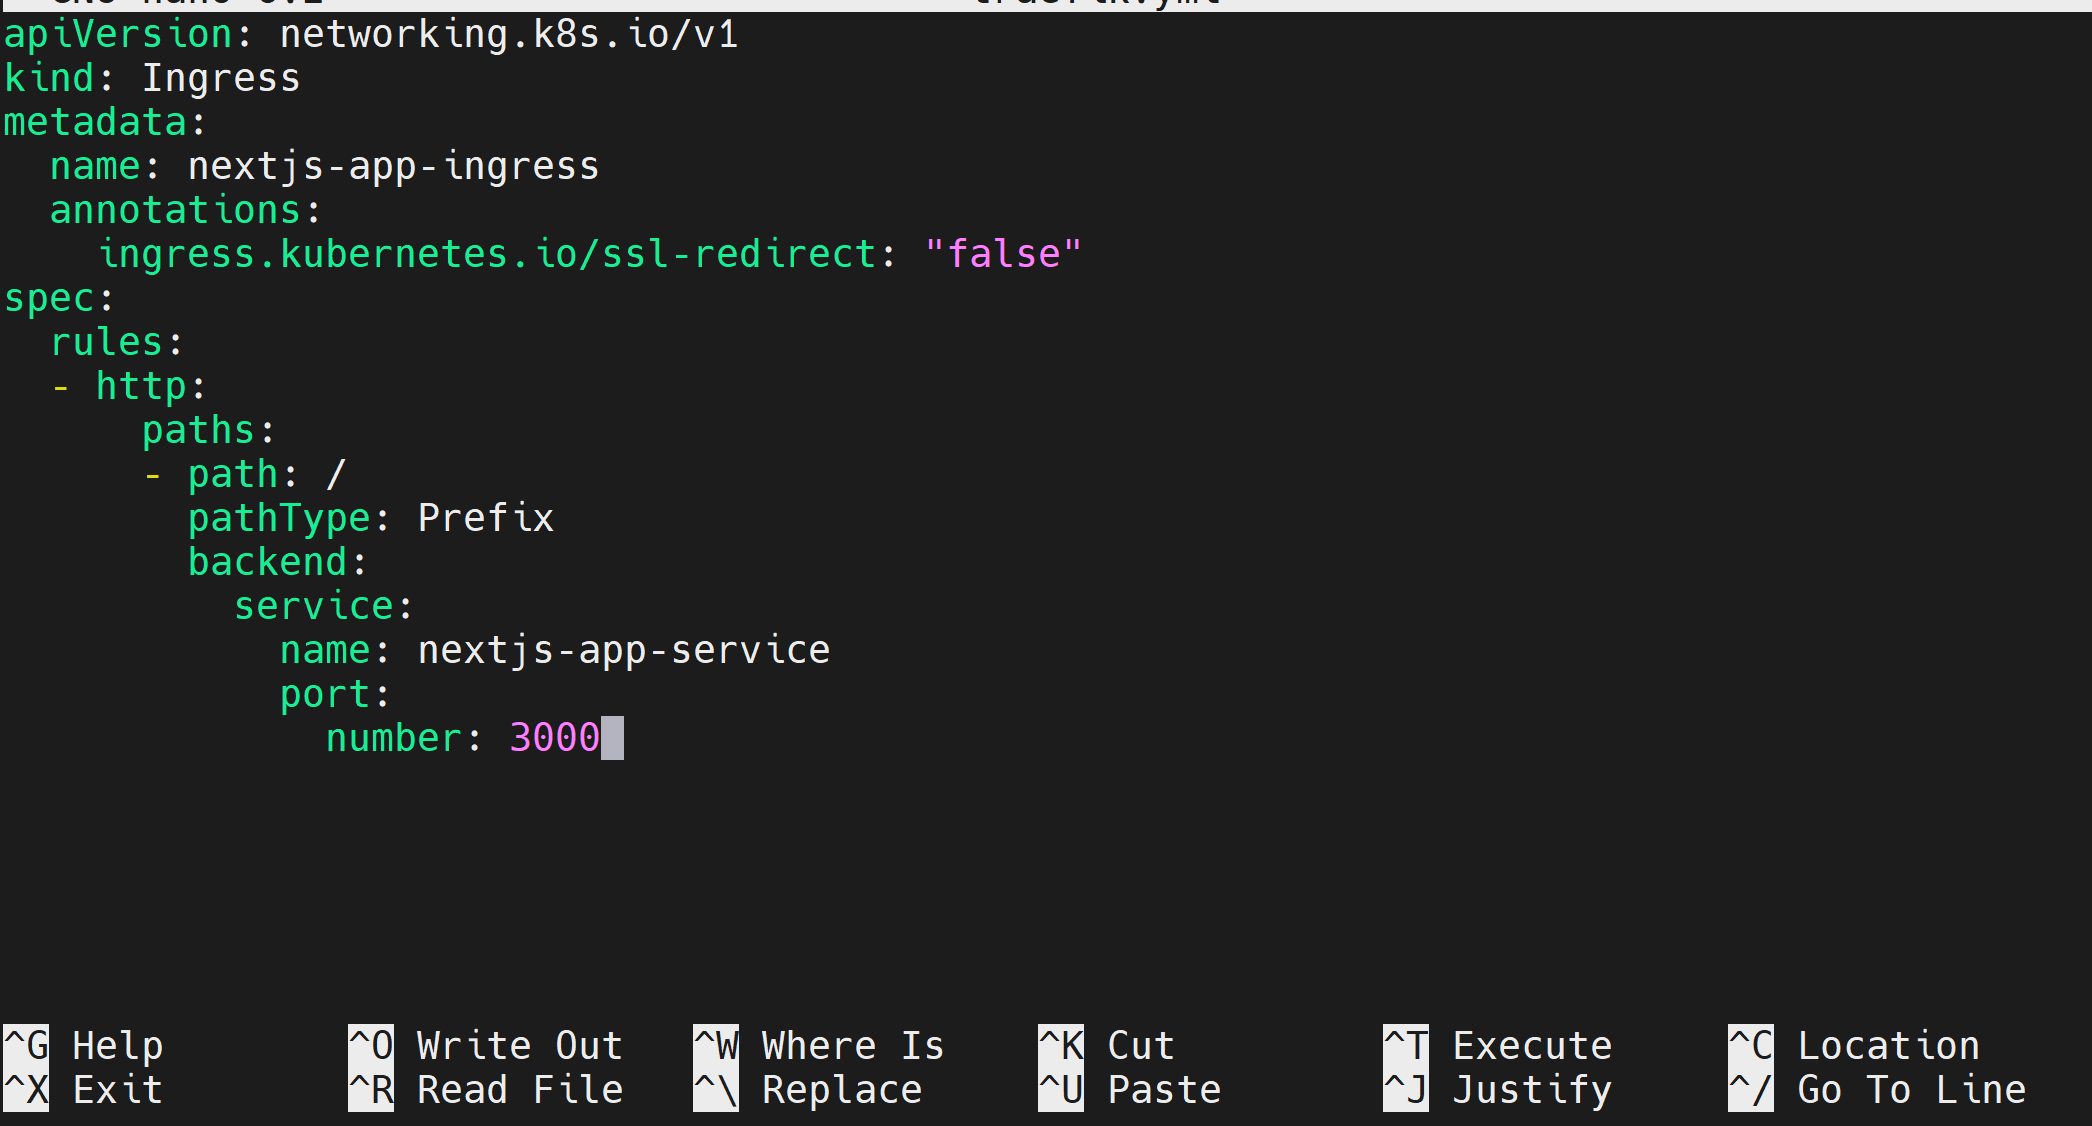
It will route the service nextjs-app-service to the Internet as follows:
apiVersion: networking.k8s.io/v1
kind: Ingress
metadata:
  name: nextjs-app-ingress
  annotations:
    ingress.kubernetes.io/ssl-redirect: "false"
spec:
  rules:
  - http:
      paths:
      - path: /
        pathType: Prefix
        backend:
          service:
            name: nextjs-app-service
            port:
              number: 3000
Running Your K3s Production Cluster
Once the three files are ready and you have saved each manifest, deploy them to the K3s cluster as follows:
# deployment
kubectl apply -f deployment.yml
# service
kubectl apply -f service.yml
# Traefik Ingress
kubectl apply -f traefik.yml

Check if the pod is running as expected:
kubectl get pods

If you have any errors, dig into each component and check if they are experiencing any errors:
kubectl describe deployment nextjs-app-deployment
kubectl describe service nextjs-app-service
kubectl describe ingress nextjs-app-ingress
It’s now time to test if k3s has successfully deployed the production application:
First, check the states of the Traefik Ingress:
kubectl describe ingress nextjs-app-ingress
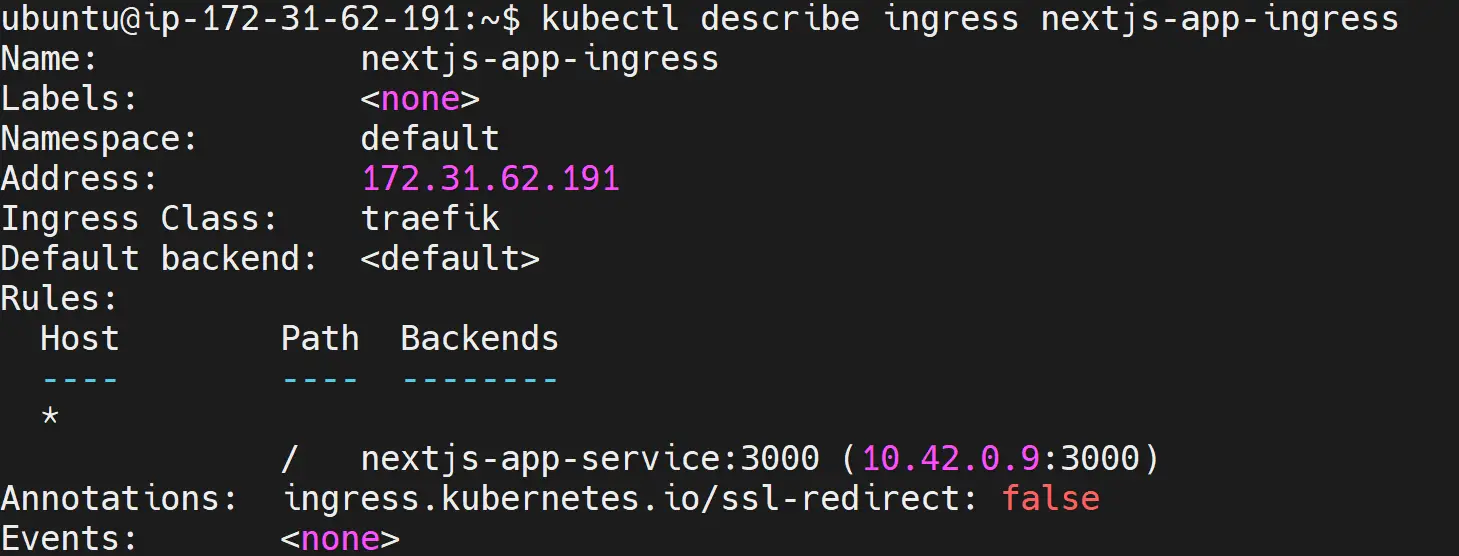
Traefik Ingress is serving your application to your server’s private address. So, at this point, copy your server’s public ipv4 address to your browser, and you should be able to have the ready-deployed application served to you as follows:
Automating k3s CICD Production Deployments to GitHub Actions
Now comes the fun part. A CICD pipeline will ensure you don’t have to access your server to make changes. Any single coming to GitHub will trigger a pipeline to add new changes to the current code base and create a continuous deployment. Let’s dive and do that.
The first step is to ensure your application is ready and hosted on the GitHub repository. Ensure you have all files available, including the Dockerfile. Once you have the application ready on GitHub, it is time to have some fun:
Navigate to the GitHub setting and access the action tab as follows:
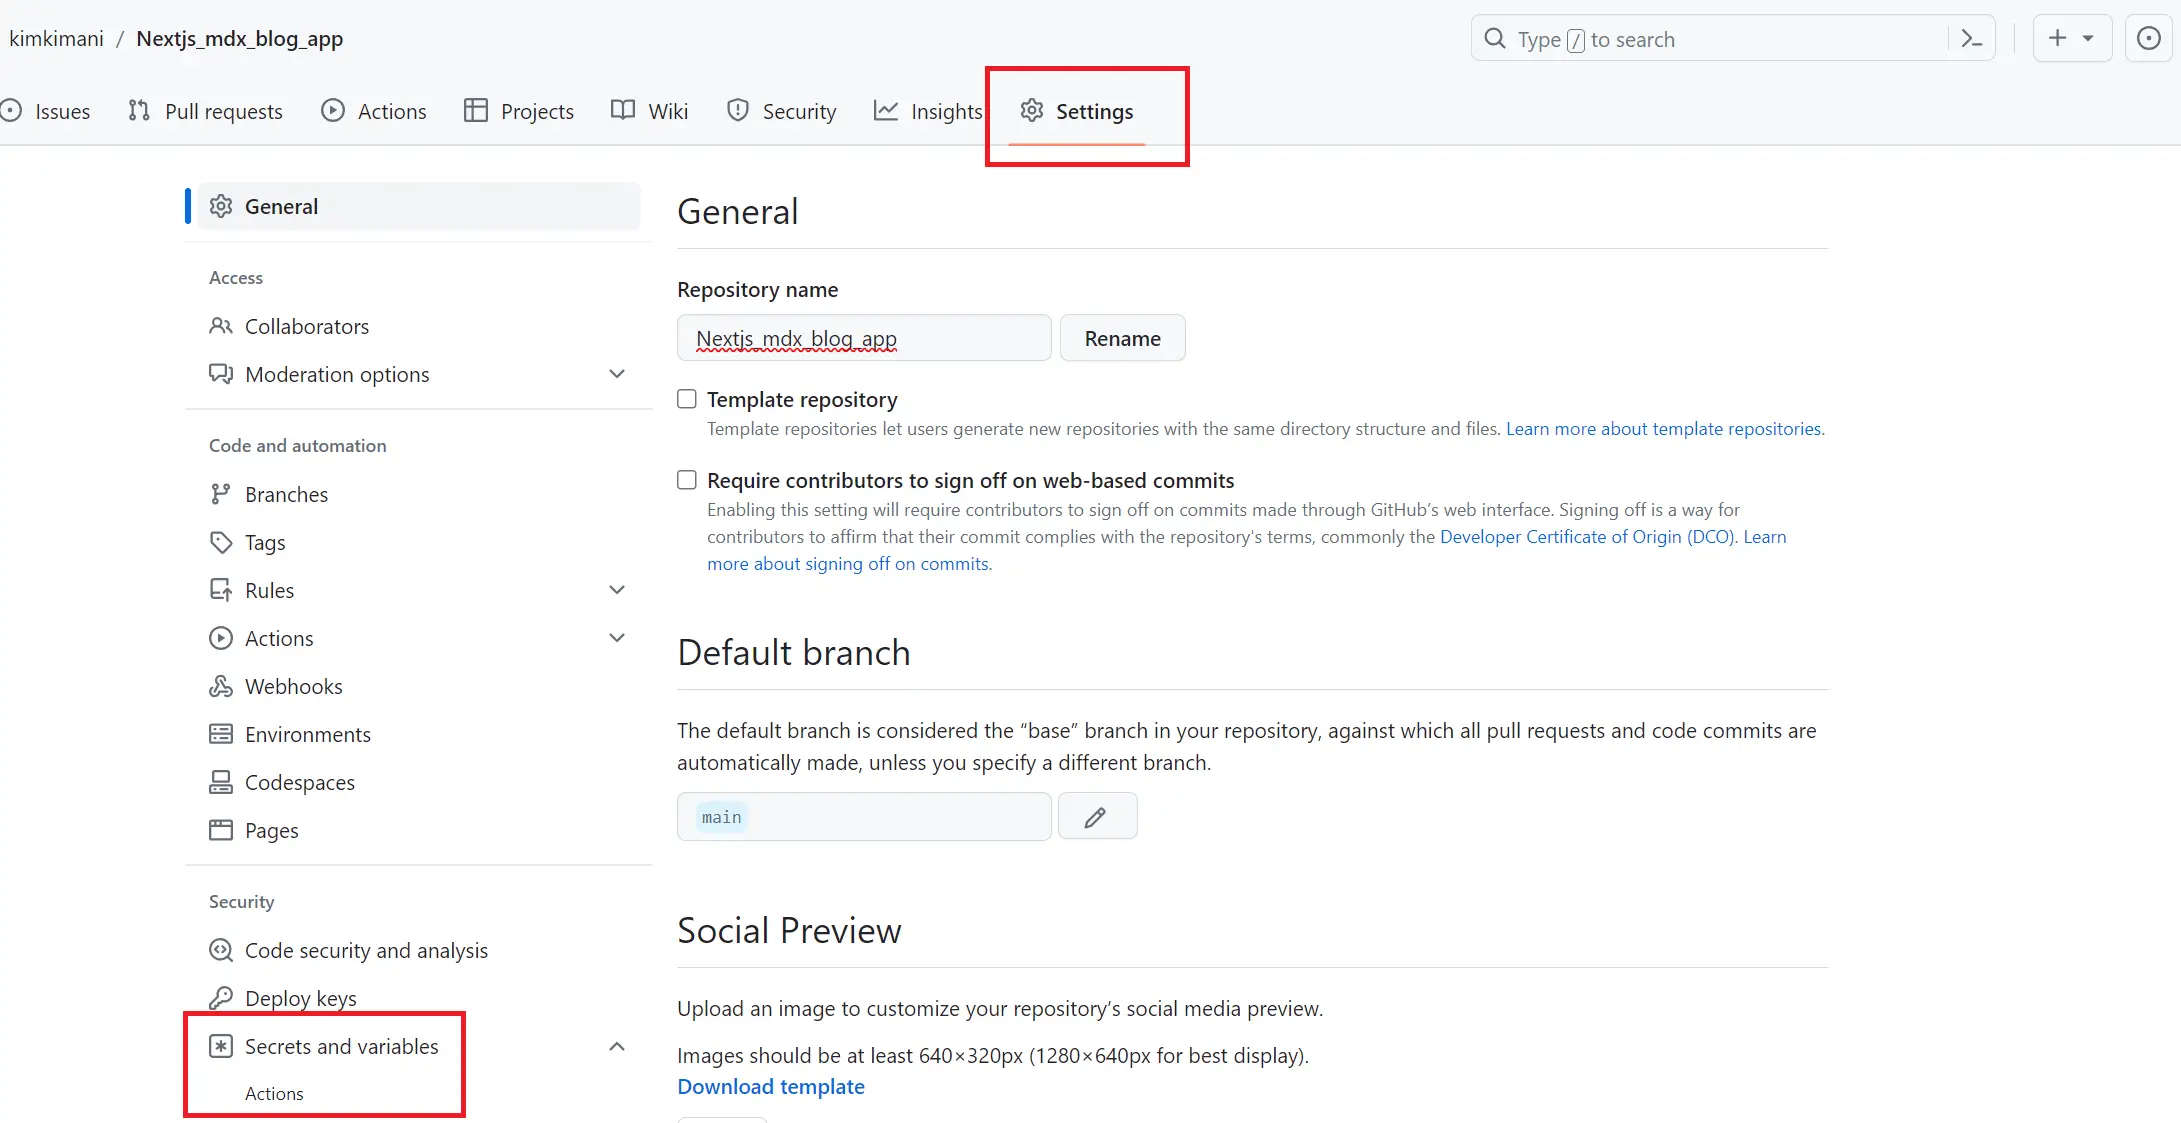
This section will host the GitHub Actions environment variables the pipeline will use. These variables are sensitive and cannot be hosted on code. The only way is to add them as environment variables as follows:
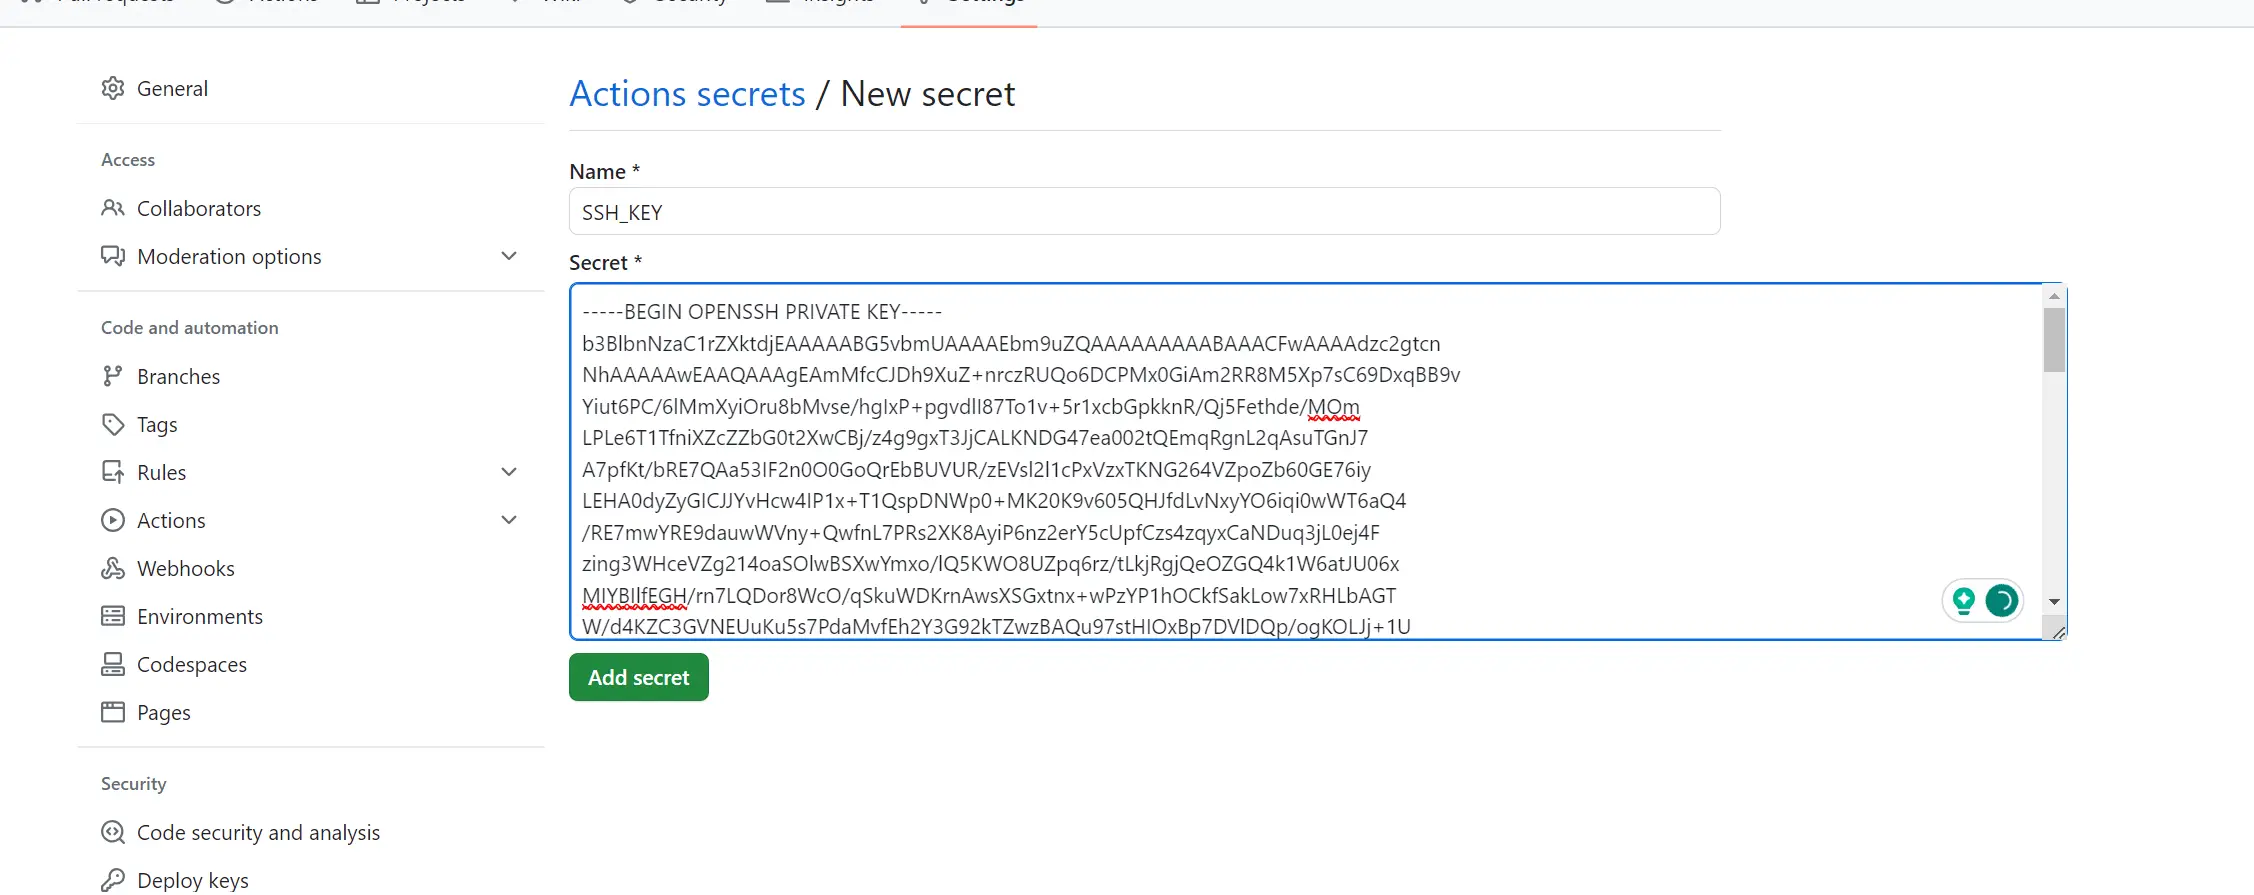
- DOCKERHUB_USERNAME - this will be your Dockerhub account username
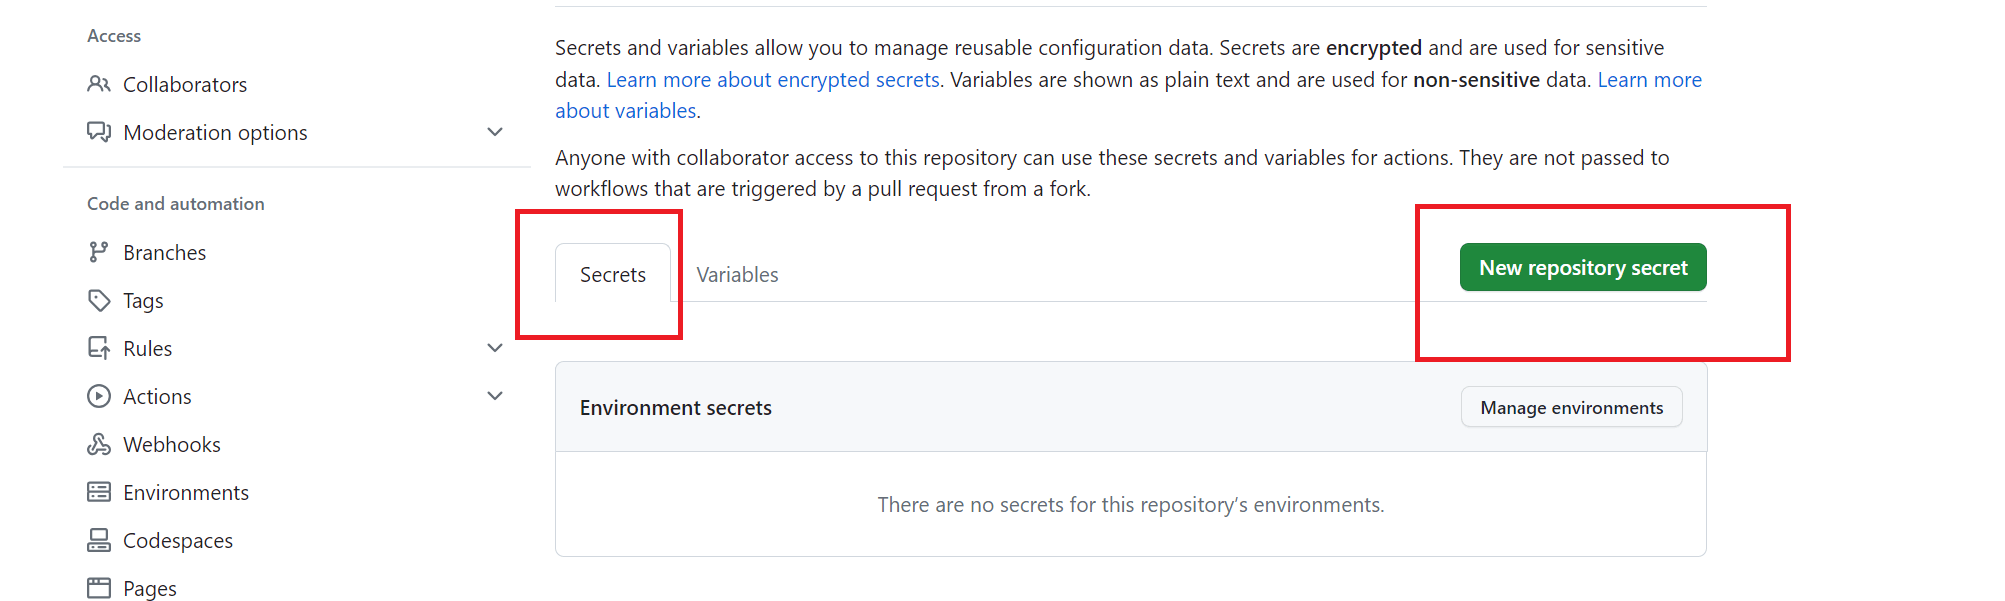
Here is an example of adding DOCKERHUB_USERNAME to GitHub secrets:

Follow the above steps to add other secrets.
- DOCKERHUB_TOKEN - GitHub Actions will use a token as the password to access the Dockerhub repository. In this case, ensure you generate the key in your Dockerhub security settings.
- SSH_HOST - add this as your server’s public IP address.
- SSH_USERNAME - this should the the user name running your k3s cluster for example
root. - SSH_PORT - SSH port should be 22 by default.
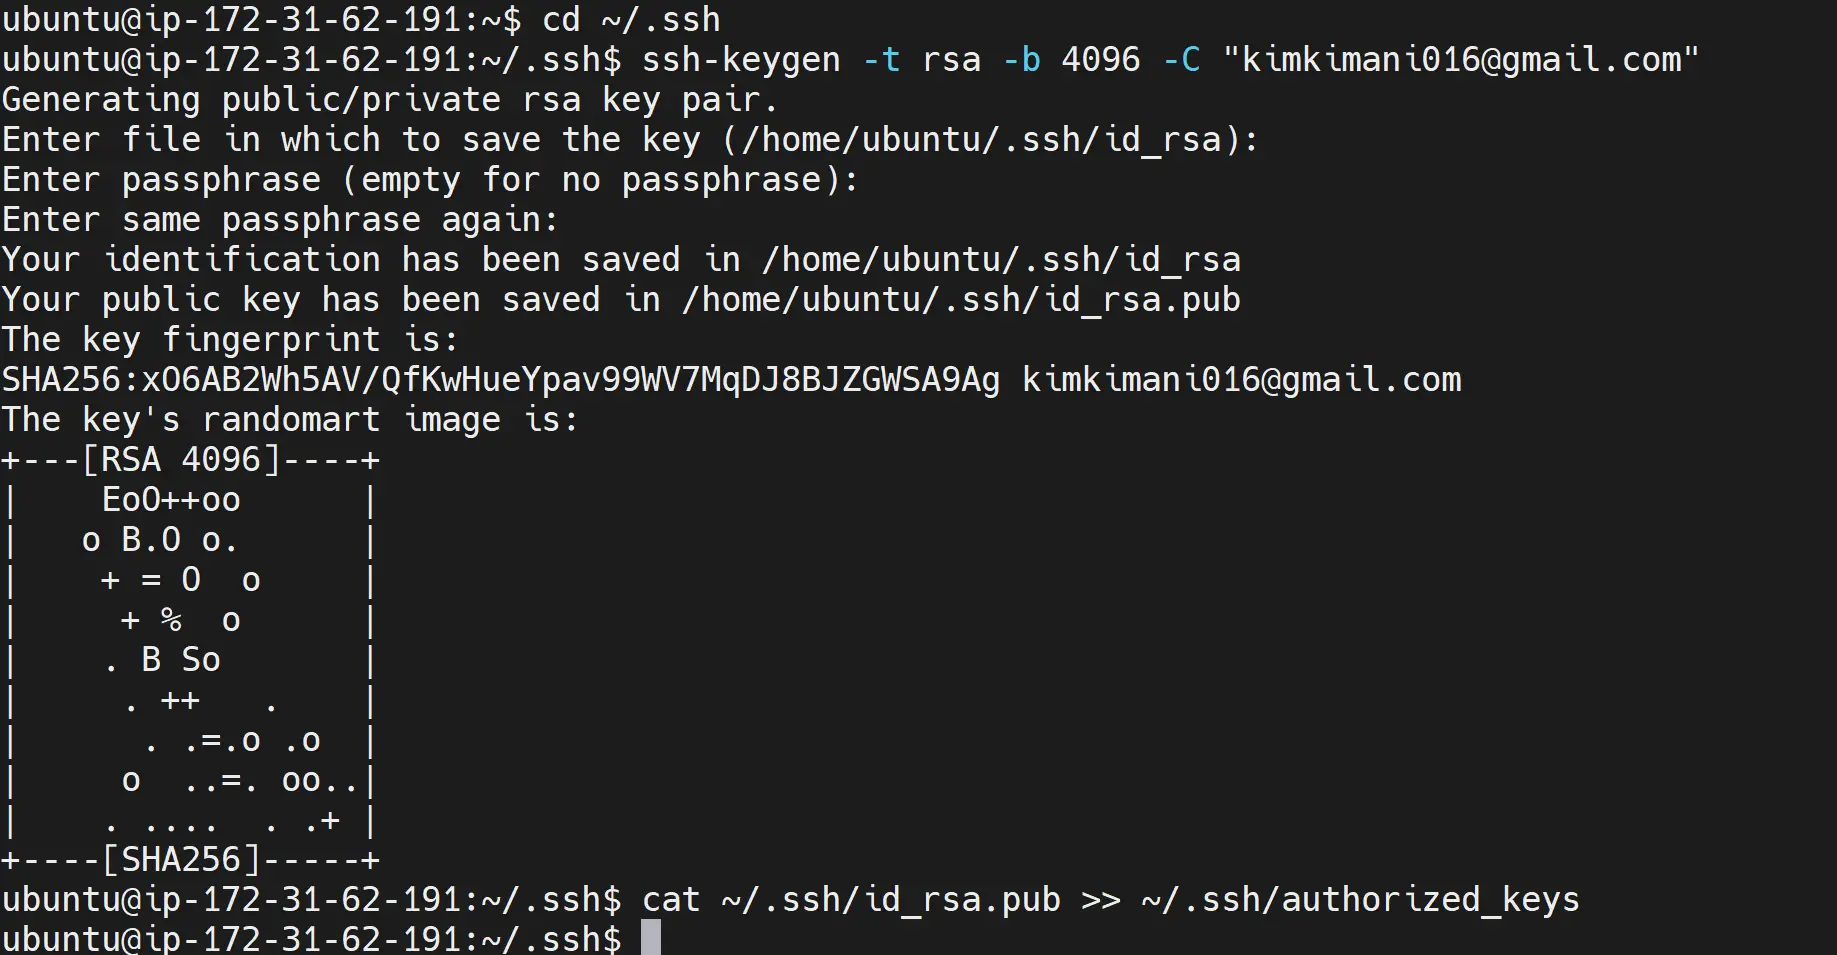
- SSH_KEY - This should be generated on your cloud machine/server as follows:
Change the directory to access the server SSH.
ssh-keygen

cd ~/.ssh
Generate your SSH key (add the email you use on your GitHub account).
ssh-keygen -t rsa -b 4096 -C "[email protected]"
In this step, press enter to keep every setting default.
Add your SSH key as authorized:
cat ~/.ssh/id_rsa.pub >> ~/.ssh/authorized_keys
Finally, read the key:
cat ~/.ssh/id_rsa
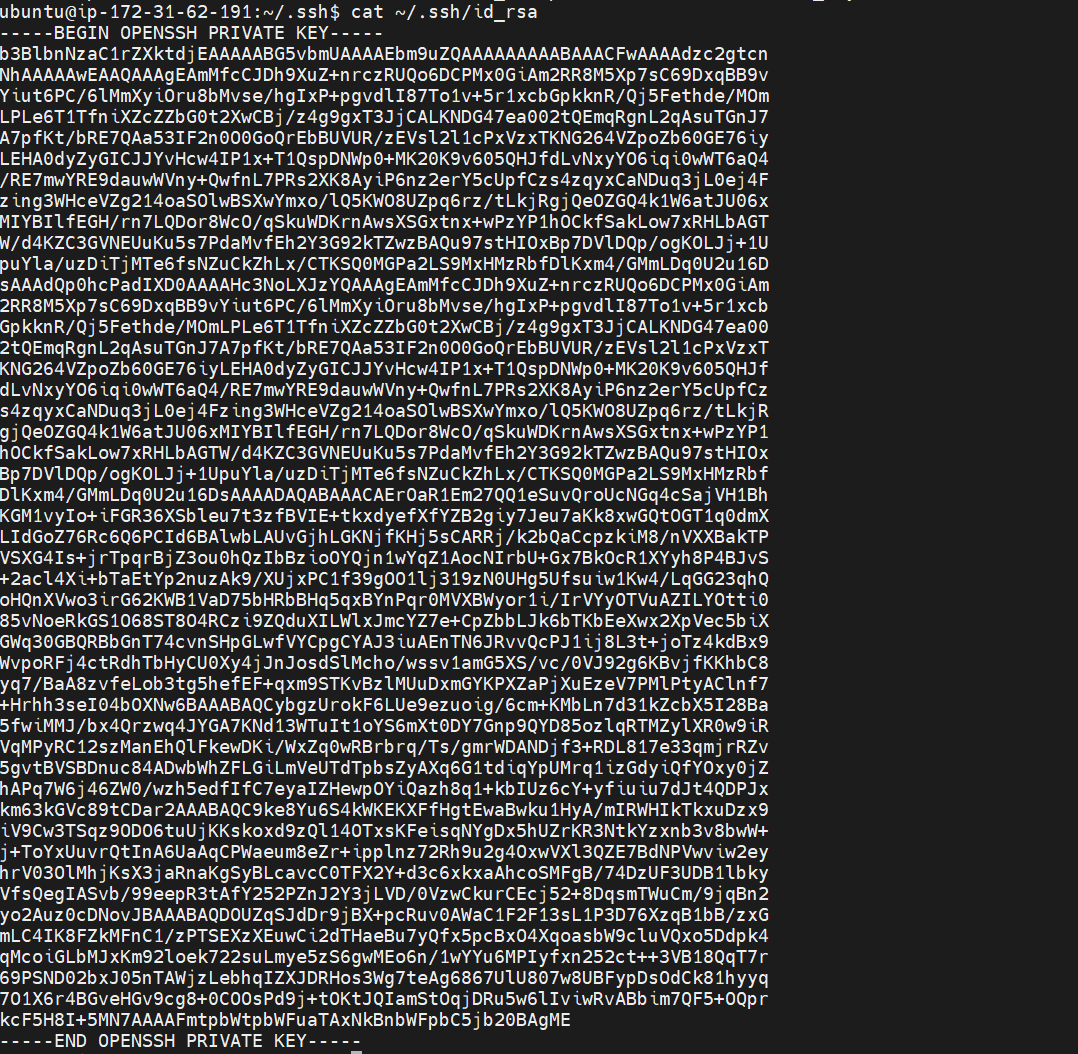
You need to copy this key and add it to SSH_KEY on your GitHub secrets as follows:
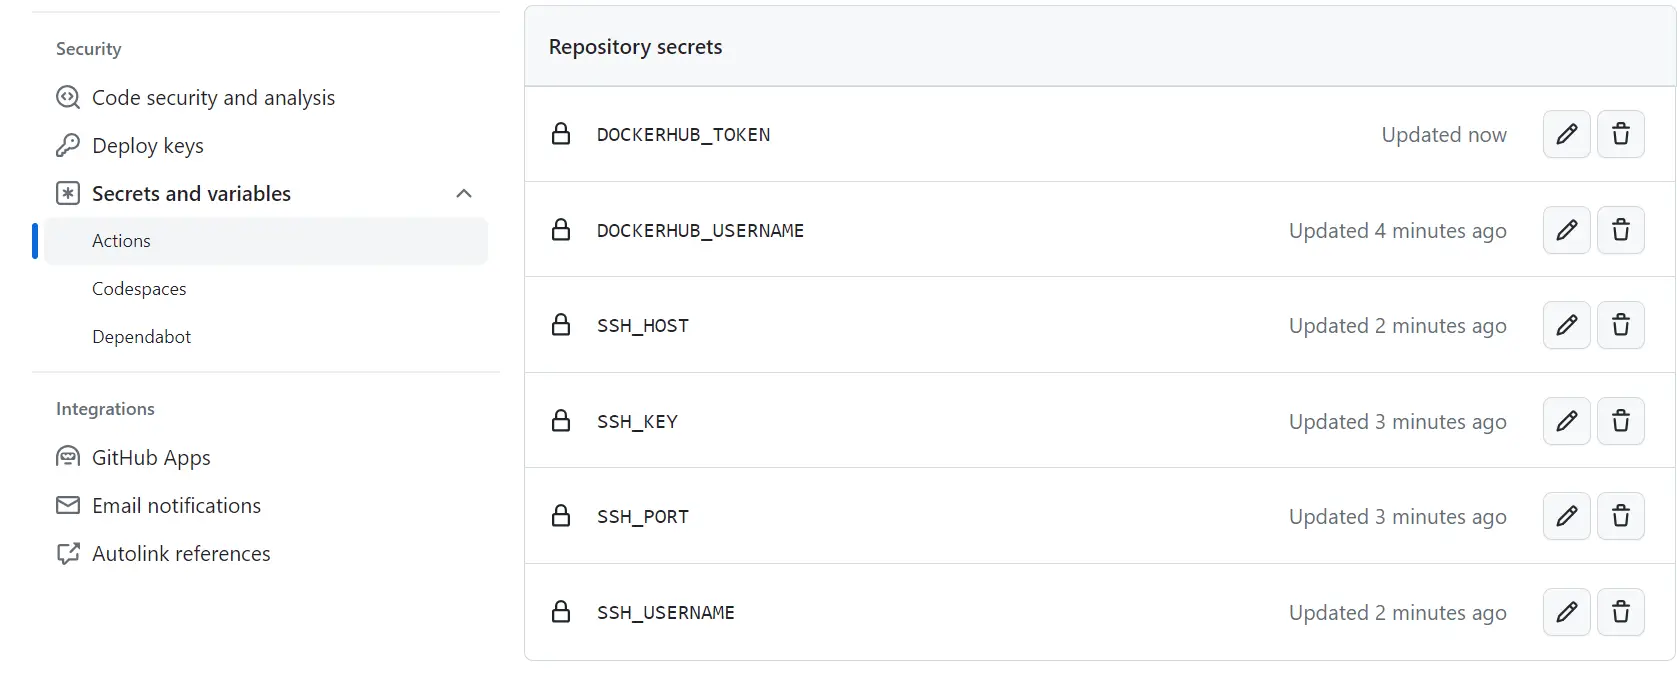
You should now have all keys ready as follows:
Creating the K3s CICD Pipeline
On your GitHub repository, navigate to the Actions section and set your workflow:
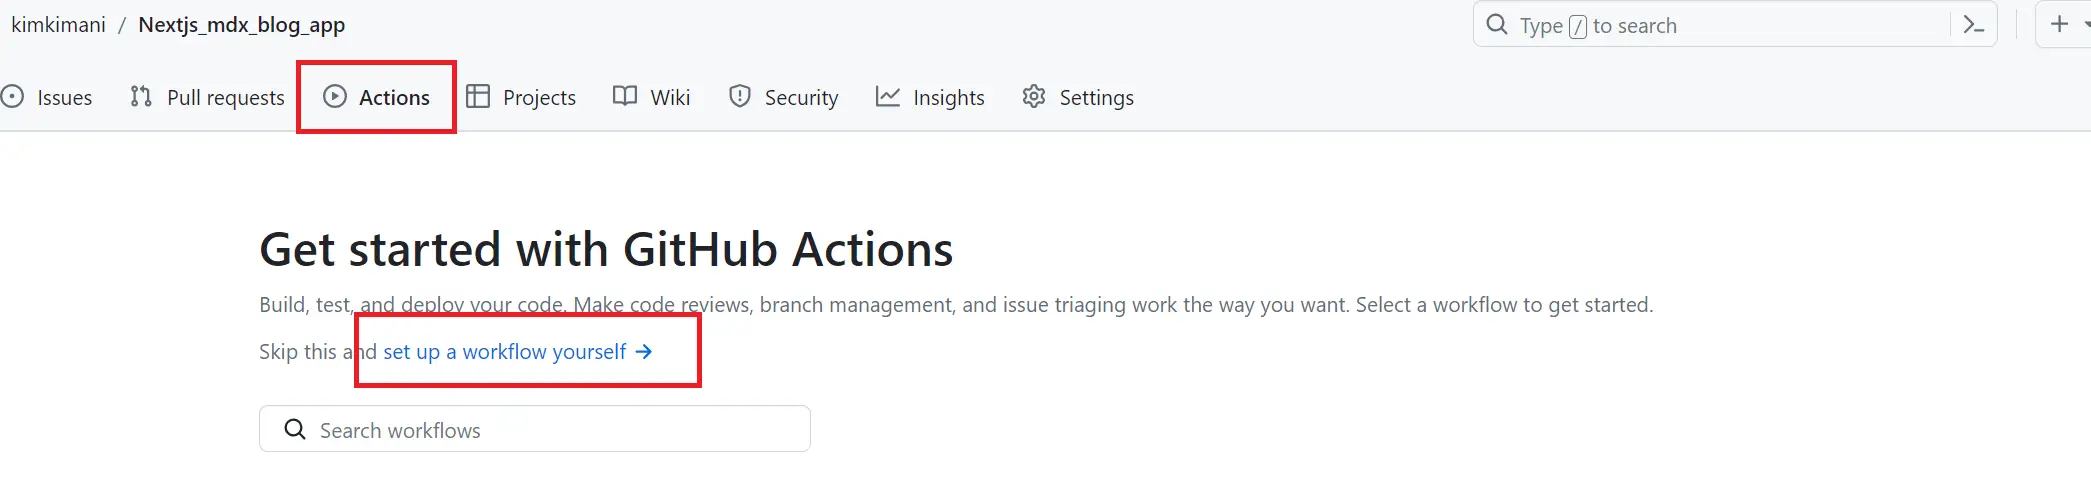
Add the following workflow:
name: Next.js

on: # trigger the automated ci/cd
    push:
        branches:
            - "main"
jobs:
    build:
        name: Build Docker image
        runs-on: ubuntu-latest # build machine
        steps:
            - # checkout to the repository on the build machine
                name: Checkout
                uses: actions/checkout@v3
            - # login to Docker Hub using the secrets provided
                name: Login to Docker Hub
                uses: docker/login-action@v2
                with:
                  username: ${{ secrets.DOCKERHUB_USERNAME }}
                  password: ${{ secrets.DOCKERHUB_TOKEN }}
            - # create a buildkit builder instance
                name: Set up Docker Buildx
                uses: docker/setup-buildx-action@v2
            - # build the container image and push it to Docker Hub
                name: Build and push
                uses: docker/build-push-action@v4
                with:
                  context: .
                  file: ./Dockerfile
                  push: true
                  tags: ${{ secrets.DOCKERHUB_USERNAME }}/nextjs-app
            - # Login to the server
                name: Restart K3S deployment
                uses: appleboy/ssh-action@master
                with:
                  host: ${{ secrets.SSH_HOST }}
                  username: ${{ secrets.SSH_USERNAME }}
                  port: ${{ secrets.SSH_PORT }}
                  key: ${{ secrets.SSH_KEY }}
                  # rollout your deployment
                  script: kubectl rollout restart deployment nextjs-app-deployment
Keys thing to Note:
- GitHub will run your repository Dockerfile and build a new image with new changes
- GitHub will publish the changes to Dockerhub as
DOCKERHUB_USERNAME }}/nextjs-app. This is equivalent ofyour_dockerhub_username/nextjs-appyou used earlier - To add the changes to K3s, Github will log in to the server using the SSH details you provided.
- At this point, you are not creating a completely new department. So, GitHub will only instruct the server to restart your deployment to fetch the newly built image.
- You must specify your deployment. In this case, we used
nextjs-app-deployment. - To be sure that changes are correct, restart the deployment using the
rolloutflag, - k3s will run the
kubectl rollout restart deployment nextjs-app-deploymentcommand. However, if the new changes have an error, the earlier deployment will not be affected, and your application will remain running.
Teting the Production (LIVE) K3s Github Actions CICD Pipeline
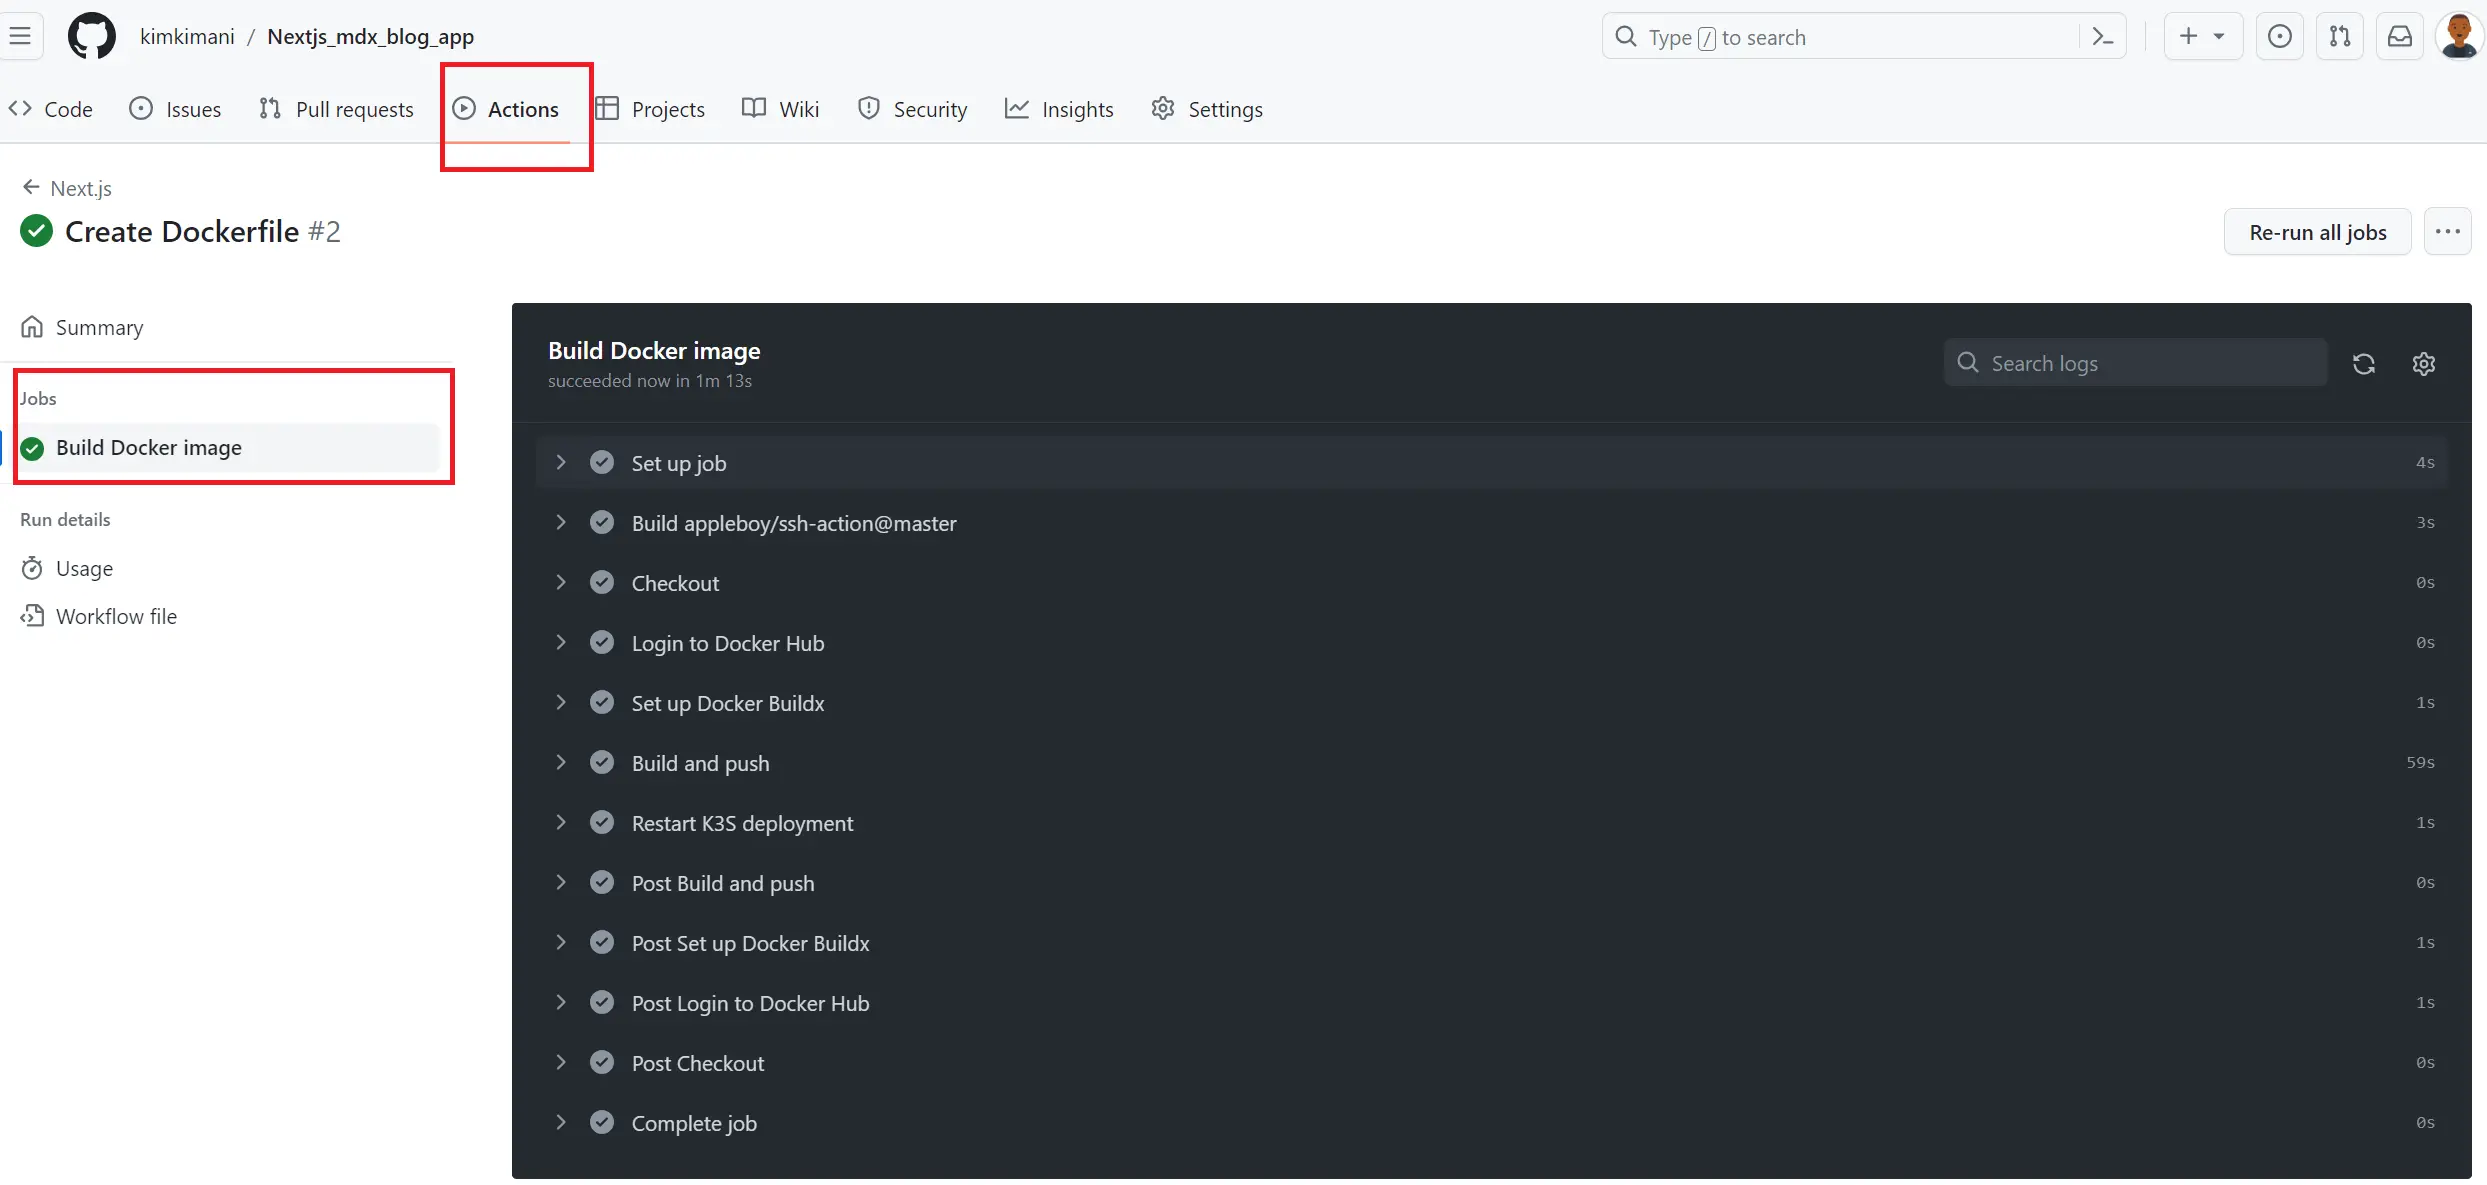
To test if you set up working commin the file containing your added Github Actions workflow.
This will automatically trigger a build pipeline to allow continuous deployment. If successful, you should have the following results:
Recchek your pod to make sure it is running as expected:
kubectl get pods
As expected, your new deployment has a new pod up and running:

Go ahead and make new commits to your blog and publish them in your GitHub report. The continuous pipeline will be triggered without manually interacting with the server or K3s.
Adding Domain Name to Access Your Application
To access the running on the production K3s on the domain, you need to add direct Public Internet Access to your application.
You must create a DNS record pointing to your server’s public IP address. On your Domain provider, go to managing your domain name and create an A record pointing to your public IP address.
Here is an example of how it is used Namecheap:
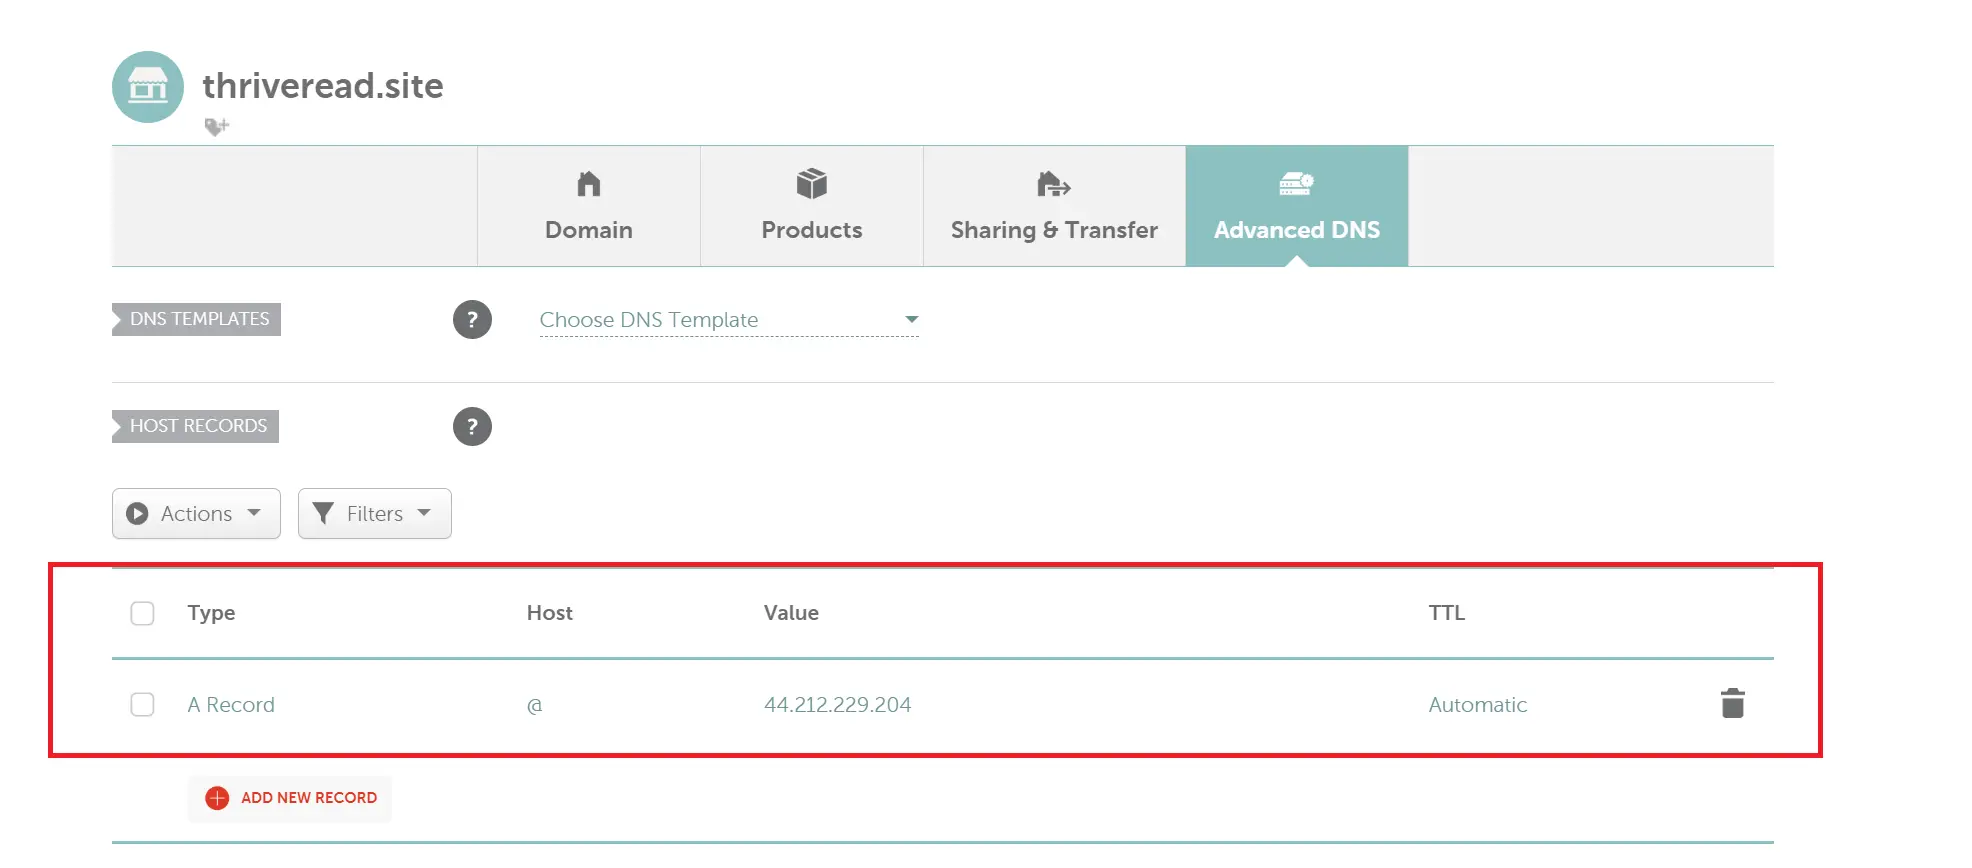
Once you add the record, you must allow the Domain provider to propagate to your IP. So, give this step a few minutes before testing it out. Note: This step may differ based on the DNS you use or your Domain name provider.
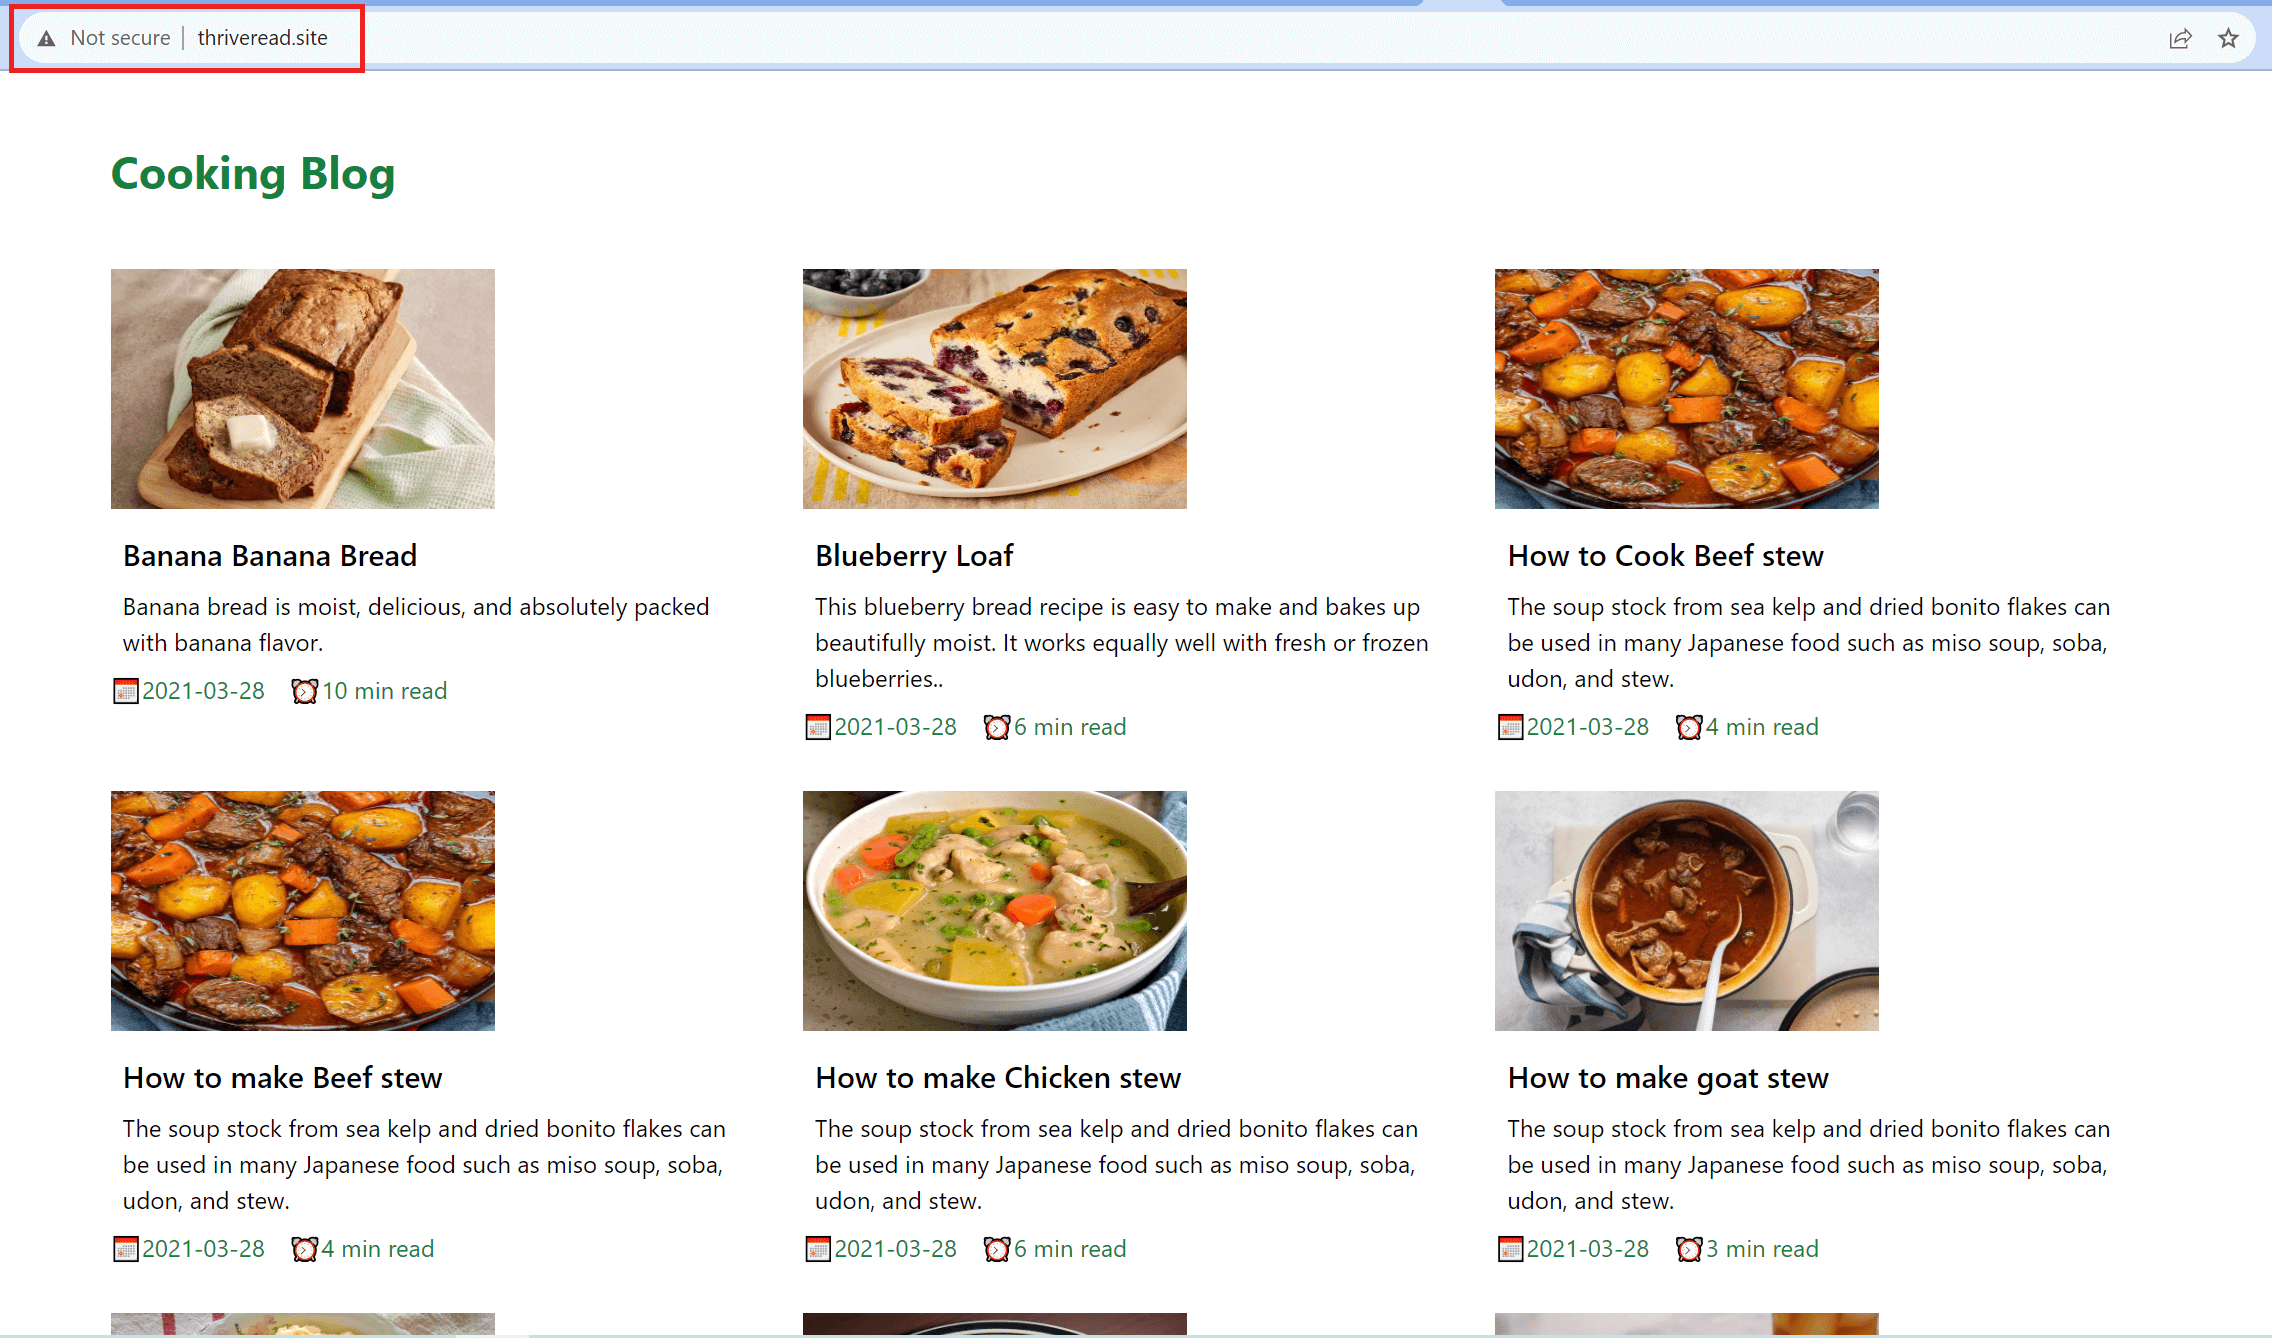
As you can see, I am running the server on thriveread.site:
Wrapping up
You now have a production self-hosted K3s cluster. You have created a CICD pipeline to Automate production deployments to GitHub Actions. The application Domain accesses your application running on the production K3s and directs Public Internet Access to your application.
You might note that the domain name runs on HTTP, not secure HTTPS. Let me know if you need us to complete this step and add a valid SSL to your application.
If you have any questions regarding this setup, let us know. Leave a comment, and we will address it ASAP.
Written By: