Installing K9s for Microk8s Kubernetes Instance
Posted February 11, 2025
Microk8s has been one of the lightweight Kubernetes distributions. As a Developer, you want a perfect way to manage all your Microk8s resources. K9s is an ideal terminal and text-based UI. It lets you interact with Microk8s Kubernetes clusters.
This gives you an easier CLI to manage and navigate all corners of Microk8s deployed applications. Dive into this guide and unravel the power of using a K9s CLI to manage Microk8s cluster.
Step One: Ensure MicroK8s is Running
In what environment are you in? Ensure that MicroK8s is installed, up, and running.
sudo microk8s status --wait-ready
sudo microk8s start

Step Two: Install k9s
Here, you will download and install k9s based on your OS as such:
sudo snap install k9s
Step Three: Configure kubectl for k9s
By default, MicroK8s uses its kubectl to manage clusters. To let k9s see your local installed microk8s instance:
microk8s.kubectl config view --raw > $HOME/.kube/config
To use k9s, make sure the kubeconfig is set up:
sudo microk8s config > ~/.kube/config
export KUBECONFIG=~/.kube/config
If using multiple clusters, you can specify the config in k9s:
k9s --kubeconfig=~/.kube/config
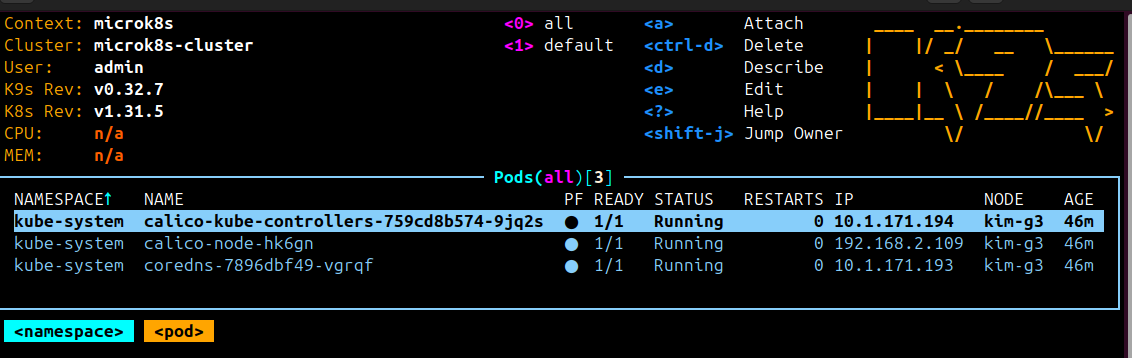
Step Four: Launch k9s
k9s
This will give you an interactive terminal UI for managing your MicroK8s cluster.
That is all you need to get MicroK8s ready with K9s. Also check, Installing K9s for K3s Kubernetes Cluster
Written By: