TypeScript NodeJS Server tutorial with MySQL2 and ExpressJS
Posted January 25, 2024

This tutorial teaches you how to create TypeScript Node.js API using MySQL and Express. TypeScript adds taste to JavaScript, so you Node.js APs can enjoy the flavor of TypeScript features. This way, you connect to MySQL using the MySQL2 library without the headache of runtime Node.js Errors.
Now, why not dive into this guide, set up Node.js with TypeScript, and leverage MySQL2 to connect to the MySQL database while using Express? You will learn:
- How to create TypeScript models/interface to Type checks your MySQL table attributes.
- Using TypeScript and Express to connect to a MySQL database
- How to Build a TypeScript Node.js CRUD API with MySQL and Express along the way.
Related: Create Sequelize Models with Typescript using MySQL and PostgreSQL
What you Need to Run TypeScript Node.js APP with MySQL2
You Need to add TypeScript to Node.js and access types for Express and MySQL. As prerequisites to this guide, ensure you have the following:
- Basic knowledge of working with TypeScript and Node.js.
- Have Node.js runtime ready on your machine.
- You need MySQL server up and running on your computer
Ready? Get your hands ready to create a MySQL TypeScript example app with Node.js like a pro.
Preparing Node.js with TypeScript and Express
You need a working Node.js app setup. Go to your working folder and set up Node.js with npm init -y. Once ready, install TypeScript to your global path using the following command:
npm install typescript -g
At this point, you should have TypeScript ready for this Node.js project. Initialize it with the following command:
npx tcs --init
If you are ready, you need to install a list of Node.js TypeScript packages, including Express and MySQL2. Here you will need:
The Core dependencies:
- Express for crafting Node.js server
- MySQL2 as your MySQL client for Node.js
- ts-node to run your TypeScript code
npm install --save express mysql2 ts-node
Development dependencies to facilitate the smooth running of TypeScript within Node.js and extend the same to Express and MySQL2:
- @types/express adds type checks for ExpressJS
- @types/node will add Node.js TypeScript check as well as those of MySQL2
- Nodemon - To run the application in watch mode
- Typescript - The Core Node.js TypeScript library
npm install --save-dev typescript nodemon @types/node @types/express
How to Run TypeScript with Node.js Express and MySQL
TypeScript can’t run out of the box. You’ll need the right approach and the correct command to execute and compile TypeScript. As we have done above, we have TypeScript types for MySQL Express and Node.js.
To run your code, you will edit the generated tsconfig.json file with the following:
rootDirtells TypeScript which root folder within your app has the source filesoutDIrgives TypeScript the context under which directory it will output into JavaScript files.
Go ahead and edit the tsconfig.json file as such:
/* Add them inside compilerOptions tags */
"rootDir": "./src",
"outDir": "./build",
The next step is to get the commands for running your app ready. In your package.json file, add these commands:
"scripts": {
    "dev": "nodemon --watch src --exec 'ts-node' src/index.ts",
    "test": "npx tsc && node build/index.js",
    "start": "nodemon src/index.ts --exec ts-node"
},

These commands will be fine for running your TypeScript NodeJS Server with MySQL2 and ExpressJS.
Connect MySQL with TypeScript and Node.js
Before allowing Express to expose your CRUD, your app must establish a connection to the MySQL database.
In your working directory, create an src folder. Add a database.ts with the following MySQL connection parameter:
import { createPool } from 'mysql2/promise';

export async function connect() {
    const connection = await createPool({
        host: 'localhost',
        user: 'database-user',
        password: 'your-password',
        database: 'blog',
        connectionLimit: 10
    });

    return connection;
}
At this step, you must ensure:
- MySQL is running.
- You have created a database named
blog. - Ensure you provide the above TypeScript MySQL2 connection with your database username and password as such.
Modeling MySQL Database Table with TypeScript
A model is a blueprint for your MySQL table. This mimics the shape of your table attributes. With TypeScript, you typically create an interface to define a contract for the shape or structure of an object. It describes the properties, methods, and types that an object should have.
An Interface will define custom data types in a more flexible and reusable manner. So, based on this case, we need a TypeScript Interface to set up a custom class referencing the attributes of the MySQL table.
First, ensure you have a ready MySQL table in your blog database. Use the following SQL query:
CREATE TABLE posts(
    id INT(11) NOT NULL AUTO_INCREMENT PRIMARY KEY,
    title VARCHAR(255) NOT NULL,
    description TEXT NOT NULL,
    author  VARCHAR(255) DEFAULT NULL,
    content VARCHAR(255) DEFAULT NULL,
    created_at TIMESTAMP DEFAULT CURRENT_TIMESTAMP
)
Now, TypeScript will mimic these characteristics using an Interface. Go ahead and create a model folder inside src. Add a Post.ts file in this model folder. TypeScript will ensure type safety and represent the structure of the data stored in the posts table as follows:
// Post.ts
export default interface Post {
    // The '?' indicates that id is optional
    //It is set to AUTO_INCREMENT
    id?: string,
    title: string,
    description: string,
    // The '?' indicates that author is optional
    author?: string | null;
    // The '?' indicates that content is optional
    content?: string | null;
    // Date has a DEFAULT value
    created_at?: Date,
}
Here you have the TypeScript interface where:
idis of type number and represents the primary key.Titleis a type string.descriptionis a type string.authoris an optional field, either a string or a null.contentis an optional field of type string or null.created_atis of type Date.
All these characteristics are derived based on your posts table and its SQL query to reflect its structure as such.
Adding Data to MySQL with TypeScript and Express
You have MySQL connection and models ready. Let’s try to use Express to add new items to the database.
In this scenario, you’ll need a controller. Controllers are components for handling the Express incoming HTTP requests, processing them, and returning an appropriate HTTP response.
To add items, you’ll need to create a controller with the POST method. In your src folder, create a controllers folder and add posts.controller.ts file. First, import the Post interface, the database connection, and Express:
import { Request, Response } from 'express';
import { connect } from "../database"
import Post from '../model/Post';
Now add a createPost to execute the INSERT command to MySQL while using Express. This method should use the Post interface to ensure the data being added takes the structure of your exact MySQL posts table.
Typically, the new items will take the Post interface and make sure the request body represents the structure of posts as follows:
export async function createPost(req: Request, res: Response) {
    const newPost: Post = req.body;
    const conn = await connect();
    await conn.query(`INSERT INTO posts SET ?`, [newPost])
    return res.json({
        message: "Post created"
    });
}
Fetching Data from MySQL with TypeScript and Express
The next thing you need is to get data using SELECT and MySQL. Just like you have used POST, you’ll need to use the GET method to execute this condition.
export async function getPosts(req: Request, res: Response): Promise<Response> {
    const conn = await connect();
    const posts = await conn.query("SELECT * FROM posts");
    return res.json(posts[0]);
}
SELECT has many conditions. You might need to fetch a single post based on its ID. In this case, the id will passed as a URL parameter, and Express will communicate with MySQL to return the specific items related to the passed id as follows:
export async function getPost (req: Request, res: Response): Promise<Response> {
    const id = req.params.postId;
    const conn = await connect();
    const posts = await conn.query(`SELECT * FROM posts WHERE id = ?`, [id])
    return res.json(posts[0])
}
Update and Delete with MySQL and Express/ TypeScript
You need to use a unique parameter to update or delete an item from the MySQL database. Here, you have ID as the primary key. This makes it best to send PUT and DELETE requests.
You need to prepare the controllers responsible for handling these incoming HTTP requests. They receive requests from clients (browsers or other applications) and determine the item to update or delete based on URL parameters as follows:
export async function updatePost(req: Request, res: Response) {
    const id = req.params.postId;
    const updatePost: Post = req.body;
    const conn = await connect();
    await conn.query(`UPDATE posts SET ? WHERE id = ?`, [updatePost, id])
    return res.json({
        message: "Post updated"
    })
}

export async function deletePost(req: Request, res: Response) {
    const id = req.params.postId;
    const conn = await connect();
    await conn.query(`DELETE FROM posts WHERE id = ?`, [id])
    return res.json({
        message: "Post deleted"
    })
}
Adding TypeScript Routes with Express
To access the above controllers, you need routes. Routes will refer to the mapping of HTTP methods (GET, POST, PUT, DELETE, etc.) and URLs to specific controllers that handle those requests.
Here, we are using routers to modularize the code. Each route determines which piece of the controller to execute based on the sent request. Create a routes folder inside src and add a post.routes.ts file with the following code:
import { Router } from 'express';
import { createPost, deletePost, getPost, getPosts, updatePost } from '../controllers/posts.controller';

const router = Router();

router.route("/")
    .get(getPosts)
    .post(createPost);

router.route("/:postId")
    .get(getPost)
    .delete(deletePost)
    .put(updatePost)

export default router;
Starting the Node.js Server
The final piece of this MySQL2 TypeScript Node.js and Express puzzle is to open the server and expose these routes. Express will access the routes and use a PORT to expose the API to the clients.
Create an index.ts file in the src folder and start the server as follows:
import express from "express";

// Import the PostsRoutes from the post.routes file
import PostsRoutes from "./routes/post.routes";

// Create an instance of the Express
const app = express();

// Define the port to listen on
const PORT = process.env.PORT || 3000;
app.use(express.json());

// Use the PostsRoutes for any routes starting with /posts
app.use('/posts', PostsRoutes);

// Start the server
app.listen(PORT, () => {
  console.log(`Server is running at http://localhost:${PORT}`);
});
This way, you will have the http://localhost:3000/posts as the base URL to your server.
Testing the Server
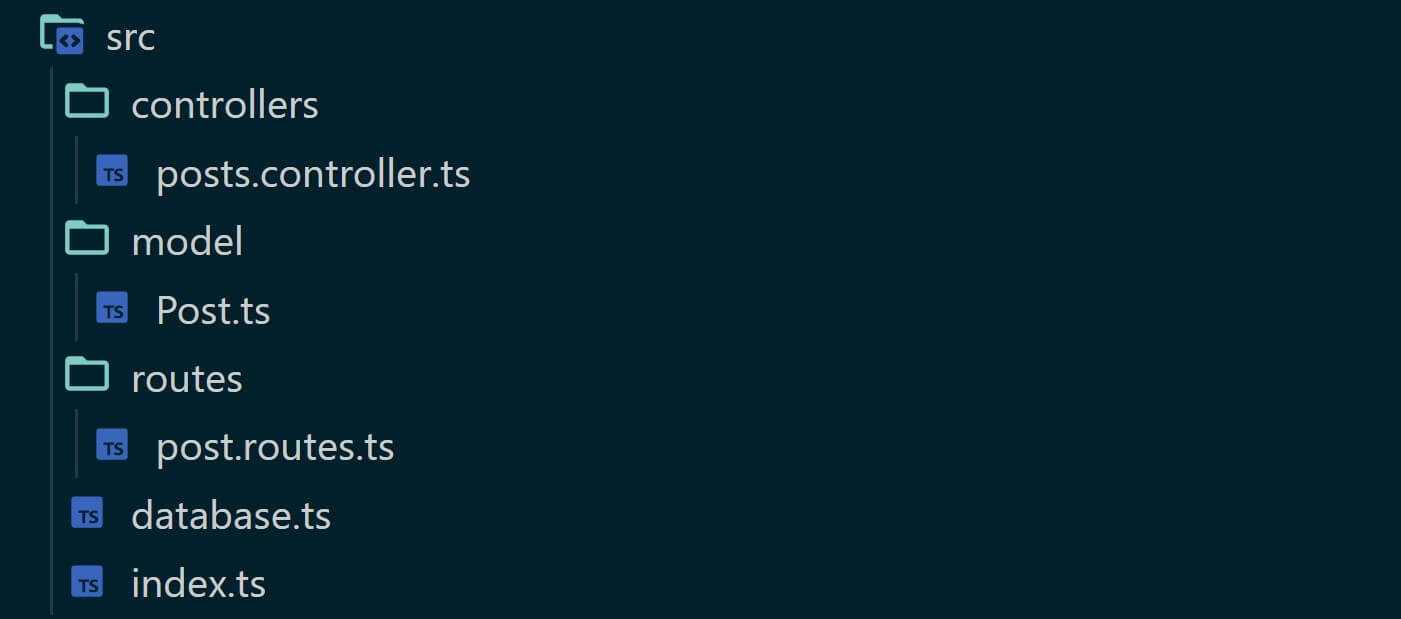
We Need to confirm if what we have so far is working. You should have the following structure:
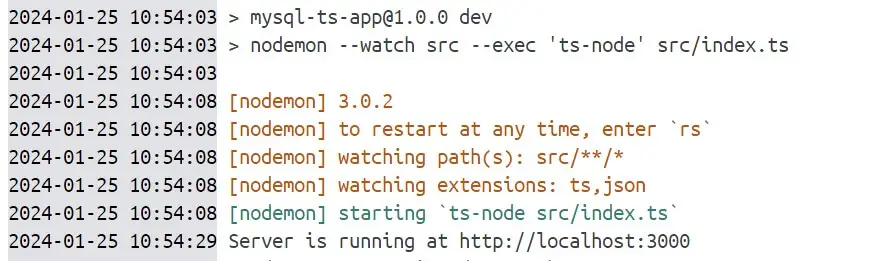
Use the command to start the server:
npm run dev
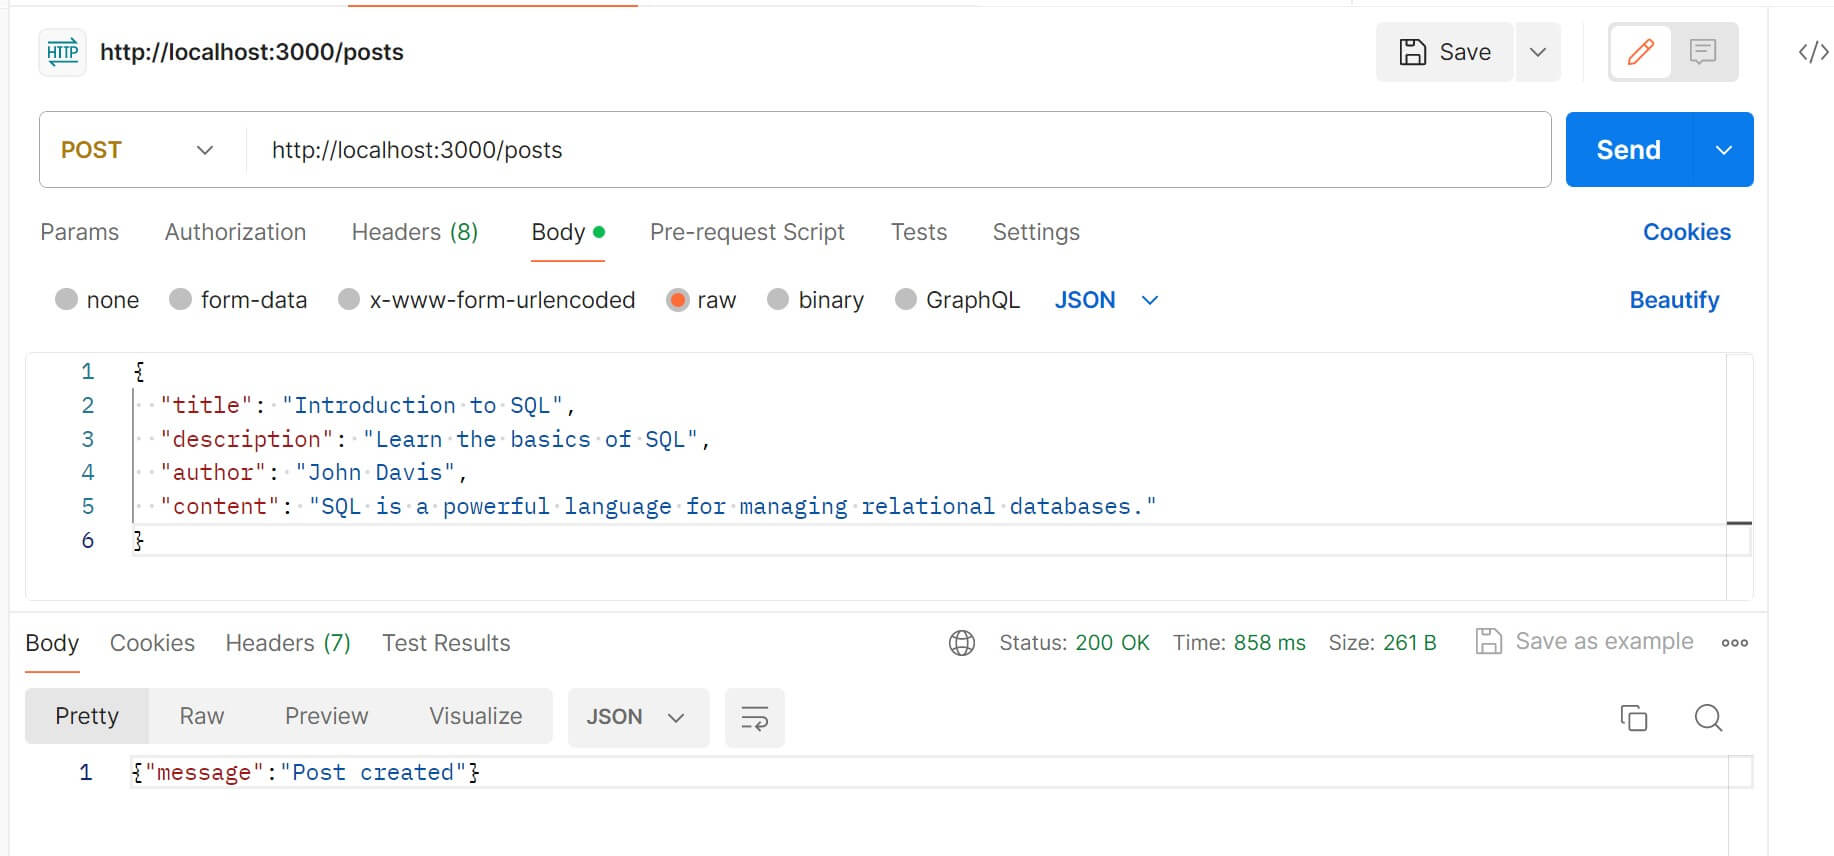
To test if the whole app is working, open Postman and send your first POST request to http://localhost:3000/posts as follows:
{
  "title": "Introduction to SQL",
  "description": "Learn the basics of SQL",
  "author": "John Davis",
  "content": "SQL is a powerful language for managing relational databases."
}
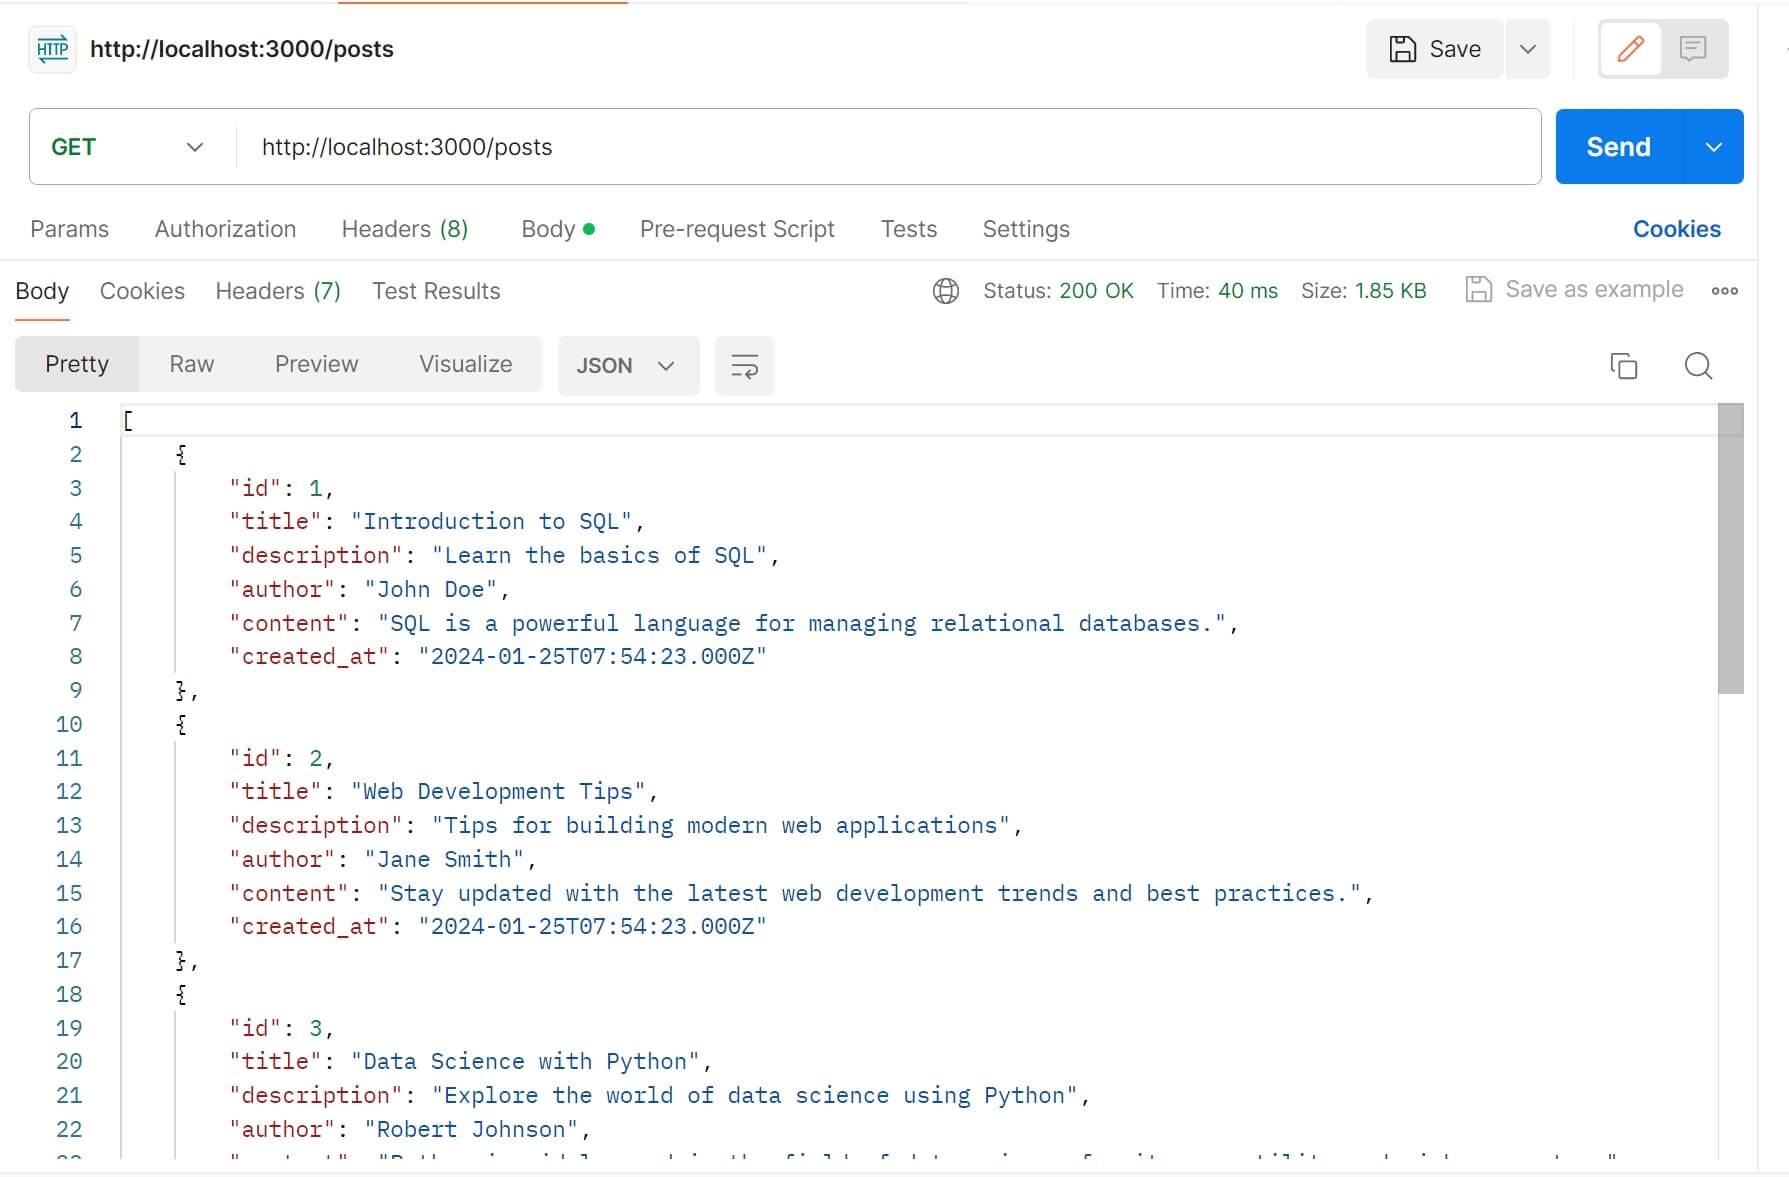
Add more posts and send a GET request to http://localhost:3000/posts and fetch the added items:
Now, go ahead and test the remaining methods.
Conclusion
You have learned how to create TypeScript models/interfaces to Type checks your MySQL table attributes. I hope you can now build a TypeScript Node.js CRUD API with MySQL and Express along the way. The whole code on this GitHub repo
Written By:
Joseph Chege
More Related Articles:
-

Dockerize Node.js TypeScript with Docker, MySQL and Compose
Jan 25, 2024
-

Sequelize Models with Typescript using PostgreSQL and MySQL
Jan 24, 2024
-

Build TypeScript Express App with PostgreSQL/pg and NodeJS Example
Jan 24, 2024
-

Add All CORS Access Control Allow Origin in NodeJS Express Headers
Jun 14, 2024