Setup and Build a Vanilla TypeScript API with Node.js
Posted December 21, 2023

Are you trying to create a Vanilla Typescript API using Node.js? In this tutorial, I will teach you how to build a complete CRUD Vanilla Typescript API with Node.js Native packages and without using installable JavaScript Frameworks and packages such as Express.
What you will learn along this guide:
- How to set Typescript with Node.js
- Create a file store to manage your Vanilla Typescript API
- The perfect way to create and send Vanilla Typescript CRUD requests with Node.js
“Vanilla TypeScript,” typically means using TypeScript without any specific framework or library. Dive in and learn how to use it without the bells and whistles of additional libraries
Why I Wrote this Vanilla Typescript Node.js API
Creating an app with a Vanilla code setup lets you understand what happens behind the scenes of your installed packages. You get to understand how packages such as Express.js use Vanilla JavaScript/Typescript code to reduce your API code base and transform any API with a few methods.
This tutorial will make sure you experience the purest server without using libraries such as Express and Learn to use Barebones to create something good.
I looked for posts on the internet to use Learn Vanilla Typescript Node.js API. However, most of these guides have CRUD methods created but only READ works. You can’t POST a new record, edit, or delete it. This process is simple. I decided to dive, create a flexible Vanilla Typescript CRUD API, and share it with you
This way:
- It’s the raw TypeScript language.
- No additional abstractions and tooling beyond what TypeScript and Node.js itself provide.
- You don’t rely on a specific package.
- It gives you control over the structure and architecture of your code.
Why I Still Think JavaScript/Typescript Frameworks Are Awesome
Don’t get it wrong. JavaScript/Typescript is diverse with great packages. You take advantage of NPM packages to
- Abstract most code (hard AND complex code) you would have to write manually.
- They allow you to ship your code faster with increased development speed
- You only need a small code base to build a complex app.
- Packages shift focus to adding application value rather than its implementation
Setting up a Vanilla TypeScript Node.js App
To create your API, ensure you have Node.js installed. and unitize your project with Node.js:
npm init -y
Install TypeScript globally on your computer:
npm install -g typescript
Run tsc --init to add TypeScript configurations to your project:
npx tsc --init
To run TypeScript code, you will use ts-node and run TypeScript files directly without first compiling them to JavaScript:
npm install --save-dev ts-node typescript
You are now ready. Go ahead and set up the following application file structure:
vanilla-typescript-api/
│ package-lock.json
│ package.json
│ tsconfig.json
│
├───data
│ notes.json
│
└───src
        index.ts
        note.controller.ts
        note.model.ts
        note.routes.ts
This means you will create:
datafolder withnotes.jsonfile. This will act as your file system database.- An
srcfolder withindex.ts,note.controller.ts,note.model.ts, andnote.routes.tsfiles for the application code.
Creating a Vanilla TypeScript Model
TypeScript uses a model to create an interface. It acts as your application blueprint. If you’re using Node.js with its packages, you will use ORMS such as Mongoose, Sequelize, or Prisma to create a mode.
This example doesn’t use these packages. Therefore, go to your src/note.model.ts file. I will use a simple Note app and create a Note interface as INote Interface:
export interface INote {
  id: string;
  title: string;
  content: string;
}
Your data/notes.json will contain the sample Notes data. For now, let’s add a few note items based on the above INote interface:
[
  {
    "id": "1",
    "title": "Meeting Notes",
    "content": "Discuss project timelines and goals."
  },
  {
    "id": "2",
    "title": "Ideas",
    "content": "Brainstorm new features for the application."
  }
]
Reading and Writing Data using TypeScript
The above file must be accessible. The API will read data from this file and perform other related CRUD operations.
In such case, you’ll attempt to read and parse the file content as JSON and return an array of notes based on INote as (INote[]). To do this, use the native Node.js fs module and create a file read method using readFileSync in the src/note.model.ts file:
const DATA_FILE_PATH = './data/notes.json';

const readDataFile = (): INote[] => {
  try {
    const data = fs.readFileSync(DATA_FILE_PATH, 'utf8');
    return JSON.parse(data) as INote[];
  } catch (error) {
    return [];
  }
};
To write data to the same file, an array of notes (INote[]) will be sent. You need to convert it to JSON and use fs.writeFileSync to record it to the data file as such:
const writeDataFile = (data: INote[]) => {
  fs.writeFileSync(DATA_FILE_PATH, JSON.stringify(data, null, 2), 'utf8');
};
All these methods and the interface will be accessed with your Node.js TypeScript App. Export them from the module:
let notes: INote[] = readDataFile();
export { notes, writeDataFile };
Creating Vanilla TypeScript GET Requests
We are creating a server. It must be able to handle incoming requests and serve responses based on HTTP methods such as GET, POST, DELETE, and PUT.
GET request will read data from data/notes.json. Node.js must be able to send the right request.
In the src/note.model.ts file, the readDataFile method is initialized with a notes variable with the current content of the notes in the data file. This way, you only need to create a Node.js request to convert notes and its INote[] array data into JSON and return it as the server response.
You will use Node.js http module to handle incoming server requests
Go to src/note.controller.ts and import HTTP and the elements of your INote Interface:
import { IncomingMessage, ServerResponse } from 'http';
import { notes, writeDataFile, INote} from './note.model'
Create a method to handle GET requests:
export const getAllNotes = (req: IncomingMessage, res: ServerResponse) => {
  res.writeHead(200, { 'Content-Type': 'application/json' });
  res.end(JSON.stringify(notes));
};
If you were to create a method that handles requests based on a single Note (i.e., get notes based on note id), you will need to use a find() method to traverse the data/notes.json file and look for matching id request parameter as follows:
export const getNoteById = (req: IncomingMessage, res: ServerResponse, noteId: string | undefined) => {
  if (noteId) {
    const note = notes.find((n) => n.id === noteId);
    if (note) {
      res.writeHead(200, { 'Content-Type': 'application/json' });
      res.end(JSON.stringify(note));
    } else {
      res.writeHead(404, { 'Content-Type': 'application/json' });
      res.end(JSON.stringify({ message: 'Note not found' }));
    }
  } else {
    res.writeHead(400, { 'Content-Type': 'application/json' });
    res.end(JSON.stringify({ message: 'Invalid request' }));
  }
};
The above example will use Note id as a string. noteId will be an argument passed to your GET endpoint. We’ll check that later in this guide.
Sending POST Requests with Vanilla TypeScript and Node.js
Your API should handle POST requests and add new data into the data/notes.json file. In this case, you’ll be sending a request body containing the note ID, title, and content.
The fs module will parse this data and use push() to push the new note to the file database. A new element is added to the array that the http Node.js module will convert to JSON.
And this is when the writeDataFile method should be executed, take the array of notes (INote[]) and write it to the notes data file.
The following code will summarize all these points:
const generateRandomNumber = (): number => Math.floor(Math.random() * 1000000);

export const createNote = (req: IncomingMessage, res: ServerResponse) => {
  let data = '';
  req.on('data', (chunk) => {
    data += chunk;
  });

  req.on('end', () => {
    try {
      const { title, content } = JSON.parse(data);
      const newNote: INote = {
        id: generateRandomNumber().toString(),
        title,
        content,
      };
      notes.push(newNote);
      writeDataFile(notes);

      res.writeHead(201, { 'Content-Type': 'application/json' });
      res.end(JSON.stringify(newNote));
    } catch (error) {
      res.writeHead(400, { 'Content-Type': 'application/json' });
      res.end(JSON.stringify({ message: 'Invalid request body' }));
    }
  });
};
Updating Data with PUT Requests using Vanilla TypeScript and Node.js
When Updating your Notes, TypeScript looks almost the same as the POST request. But because you are not adding a new note, you will use PUT to update the existing one.
You must get the ID (using the findIndex method) of the note you intend to update before sending the PUT requests.
Create the following updateNote controller:
export const updateNote = (req: IncomingMessage, res: ServerResponse, noteId: string | undefined) => {
  if (noteId) {
    let data = '';
    req.on('data', (chunk) => {
      data += chunk;
    });

    req.on('end', () => {

      const { title, content } = JSON.parse(data);
      const index = notes.findIndex((n) => n.id === noteId);

      if (index !== -1) {
        notes[index] = { ...notes[index], title, content };
        writeDataFile(notes);

        res.writeHead(200, { 'Content-Type': 'application/json' });
        res.end(JSON.stringify(notes[index]));
      } else {
        res.writeHead(404, { 'Content-Type': 'application/json' });
        res.end(JSON.stringify({ message: 'Note not found' }));
      }
    });
  }
};
Deleting Data with DELETE, Vanilla TypeScript and Node.js
The fs file uses splice to remove and delete items in your data file. You must at the same time use the findIndex() method to find the index of the note you want Node.js to delete. The added delete change should use writeDataFile to slice the existing note as follows:
export const deleteNote = (req: IncomingMessage, res: ServerResponse, noteId: string | undefined) => {
  if (noteId) {
    const index = notes.findIndex((n) => n.id === noteId);

    if (index !== -1) {
      notes.splice(index, 1);
      writeDataFile(notes);

      res.writeHead(204, { 'Content-Type': 'application/json' });
      res.end();
    } else {
      res.writeHead(404, { 'Content-Type': 'application/json' });
      res.end(JSON.stringify({ message: 'Note not found' }));
    }
  }
};
Adding API Routes using HTTP Module
Routes the API endpoints for accessing various HTTP methods you have. Go to the src/note.routes.ts file and handle the following endpoints:
import { IncomingMessage, ServerResponse } from 'http';
import { getAllNotes, getNoteById, createNote, updateNote, deleteNote } from './note.controller';

// Route handling for notes
export const noteRoutes = (req: IncomingMessage, res: ServerResponse) => {
  const { method, url } = req;

  // Handle GET request to retrieve all notes
  if (method === 'GET' && url === '/api/notes') {
    getAllNotes(req, res);
  }
  // POST request to create a new note
  else if (method === 'POST' && url === '/api/notes') {
    createNote(req, res);
  }
  // GET a single note
  else if (method === 'GET' && url && url.match(/\/api\/notes\/([\w-]+)/)) {
    const [, noteId] = url.match(/\/api\/notes\/([\w-]+)/) || [];
    getNoteById(req, res, noteId);
  }
  // Update a note
  else if (method === 'PUT' && url && url.match(/\/api\/notes\/([\w-]+)/)) {
    const [, noteId] = url.match(/\/api\/notes\/([\w-]+)/) || [];
    updateNote(req, res, noteId);
  }
  // Create DELETE request to delete note by ID
  else if (method === 'DELETE' && url && url.match(/\/api\/notes\/([\w-]+)/)) {
    const [, noteId] = url.match(/\/api\/notes\/([\w-]+)/) || [];
    deleteNote(req, res, noteId);
  }
  // Handle (Fallback) unmatched routes with a 404 Not Found response
  else {
    res.writeHead(404, { 'Content-Type': 'application/json' });
    res.end(JSON.stringify({ message: 'Not Found' }));
  }
};
This will map your endpoints as follows:
- GET all Notes:
http://localhost:3000/api/notes - POST a new note:
http://localhost:3000/api/notes - GET a single note:
http://localhost:3000/api/notes/:noteId - PUT (Update) a note by ID:
http://localhost:3000/api/notes/:noteId - DELETE a Note:
http://localhost:3000/api/notes/:noteId
Serving your Vanilla TypeScript Node.js API
To make sure the above endpoints are complete, you need to server to run and expose port 3000. Add the following changes to your src/index.ts file:
import http from 'http';
import { noteRoutes } from './note.routes';

// Create an HTTP server
const server = http.createServer((req, res) => {
  // Handle the incoming request from the Routes
  noteRoutes(req, res);
});

// Expose a port on which the server will listen
const PORT = process.env.PORT || 3000;

// Start the server and listen for incoming requests
server.listen(PORT, () => {
  //console log server status
  console.log(`Server is running on http://localhost:${PORT}`);
});
Your API should be complete. Use the following command to start the server:
npx ts-node ./src/index.ts

Testing the API
Is this Vanilla TypeScript API working? Well, let’s head over to Postman and find out:
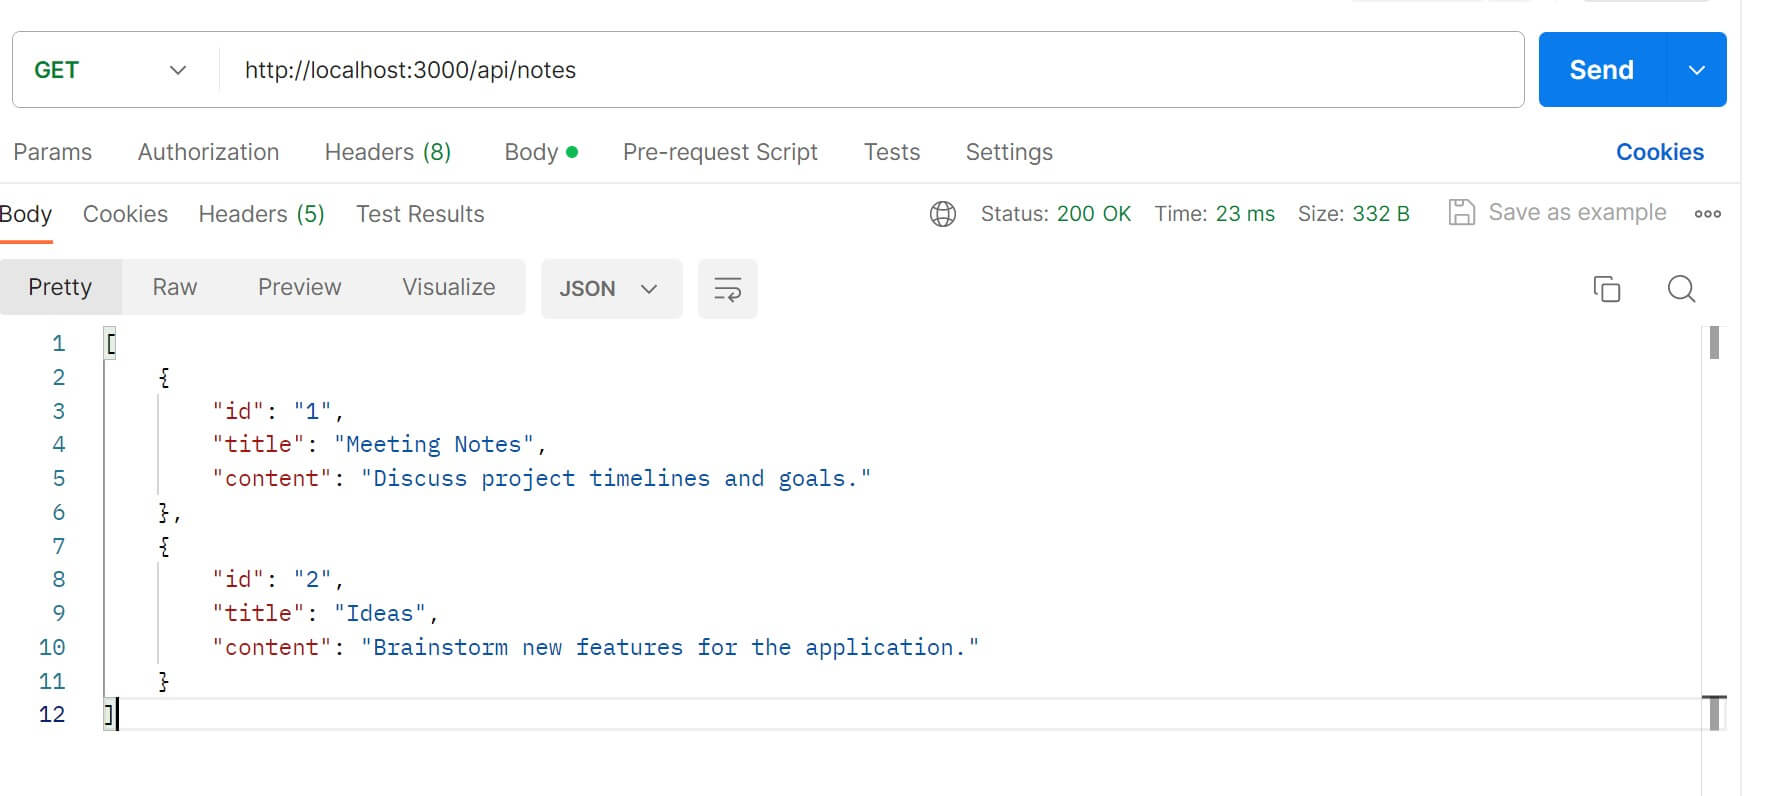
- Sending GET requests
If you send a GET request to http://localhost:3000/api/notes, you should get a list of available items in your database file:
To GET one item add Note ID as a URL parameter. For sample, get the item with id one http://localhost:3000/api/notes/1:

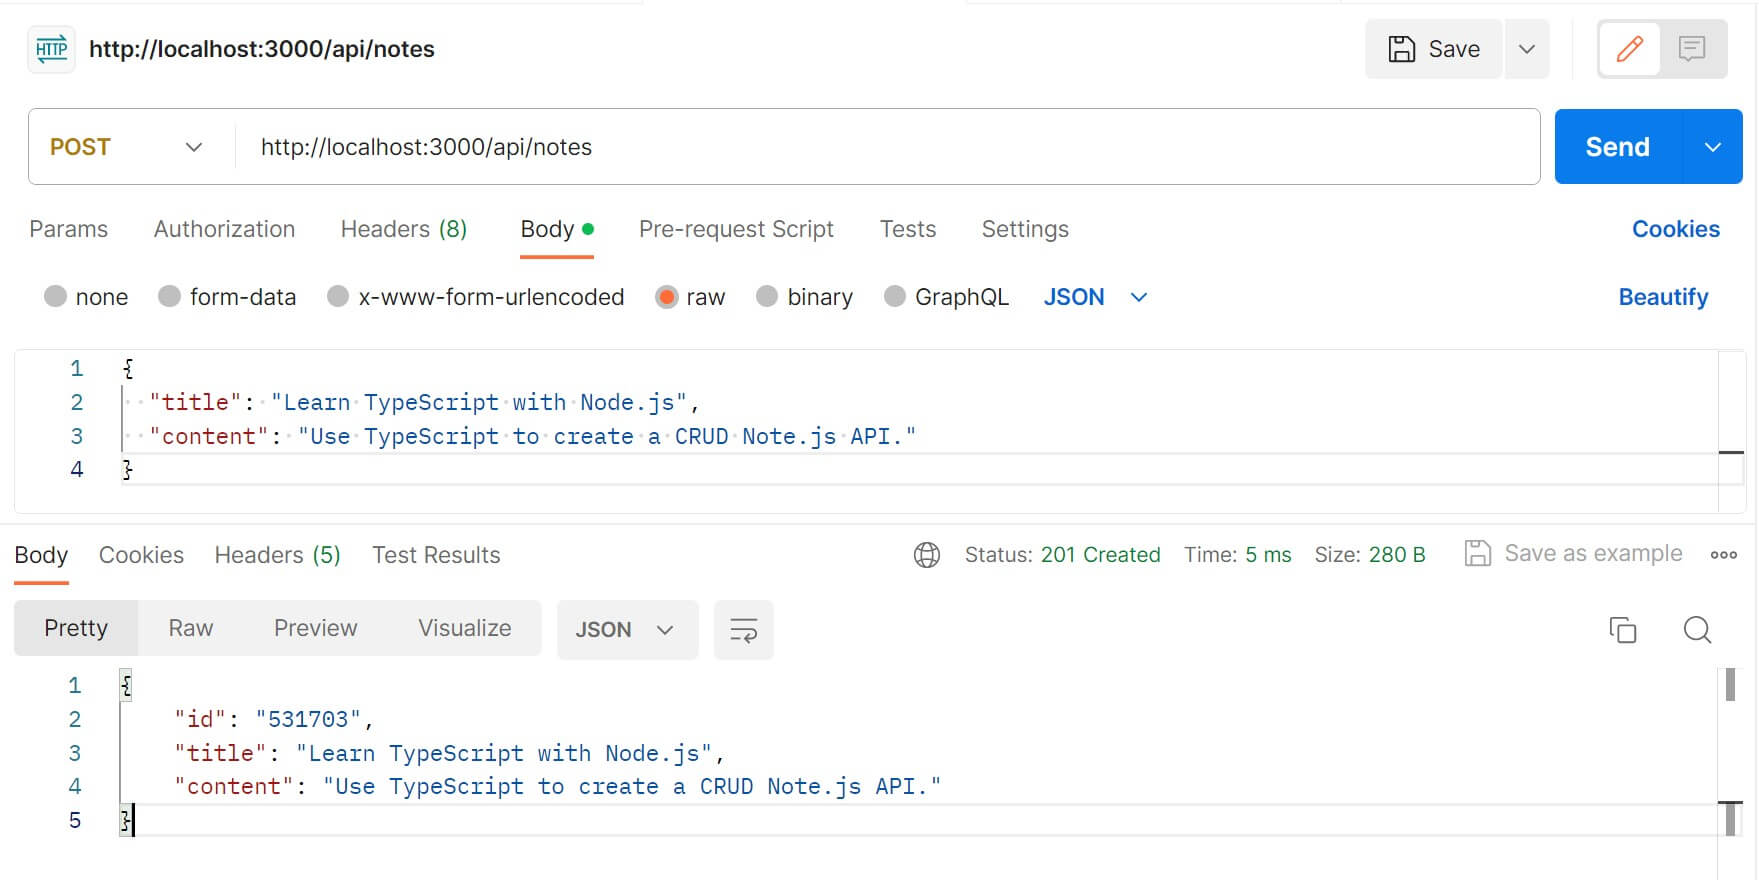
- Sending POST requests
You send to send a JSON payload to http://localhost:3000/api/notes:
{
  "title": "Learn TypeScript with Node.js",
  "content": "Use TypeScript to create a CRUD Note.js API."
}
Postman should look as follows:
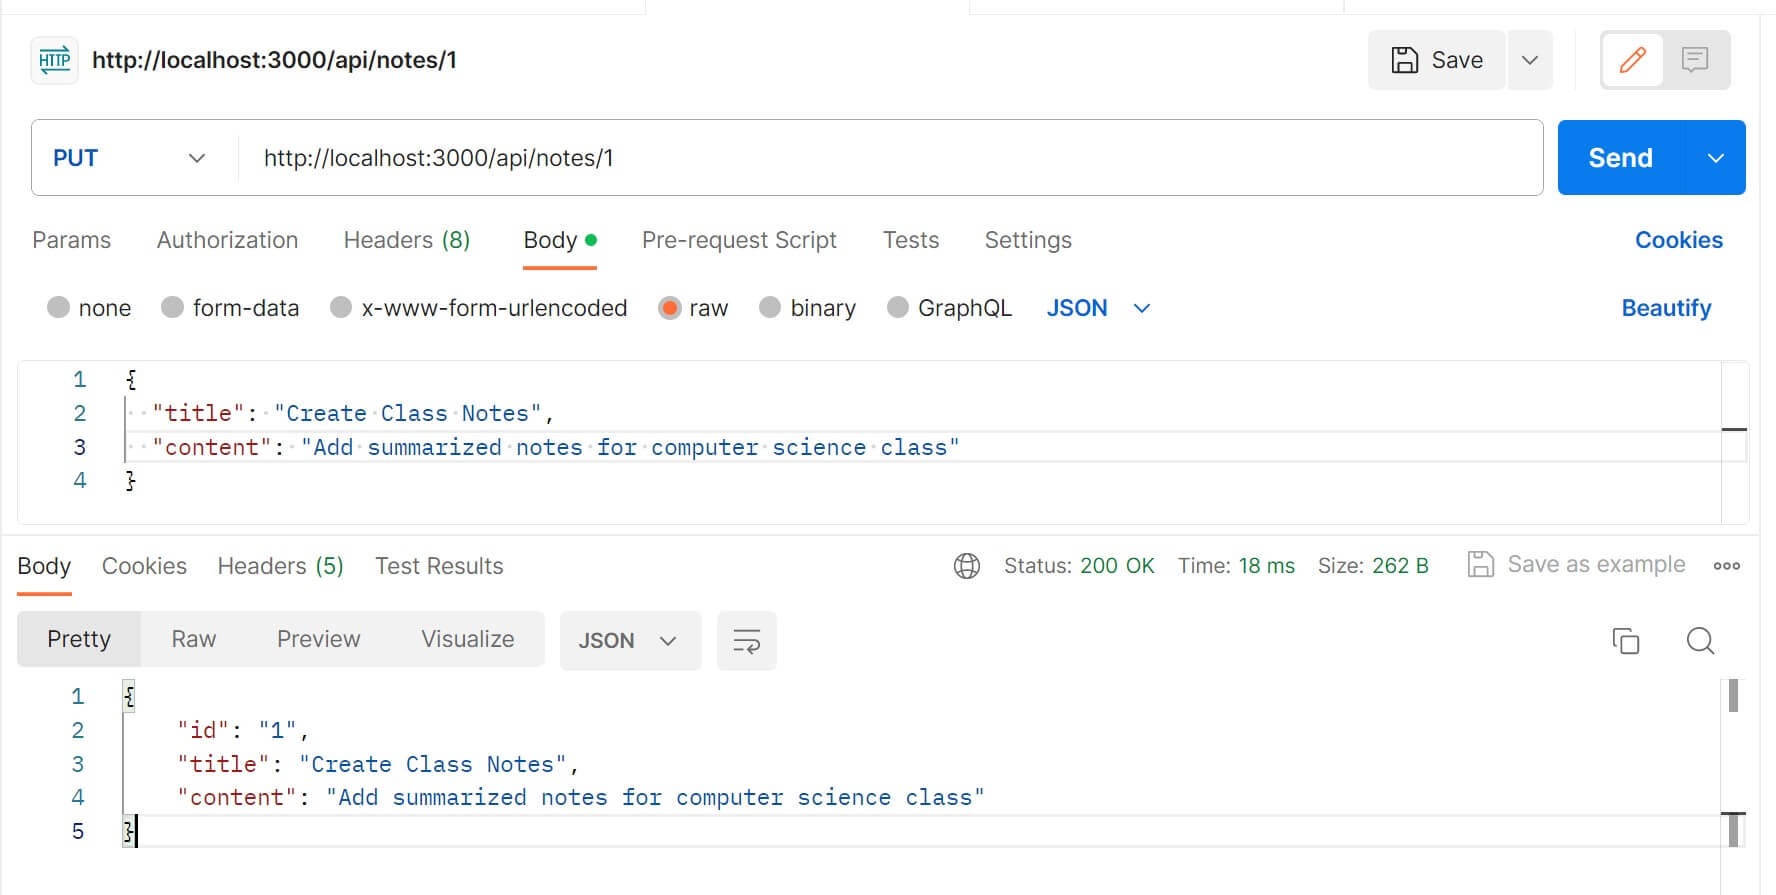
- Updating a single Note.
Use http://localhost:3000/api/notes/1 to send a PUT request with new data:
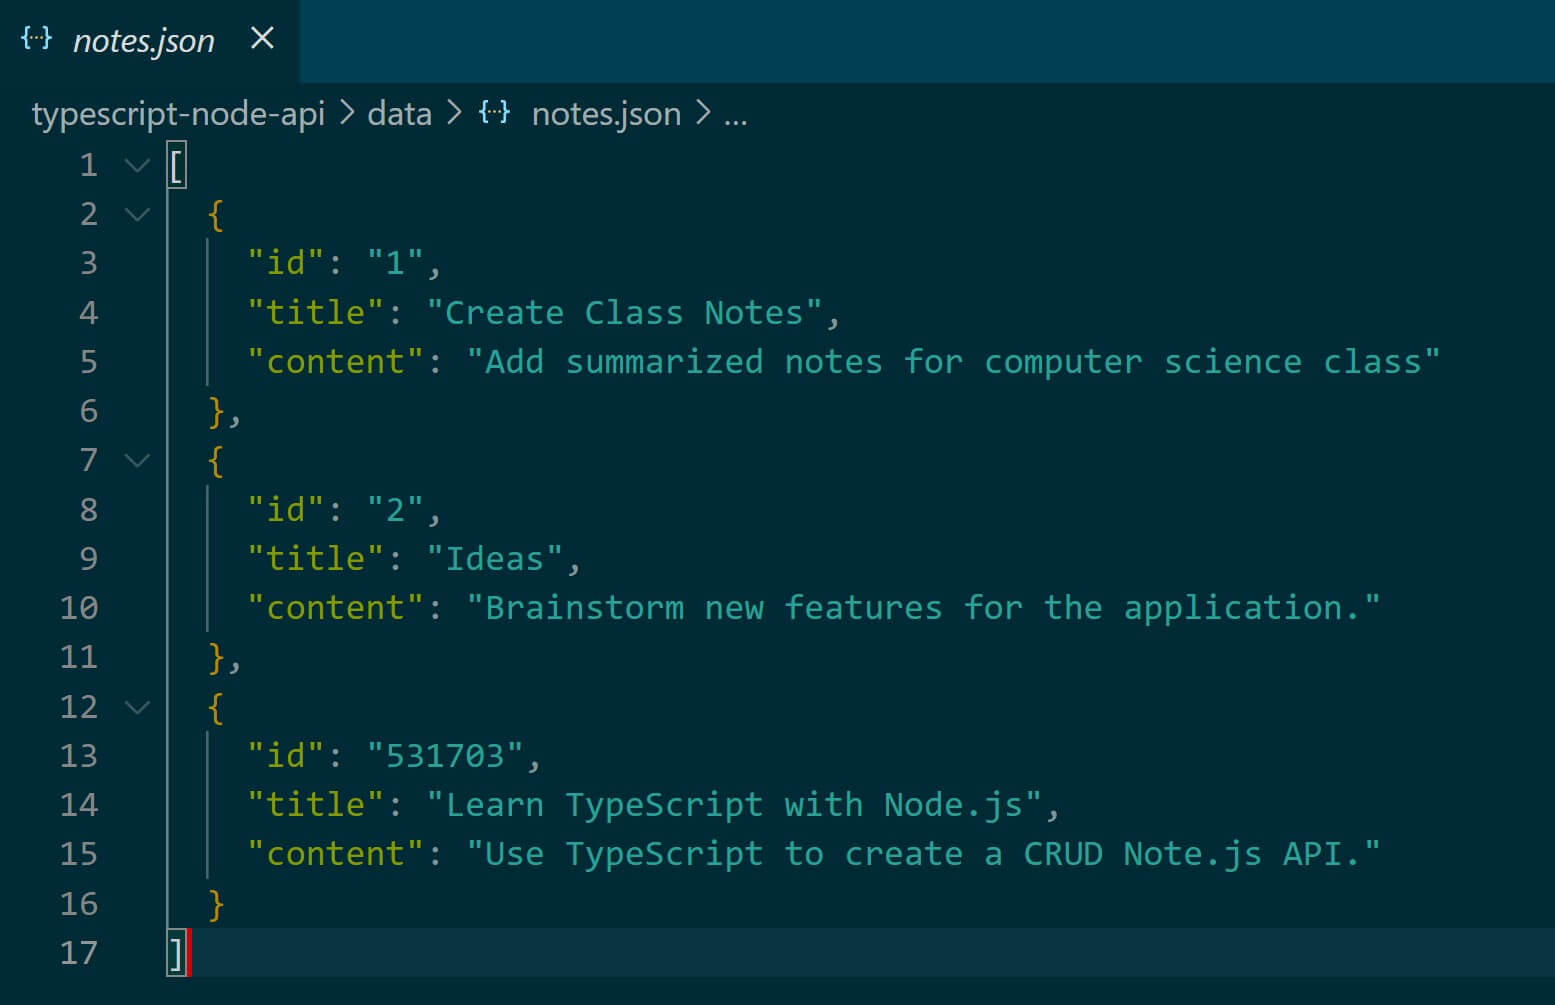
All these changes should be reflected in your data/notes.json file:
Conclusion
This guide comprehensively creates a Vanilla Node.js and TypeScript API only using native modules. You learned:
- How to create a file store to manage your Vanilla Typescript API
- The perfect way to create and send Vanilla Typescript CRUD requests with Node.js
Check all code samples used here on this GitHub repo.
Happy TypeScript Coding!
Written By: