Master Oracle DB Connection with TypeORM and NestJS Example
Posted January 26, 2024

Node.js allows you to connect to different databases, Oracle DB being one of them This applies when working with Nest.js (built on top of Node.js). In this case, you will have the OracleDb library to allow you to create valid and secure connections to an Oracle server.
Now, to make it easier to use and connect Oracle with Nest.js you use ORMs. TypeORM is the best choice here. That’s why this guide will use TypeORM to connect to Oracle. This way, you don’t need to create direct SQL queries on your Nest.js code. TypeORM only needs an entity and it will populate your database tables and related attributes just using code.
Ready? Dive in and explore Nest.js and find out the pro way to connect to the Oracle database using TypeORM. In summary, you will learn:
- How to use Nest.js with Oracle and connect to Oracle database example using TypeORM.
- Creating a Nest.js TypeORM Oracle Db connection example.
- Use the Nest.js TypeORM and Oracle connections and create CRUD API.
Step 1: Setting Oracle DB with Nest.js and TypeORM
Nest.js uses TypeScript, structured to build server-side applications. First, you need a working Nest.js and install your TypeORM and Oracle dependencies. Ensure you have the CLI ready and run the following command to set Nest.js:
npm i -g @nestjs/cli
nest new nest-oracle
Now cd nest-oracle to the created new folder and install TypeORM, OracleDb, and TypeORM and Nest.js TypeORM packages as follows:
npm install oracledb @nestjs/typeorm typeorm
Now, you need to set up a Nest.js module. Use the following command to create a REST API resource:
nest g resource posts --no-spec

Step 2: Connecting Oracle with TypeORM and Nest.js
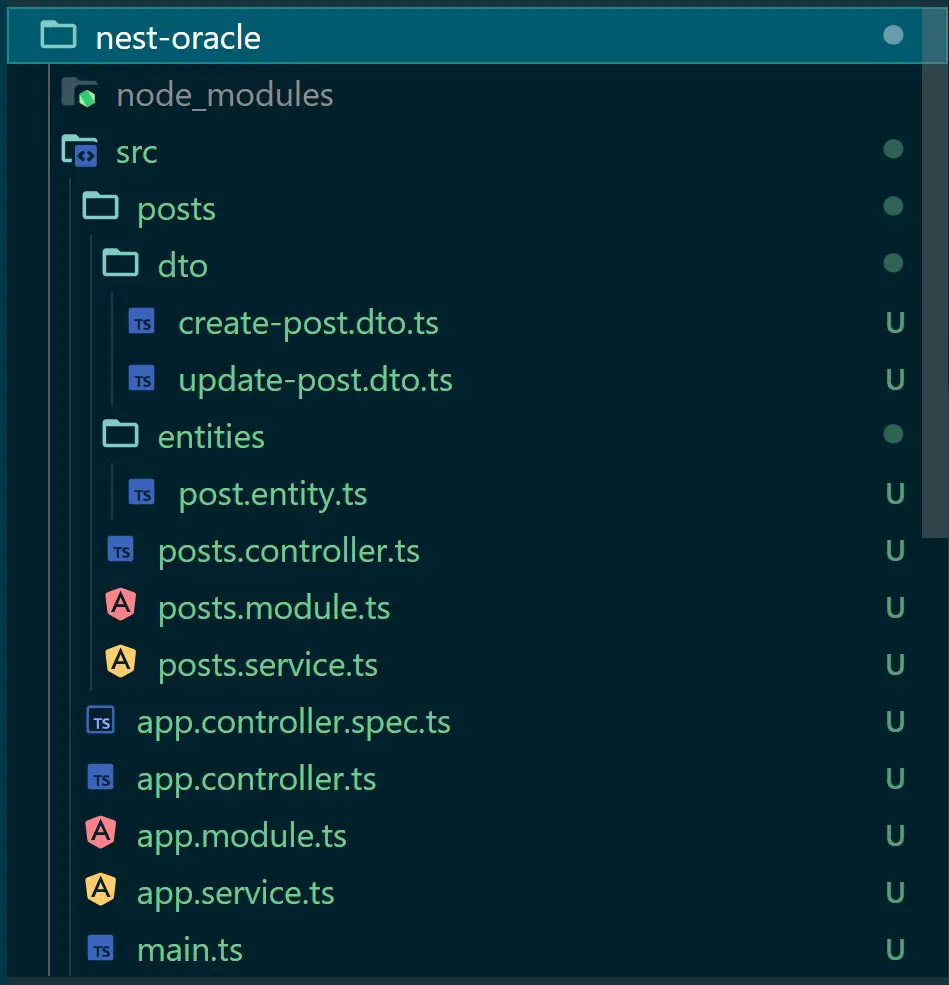
Use the created folder structure.
head over to post.entity.ts and use TypeORM to create an entity as follows:
// post.entity.ts
import { Entity, Column, PrimaryGeneratedColumn } from 'typeorm';

@Entity()
export class Post {
  @PrimaryGeneratedColumn()
  id: number;

  @Column()
  title: string;

  @Column()
  content: string;
}
To use this Entity, you will need to head to the created module (post/posts.module.ts) and execute your Entity as follows:
import { Module } from '@nestjs/common';
import { PostsService } from './posts.service';
import { PostsController } from './posts.controller';
import { TypeOrmModule } from '@nestjs/typeorm';
import { Post } from './entities/post.entity';

@Module({
  imports: [TypeOrmModule.forFeature([Post])],
  controllers: [PostsController],
  providers: [PostsService],
})
export class PostsModule {}
Step 3: Adding Oracle with TypeORM and Nest.js
It’s time to create the TypeORM Nest.js Oracle connections. Head over to the app.module.ts file and create a Nest.js Oracle connection using TypeORM as follows:
// Import necessary modules and entities
import { Module, Post } from '@nestjs/common';
import { AppController } from './app.controller';
import { AppService } from './app.service';

// Import the custom module for handling posts
import { PostsModule } from './posts/posts.module';
import { TypeOrmModule } from '@nestjs/typeorm';

@Module({
  imports: [
    // Configure TypeORM Oracle database connection
    TypeOrmModule.forRoot({
      type: "oracle", // Database type
      host: "localhost", // Database host
      port: 1521, // Database port
      username: "oracle-username", // Database username
      password: "user-password", // Database password
      database: 'oracle-db', // Database name
      // SID (Service Identifier) for Oracle database
      sid: "XE",
      // Entities
      entities: [Post],
      // Auto-create database tables
      synchronize: true,
      logging: true, // Enable SQL query logging (helpful for debugging)
    }),

    // Include the custom PostsModule for managing posts
    PostsModule
  ],
  controllers: [AppController], // controllers as used in the application
  providers: [AppService], // Add services
})
export class AppModule {}
Here, you have:
- the type that specified the type of database, in this case, “oracle.”
- host for the hostname of the Oracle database server
- port the Oracle database connection using 1521 for Oracle databases.
- username to connect to the database.
- password for the specified username.
- sid as the System Identifier (SID) of the Oracle database.
- entities with data source for “Post” entity.
At this point, you should have a correct Oracle database connection. This step is made easier using TypeORM.
Step 4: Creating Controllers and Services using Oracle, TypeORM and Nest.js
Once the Oracle database is set up, you now need to create controllers and services to create a complete Nest.js TypeORM Crud app.
For this step check out:
- Guide To TypeORM MSSQL With Nest.js and Typescript
- Guide to TypeORM with NestJS, Postgres, and MySQL
- Guide To TypeORM SQLite With Nest.js and Typescript
Any of these guides will teach you how to use the above Oracle connection and create your CRUD.
Conclusion
This guide taught you how to use Nest.js with Oracle and connect to Oracle database examples using TypeORM. Node. dive deeper and use this setup to create your TypeORM Oracle Nest.js CRUD APIs.
Written By:
Joseph Chege
More Related Articles:
-
Guide to TypeORM with NestJS, Postgres, MySQL, Multer, Docker and Docker Compose
Sep 28, 2023
-

How to Create and Run Sequelize Migrations with Nest.js
Feb 13, 2024
-

Easy Guide to Nest.js with Auth0 and Passport JWT|AuthGuard
Feb 7, 2024
-

Build NestJS oauth2 Server | Passport FT Google 2.0 Example
Feb 7, 2024