Guide to docker php ext install and enable Imagick Commands
Posted September 22, 2023

In the plethora of PHP extensions, Imagick allows you to process and manipulate images with PHP scripts. Yet, when using Docker, you must use this special docker php ext install (enable) imagick command to harness the power of Imagick within a Dockerized PHP environment.
Dive into this Mastering Imagick Extension in PHP with Docker guide and learn how to safely use docker php ext (pecl) install imagick and docker php ext enable imagick commands, and allow your PHP Docker apps to use Imagick extension.
Step 1: Prerequisites
Before diving into this Imagick PHP hands-on setup, ensure Docker and its prerequisites are installed on your computer.
Step 2: Understanding Imagick Extension and its docker php ext install imagick Command
Imagick is a native PHP extension. It uses the ImageMagick library so you can create PHP image-related tasks.
As a containerization platform, Docker always creates a better environment to run your PHP code. You can install and enable the Imagick extension on Docker as you would on bare metals.
You must use commands that Docker understands. They are:
pecl install imagick. Equivalent ofdocker-php-ext-install imagick, anddocker-php-ext-enable imagickto active Imagick within Docker environment.
Now, let’s learn how to use this command on Docker.
Step 3: Setting Up Docker Environment for PHP with Imagick Extension
Docker uses Dockerfile to allow you to include instructions to install the necessary dependencies and configure PHP extensions. Dockerfile acts as your Docker application blueprint with an out-of-the-box Command line for running your commands.
Let’s assume you have the following application structure:
imagick-with-php/
│ ├── imagick.dockerfile
│ └── docker-compose.yml
└── php/
    ├── image.jpg
    └── index.php
Go ahead and update the Dockerfile with the following instructions:
FROM php:7.4-apache
# Use the following ccommands to get Imagick ready
RUN apt-get update \
    # Install libmagickwand-dev imagick package
    && apt-get install -y libmagickwand-dev \
    # use pecl to install imagick
    && pecl install imagick \
    # Enable you installed extension
    && docker-php-ext-enable imagick
In this case:
- Docker will use PHP 8.2 and run it with Apache so you can access your app on the web.
- You must install
libmagickwand-devwithapt-get install -y libmagickwand-dev. It contains the development files required to build the Imagick extension. - Use the
pecl install imagickordocker-php-ext-install imagickcommand to install Imagick on Docker. - And
docker-php-ext-enable imagickenables the installed Imagick extension in the PHP Docker environment.
Step 4: Running Imagick Extension and PHP with Docker Containers
Dockerfile will build a Docker image incorporating PHP and the configured Imagick extension. To run it, you will create a container using Docker Compose.
Go to your docker-compose.yml file and spin up your container as follows:
version: '3.9'

services:
  imagick-app:
    build:
      context: .
      dockerfile: ./imagick.dockerfile
    ports:
      - "3000:80"
    volumes:
      - type: bind
        # source directory
        source: ./php
        #  target directory within the container
        target: /var/www/html
What you need:
- The contentx on the Dockerfile path
- mount source directory to the target directory within the container
Remember that you must share your
php/index.phpfile with Docker.volumes: - ./php:/var/www/htmlwill do so.
Because you are executing php/index.php, check the next step to add PHP test code and confirm in Imagick is working.
Step 5: Creating a PHP Test Script using Imagick
Go to your php/index.php file and create a basic test script to verify Imagick functionality within Docker. If Imagick is correctly working, the Docker PHP should load display a sample image.jpg. Add the following code:
<?php
$image = new Imagick('image.jpg');
$image->rotateImage(new ImagickPixel(), 0);

header('Content-Type: image/jpeg');
echo $image;
?>
You must ensure you have image.jpg and set the right path for the image you want to load Imagick.
If Imagick displays this image, we will automatically know Imagick is working on Docker and running more complex Imagick PHP code.
Step 6: Running and Testing Imagick PHP Script with Docker
We need to package the above Imagick and PHP Script with Docker using the following Docker Compose command:
docker-compose up -d --build
This command orchestrates and build the Docker image. It then starts the container in detached mode.
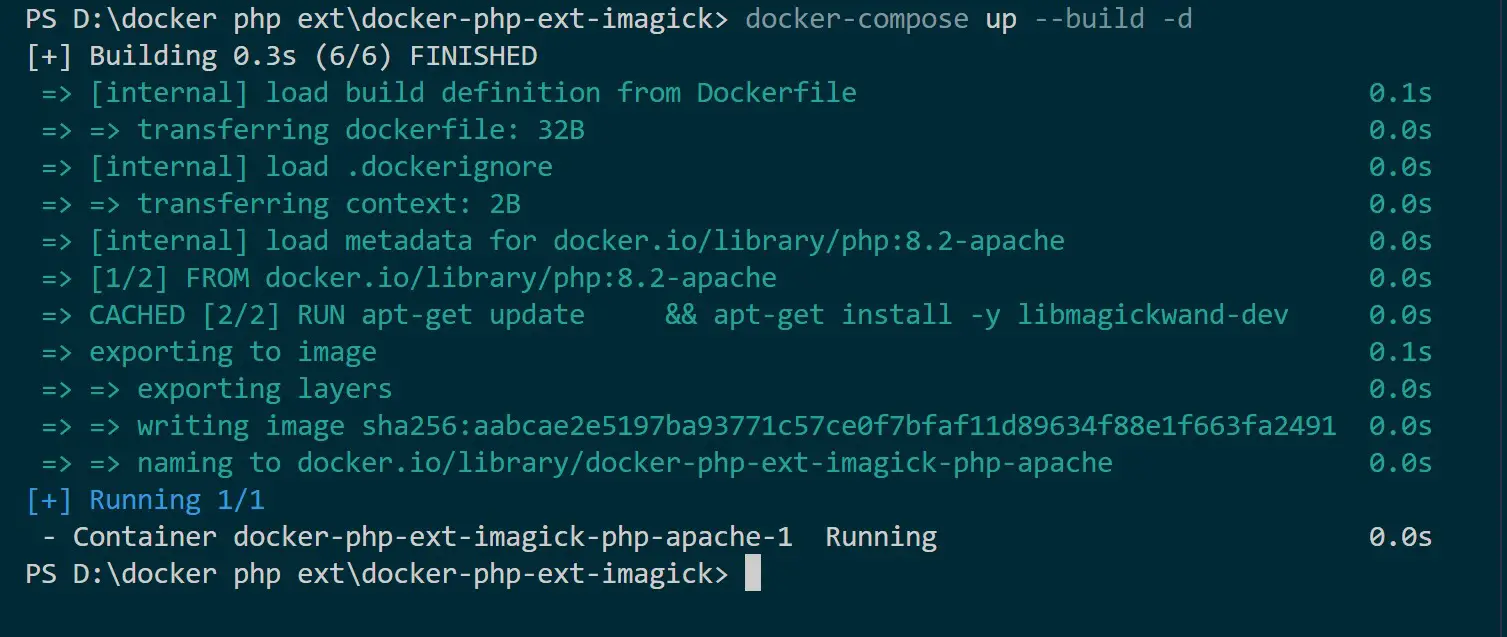
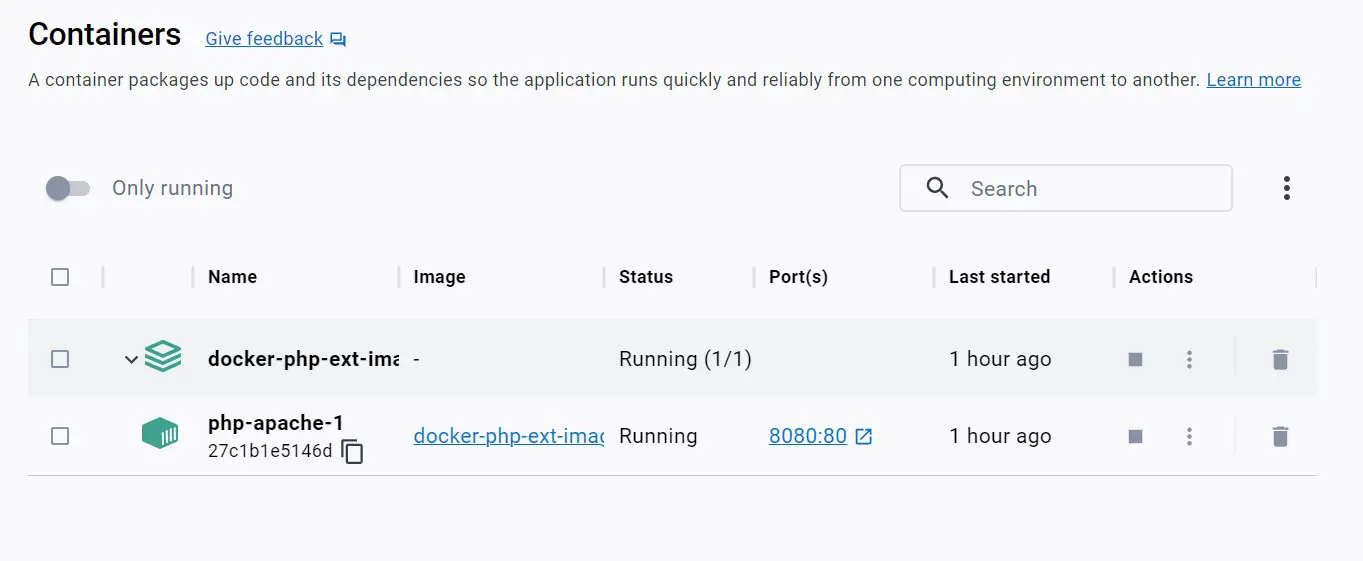
Because the comtainer is ruuning, make sure you confirm the same state on Docker Desktop:
Open the URL http://localhost:3000 on the browser to validates is the setup was successful:
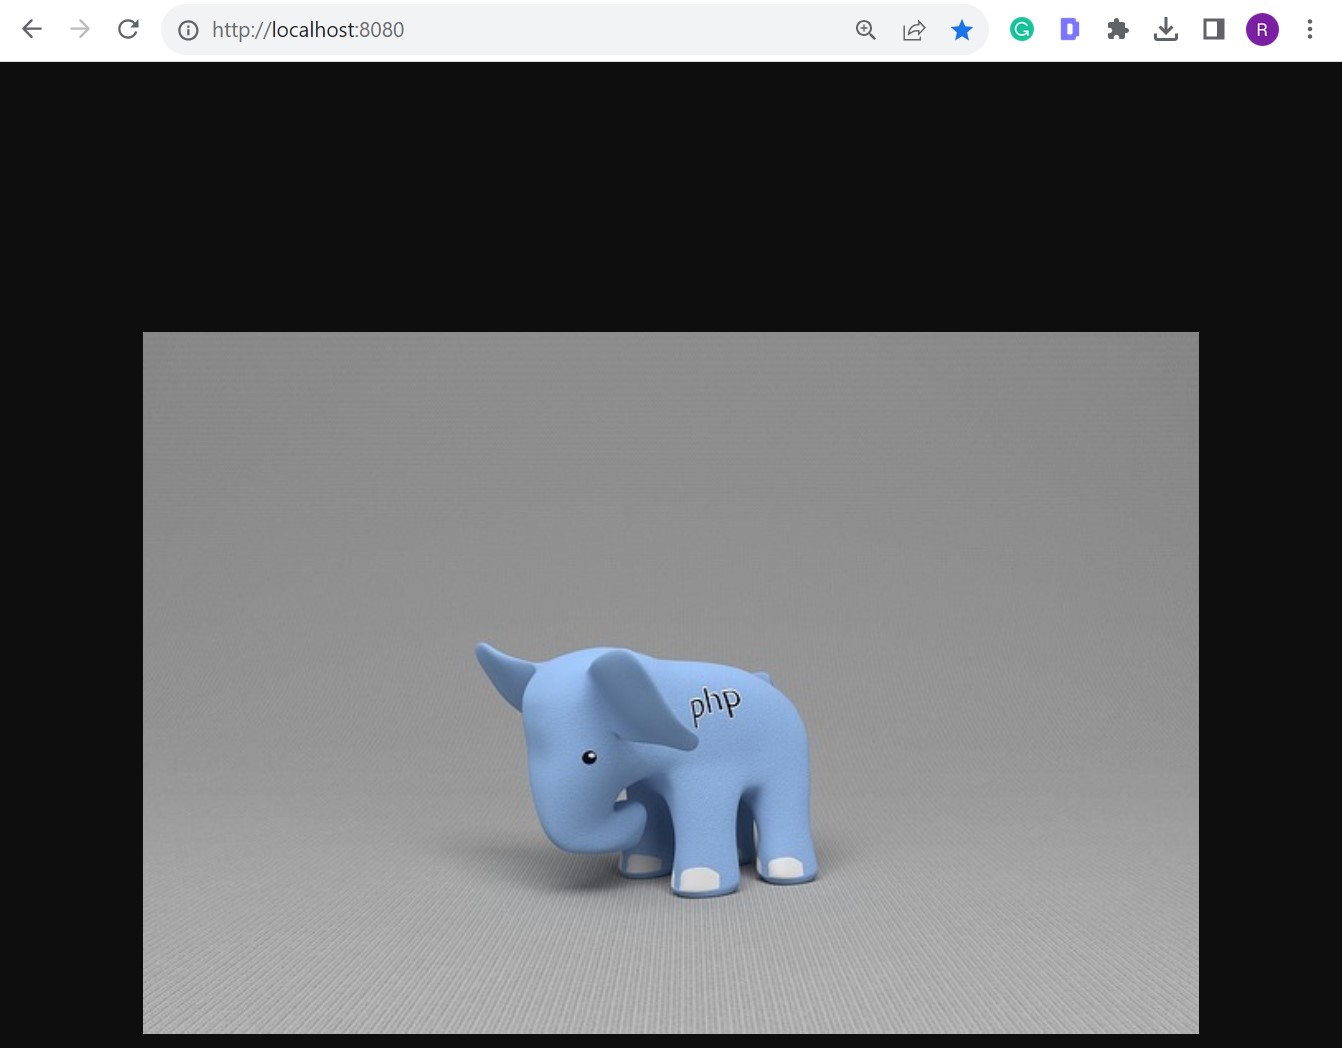
This shows your docker php ext install imagick and docker php ext enable Imagick commands are perfectly working.
The above results validates you have successfullly used docker-php-ext-install imagick and docker-php-ext-enable imagick commands, enabling you to leverage Imagick in PHP applications within Docker environments.
Now, you can create real-world scenarios utilizing Imagick in PHP applications within Docker environments.
Conclusion
This comprehensive guide equips you with the expertise to harness docker-php-ext-install imagick and docker-php-ext-enable imagick commands within Dockerized PHP environments an unlocks a realm of possibilities for PHP applications.
Written By: