Kubernetes Security with AppArmor – Whitelisting and Restricting Kubernetes Access Using AppArmor Profiles
Posted October 19, 2023

This guide discusses how to implement Kubernetes Pods Security through System Hardening using the kernel hardening tool AppArmor to create profiles for Kubernetes process whitelisting.
Getting Started with Kubernetes and AppArmor
Kubernetes allows you to create isolated applications. Just like any other application, it’s a good practice to make applications deployed in containers secure. Think of security as a spectrum in that attacker picks their target to shift their focus based on your security context.
Since the attacker can attack your cluster from the different directions, you need a strategy that makes it harder for a hacker to maneuver your cluster into weak positions. Your strategy creates a layered defense for your cluster. So, how does AppArmor add a security layer to Kubernetes?
Now, a Kubernetes host runs on BareMetal, such as Linux. AppArmor allows you to add a kernel security layer. Kernel space allows apps to send system calls such as opening, creating, writing, or closing a file. In this context, AppArmor works as a security hardening tool for Linux kernel security module to whitelist or strict access to you cluster.
If Kubernetes is running on Linux, AppArmor will be ideal for managing container access to kernel resources. Because Kubernetes cluster can use host namespace, you need to minimize the host OS footprint. This is where AppArmor comes into play to reduce attack surfaces such as:
- Running containers in privileged mode
- Limiting Node access
- Restrict Obsolete Kernel Modules
- manage cluster-allowed host paths
- Kubernetes processes whitelisting
AppArmor will create a Kubernetes profile for the Kernel Security Module and manage granular access control for clusters on your Host OS.
Now that you understand the context of AppArmor to Kubernetes, let’s dive and use AppArmor to harden a Linux kernel and move Kubernetes security to the next level with Kubernetes process whitelisting.
Prerequisites to Kubernetes Processes Whitelisting with AppArmor
To comfortably follow this guide, ensure you have the following:
- A Running Kubernetes cluster on a Linux host
Related: This guide teaches Running K3s Cluster on AWS EC2 Ubuntu machine
- Prior Knowledge of working with Kubernetes and Linux will be an added advantage
Related: Check this guide to Run a light k3s Kubernetes cluster in production
Getting AppArmor ready
AppArmor is installed by default on your Host, just on Linux machines.
Run the following command to ensure AppArmor is Active:
sudo systemctl status apparmor

Now, you need to have AppArmor enabled by running the following command:
cat /sys/module/apparmor/parameters/enabled
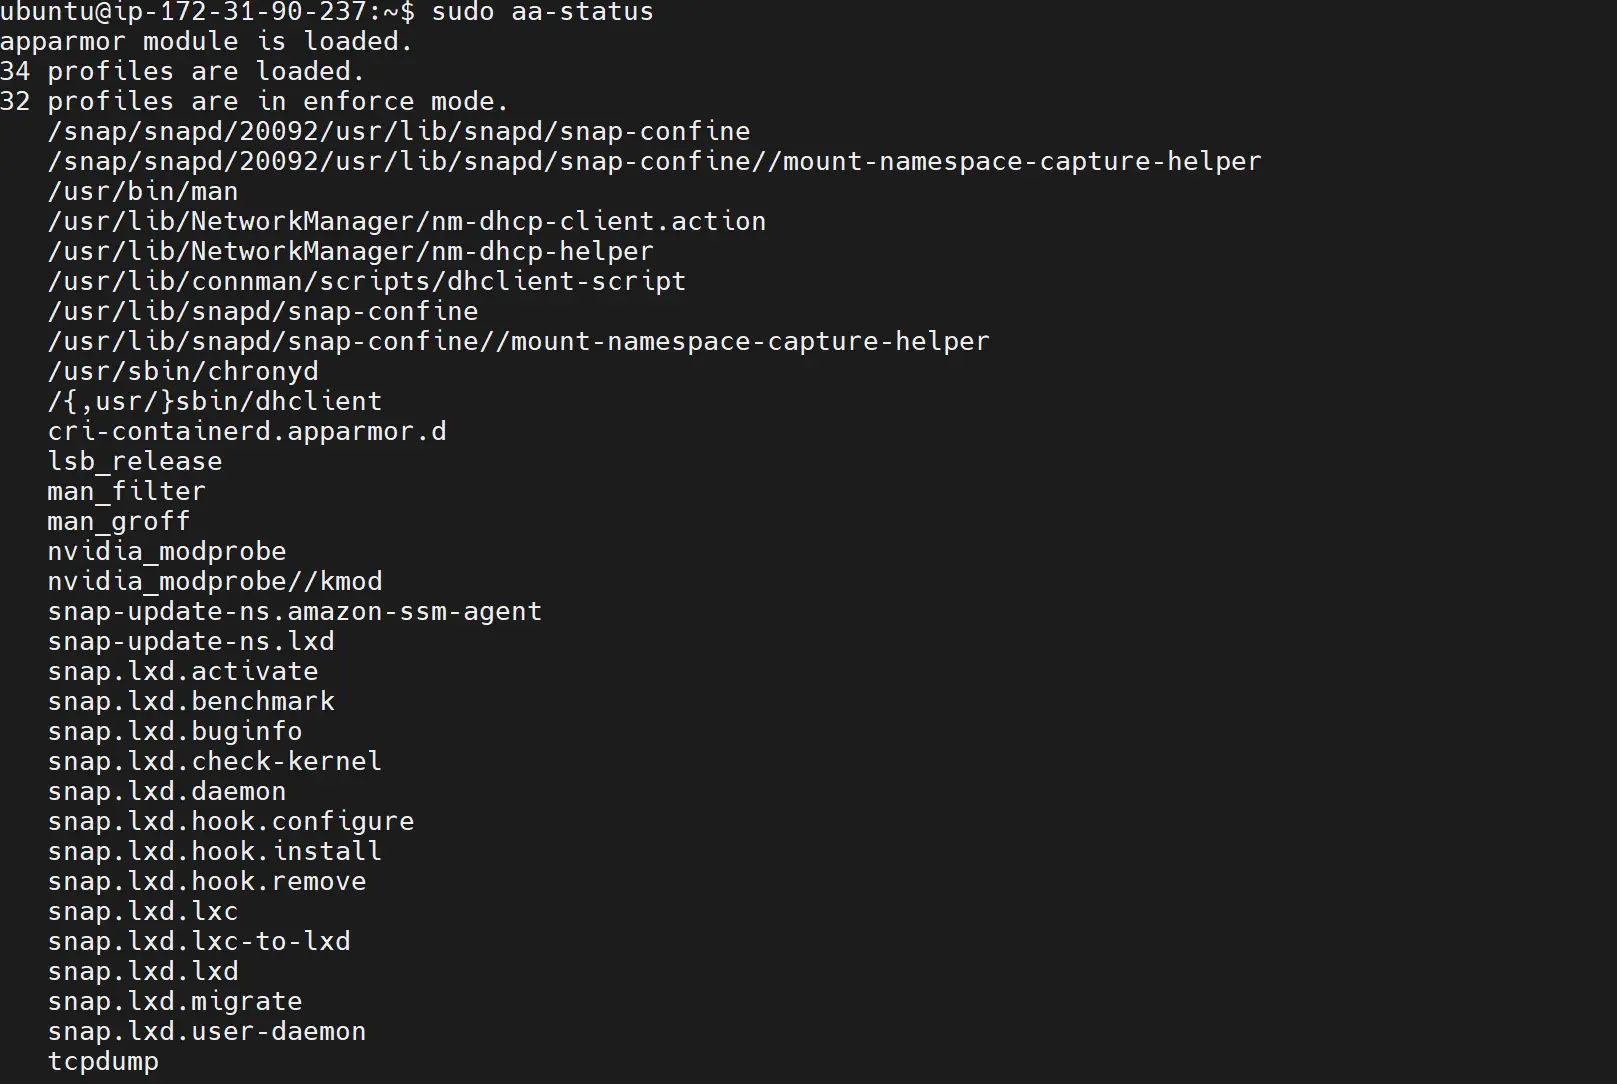
At this moment, AppArmor already has some profiles loaded to it. You can check them by running any of the following commands:
sudo apparmor_status
sudo aa-status
sudo cat /sys/kernel/security/apparmor/profiles

In this case, I already have 34 profiles loaded, and 32 profiles are in enforce mode. enforce mean the listed profile are strictly adhering to AppArmor based kernel Security Module.
These services are tracked inside the /etc/apparmor.d/ directory, and you can list them using the following command:
sudo ls -lar /etc/apparmor.d/

If you add your Kubernetes cluster and whitelist any service, you should have it in the above list. Let’s add a cluster to AppArmor.
Testing Your Cluster Without AppArmor
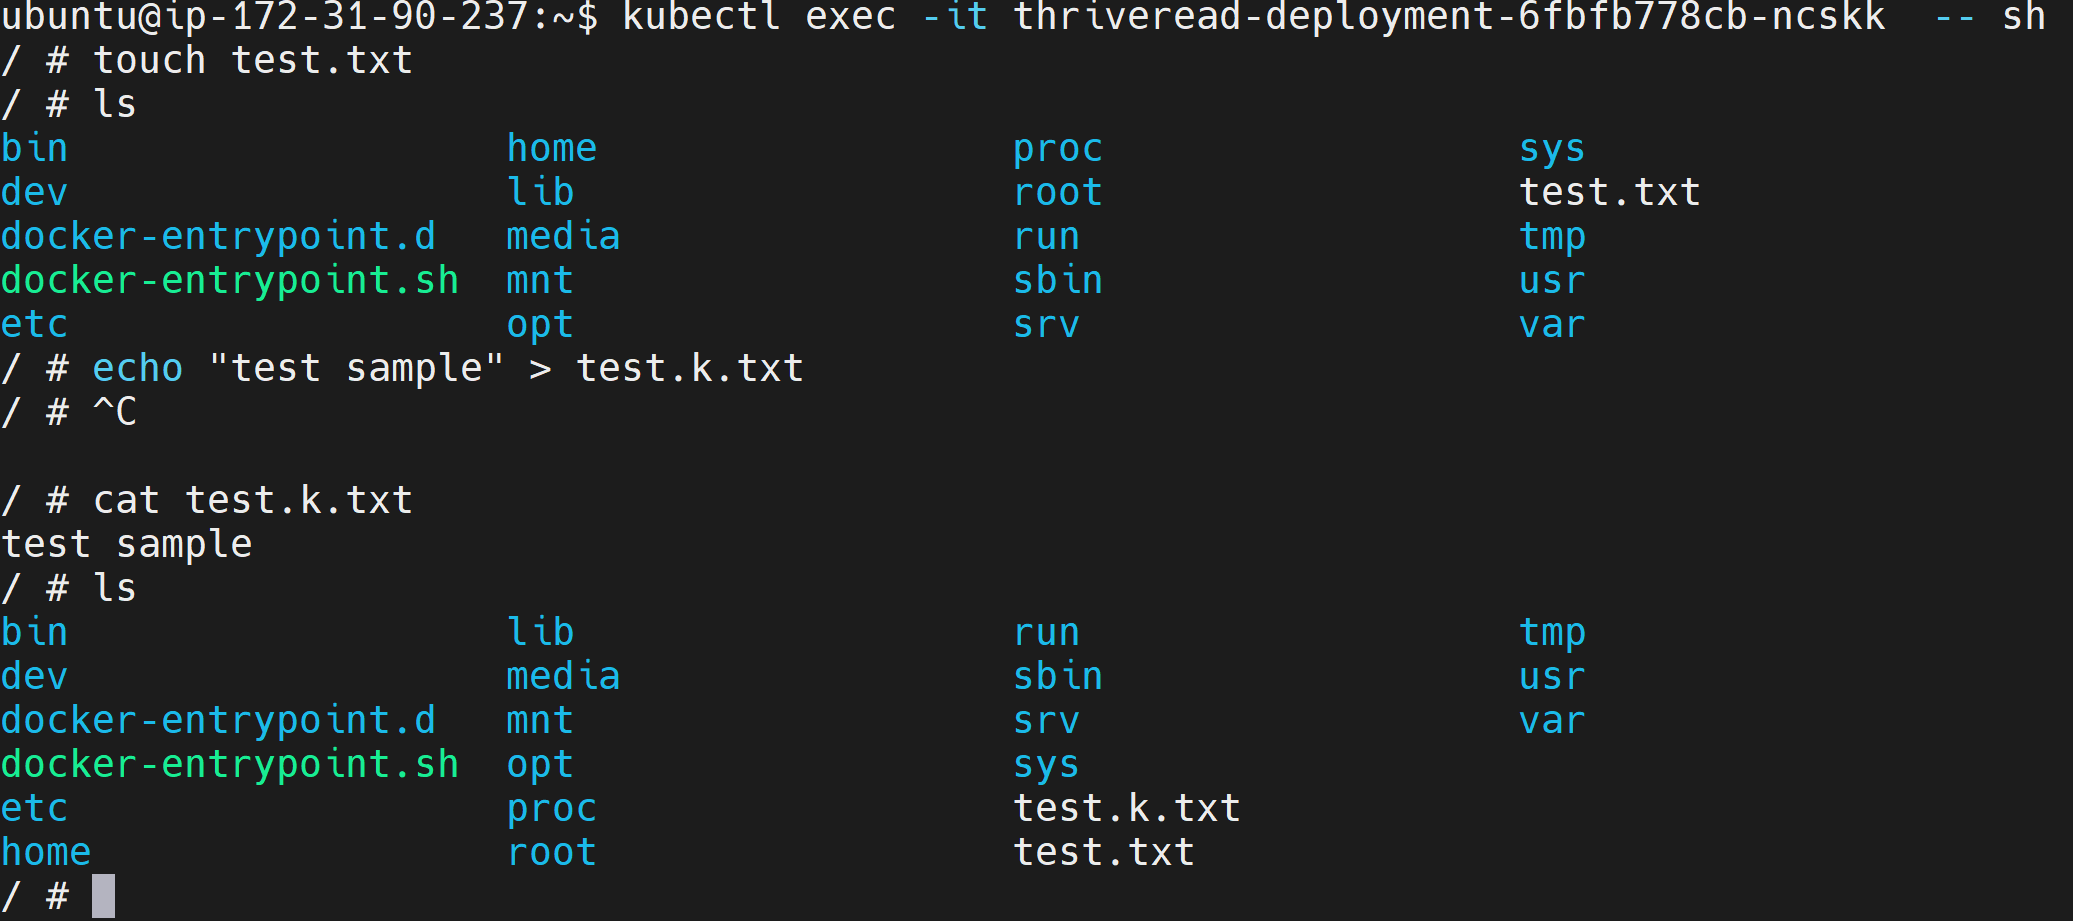
To understand the security layers AppArmor adds to Kubernetes, lets first ssh to your cluster that doesn’t use AppArmor kernel hardening yet:
kubectl exec -it pod_name -- sh
This will launch a terminal to interact with your container. In this terminal, try creating or deleting files and directories. This should work as fine as this cluster has no kernel restriction to do that:

Applying AppArmor to Kubernetes
Your cluster lacks kernel hardening, and you can simulate any attack and check if an attacker can be able to access such privileges to the kernel system of your cluster.
AppArmor uses profile names to indicate which privileges should be whitelisted and what should be restricted. A profile will be a file containing your allowed and denied operations for the container:
Below is the basic structure of an AppArmor Kubernetes profile:
profile k8s-apparmor-profile flags=(attach_disconnected){
  # Allow access to essential capabilities
  capability,
  file,
  deny mount,
  # Deny all file writes
  deny /** w,
  network,
  umount,
  # Allow processes to trace other processes
  ptrace,
  # Allow signaling processes
  signal,
  # Allow read and write access to the log file
  /var/log/container_name.log rw,
}
If this is your hypothetical AppArmor profile, these capabilities will be applied to your Kubernetes cluster as follows:
- Create you profile inside
/etc/apparmor.d/past:
sudo nano /etc/apparmor.d/k8s-apparmor-profile
Take note of k8s-apparmor-profile, and you will need it. You can change the name to your liking.
- Go ahead and add your profile to the created and save the changes. Your
k8s-apparmor-profilename used on the above command should be the same in your file as follows:

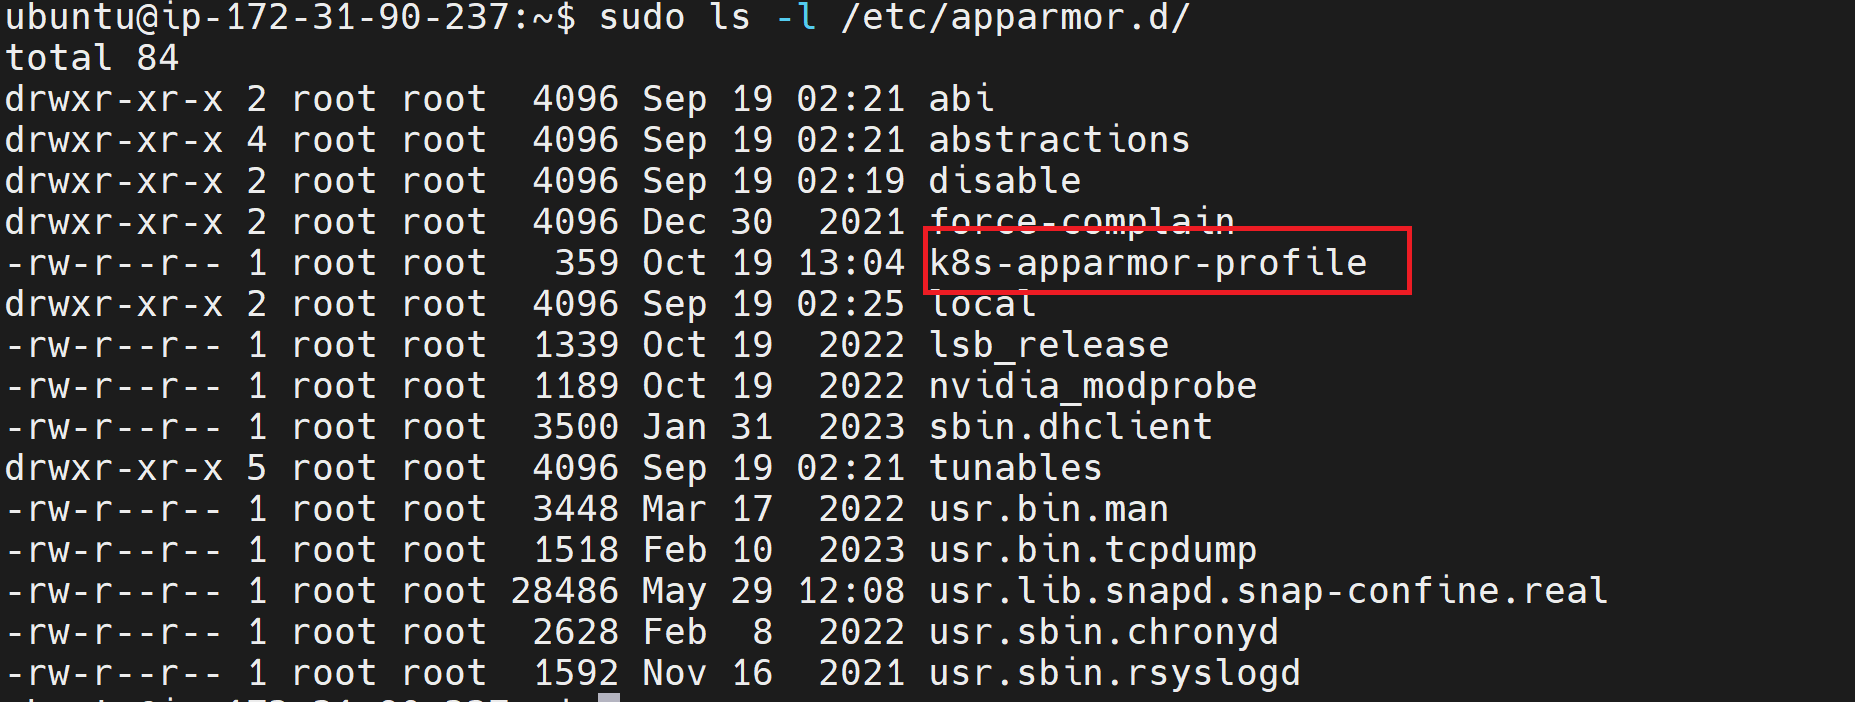
If you check what is inside the current profile list, you should have k8s-apparmor-profile ready to be profile to your cluster.
sudo ls -l /etc/apparmor.d/

However, if you check the enforce profiles, k8s-apparmor-profile won’t be listed:
sudo aa-status
Now, it’s time to enforce it.
Load and Enforcing AppArmor Profile to Kubernetes
Enforcing means applying your profile and putting it to work. This case will require you to update your cluster so AppArmor can enforce your profile to Kubernetes. Load your profile file using the following command:
sudo apparmor_parser /etc/apparmor.d/k8s-apparmor-profile
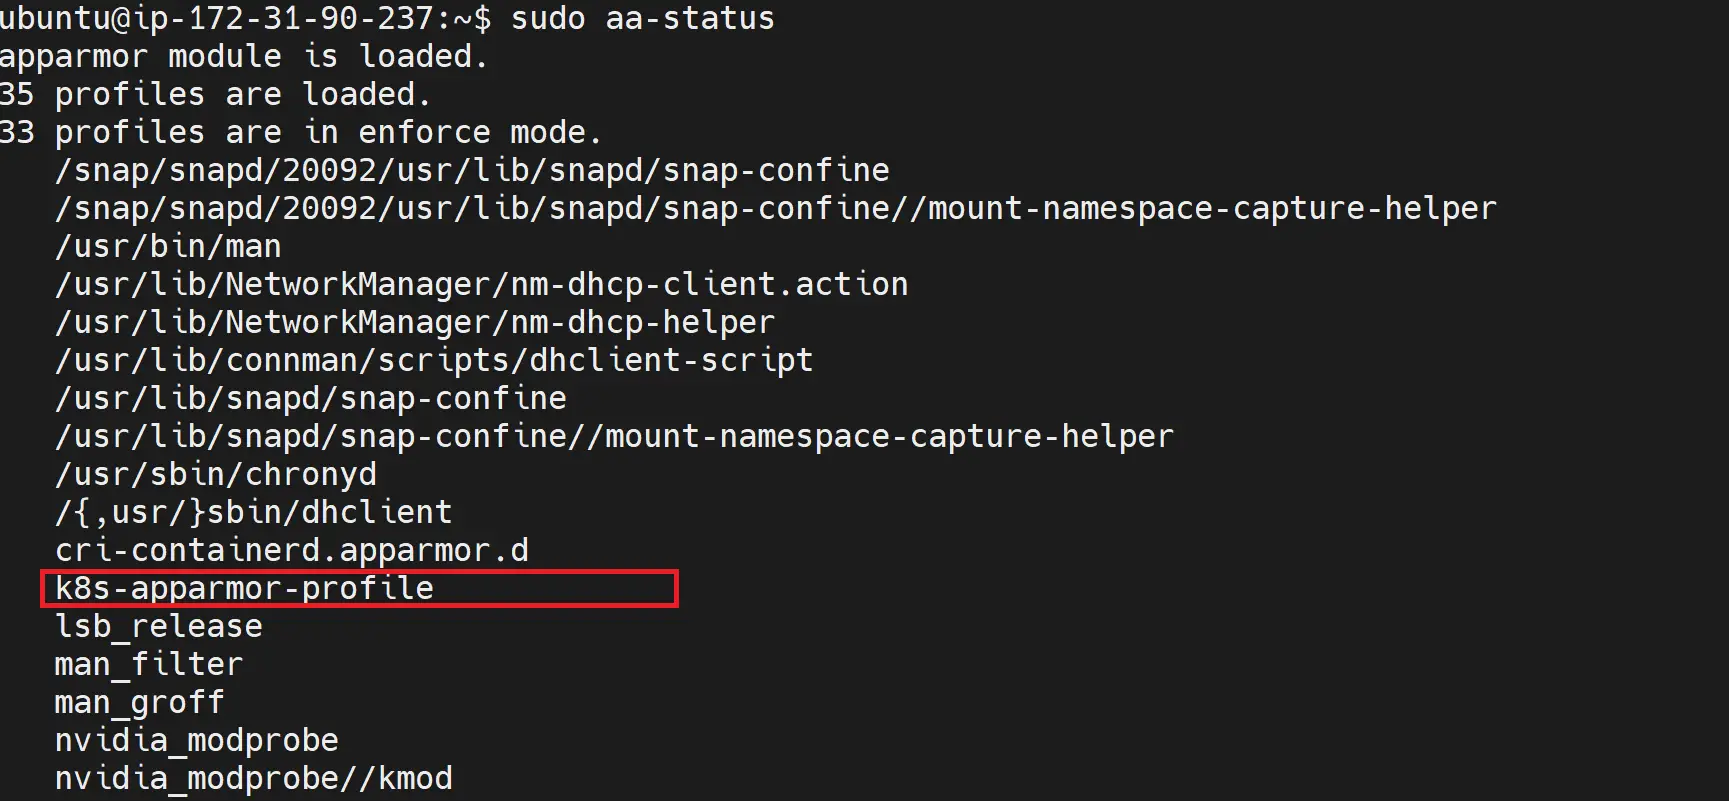
To confirm this change, run sudo aa-status, and your profile should now be in enforced mode.

So, Kubernetes can use this profile; you will need to instruct Kubernetes to apply the AppArmor profile k8s-apparmor-profile to your cluster with the following annotations:
container.apparmor.security.beta.kubernetes.io/container_name: localhost/k8s-apparmor-profile
- k8s-apparmor-profile is the profile you just created, and
container_nameshould be replaced with your actual container name
Consider the following hypothetical example of how to add the above annotations to a Pod deployment:
apiVersion: v1
kind: Pod
metadata:
  name: apparmor-cluster
  annotations:
    container.apparmor.security.beta.kubernetes.io/your-container: localhost/k8s-apparmor-profile
spec:
  containers:
  - name: your-container
    image: busybox:1.28
However, if you are running a typical cluster deployment, you will add annotations as follows:
apiVersion: apps/v1
kind: Deployment
metadata:
  name: deployment-name
  labels:
    app: deployment-name
spec:
  replicas: 1
  selector:
    matchLabels:
      app: deployment-name
  template:
    metadata:
      labels:
        app: deployment-name
      annotations:
        container.apparmor.security.beta.kubernetes.io/your-container: localhost/k8s-apparmor-profile
    spec:
      containers:
        - name: your-container
Once you have the changes ready, run kubectl apply -f deployment.yml to apply them. You can create a file as an example to check if the AppArmor profile was added to Kubernetes.
kubectl exec apparmor-cluster -- touch /tmp/test
AppArmor will have these operations denied, and so will other profile members:

Conclusion
Security is crucial to any application. It is best to have security ready figured out even before running to production. This guide discussed how to implement Kubernetes Pods Security through System Hardening using the kernel hardening tool AppArmor Profiles for Kubernetes process whitelisting. I hope you found it helpful!


