How to Set up Nest.js with Vite and esbuild
Posted June 28, 2024

This tutorial teaches you to integrate Nest.js with Vite while leveraging esbuild correctly. You will configure Nest.js with Vite and esbuild and let these tools manage your project dependencies and source code.
You’ll learn:
- Setting up Nest.js with Vite and esbuild
- The feature that you can use with a Nest.js Vite Setup.
- Using Nest.js with vite-plugin-node to access Vite.
- How to run Nest.js test with Vitest
What are Vite and Esbuild
Vite is built for speed and modern standards for a faster development experience. Vite achieves this by leveraging native ES modules in the browser. This way, it serves source files directly without the need for bundling them first. Now, to understand Vite, take a closer look at how an application is structured. You’ll have source code and application Dependencies.
Technically, the Dependencies tree of your application will change frequently. This means Vite will divide Nest.js into dependencies and source code. Here, Vite will use esbuild to first pre-bundle dependencies under the hood. Vite will then use ES modules in the browser to serve the changing source code file.
This is where Vite will start using its Instant Server Start and Hot Module Replacement (HMR) features to server your Nest.js on demand. Changes in your code will get reflected in the browser immediately without a full reload. Now, Vite using esbuild will give you Nest.js apps a Fast Cold Start.
Remember Vite pre-bundles dependencies using esbuild. Esbuild is a fast bundler and minifier. It will let Vite get pre-bundled dependencies resulting in a very quick cold start. The browser will use route-based code-splitting and conditional dynamic imports to bundle the needed code to achieve this speed and serve source files directly without the need for bundling them first.
Why Nest.js with Vite and esbuild
Nest.js is a progressive structured Node.js framework. It is powered by TypeScript for robust server-side apps. Nest.js with Vite and esbuild will combine the strengths to create a streamlined development process. You get:
- Optimized esbuild Builds with tree shaking and code splitting for smaller and faster build performance.
- NestJS promotes a modular architecture that complements Vite’s plugins.
- Nest.js development performance gets a boost.
- You get a structured and efficient way to build server-side applications
Now that you understand these tools, let’s dive deeper and learn how to get Nest.js ready with Vite and esbuild.
How to Integrate Vite and esbuild with Nest.js
Along the following steps, you will use the Nest CLI. Use NPM to install it globally on your computer:
npm i -g @nestjs/cli
You must bootstrap the Nest.js starter and structured code. Make sure the above CLI is ready. Once done, follow these steps:
Step One: Creating and Configuring Nest.js App
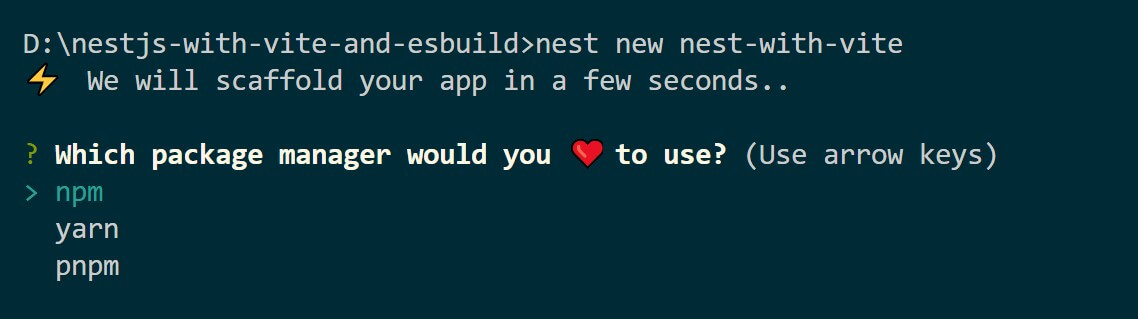
Go to your working directory and run the following command to create a Nest.js app:
nest new nest-with-vite
Make sure you select your working package manager as such:
A new nest-with-vite directory will be created. Wait until the installation process is completed. Now change your terminal and point to the created nest-with-vite folder:
cd nest-with-vite
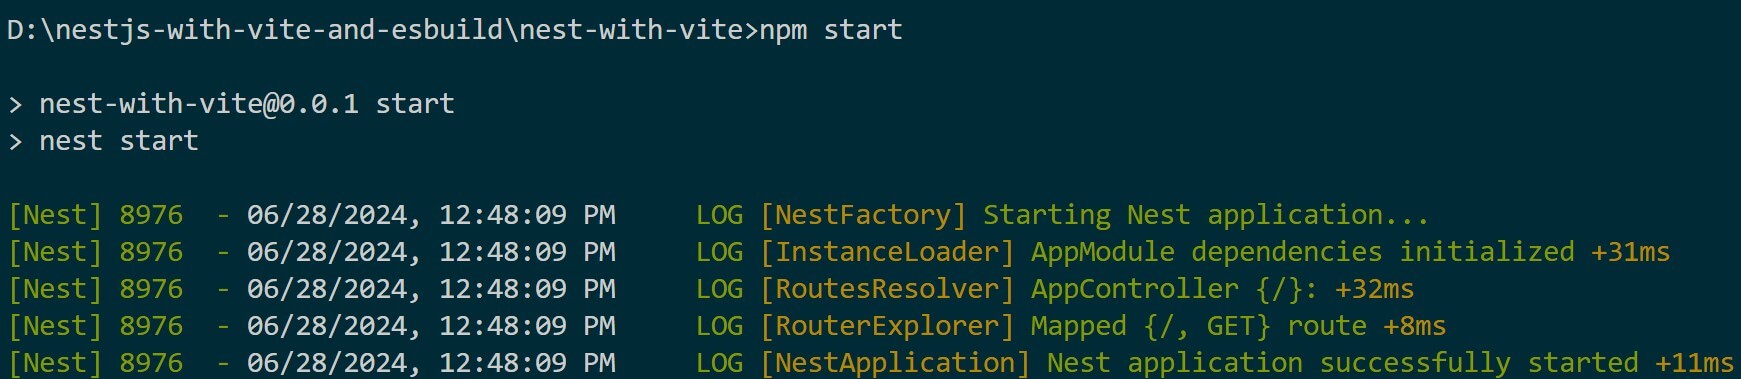
You can test this boilerplate using the following command:
npm start
Finally, navigate to the http://localhost:3000/ in your browser and you should get a Nest.js Hello World!
Step Two: Adding Vite to Nest.js
Vite works as a plugin. You are using it within the backed of Nest.js. Its experience is mainly on front-end web projects. This means you scaffold a whole front-end app with Vite ready and working. To Integrate Vite and esbuild with Nest.js, you will need to install these plugins manually.
First, use the following vite plugins and make them as development dependencies as such:
npm install vite vite-plugin-node -D
Within your nest-with-vite folder, create a vite.config.ts file with Vite configurations as follows:
import { defineConfig } from 'vite';
import { VitePluginNode } from 'vite-plugin-node';

export default defineConfig({
 server: {
    // vite server
 port: 3000,
 },
 plugins: [
    ...VitePluginNode({
 adapter: 'nest',
 appPath: './src/main.ts',
 tsCompiler: 'esbuild',
 }),
 ],
 optimizeDeps: {
    // Note
    // Vite has known problems with optional dependencies
    // Ignore them as such
 exclude: [
      '@nestjs/websockets',
      'class-transformer',
      'class-validator',
      'fastify-swagger',
      'cache-manager',
      '@nestjs/microservices',
 ],
 },
});
The next focus in the Nest.js entry point is at main.ts. Here Vite will look for the viteNodeApp of your exportName on your vite.config.ts file. Go to the /src/main.ts file and add the following line:
export const viteNodeApp = NestFactory.create(AppModule);
Note: Nest.js and Vite have a known problem. The Nest.js socket module has been reported to not work with Vite yet.
Step Three: Adding Vite and Nest.js Running Scripts
You will need an npm script to start the Nest.js Vite server. Go to the package.json file add add the npm run dev command within the scripts section as follows:
"dev": "vite"
The npm run dev command will run the app. To build it add the npm run build command in the same package.json file as such:
"build": "vite build"
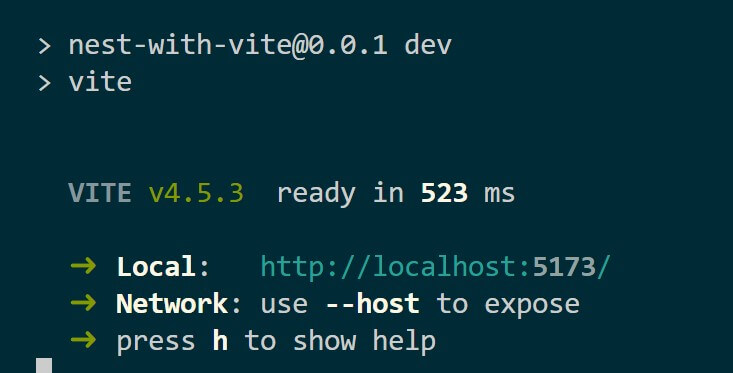
Step Four: Testing Nest.js with Vite and esbuild
Your Nest.js app should be ready at this point. First, test if Vite is working using the npm run dev command. Vite should be ready:
At the same time, ensure the expected results of your test suites work:
npm run test

And for production reasons, you will need a highly optimized build for its environment. Use Vite to build Nest.js and not the default "build": "nest build",. You will get a highly optimized build for production:
npm run build
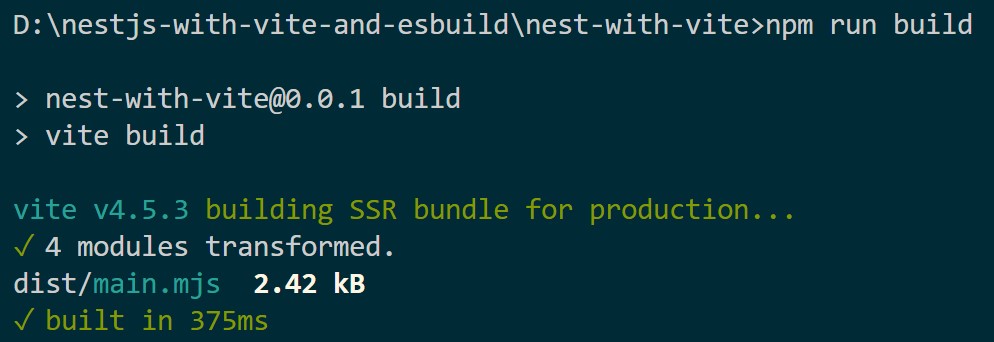
It’s here Vite will use esbuild under the hood to run TypeScript to JavaScript. You will then use tsCompiler: 'esbuild', if the Vite configurations. This will add fast transpilation and Vite will then give you an optimized build.
Conclusion
That’s the end of this journey. The strengths of Vite and esbuild are adding modern features to Nest.js. I hope you can now take full advantage of the latest advancements in JavaScript and TypeScript tooling.
Written By: