How to Create Nest.js MySQL CRUD API Without ORM
Posted April 30, 2024

This post guides you through creating Nest.js CRUD APIs with MySQL without using an ORM. You can use Nest.js to set up the MySQL database connection without ORMs. Along the way, you will add modules and implement CRUD operations.
ORM makes your database operations much easier. However, it’s not a bad option to explore how Nest.js natively accesses MySQL to run queries without an ORM abstraction. This tutorial lets you have full control over your codebase and the barebones of Nest.js.
Ready? Dive into this guide and learn how to create Nest.js APIs with MySQL and without ORM like a Pro.
Why use Nest.js and MySQL Without ORM
You are using Nest.js and MySQL without an Object-Relational Mapping (ORM) library like TypeORM or Sequelize. I would use this setup because I get:
- Direct SQL queries that are more performant.
- Without an ORM, you have full control over your database interactions.
- Working directly with SQL deepens your understanding of how databases work with SQL.
At the same time, this setup has its limitations such as:
- Writing raw SQL queries means writing more boilerplate code for CRUD operations.
- Your code becomes less portable across different database systems.
- You are responsible for handling tasks such as connection, query building, and data mapping manually.
- Raw SQL queries increase the risk of SQL injection vulnerabilities.
Prerequisites
This is a step-by-step guide. Ensure:
- Node.js and npm are installed.
- Install MySQL Server on your machine.
- If you prefer to use Docker for running MySQL and phpMyAdmin, have Docker Desktop ready.
Creating Nest.js and MySQL App Without ORM
To set up your Nest.js and MySQL App Without ORM project, Nest.js CLI must be installed globally on your machine. Use the following command to get ready:
npm i -g @nestjs/cli
Now, head to your working directory and create your Nest.js app as such:
nest new nestjs-mysql-without-orm
To access the new app, change the directory and let your terminal point to this new directory:
cd nestjs-mysql-without-orm
You are creating a MySQL Nest.js app without ORM. This means the only package you need is a driver to access MySQL. You will go ahead and install the following MySQL2 package:
npm i mysql2
How to set up MySQL database with Nest.js
You will need to have your MySQL database ready and live. Your MySQL server will host a database to which Nest.js will create a connection. In your MySQL setup ensure you have:
        host: 'localhost',
        user: 'your_username',
        password: 'your_password',
        database: 'task',
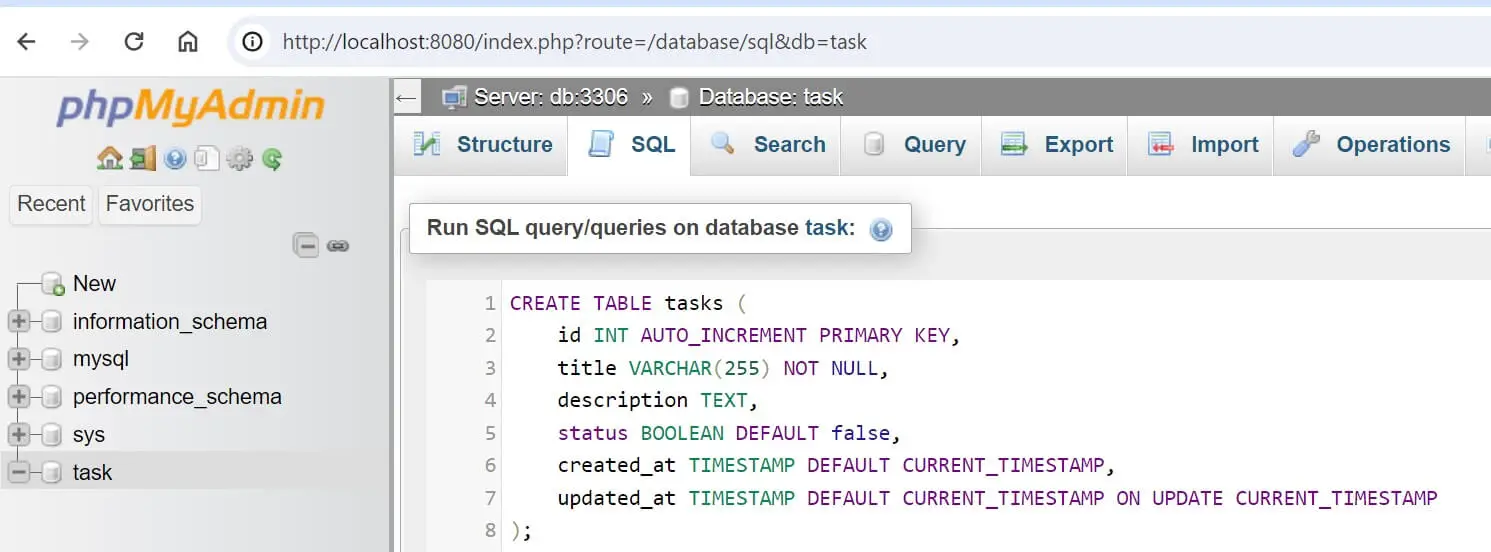
For this example, you will use a task database. Create a task and go ahead and add your tasks database using the following query:
CREATE TABLE tasks (
    id INT AUTO_INCREMENT PRIMARY KEY,
    title VARCHAR(255) NOT NULL,
    description TEXT,
    status BOOLEAN DEFAULT false,
    created_at TIMESTAMP DEFAULT CURRENT_TIMESTAMP,
    updated_at TIMESTAMP DEFAULT CURRENT_TIMESTAMP ON UPDATE CURRENT_TIMESTAMP
);
Set up MySQL with Docker
If you don’t have a working MySQL server installed, worry not. Get your Docker ready and create a docker-compose.yml file to spin a MySQL container as follows:
version: '3.8'
services:
  # MySQL service
  mysql:
    image: mysql:8.3
    restart: always
    environment:
    # Root password for MySQL
      MYSQL_ROOT_PASSWORD: your_root_password
      # Name of the database to be created
      MYSQL_DATABASE: your_database_name
      # Username for MySQL user
      MYSQL_USER: your_username
      # Password for MySQL user
      MYSQL_PASSWORD: your_password
      # Mapping MySQL port
    ports:
      - 3306:3306

  # phpMyAdmin service
  phpmyadmin:
    image: phpmyadmin/phpmyadmin
    # Mapping phpMyAdmin port
    ports:
      - 8080:80
    environment:
    # MySQL hostname
      - PMA_HOST=mysql
      # MySQL port
      - PMA_PORT=3306
To be able to access a MySQL server GUI, I added phpmyadmin admin. This makes it easier to manage your database. Once ready, run the following command to get your database up and running:
docker-compose up --build -d

Open http://localhost:8080/ to access MySQL with phpmyadmin.
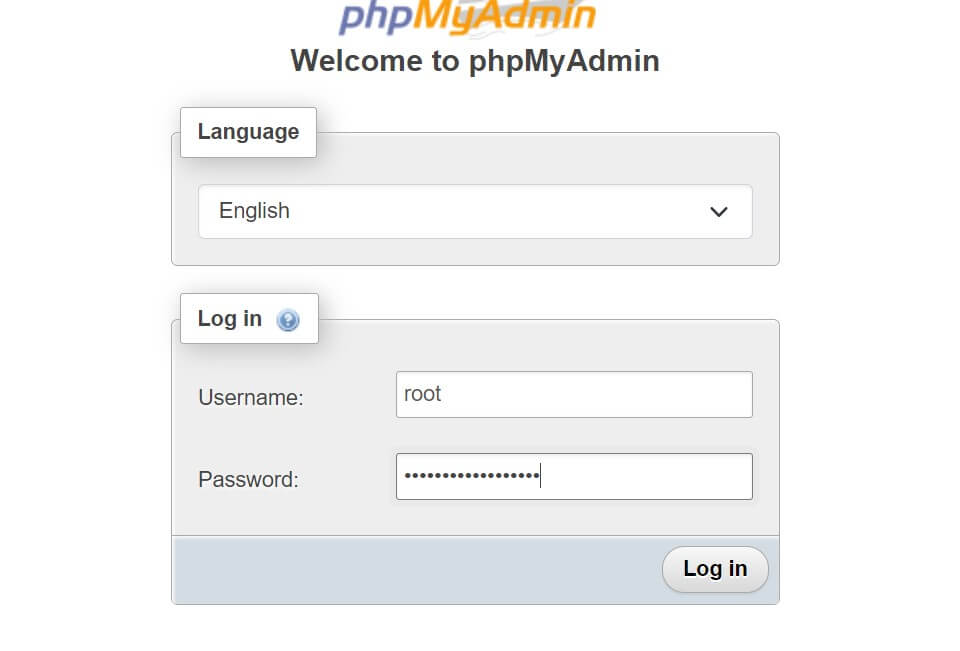
In this case, use root as the username and the password based on MYSQL_ROOT_PASSWORD: your_root_password. So you add the value of your_root_password. You should have the task database ready. Add your tasks SQL query to create your table:
Creating MySQL Nest.js DB Connection Without ORM
The above MySQL will be needed to create a connection on Nest.js without an ORM. ORM has template codes that let you add details to your MySQL database. We don’t have one here. This means you will create a MySQL database connection from scratch.
However, you installed a mysql2 driver. This should make it easier to access MySQL as it has the createConnection and Connection methods that MySQL needs without using an ORM.
In your src folder create a new database.service.ts file. You will add your database connection as follows:
import { Injectable, Logger } from '@nestjs/common';
import { createConnection, Connection } from 'mysql2/promise';

@Injectable()
export class DatabaseService {
  // Property to hold the connection to MySQL database
  private connection: Connection;
  // Logger instance
  private readonly logger = new Logger(DatabaseService.name);

  // Call the connect method when an instance of DatabaseService is created
  constructor() {
    this.connect();
  }

  private async connect() {
    try {
      // Attempt to create a connection to MySQL
      this.connection = await createConnection({
        host: 'localhost',
        user: 'your_username',
        password: 'your_password',
        database: 'task',
      });
      // Log a message if the connection is successful
      this.logger.log('Connected to MySQL database');
    } catch (error) {
      // Log an error message if the connection fails
      this.logger.error('Error connecting to MySQL database', error.stack);
    }
  }

  getConnection(): Connection {
    // return the connection to MySQL
    return this.connection;
  }
}
In this example:
- The
DatabaseServiceis@Injectable()so it gets injected into other components within the Nest.js. - The constructor method calls the
connect()to establish a connection to the MySQL database. connect()is asynchronous.- The
getConnection()will return the connection to the MySQL that Nest.js will use to perform operations.
Running the MySQL Connection on Nest Without ORM
Remember you don’t have an ORM. This means the connection must be executed at the root of your app and the modules you have. The AppModule will execute DatabaseService when the app runs so the application can have access to a successful MySQL connection.
Go to the app.module.ts file and get the DatabaseService provider ready as such:
// other imports and modules
import { TaskModule } from './task/task.module';
import { DatabaseService } from './database.service';

@Module({
  imports: [TaskModule],
  controllers: [AppController],
  // add the DatabaseService provider
  providers: [AppService, DatabaseService],
})
export class AppModule {}
At the same time, you will use this connection with TaskModule. TaskModule will require access to DatabaseService provider. Edit the src\task\task.module.ts file as follows:
// ensure the other imports are ready
import { DatabaseService } from '../database.service';

@Module({
  // Run the DatabaseService within the module provider
  providers: [TaskService, DatabaseService],
  // task controller
  controllers: [TaskController]
})
export class TaskModule {}
The last thing you need to add to make your database connection complete is a Logger. Note that you have a Logger in your DatabaseService. This lets you log messages based on whether the database connection is successful or not.
Adding and Getting Data from PostgreSQL with Nest.js
You have access to MySQL now. Nest.js will use this setup to carry out your operations. In this first section, let’s use Nest.js to send and get data from your database.
Remember you don’t have an ORM. You will use raw SQL queries with the Nest.js MySQL method to process your data. HTTP requests will be sent based on the methods you execute.
- POST request to add data to the database. Here you will let Nest.js run an INSERT query with a pyload of the items you need saved to MySQL.
- When fetching data, you create a method that reads your database. This way, Nest.js will be able to use GET as the HTTP method to return a request with selected data from your tables. A SELECT query comes in handy.
To make these operations ready, go to the src\task\task.service.ts file:
- Inject the DatabaseService to access the connection to MySQL.
getAllTaskswith SELECT from the tasks table.createTaskthat gets a JSON payload and saves the data with INSERT.
Your file should look as follows:
// src/task/task.service.ts
import { Injectable } from '@nestjs/common';
import { DatabaseService } from '../database.service';
import { ResultSetHeader} from 'mysql2/promise'; // Import the necessary types

@Injectable()
export class TaskService {
  constructor(private readonly dbService: DatabaseService) {}

  async getAllTasks() {
    const connection = this.dbService.getConnection();
    const [rows] = await connection.query('SELECT * FROM tasks');
    return rows;
  }

  async createTask(task: any) {
    const connection = this.dbService.getConnection();
    const [result] = await connection.query<ResultSetHeader>('INSERT INTO tasks SET ?', task);
    return { id: result.insertId, ...task };
  }
}
Running Nest.js Controllers
Controllers are the endpoints to the different methods you have created above. Controllers will map the method to their respective HTTP methods. For example createTask adds an item. Nest.js must mapp this method with a POST method and an endpoint that will be used to add a payload of the item in question.
You will b=navigate to the src\task\task.controller.ts file and create your endpoints as follows:
// src/task/task.controller.ts

import { Controller, Get, Post, Put, Delete, Param, Body } from '@nestjs/common';
import { TaskService } from './task.service';

@Controller('tasks')
export class TaskController {
  constructor(private readonly taskService: TaskService) {}

  @Get()
  getAllTasks() {
    return this.taskService.getAllTasks();
  }

  @Post()
  createTask(@Body() task: any) {
    return this.taskService.createTask(task);
  }
}
Running the Nest.js MySQL API Without ORM
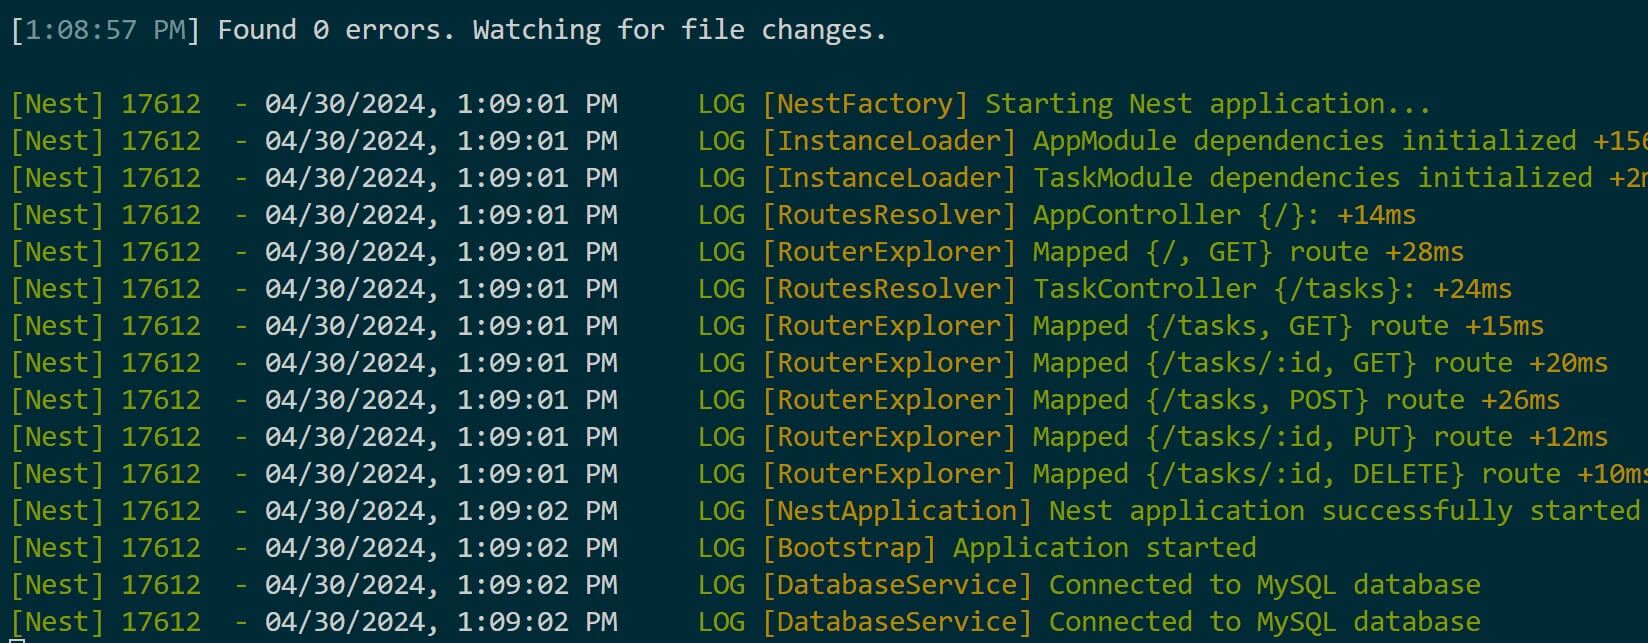
You are almost there. First, let’s test if the API works up to this point. You will use the following command to run your app:
npm run start:dev
At this point, you should be able to know if Nest.js is Connected to the MySQL database or Not. If the connection is working, your API is working as expected.
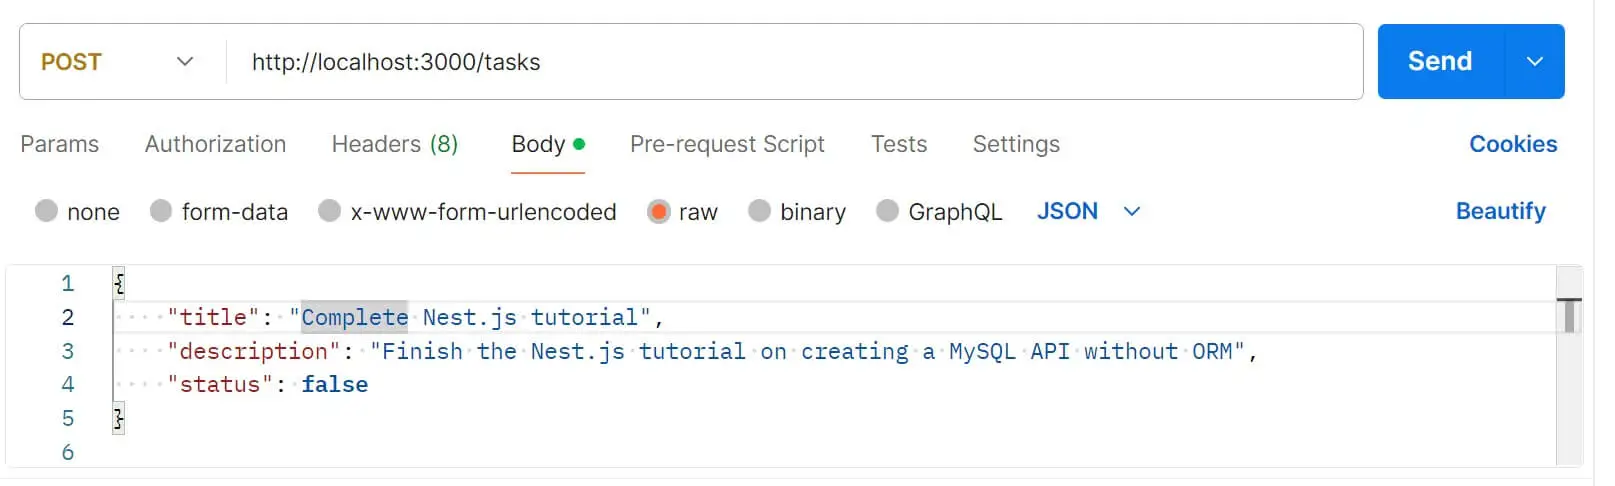
You will use REST clients such as Postman to send a POST request to http://localhost:3000/tasks as follows:
- Open Postman
- Create a New Request.
- Set the request method to POST and enter the URL
http://localhost:3000/tasks. - Click on the “Body” tab below the URL input field, then select “raw” and choose JSON as the format. Now, you can enter the JSON data for the task you want to create. For example:
{
    "title": "Complete Nest.js tutorial",
    "description": "Finish the Nest.js tutorial on creating a MySQL API without ORM",
    "status": false
}
The same should work with cURL commands:
curl --location 'http://localhost:3000/tasks' \
--header 'Content-Type: application/json' \
--data '{
    "title": "Test new feature",
    "description": "Perform thorough testing of the new feature to ensure its functionality",
    "status": false
}'
Send your Request and the new task should be added to the database as such:

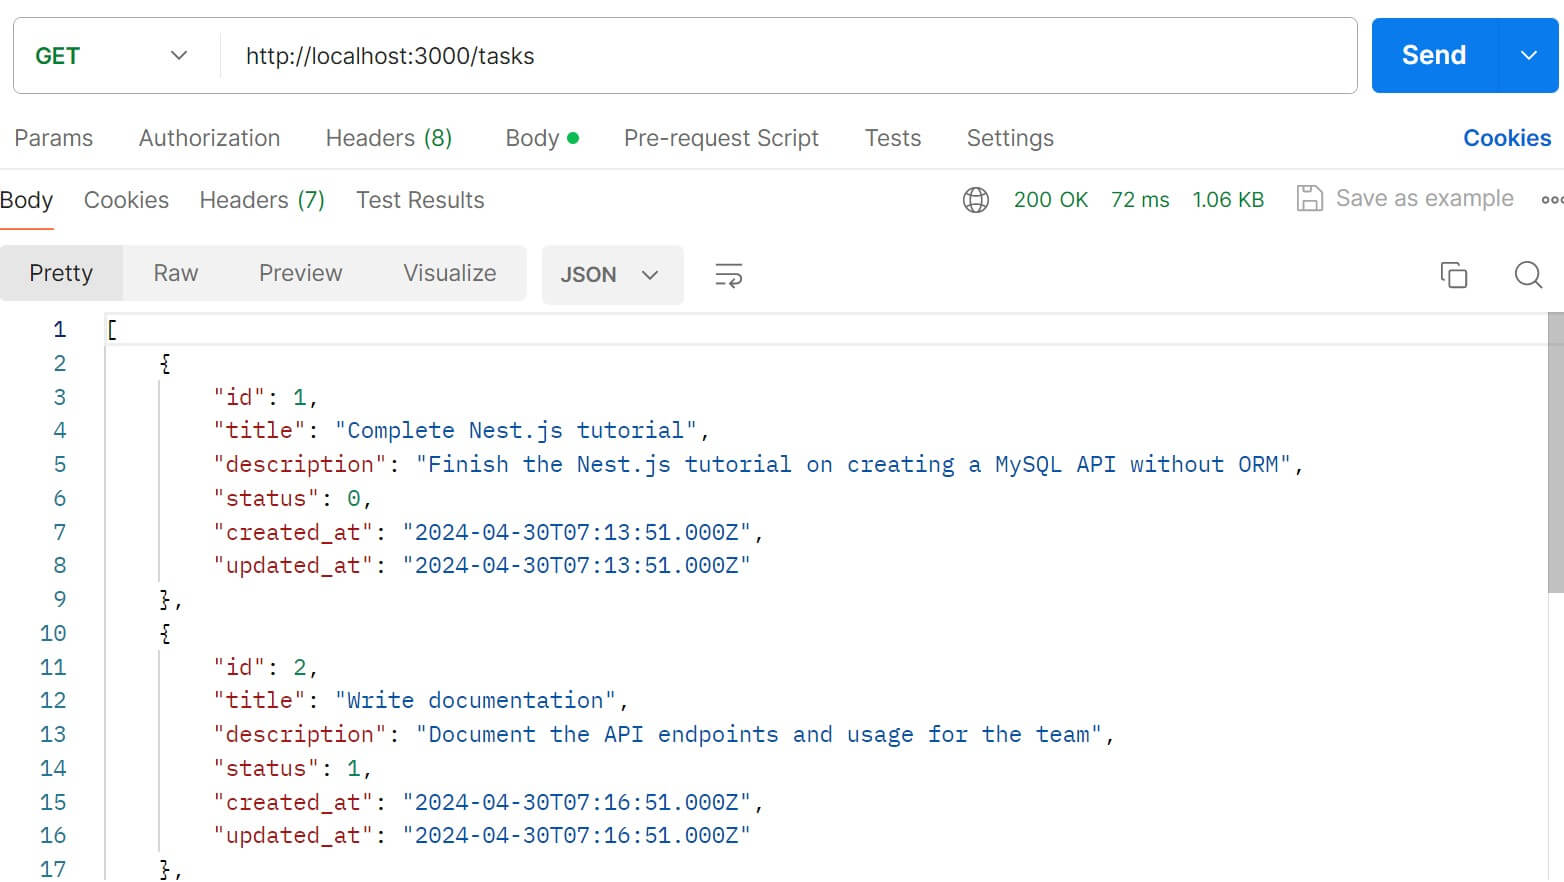
Finally, test if GET can execute SELECT requests to http://localhost:3000/tasks:
Updating and Deleting MySQL Data with Parameterized Endpoints
Each added item is unique. This means HTTP methods such as Delete and Put must be executed to a single item. This is where you create a Parameterized query with an ID of the item using a WHERE clause. You will:
- Use a specific ID to SELECT a single item.
- Update items where the ID of a given item is Parameterized to the REST Endpoint.
- Delete items using the record ID.
You will add the following methods in your src\task\task.service.ts file:
// src/task/task.service.ts
  async getTaskById(id: number) {
    const connection = this.dbService.getConnection();
    const [rows] = await connection.query('SELECT * FROM tasks WHERE id = ?', [id]);
    return rows[0];
  }

  async updateTask(id: number, task: any) {
    const connection = this.dbService.getConnection();
    await connection.query('UPDATE tasks SET ? WHERE id = ?', [task, id]);
    return { id, ...task };
  }

  async deleteTask(id: number) {
    const connection = this.dbService.getConnection();
    await connection.query('DELETE FROM tasks WHERE id = ?', [id]);
    return { message: 'Task deleted successfully' };
  }
Each of the created methods will then get mapped to an HTTP method and an Endpoint using the controller in your src\task\task.controller.ts file:
  @Get(':id')
  getTaskById(@Param('id') id: number) {
    return this.taskService.getTaskById(id);
  }

  @Put(':id')
  updateTask(@Param('id') id: number, @Body() task: any) {
    return this.taskService.updateTask(id, task);
  }

  @Delete(':id')
  deleteTask(@Param('id') id: number) {
    return this.taskService.deleteTask(id);
  }
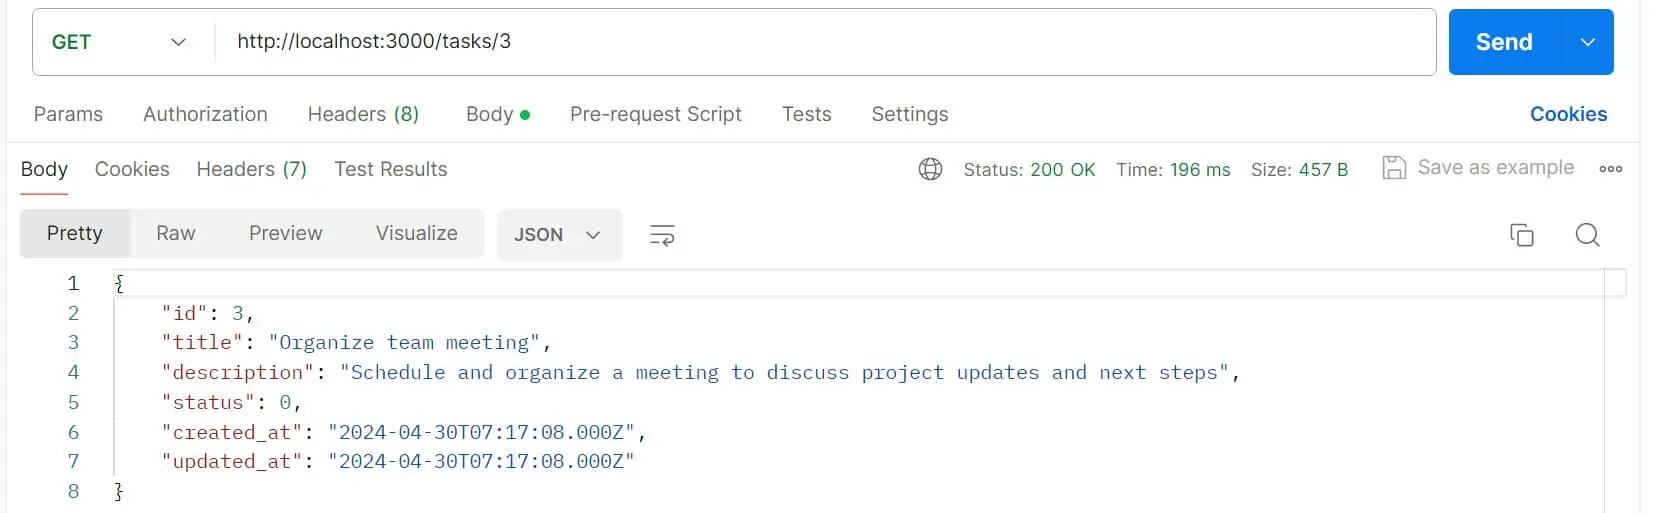
Your endpoint for these methods will include a parameter to the URL. For example to SELECT an item with id 3, the endpoint will be http://localhost:3000/tasks/3:
Conclusion
That’s all for this guide and I hope you can now Create Nest.js MySQL API Without ORM. You have CRUD (Create, Read, Update, Delete) operations and your Nest.js API works without using an ORM for MySQL.
If you love to use an ORM such as TypeORM, the following guide will be perfect for you:
Written By: