Create Node.js App with Sequelize ORM and SQLite Database
Posted February 1, 2024

Sequelize ORM supports almost every SQL/relation-related database. This way, you create Node.js apps and use Express to execute database operations. Now, the SQLite database allows you to use Sequelize ORM alongside Node.js. This way, you don’t need to install a database on your computer.
SQLite is a file database, and Sequelize supports it. You use Sequelize with Node.js and create a connection to SQLite3. Sequelize will rewire a path to auto-create your database. Sequelize will run the SQLite3 package and create a .sqlite file Node.js to manage your API.
In this example tutorial, you will learn how to set up Sequelize ORM with SQLite. You will use Node.js to run Sequelize and let Sequelize handle all SQLite database-related operations. You will learn:
- To create SQLite database with Sequelize ORM.
- Creating SQLite database connection with Sequelize.
- How to model SQLite database using Sequelize models.
- Creating a CRUD API using Sequelize, Node.js, Express, and SQLite.
Ready? Dive and Create a Node.js App with Sequelize ORM and SQLite Database.
What you Need to Run Sequelize with SQLite3 Database
Before running the code, ensure you have:
- Node.js runtime installed in your computer
- SQLite is SQL-related, the same as Sequelize. Ensure you have a background working with SQL databases
Related:
Creating Node.js with Sequelize ORM and SQLite
You need a working application. Create one using the following command:
npm init -y
Once Node.js is ready, Sequelize and SQLite3 packages must be installed. You will need the following dependencies:
- Express - A fast, unopinionated, minimalist web framework for Node.js. It uses Node.js to build scalable server-side APIs
- Sequelize - An ORM library for Node.js to interact with relational databases such as SQLite. It abstracts SQL queries with JavaScript
- SQLite3 - An sqlite3 is a Node.js driver for SQLite. It has asynchronous and synchronous APIs to create connections to SQLite databases and execute SQL queries and ORM (Sequelize) statements.
Use the following command to install the above packages:
npm install express sequelize sqlite3
Adding SQLite Database Connection with Sequelize ORM and Node.js
The first step is ensuring Sequelize can use Node.js and initialize an SQLite database using the SQLite3 package. You need two main arguments to create an SQLite database connection:
dialect- The type of database you are using, and in this case, it’s SQLite. The Sequelize ORM will use a set dialect to SQLite and generate SQL statements compatible with SQLitestorage- Indicates the file path where Sequelize ORM will create the SQLite database file. SQLite is a serverless, self-contained database engine. You must let Sequelize initialize a database file, as SQL databases are typically stored in single files.
Go ahead and create a db.js file and create an SQLite Sequelize connection as follows:
const { Sequelize } = require('sequelize');

// Connect to SQLite database
const sequelize = new Sequelize({
  dialect: 'sqlite',
  storage: 'database.sqlite',
});

// Export the Sequelize instance
module.exports = sequelize;
Sequelize will create a database.sqlite file on your working directory and connect to SQLite based on this example.
Creating SQLite database Model using Sequelize ORM
A Model definition represents database tables and relationships. Here, you will create a Sequelize ORM, a model specifically representing an SQLite table in the database.
Sequelize Model will be your SQLite database blueprint. Sequelize follows an ORM pattern. The database operations use JavaScript objects and methods instead of raw SQL queries.
Let’s dive in and create a Model with Sequelize. You will create a product example to learn how Sequelize works with SQLite. Then create a model.js file as follows:
const { DataTypes } = require('sequelize');
const sequelize = require('./db');

// Define a model for the 'products' table
const Product = sequelize.define('Product', {
  name: {
    type: DataTypes.STRING,
    allowNull: false,
  },
  price: {
    type: DataTypes.FLOAT,
    allowNull: false,
  },
  description: {
    type: DataTypes.TEXT,
    allowNull: true,
  },
});

// Export the Product model
module.exports = Product;
Here:
- Sequelize will access the SQLite database connection file.
- It will use the above model to represent a product table with the
database.sqlitefile.
Creating Sequelize SQLite CRUD with Node.js and Express
At this point, Sequelize has access to SQLite. Now, you can use this setup to carry out different database operations. Let’s assume we want to create a CRUD API.
You are using Sequelize. This means you can use raw SQL queries to interact with SQLite. Sequelize abstracts them and use Node.js class to implement different operations.
Node.js will use a controller to define the method you need Sequelize to access the server. Create a controllers.js file and import your product model. Below is a simple example of creating/adding a new product to SQLite:
//controllers.js
const Product = require('./model');

// for creating a new product
// Controller for creating a new product
exports.createProduct = async (req, res) => {
  try {
    const { name, price, description } = req.body;
    const product = await Product.create({ name, price, description });
    res.json({ message: 'Product created successfully', product });
  } catch (error) {
    console.error(error);
    res.status(500).send('Internal Server Error');
  }
};
This code has a createProduct function. It accesses the Product model to let Sequelize know which fields to use when adding a new product. To make sure the item is added to SQLite, Sequelize will use the create() method to save your operation.
How to Fetch Items from SQLite using Sequelize ORM with Node.js
Like any database, you want to Fetch data from SQLite. When using Sequelize, you utilize findAll() method as follows:
//controllers.js
// getting all products
exports.getAllProducts = async (req, res) => {
  try {
    const products = await Product.findAll();
    res.json(products);
  } catch (error) {
    console.error(error);
    res.status(500).send('Internal Server Error');
  }
};
However, if you want Sequelize to fetch a single item from the SQLite database, findAll() won’t work. Your Sequelize model creates id values, the primary key to your specific table. This means Sequelize MUST use findByPk() while you pass the id as an argument as follows:
// Controller for getting a product by ID
exports.getProductById = async (req, res) => {
  try {
    const productId = req.params.id;
    const product = await Product.findByPk(productId);
    if (!product) {
      res.status(404).send('Product not found');
    } else {
      res.json(product);
    }
  } catch (error) {
    console.error(error);
    res.status(500).send('Internal Server Error');
  }
};
Updating and Deleting Items from SQLite with Sequelize
Update your controllers.js code and allow Sequelize to delete or update items as follows:
// updating a product
exports.updateProductById = async (req, res) => {
  try {
    const productId = req.params.id;
    const { name, price, description } = req.body;
    const product = await Product.findByPk(productId);
    if (!product) {
      res.status(404).send('Product not found');
    } else {
      product.name = name;
      product.price = price;
      product.description = description;
      await product.save();
      res.json({ message: 'Product updated successfully', product });
    }
  } catch (error) {
    console.error(error);
    res.status(500).send('Internal Server Error');
  }
};

// deleting a product by ID
exports.deleteProductById = async (req, res) => {
  try {
    const productId = req.params.id;
    const product = await Product.findByPk(productId);
    if (!product) {
      res.status(404).send('Product not found');
    } else {
      await product.destroy();
      res.send('Product deleted successfully');
    }
  } catch (error) {
    console.error(error);
    res.status(500).send('Internal Server Error');
  }
};
Note that to update an SQLite database item:
- Sequelize uses
findByPkto check if the item you want to update exists on SQLite. - You will then send a PUT request with the updated payload of the item.
- Sequelize must then use
save()to update the changes. - The same
findByPkmethod applies when deleting an item. However, let Sequelize usedestroy()so that it knows this item is being deleted from SQLite.
Creating Routes and Sequelize SQLite Server
Routes will map the above methods to the respective HTTP method using Express. Create a routes.js file and add them as follows:
const express = require("express");
const { createProduct, getAllProducts, getProductById, updateProductById, deleteProductById} = require("./controllers");

const router = express.Router();

router.route("/products")
    // Create a new product
    .get(getAllProducts)
    // Get all products
    .post(createProduct);
router.route("/products/:id")
    // Get a product by ID
    .get(getProductById)
    // Update a product by ID
    .put(updateProductById)
    // Delete a product by ID
    .delete(deleteProductById)
// Export the router
module.exports = router;
You will then need to create an index.js file and set up the Node.js Express server as follows:
const express = require('express');
const sequelize = require('./db');
const productRoutes = require('./routes');

const app = express();
const PORT = process.env.PORT || 3000;

// Sync the model with the database
sequelize.sync().then(() => {
  console.log('Database synchronized');
});

app.use(express.json());

// Use product routes
app.use(productRoutes);

// Start the server
app.listen(PORT, () => {
  console.log(`Server is running on http://localhost:${PORT}`);
});
Note that you must sequelize.sync() here. It will allow Express to access the database connection, run Sequelize, and initialize your SQLite data.
Running and Testing the Server
Finally, run the following command to get your server ready:
node index.js
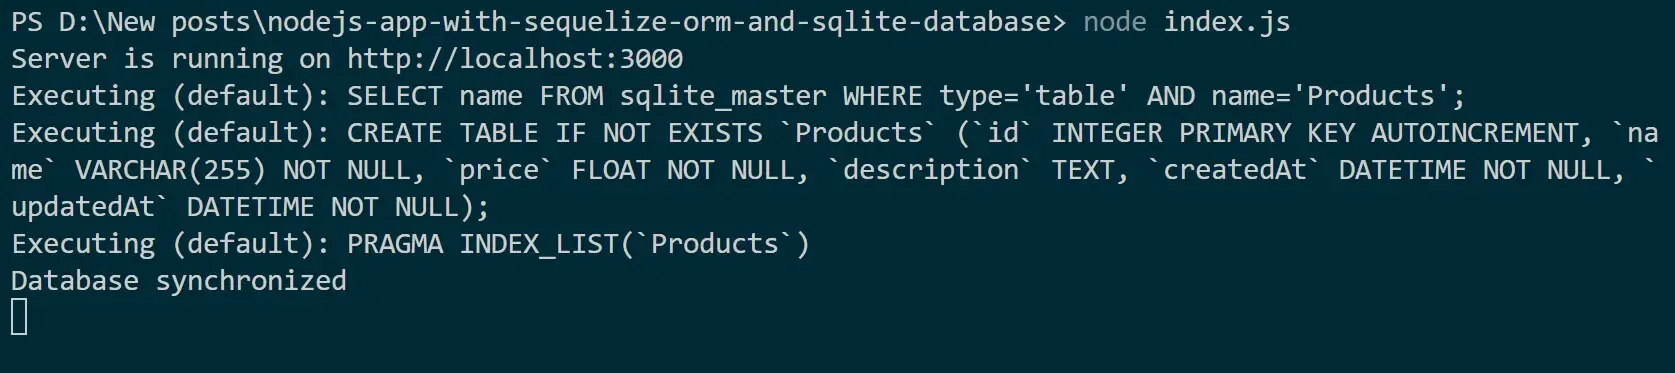
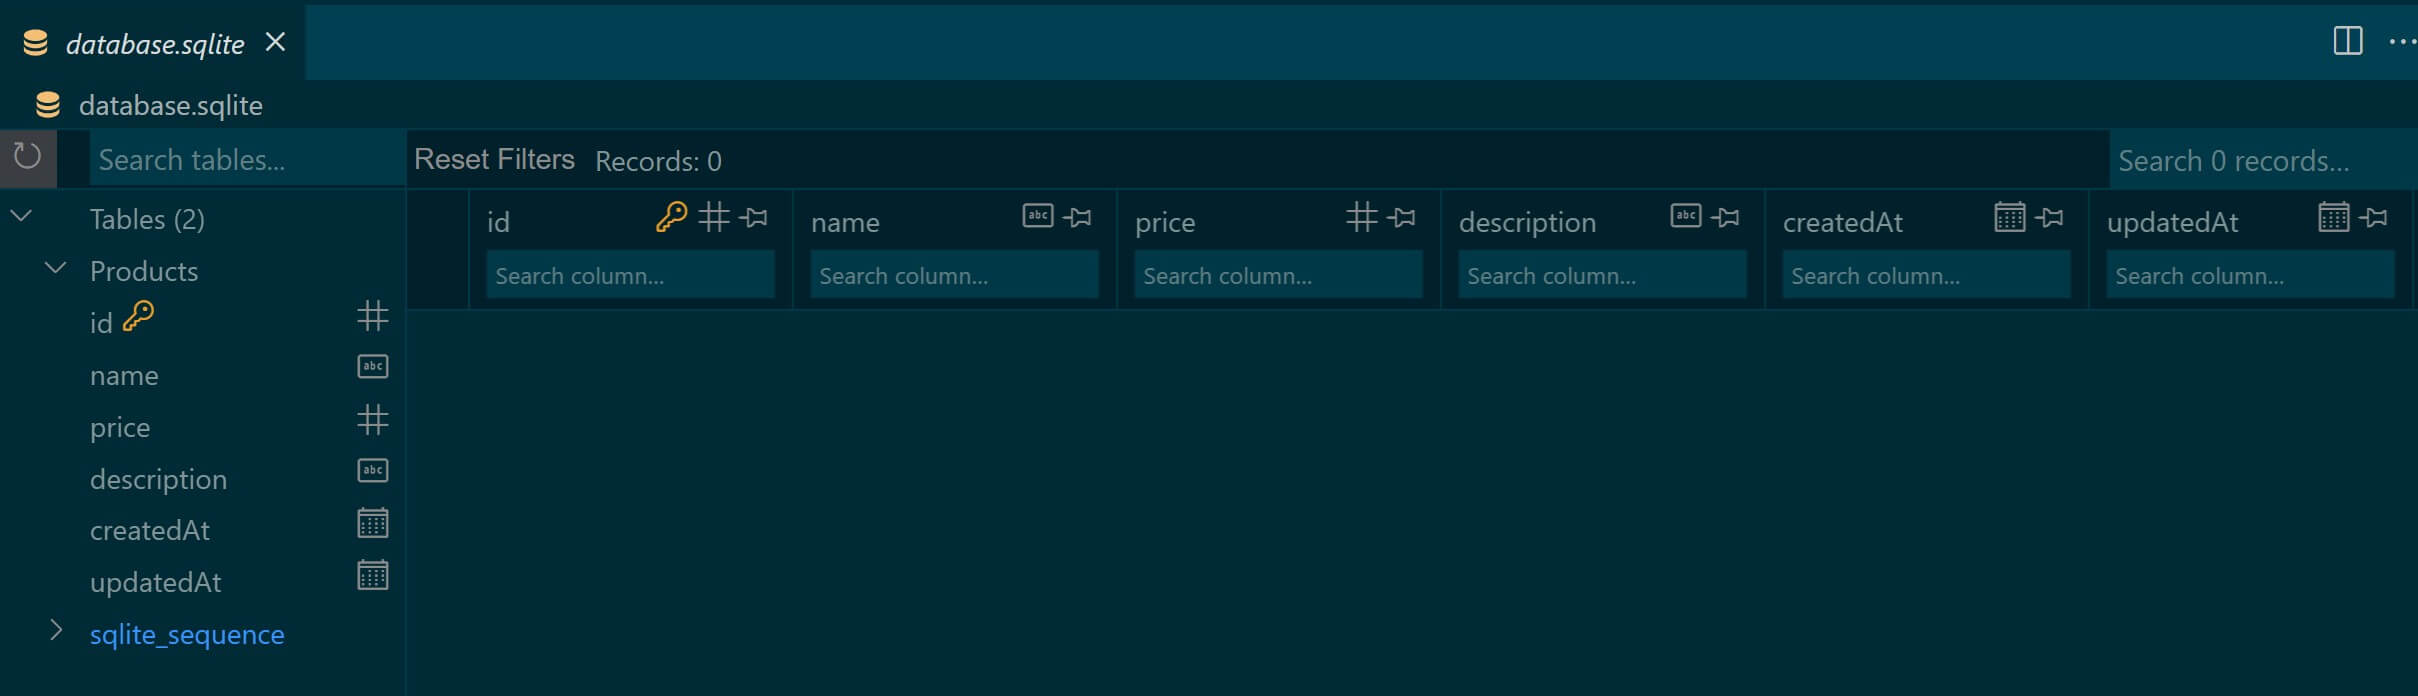
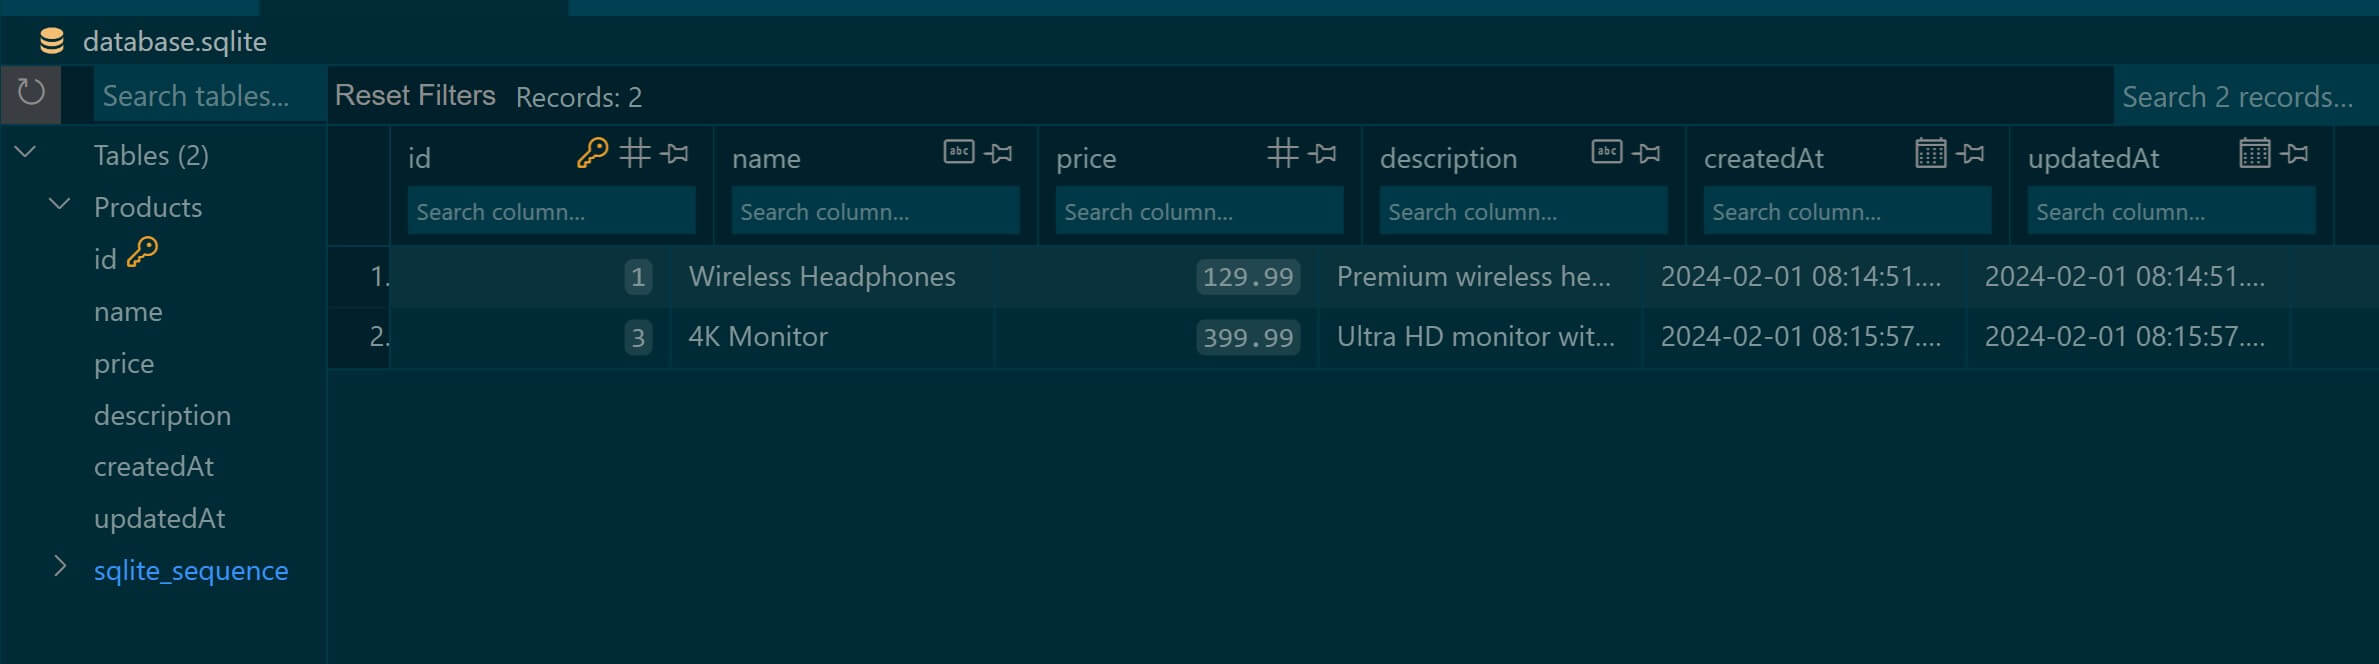
You should, at this point, have database.sqlite. Open it. Here, I’m using SQLite VS code viewer Extention as follows:
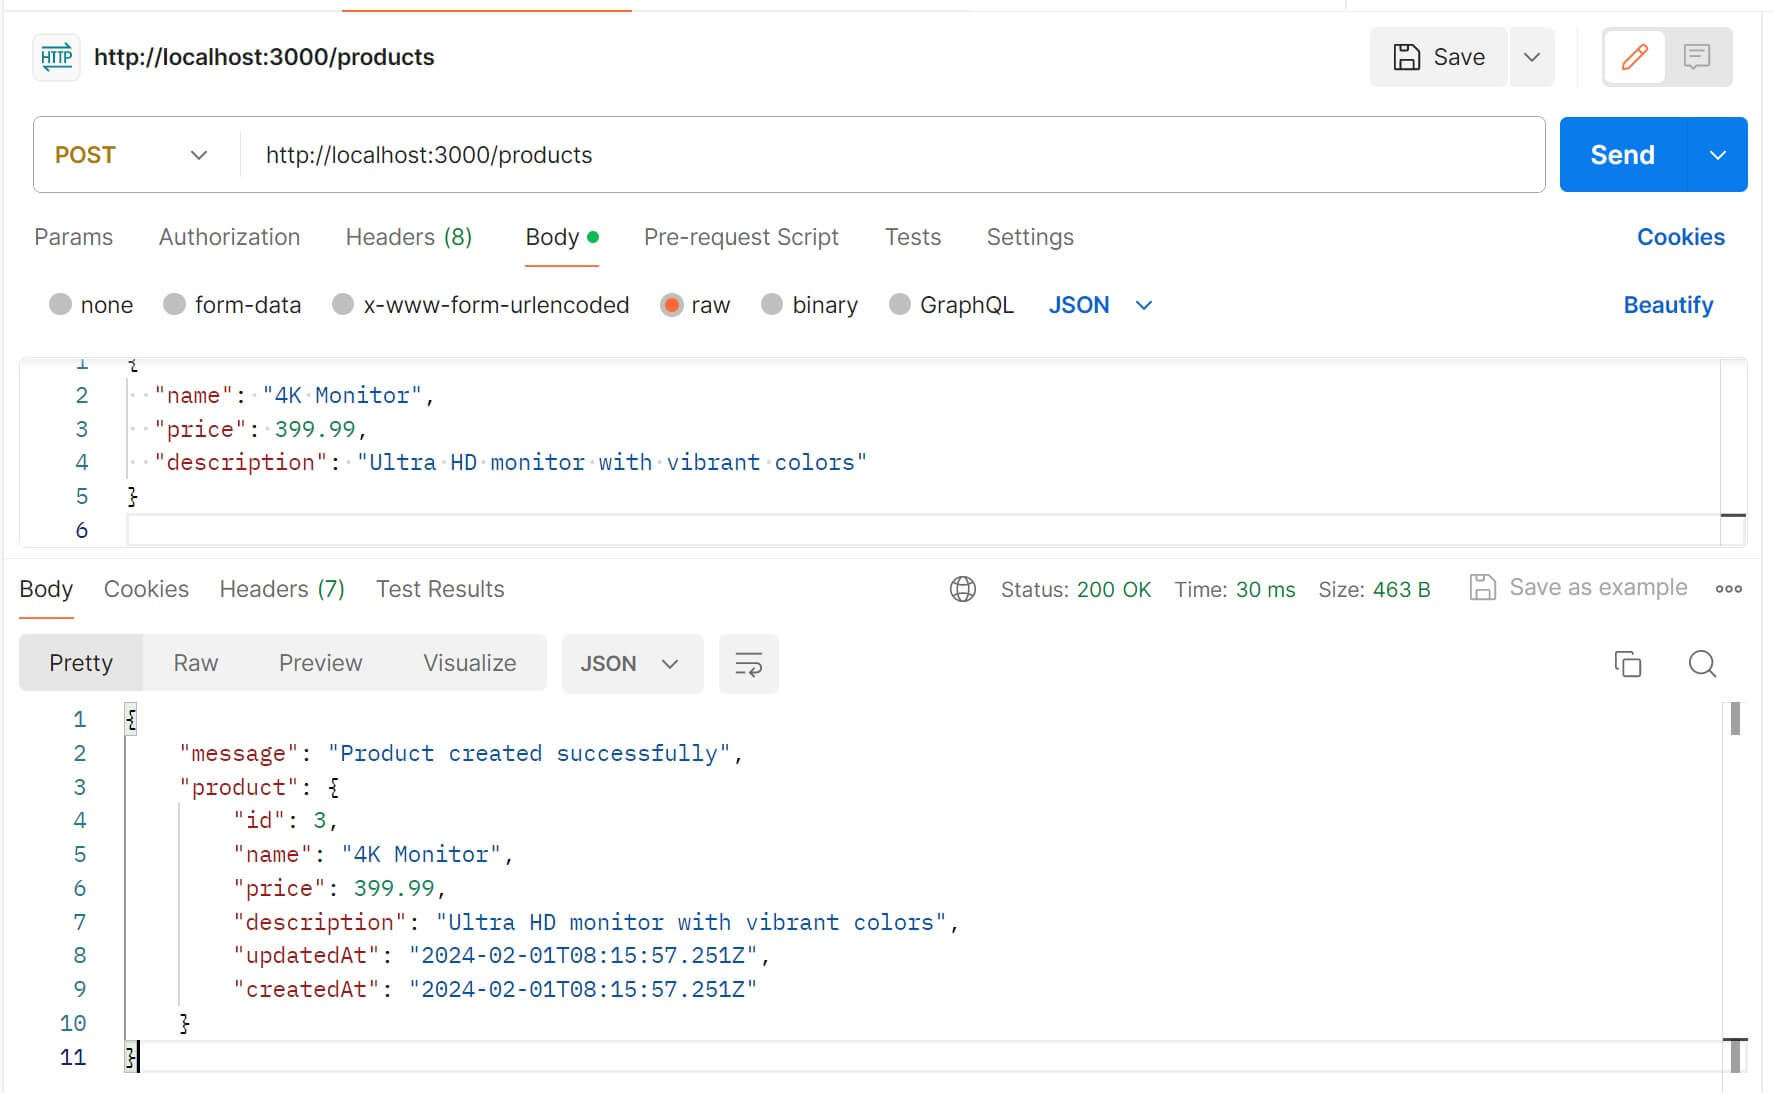
It’s time to add new items. Go to Postman and send a POST request using the following raw JSON to http://localhost:3000/products:
{
  "name": "4K Monitor",
  "price": 399.99,
  "description": "Ultra HD monitor with vibrant colors"
}
Go to the SQLite database again and check if Sequelize has made these changes:
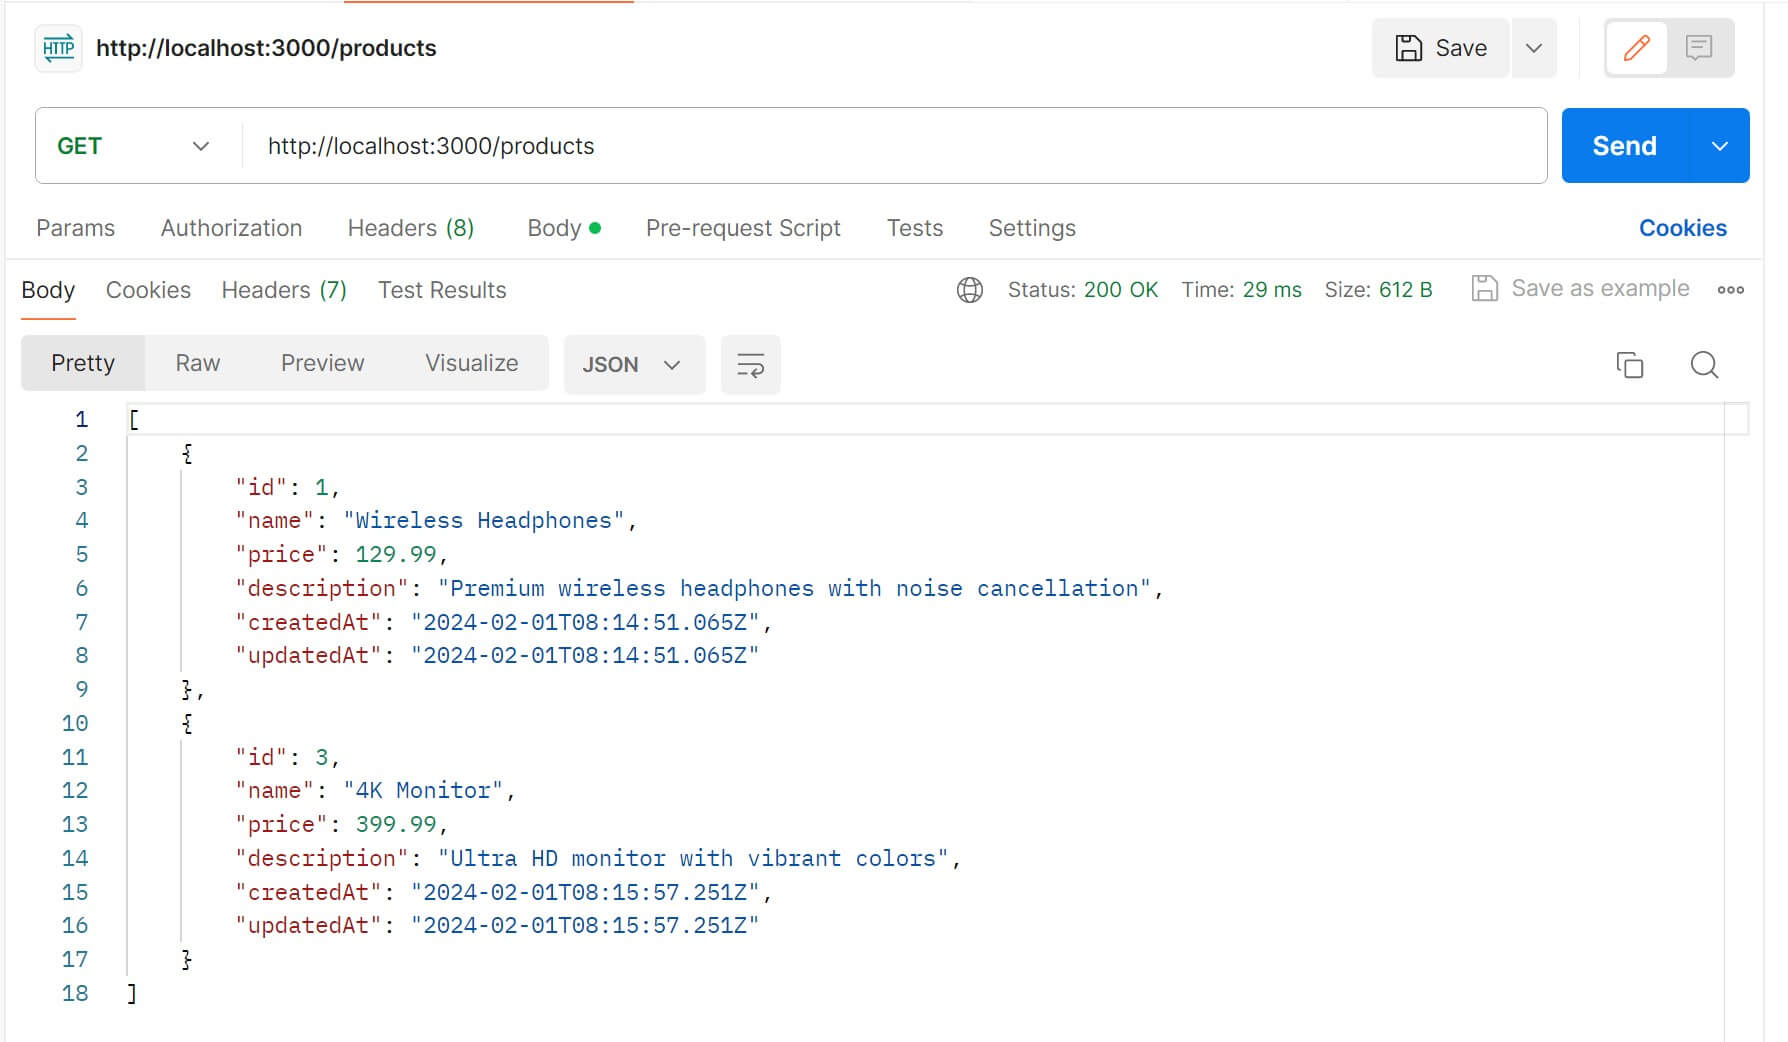
Now send a GET request to confirm the same on Postman:
Go ahead and test the PUT and Delete methods as such.
Conclusion
Along this guide, you have learned:
- To create SQLite database with Sequelize ORM.
- Creating SQLite database connection with Sequelize.
- How to model SQLite database using Sequelize models.
- Creating a CRUD API using Sequelize, Node.js, Express, and SQLite.
Written By: