Host WordPress on AWS EC2 Ubuntu AMI with SSL Domain Name
Posted September 22, 2023

Learn how to install, set up, and deploy WordPress on Amazon EC2. You’ll create a Linux/Ubuntu Instance and Apache to run WordPress with your Domain name.
Why use WordPress on AWS EC2 Ubuntu Approach
I’m sure you have used Bitnami to create your WordPress site on AWS EC2. However, I have a problem with this approach:
- WordPress is installed with default settings.
- Normal Bitnami works well on light sites. It might be challenging to scale for high-traffic loads.
Related: Boost WP Speed with Redis Object Cache Plugin for WordPress
- Resources are likely to persistently creep up even with a good-sized database and light traffic.
These are to name a few problems. Keep reading and deploy your WordPress hassle-free!
Why Create AWS EC2 Ubuntu Instance from Scratch
Bitnami WordPress uses Apache, so if your WordPress site gets extremely busy, you should set up an Ubuntu EC2 instance and install Apache and WordPress.
And so, I decided to set up WordPress from scratch and do it the traditional way. Just like you would do on your local machine. But now, with advanced and optimized tools to run on production.
Dive into this guide and:
- Create an Amazon EC2 Ubuntu (Linux) Instance to deploy your WordPress blog.
- Add WordPress database management system.
- Configure the Apache server for your WordPress site.
- Add and access WordPress with your Domain name.
- Configure Domain certificate SSL so your site can have secure connections.
Setting up WordPress AWS EC2 Ubuntu AMI Instance
Sign in to your AWS account and launch a new EC2 instance using an Ubuntu server as follows:
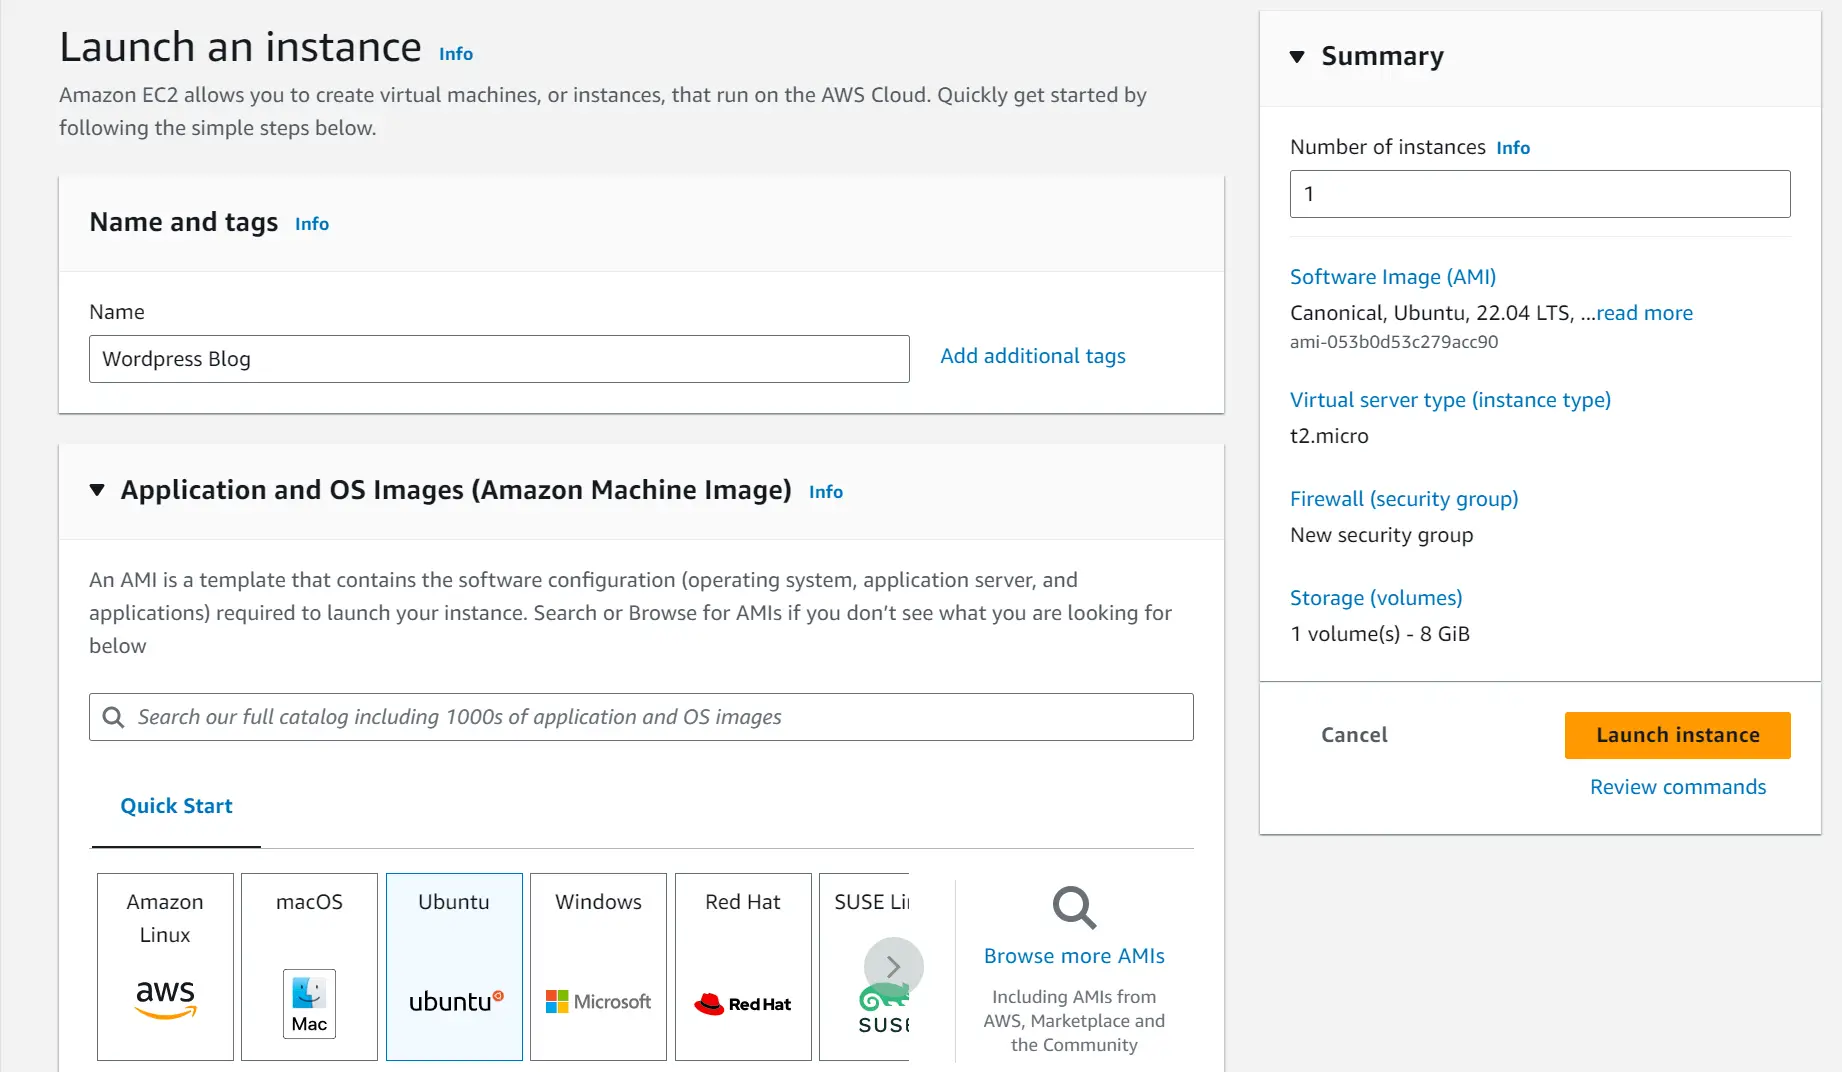
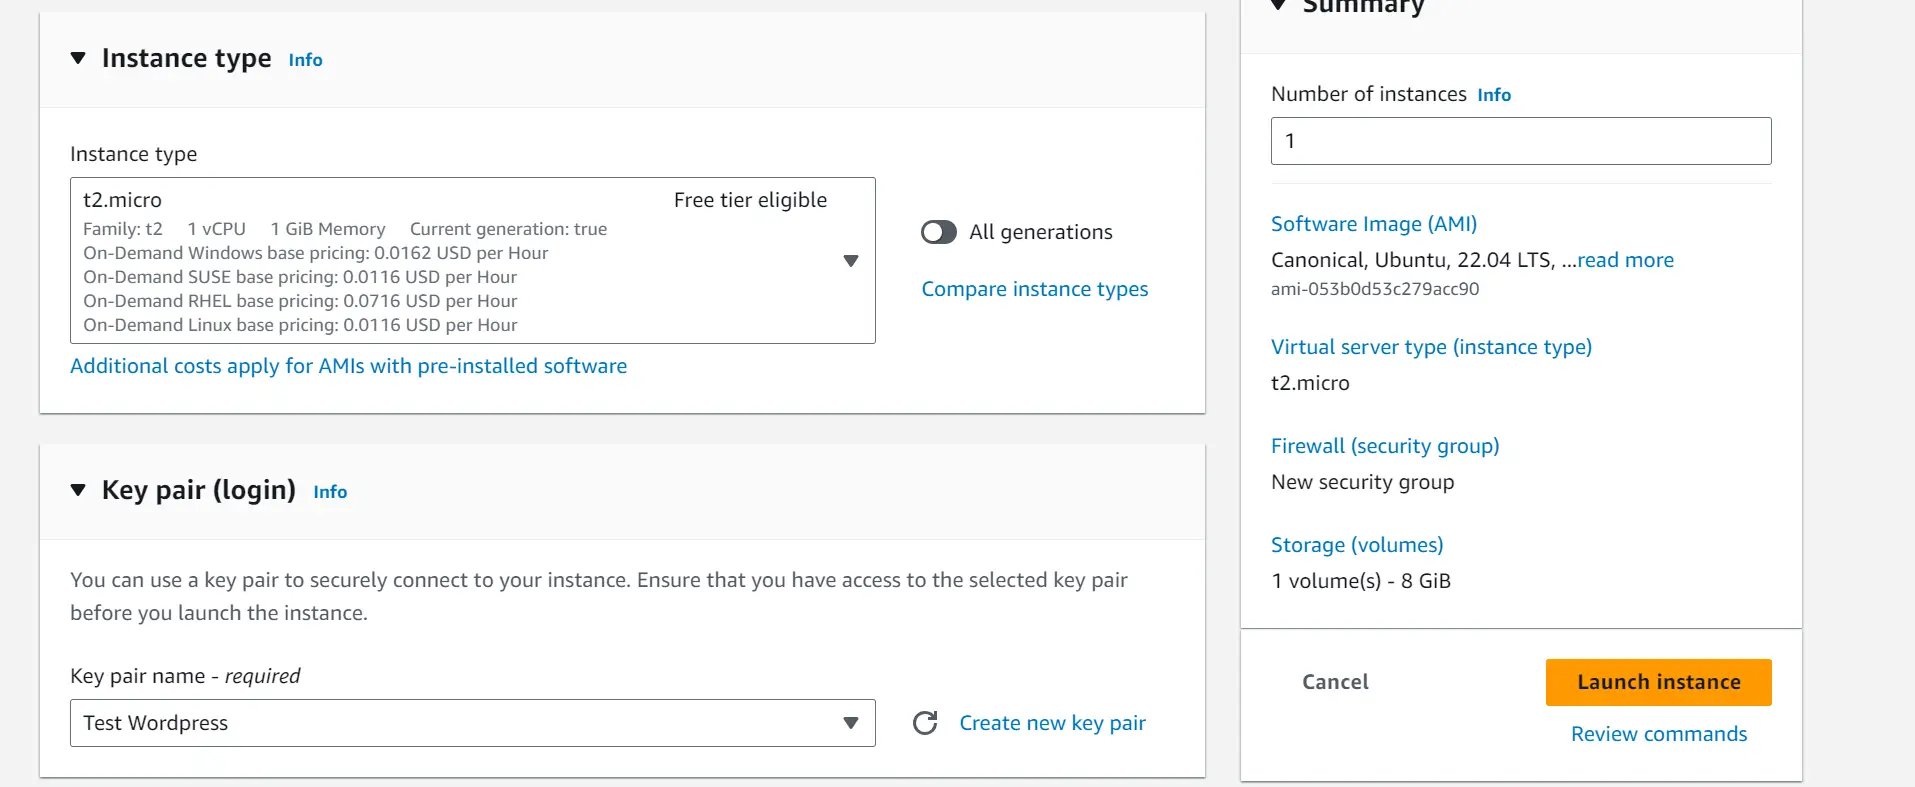
You can keep your Instance Free tier Eligible or select an AMI template with higher resources if you need to, but keep in mind this will have Additional costs:
At the same time, create a Key pair. You will need to access your Instance outside AWS.
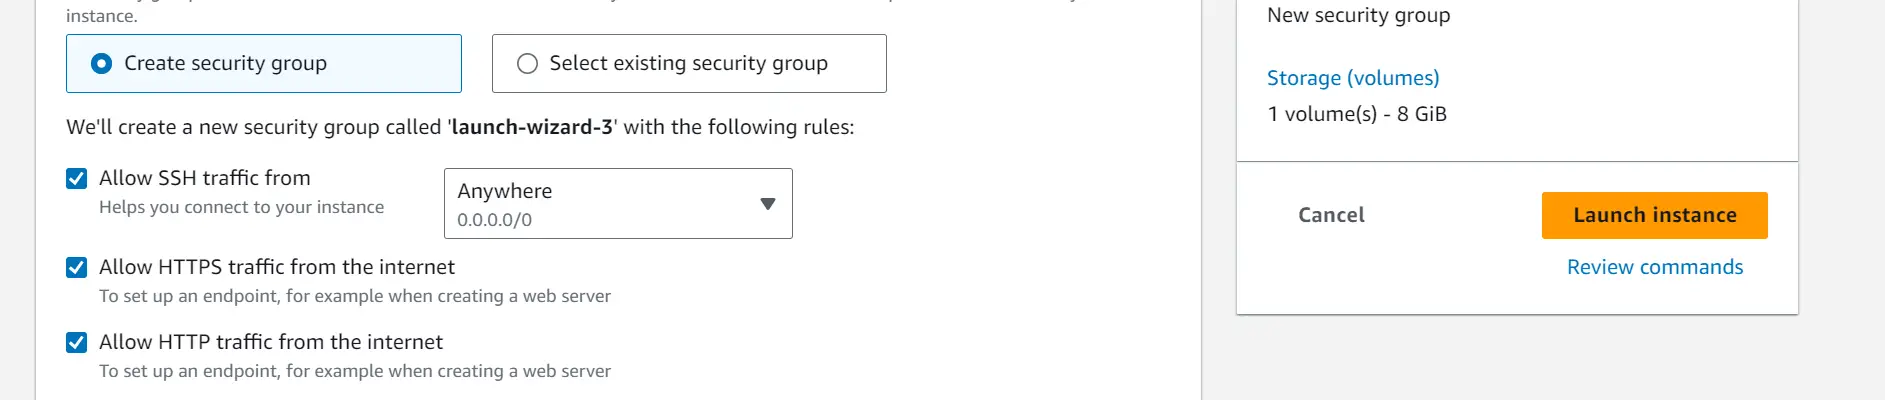
Since you are accessing your WordPress blog on the internet, ensure HTTP and HTTPS traffic are selected as follows:
If need be, you can Configure storage, or this is at default, and WordPress will still work as expected.
Now, Launch instance and your Ubuntu server should be up and running in a few seconds.
Setting up WordPress AWS EC2 Elastic IP
The service you have just created will be accessed using an IP address. Thus, you need to allocate a stable IPV4 address as such. Your AWS EC2 Ubuntu server will access WordPress with the same IP address.
So go to Network & Security, selected Elastic IPs and Allocate Elastic IP address as follows:
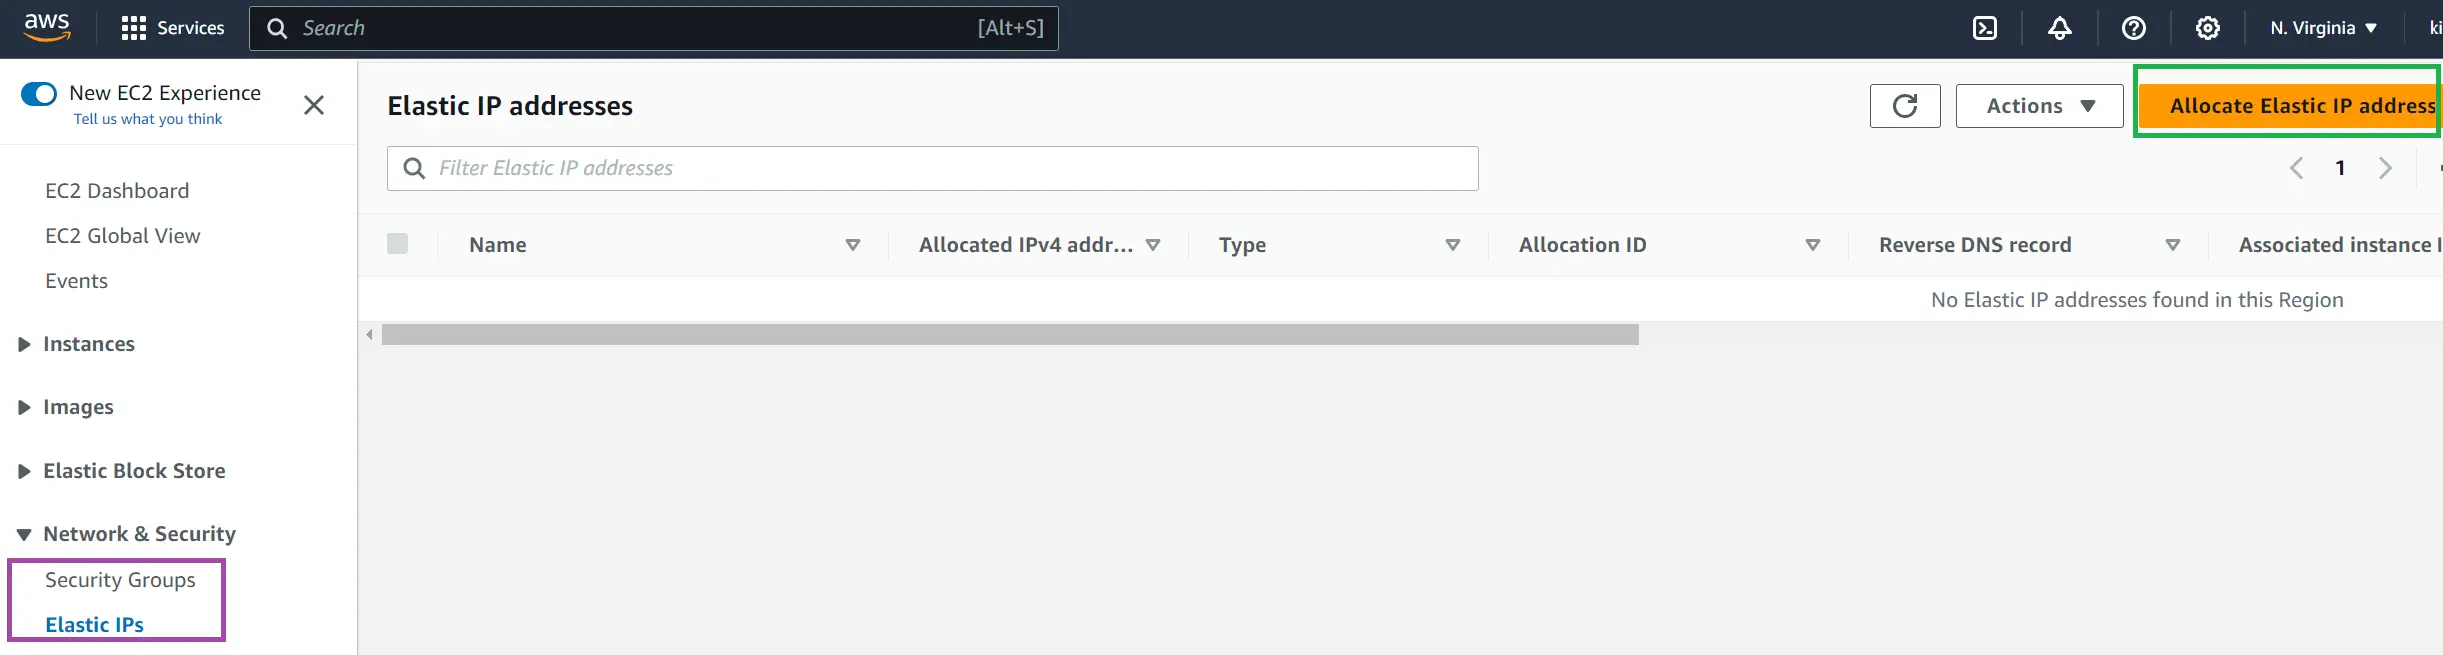
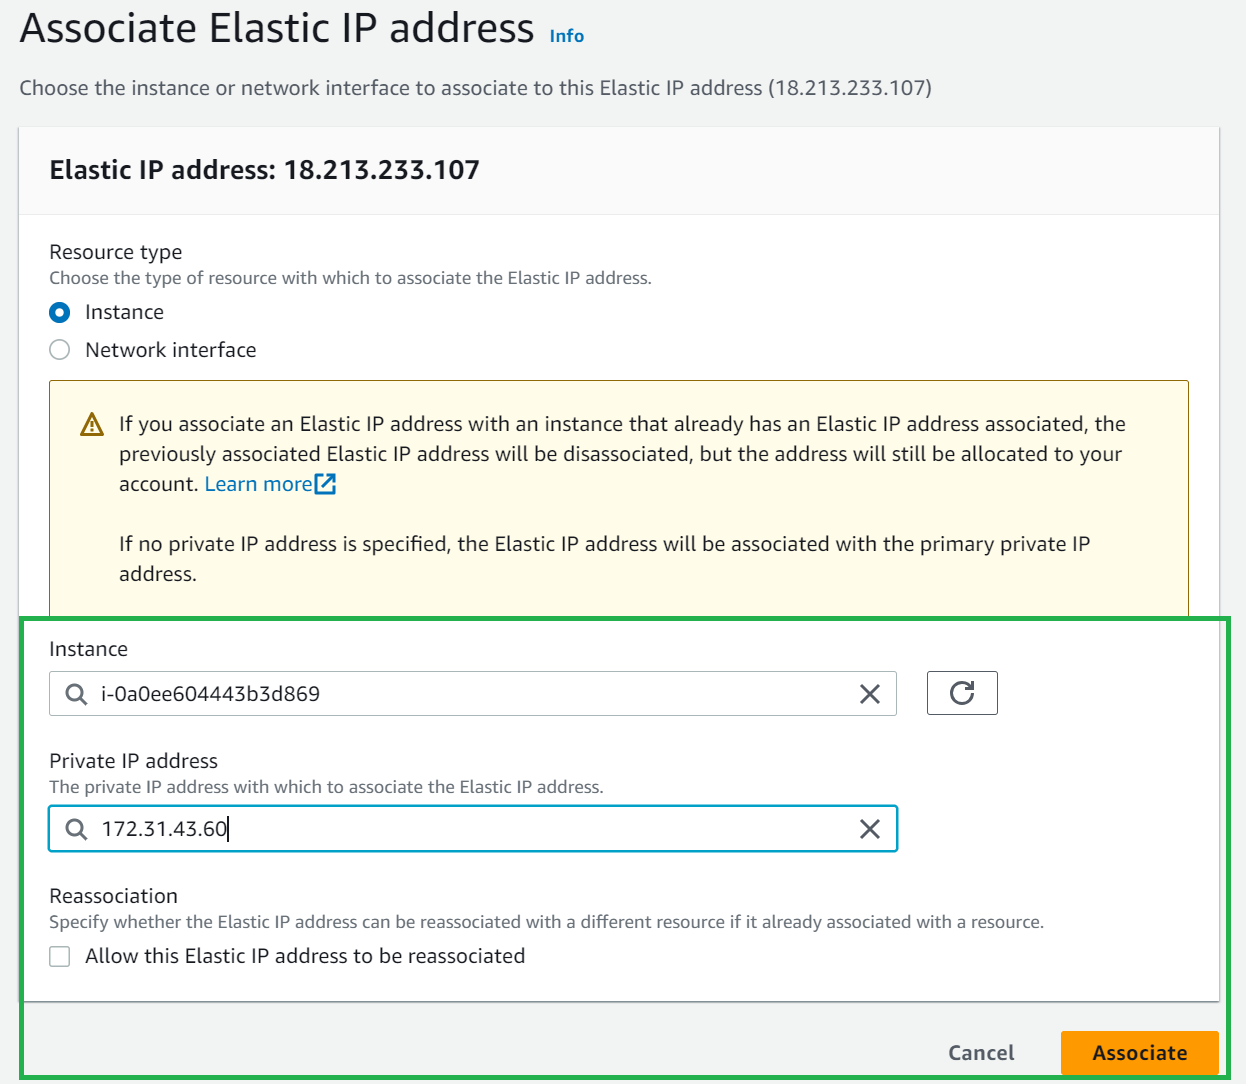
No new setting you need to change here. Just click Allocate, and AWS will generate a unique IPv4 address for your server. However, you need to Associate this Elastic IP address to the instance you created in the previous steps as follows:
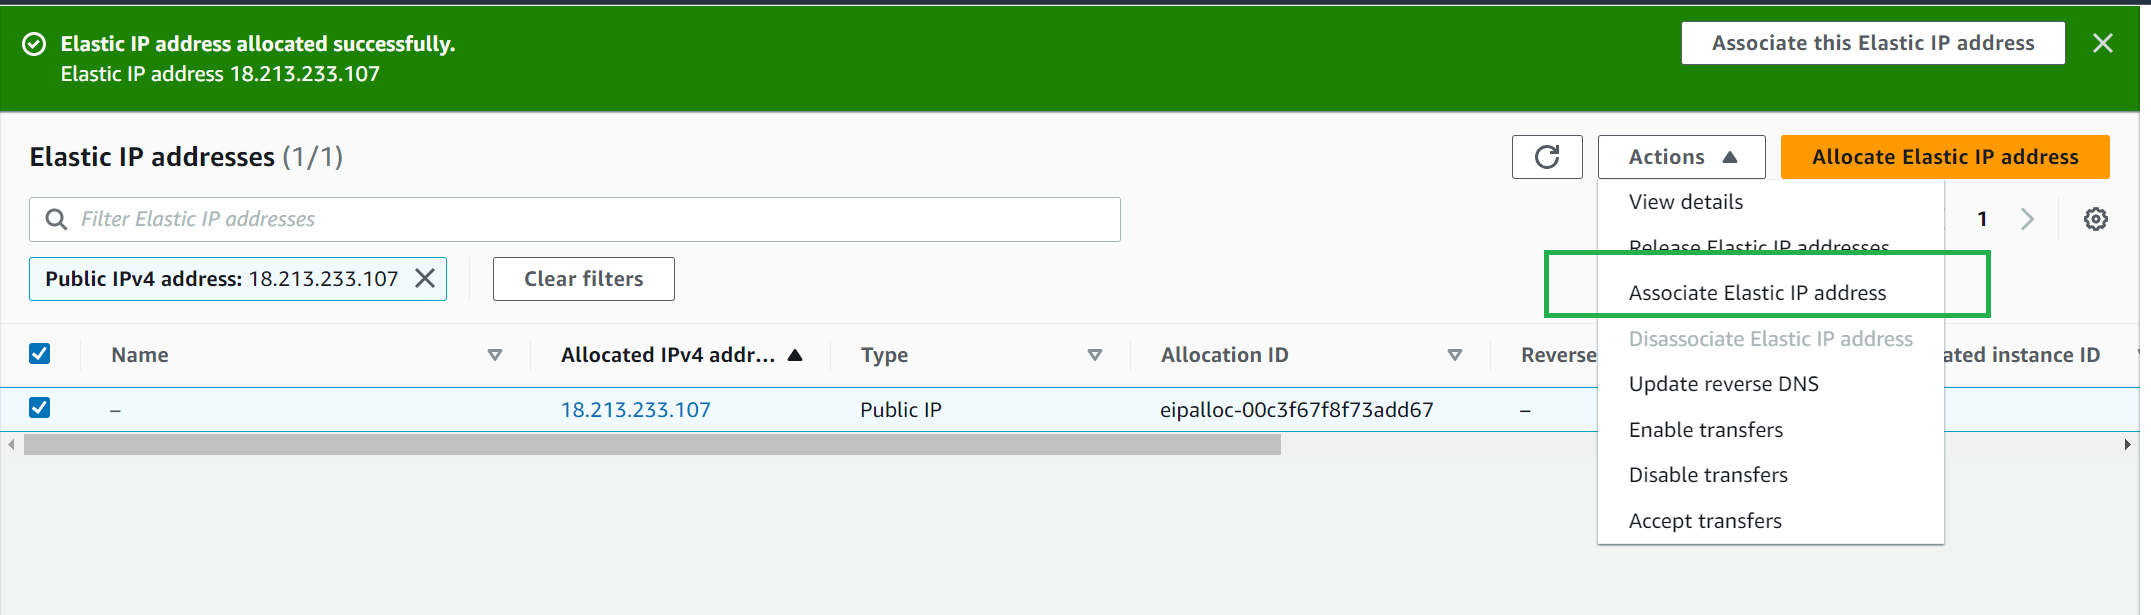
Select your instance and Associate it to this Elastic IP address:
The server is ready and running.

To add WordPress, you must access your instance over SSH. Here, you will use the key you just generated and tools such as Inbuild AWS SSH, putty, and MobaXterm.
The simple way is to run the following command:
ssh -i "Downloads/TestWordpress.pem" [email protected]
In this case "TestWordpress.pem" is the path of your key .pem file:
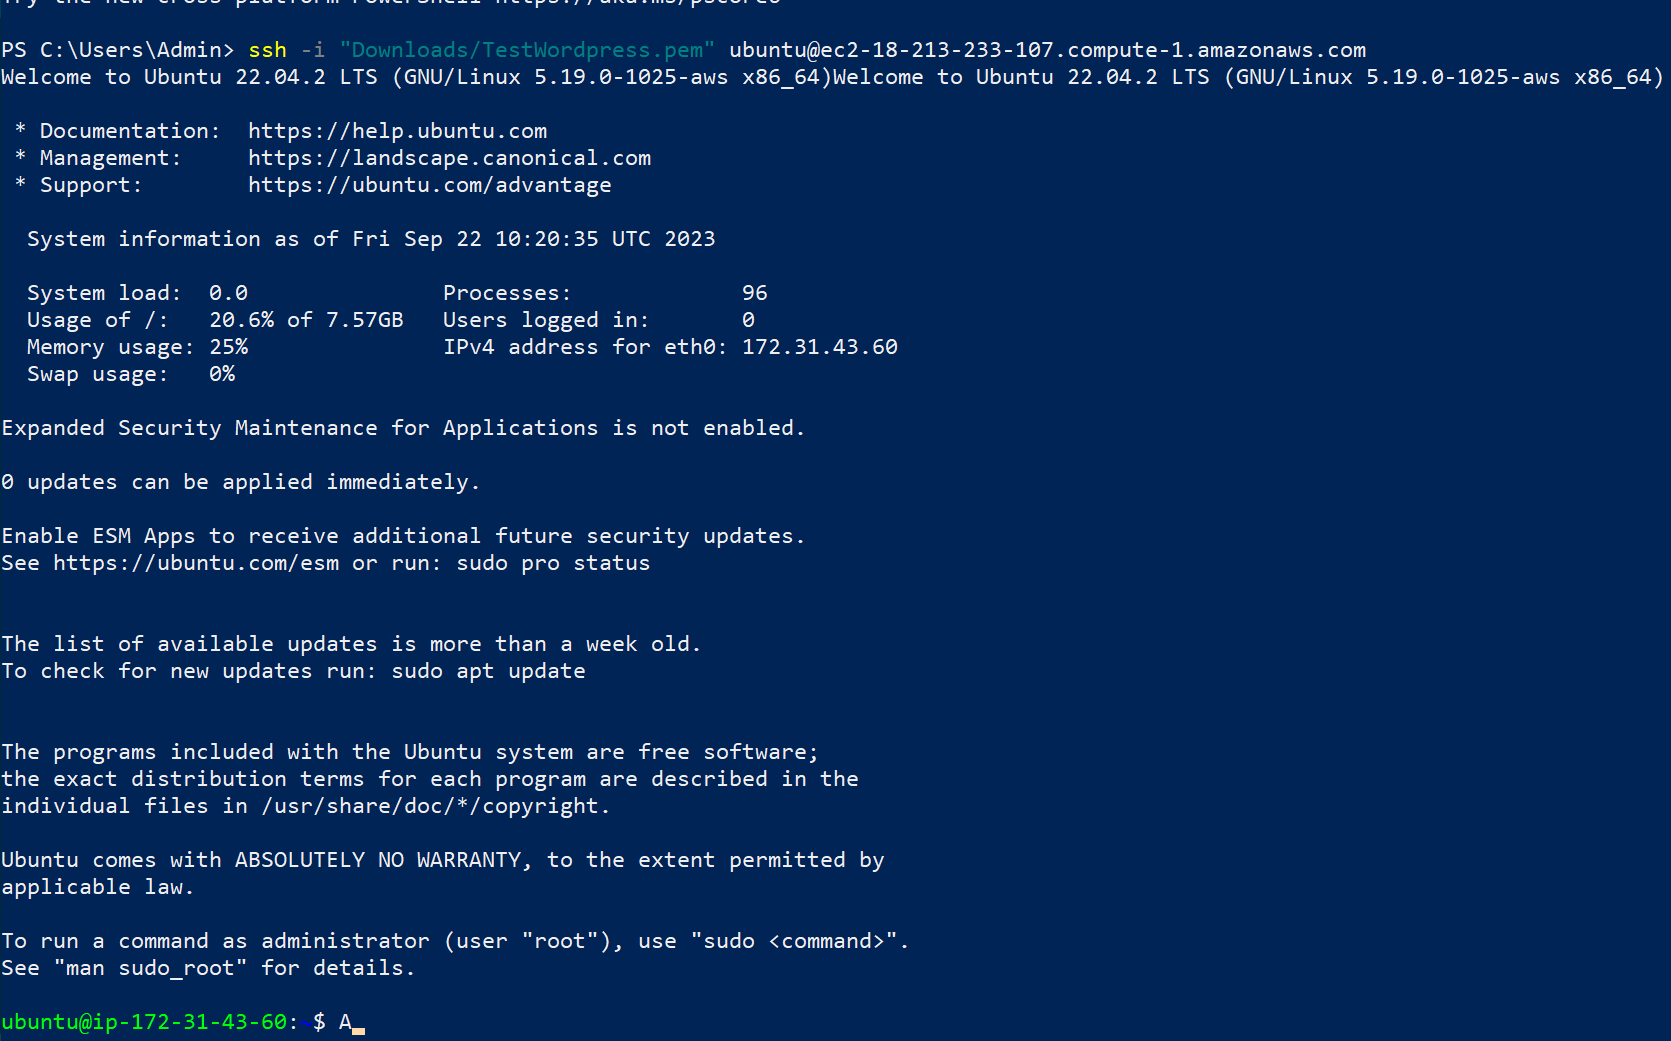
At this point, ensure your server is ready and accessible over a terminal.
Installing WordPress on AWS EC2 Ubuntu AMI
Let’s now get into the business and get the WordPress blog ready.
First, ensure your instance is up to date by running the following command:
sudo apt-get update
To access WordPress over the internet, you will use an Apache server, so run the following command to get installed:
sudo apt install apache2
Because WordPress runs on PHP and SWL database, we get them set right away:
Install PHP runtime and its database connectors using the following command:
sudo apt install php libapache2-mod-php php-mysql php-fpm
Getting MySQL Ready
Now get MySQL ready in the following steps:
Note: You can change the following configuration, such as a password to your liking
- Install mysql server:
sudo apt install mysql-server
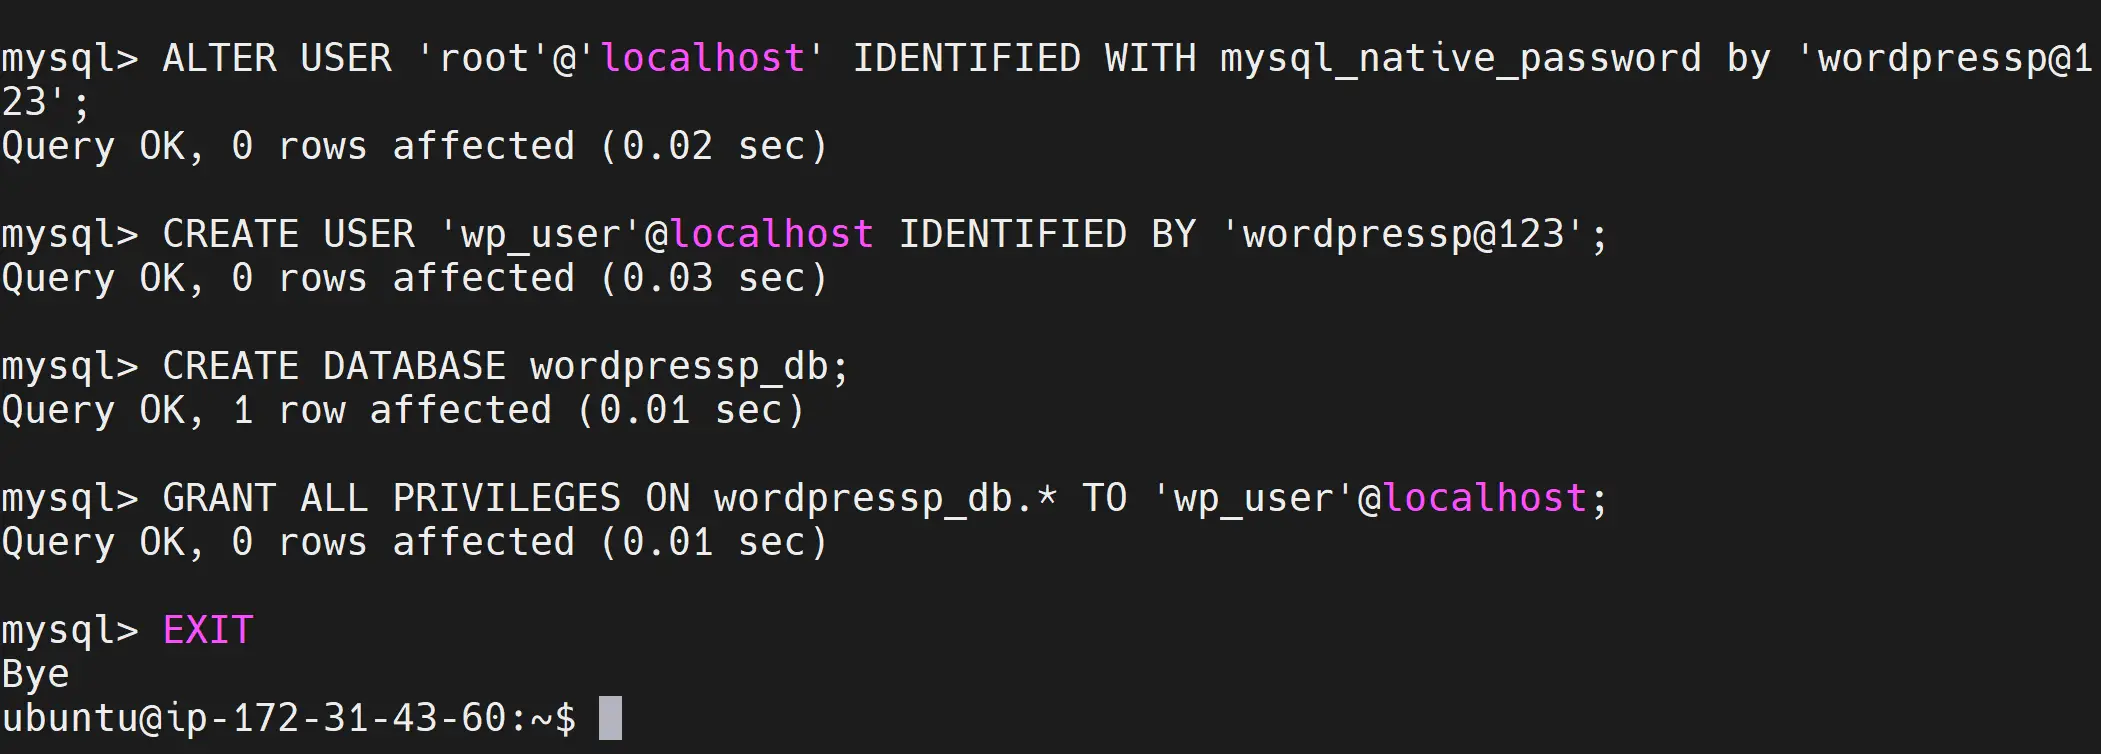
- Login to MySQL server
sudo mysql -u root
- Change MySQL server authentication password
ALTER USER 'root'@'localhost' IDENTIFIED WITH mysql_native_password by 'wordpressp@123';
- Create your WordPress database user
CREATE USER 'wp_user'@localhost IDENTIFIED BY 'wordpressp@123';
- Add your WordPress database
CREATE DATABASE wordpressp_db;
- Assign user to this DB and Grant all privileges
GRANT ALL PRIVILEGES ON wordpressp_db.* TO 'wp_user'@localhost;
- Exit MySQL shell:
EXIT
Here is a summary of how this command works:
Setup WordPress on Your AWS EC2 AMI
You have Apache, PHP, and Database ready, so let’s get the WordPress running.
Because WordPress will be exposed using Apache, you will install WordPress into the Apache root path /var/www/html. First, install WordPress using the following command:
cd /tmp
The run curl command pointing to the latest WordPress download link as follows:
curl -LO https://wordpress.org/latest.tar.gz

Unzip the WordPress files:
tar xzvf latest.tar.gz
Then Copy them into the Apache root path /var/www/html as follows:
sudo mv wordpress/ /var/www/html
If you cd /var/www/html to Apache path and run sudo ls, you see the WordPress folder is now ready:

To this point, you have WordPress deployed on your instance. To access it, use your server’s public IP address pointing to your wordpress directory as follows:
your_ip_address/WordPress
You will have this window to deploy your new WordPress configurations:

So Let’s go! and run the WordPress installation:
Ensure you add the Database configurations you used earlier. Make sure these details match as such. If you used the same command as me, your database connection details should be as follows:
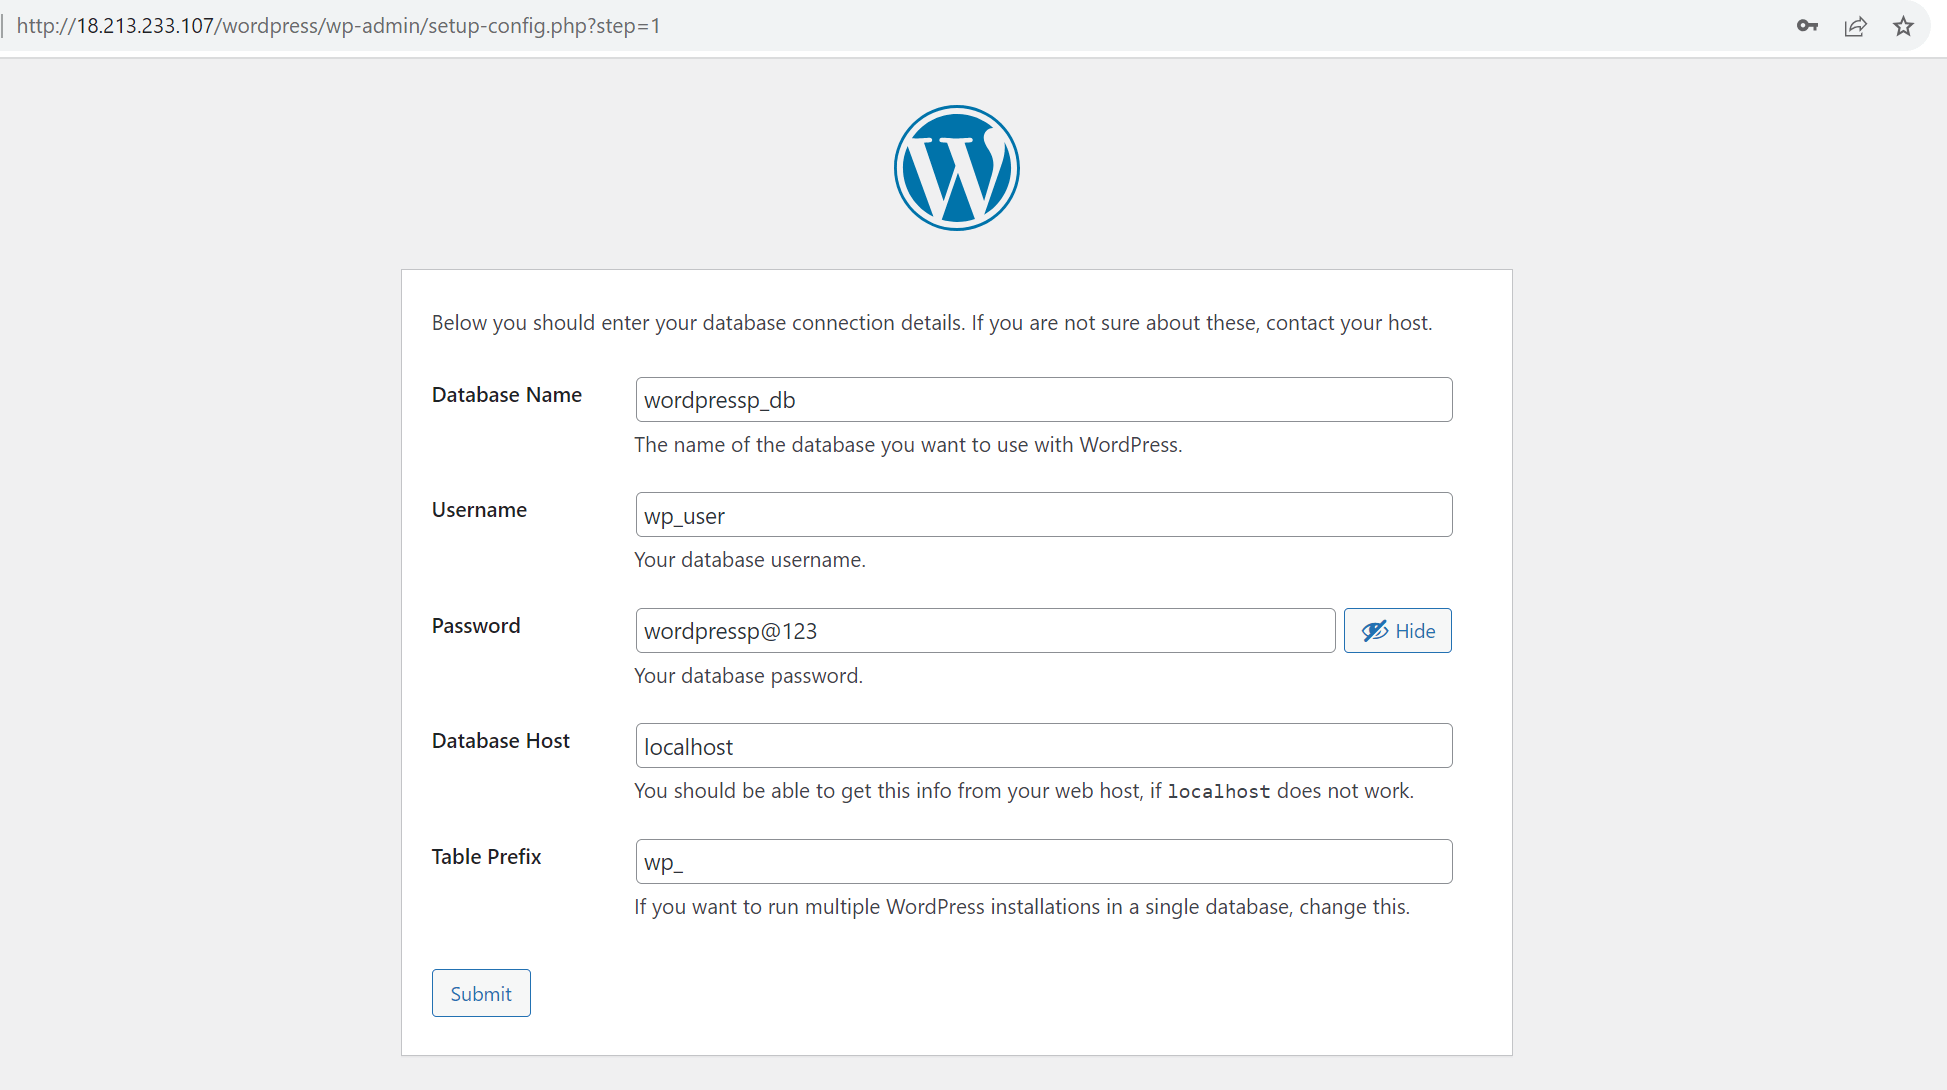
Go ahead and Submit these details. You get the following window:
Head over to your terminal and open your WordPress directory:
cd /var/www/html/WordPress
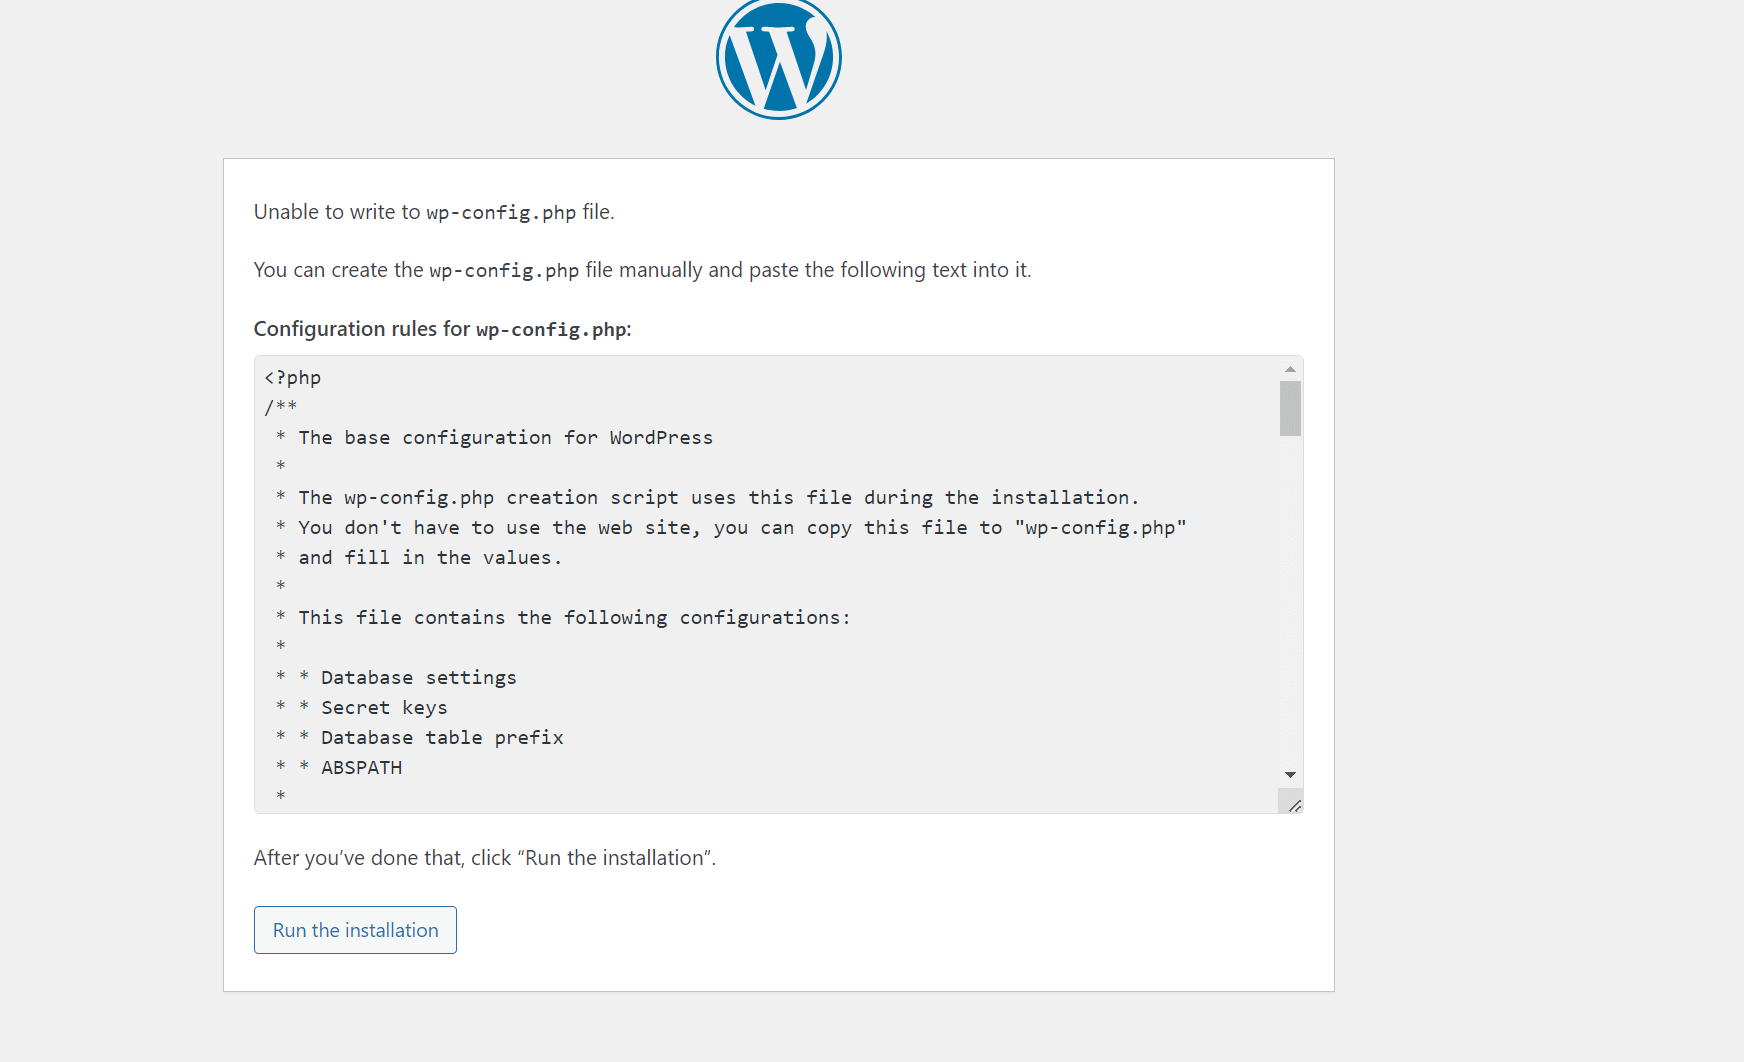
The create a new wp-config.php:
sudo nano wp-config.php
Here, add the Configuration rules presented in your Installation process and paste the enter configuration to this file:
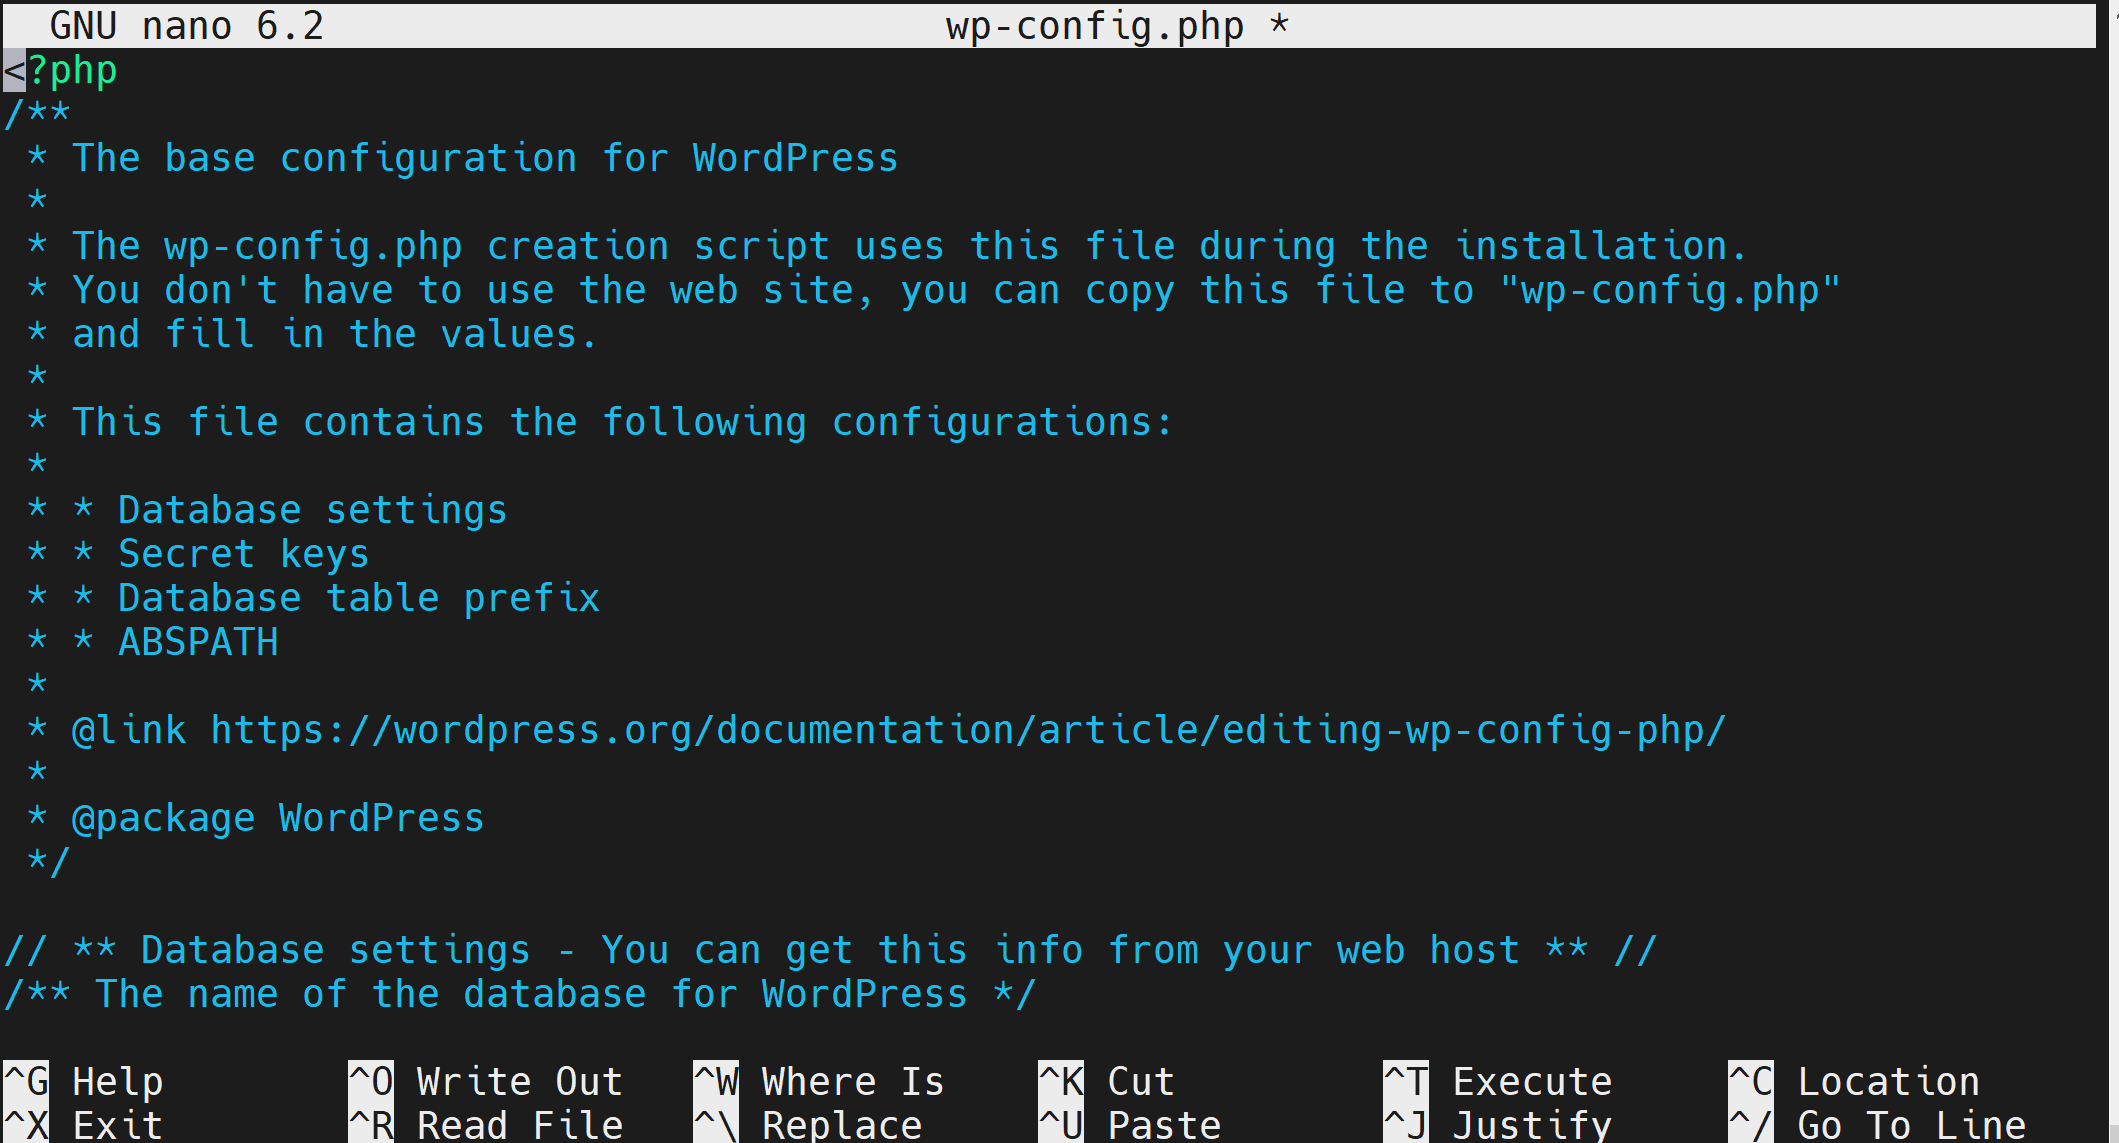
Use ctrl s and ctrl x to save and exit the terminal.
Head over to your browse and click Run the installation. Now provide your information:
Make sure the username and password are memorable, as you will use them in the coming steps:
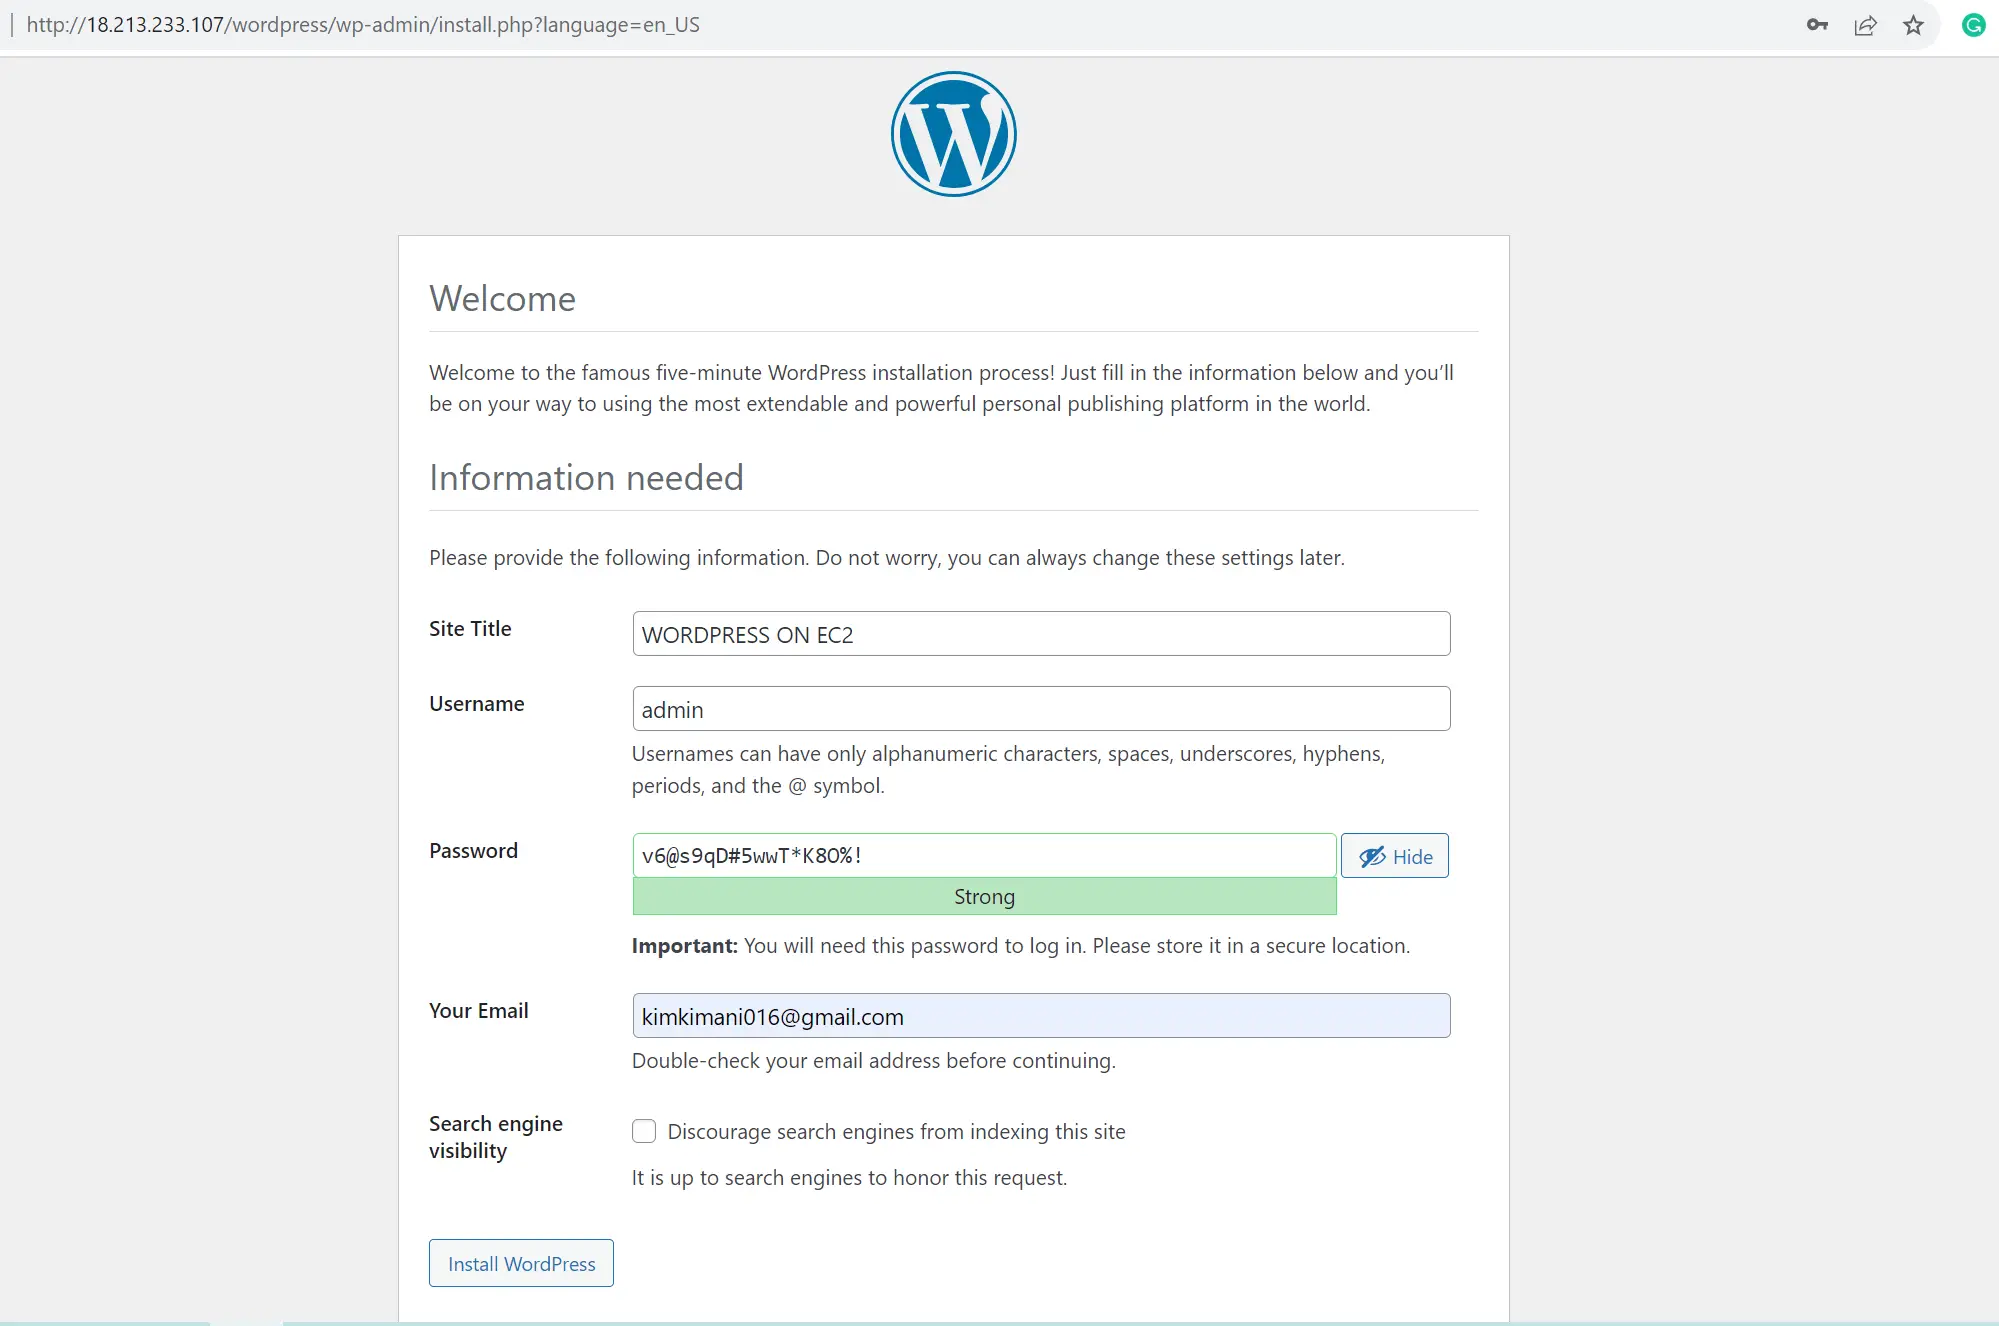
Finally, run Install WordPress.
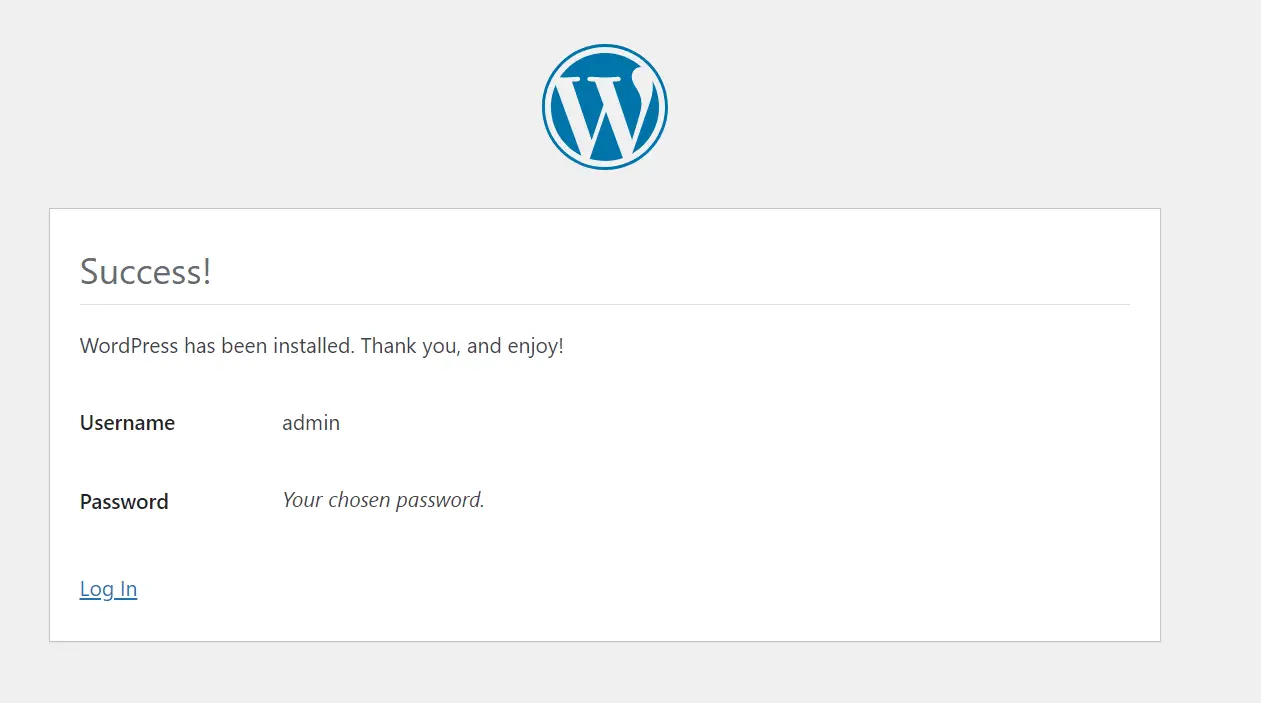
Now, you need to log in to your new installation using the credentials you provided:
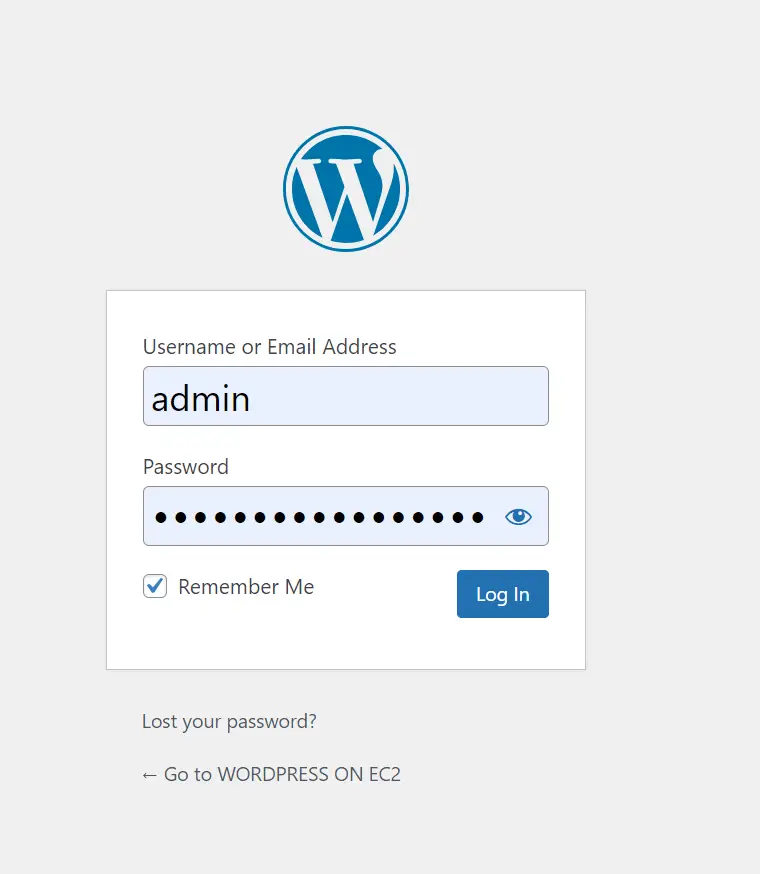
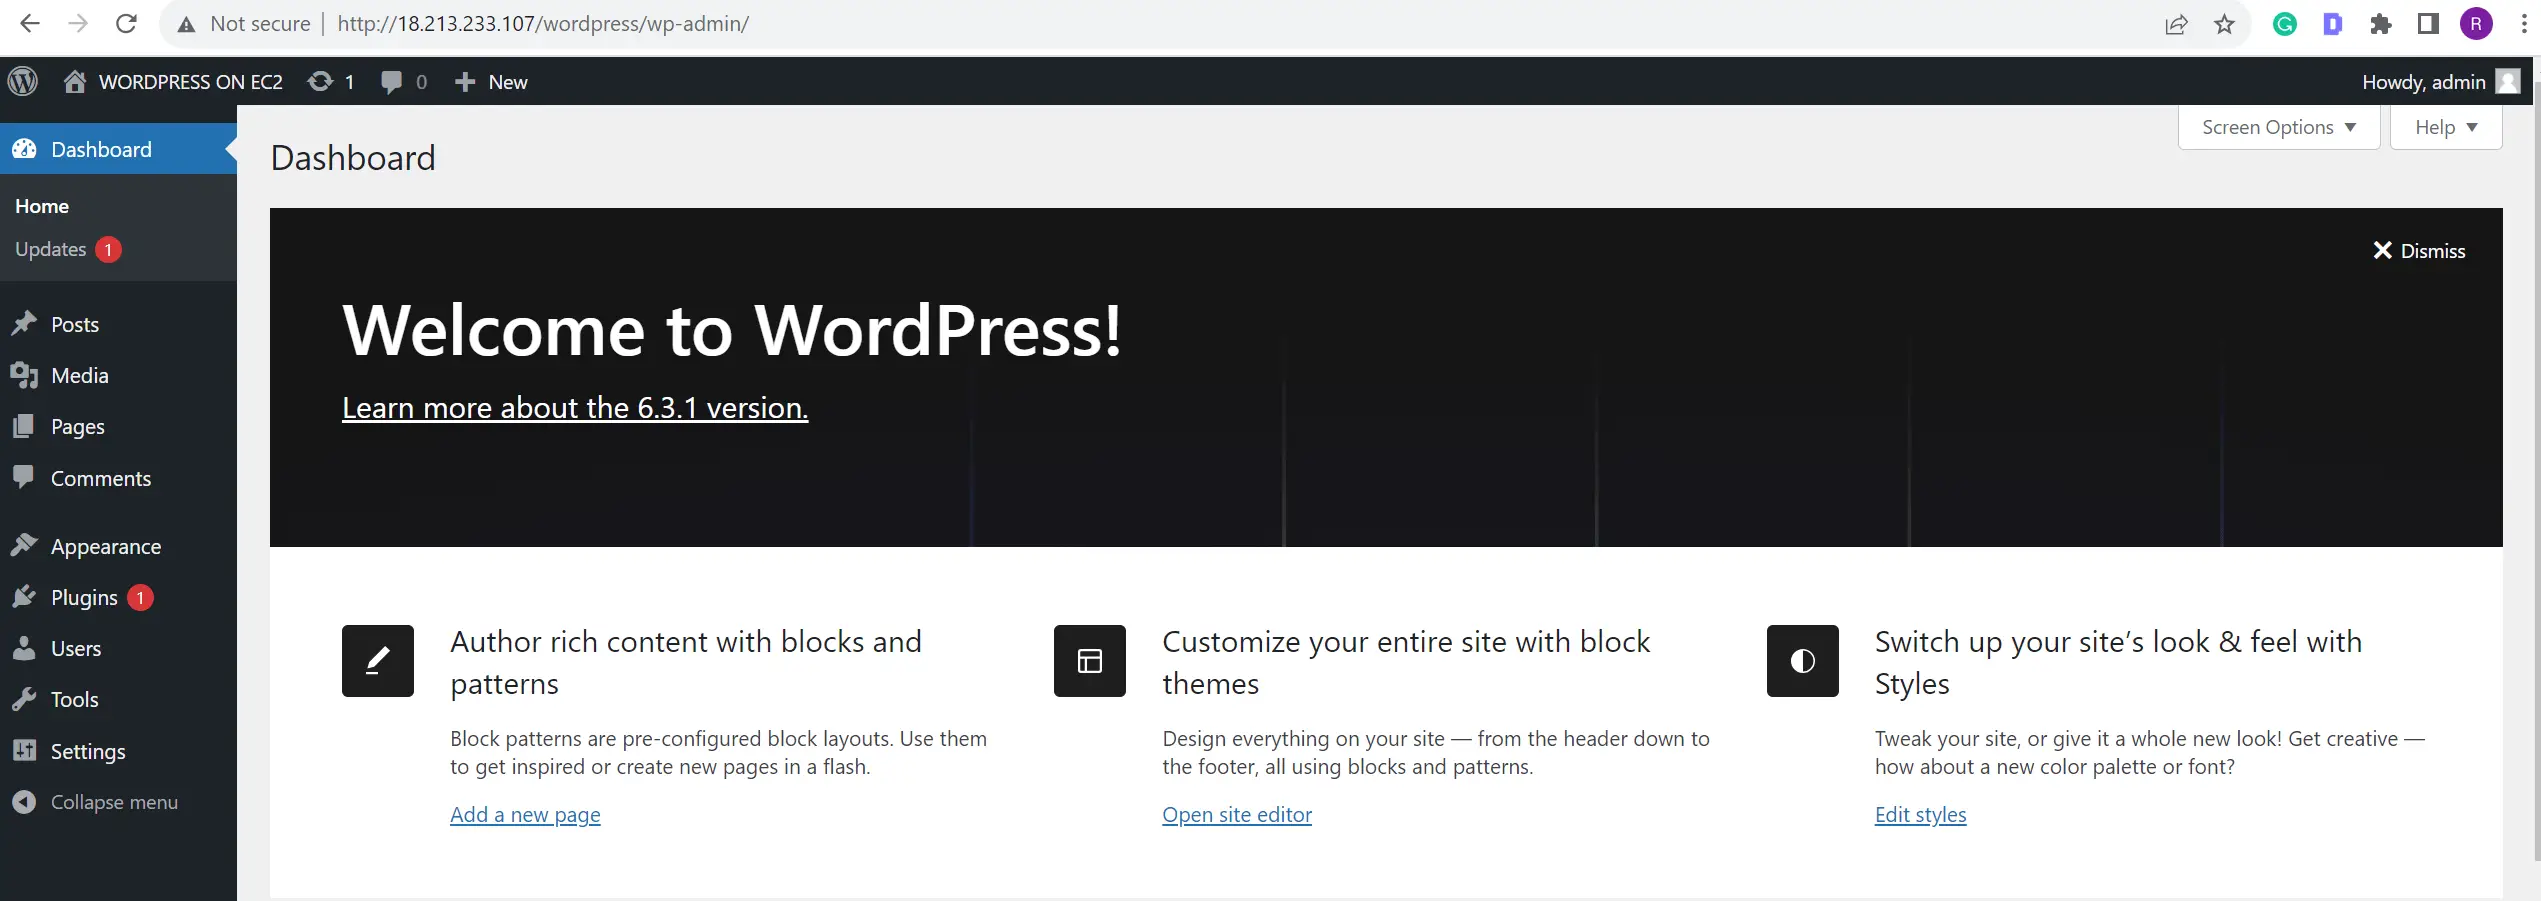
And Congratulations! Your WordPress blog is UP AND RUNNING on AWS EC2 Ubuntu AMI:
Adding Domain Name on AWS EC2 Ubuntu AMI
Get your domain name ready as you are about to go LIVE.
But first, head over to your WordPress site settings:
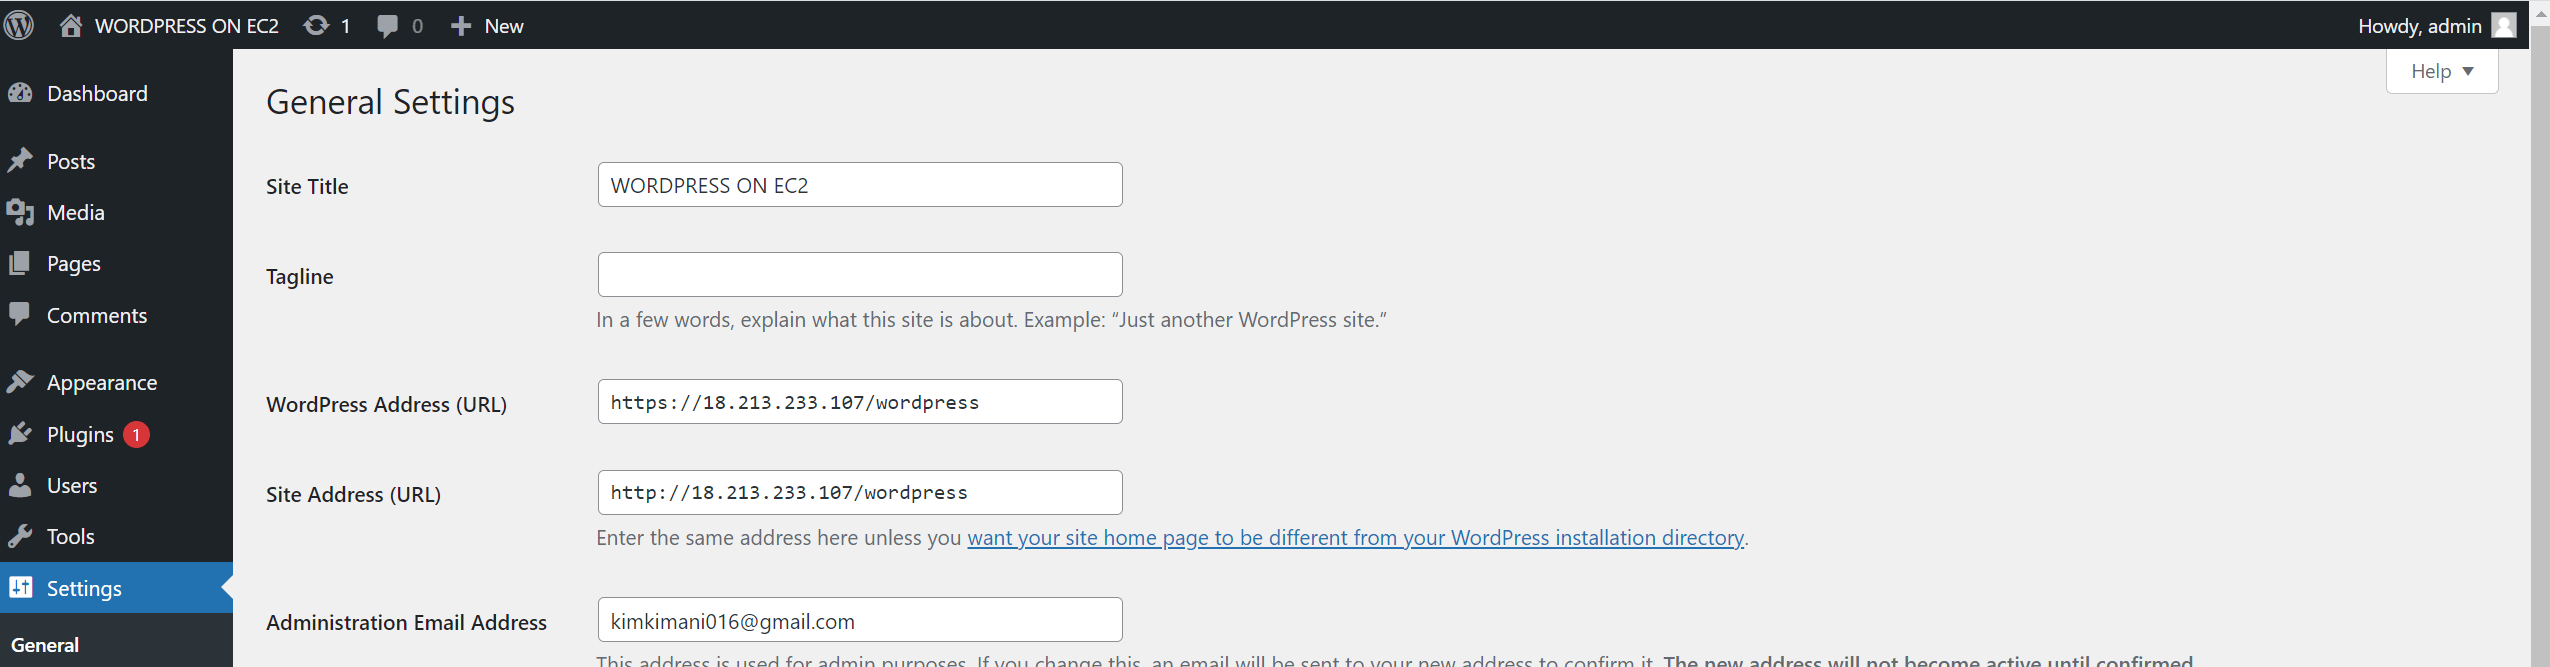
Now you need to change the above URLS and point them to your domain name, ensuring you have https as follows:
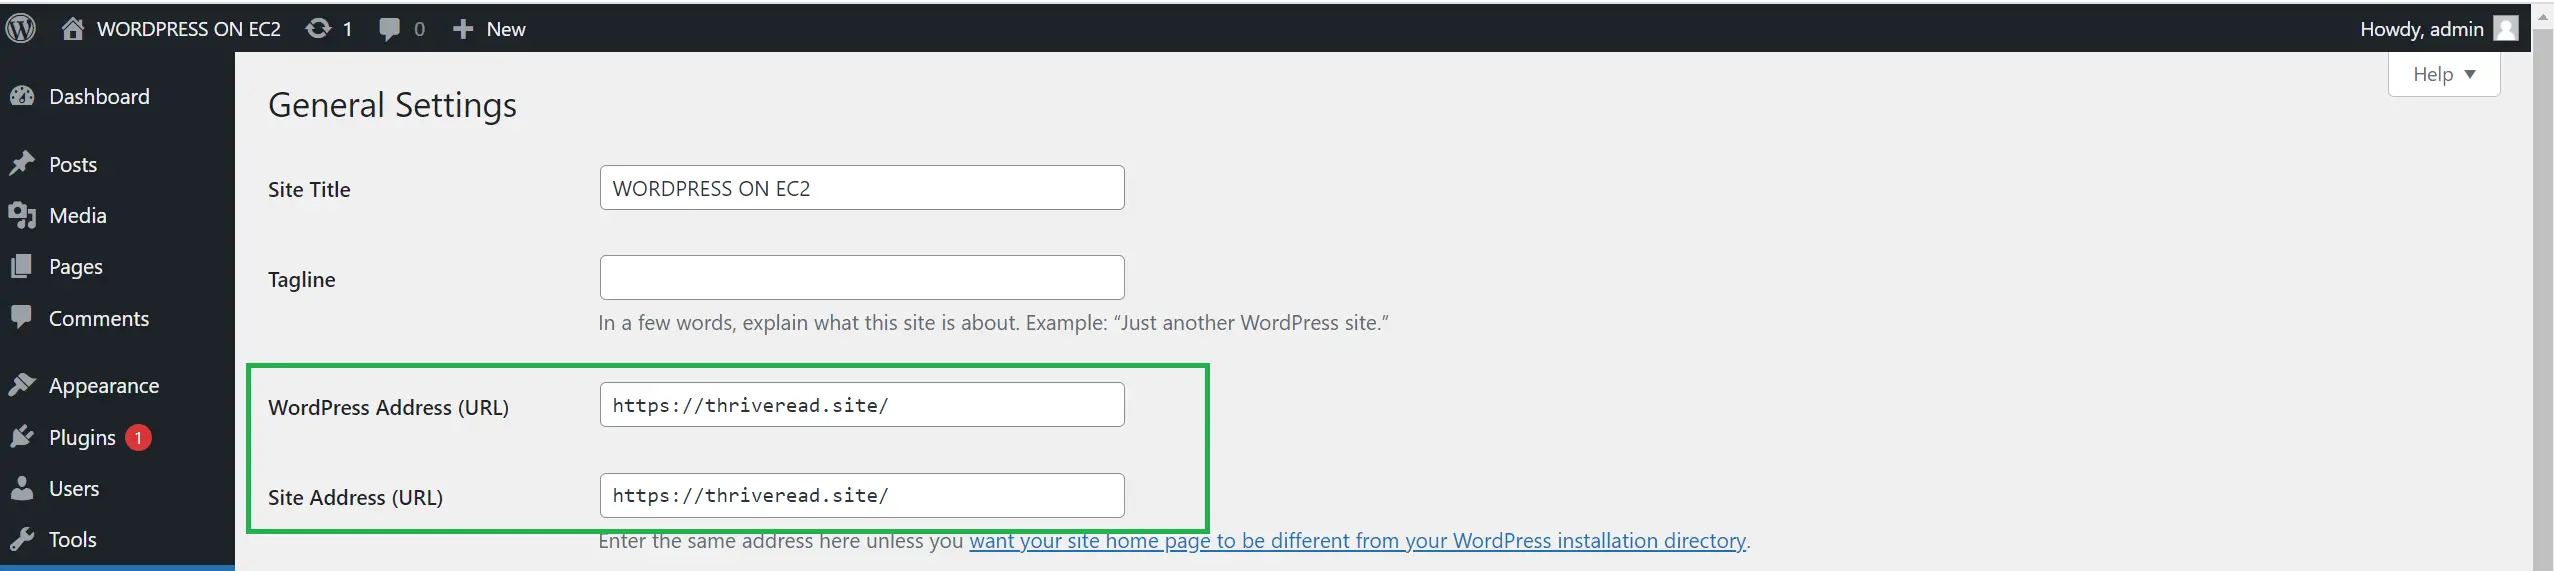
Now click Save to add these changes.
To set up your domain name on EC2, go to your server terminal and configure your Domain name as follows:
- Activate your
wordpressdirectory:
cd /var/www/html/WordPress
- Set folder permissions
sudo chown -R www-data:www-data /var/www/html/WordPress
- Open the
000-default.conffile:
sudo nano /etc/apache2/sites-available/000-default.conf
- Edit this file by removing the following line of code:
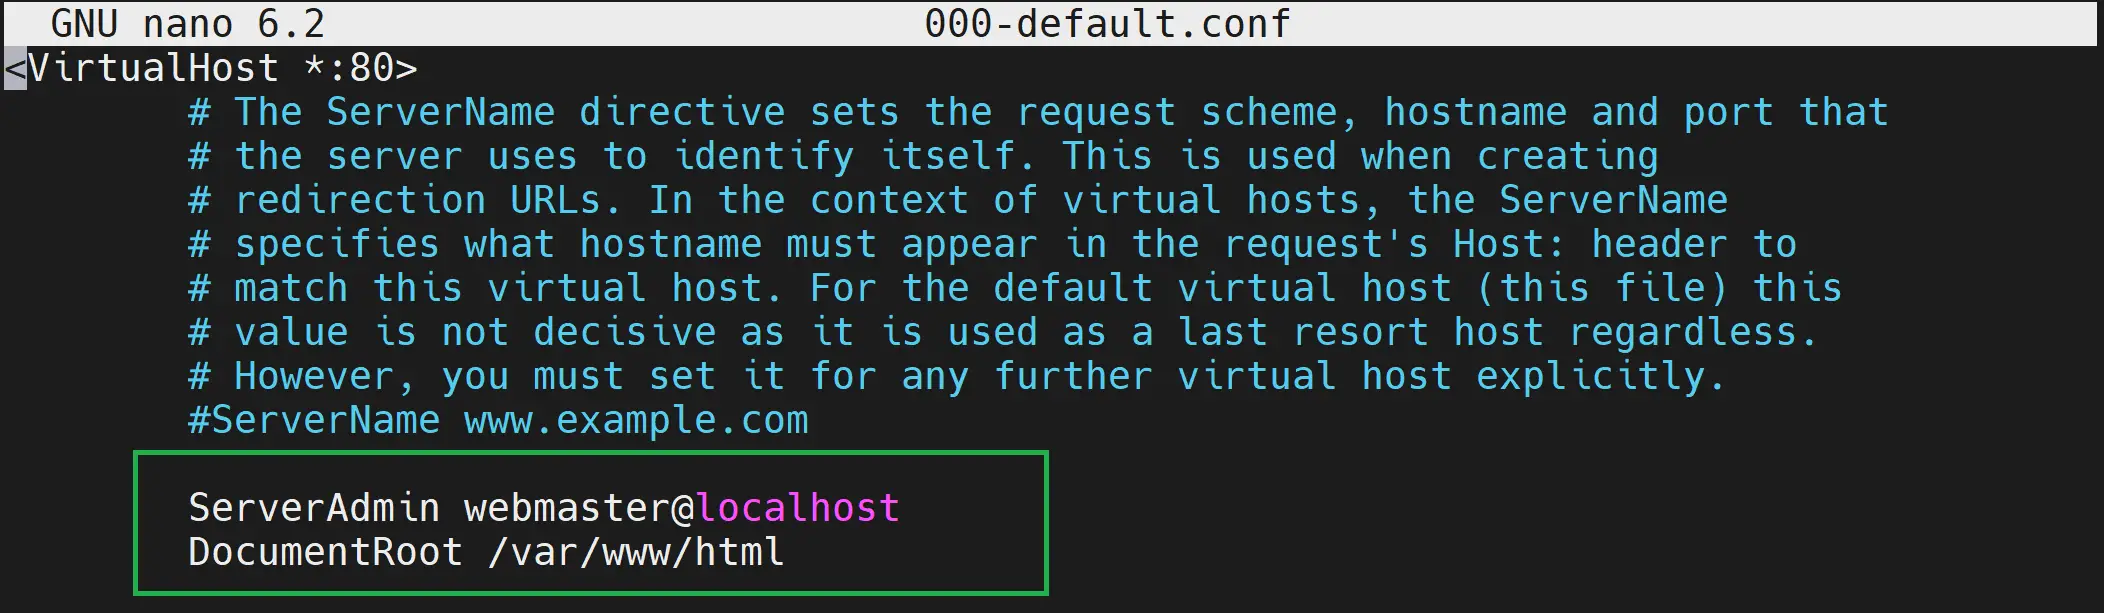
- Add your site configuration containing your domain name in
your_domain_nameentries:
        ServerAdmin webmaster@localhost

        DocumentRoot /var/www/html/WordPress
        ServerName your_domain_name
        ServerAlias your_domain_name

        <Directory /var/www/html/WordPress/>
             AllowOverride All
             Options +FollowSymlinks
             Require all granted
        </Directory>
Once you have these changes, your 000-default.conf file should be as follows:
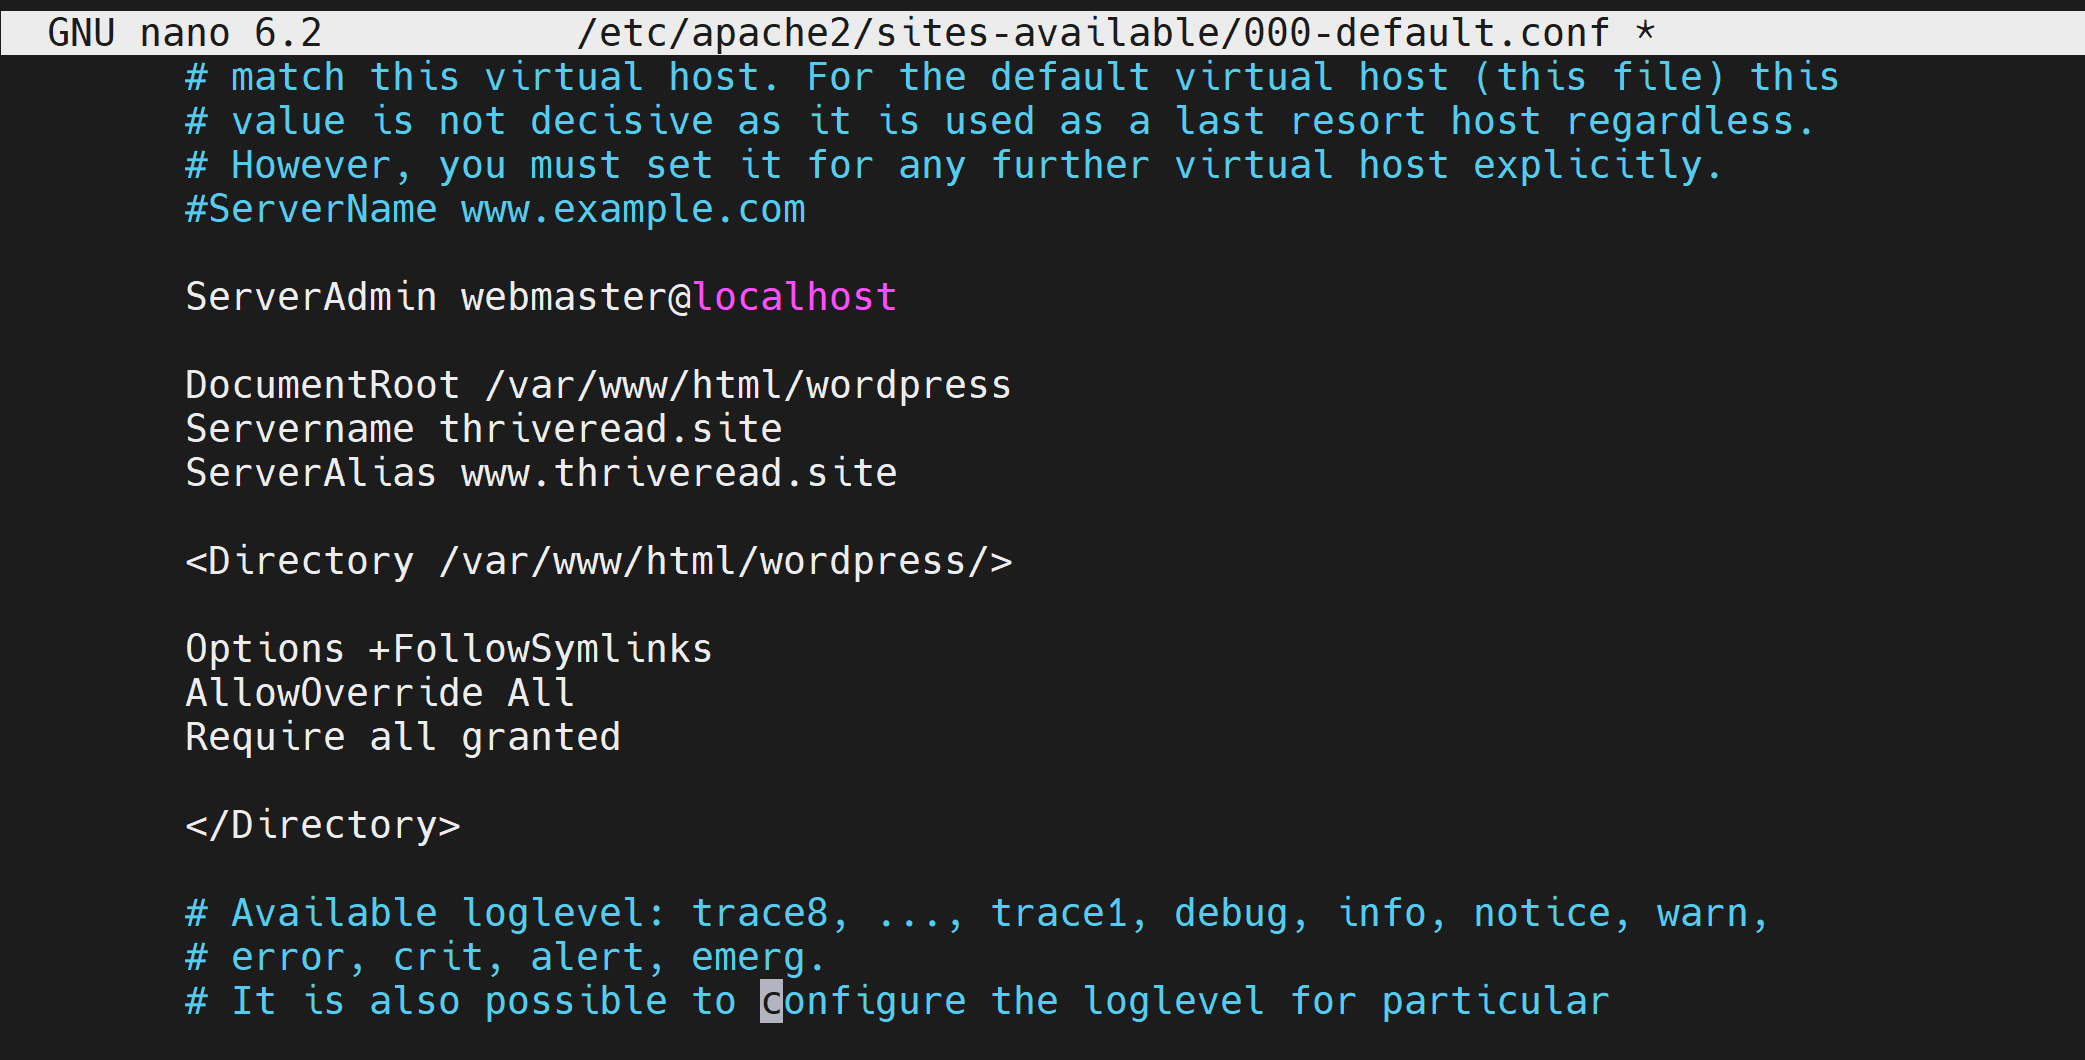
Use ctrl s and ctrl x to save and exit the terminal. Confirm if your configuration is ready.
You should get the following output if your 000-default.conf file has no error:

Finally, restart your Apache:
sudo systemctl restart apache2
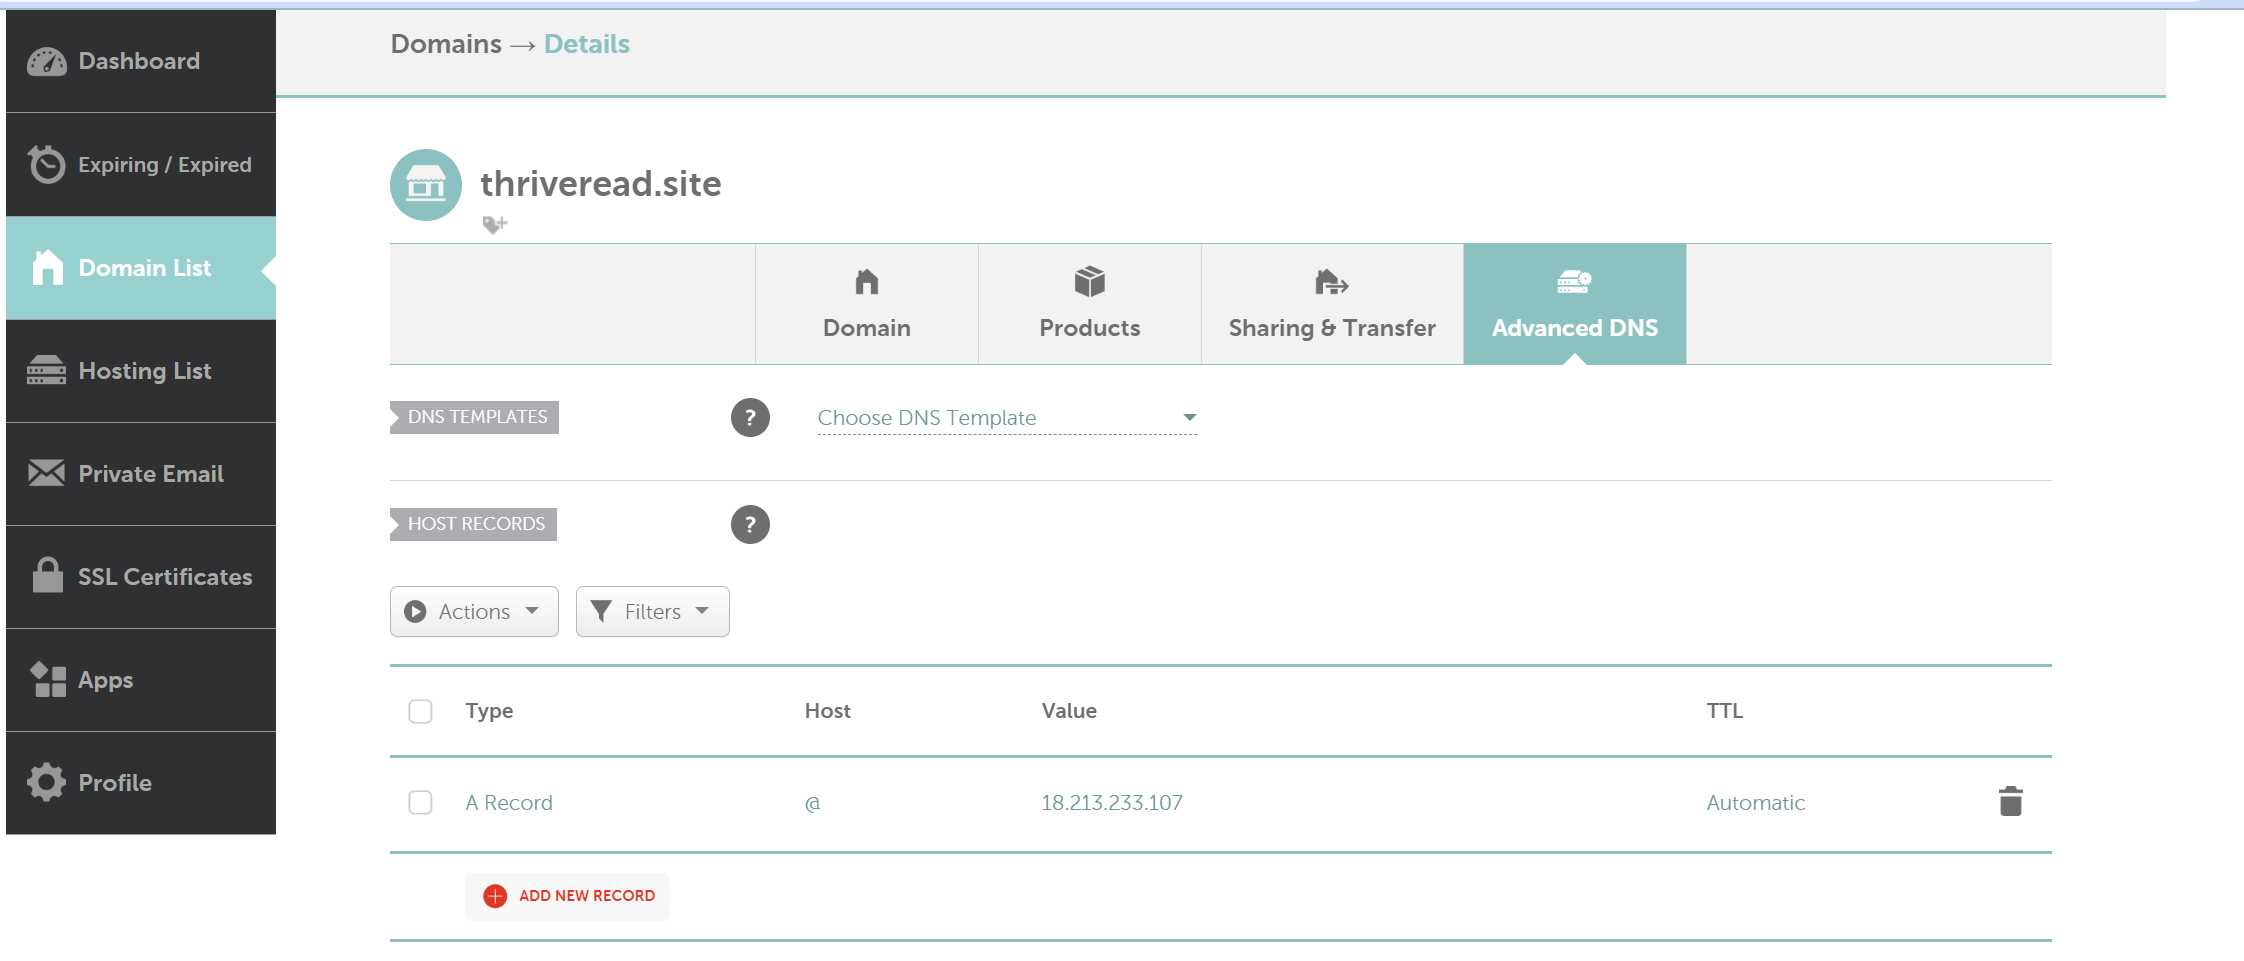
To access your site, Go to your Domain name provider and manage your domain name DNS. This will include adding an A record pointing to your EC2 public IP address. Here is how I did it on Namecheap:
Now, give your domain provider a few minutes to propagate your IP. In the meantime, let’s add the SSL certificate.
Adding SSL Certificate to Your WordPress on AWS EC2 Ubuntu AMI
To add an SSL Certificate, you will use certbot; install is as follows:
sudo apt install certbot python3-certbot-apache
Now add your domain name and request certbot to install SSL.
sudo certbot --apache
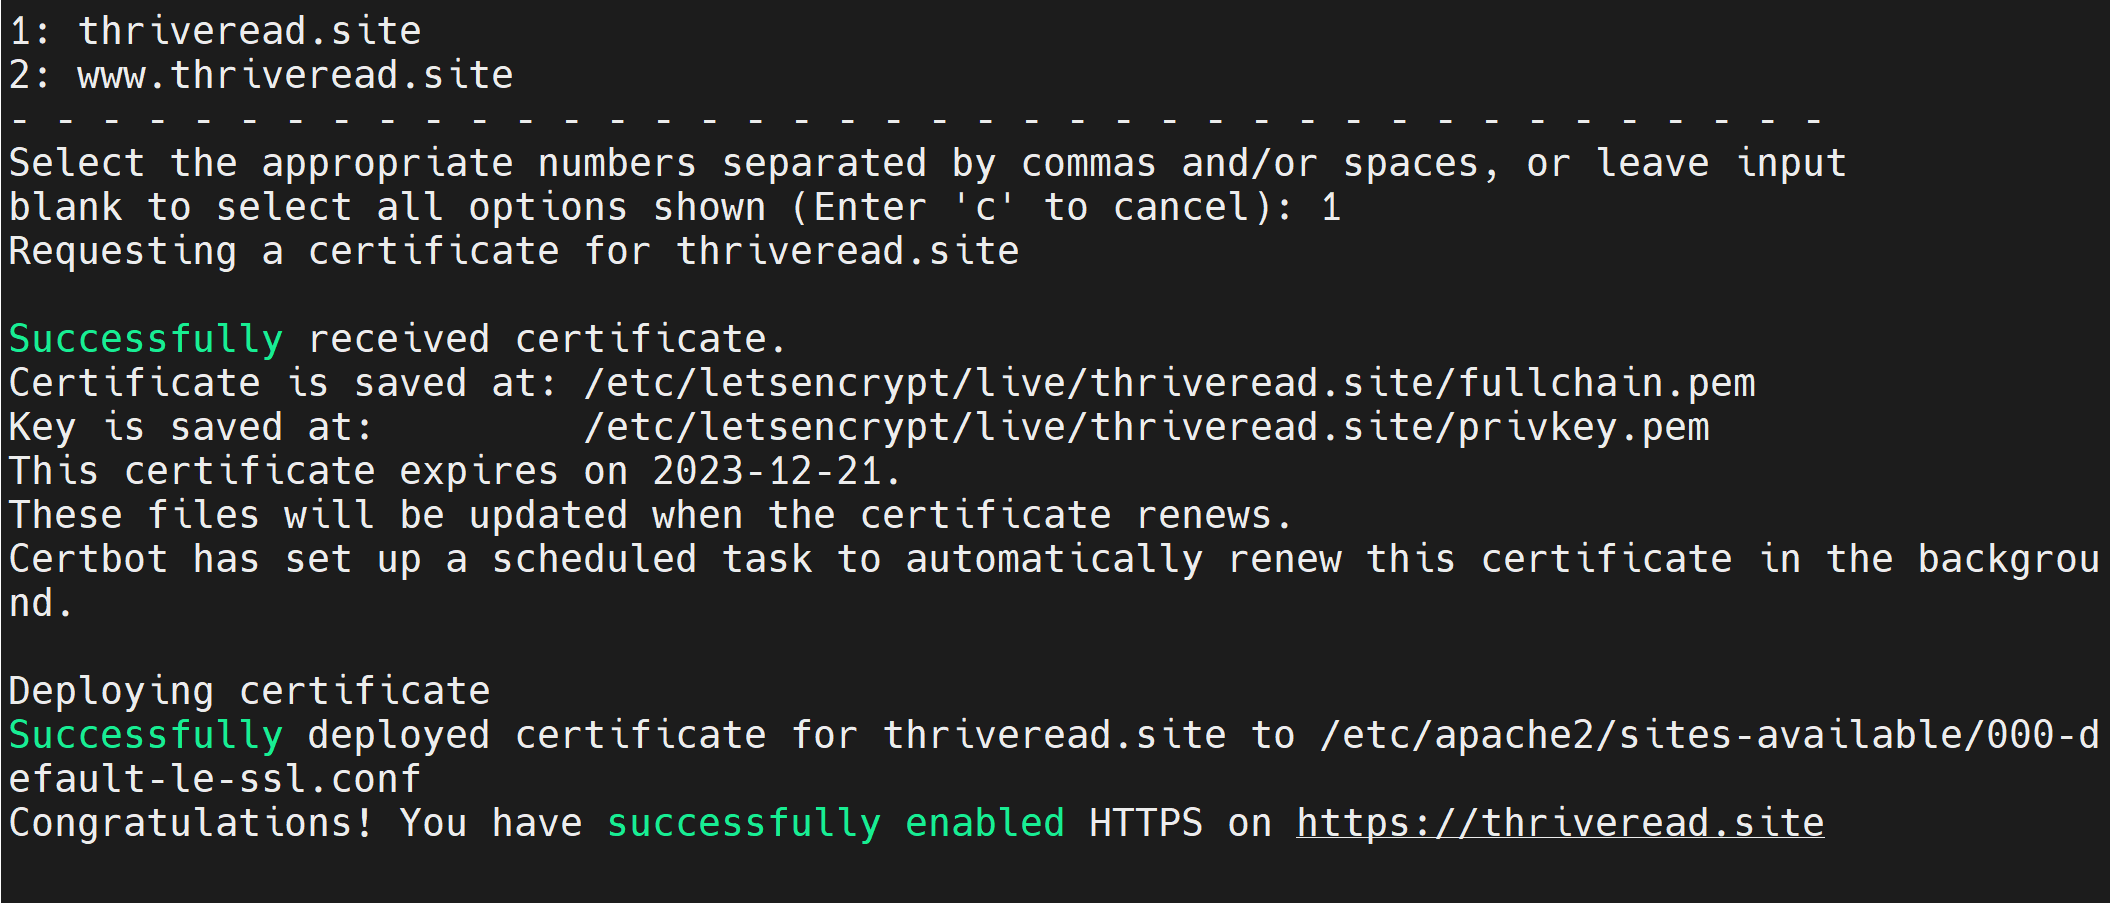
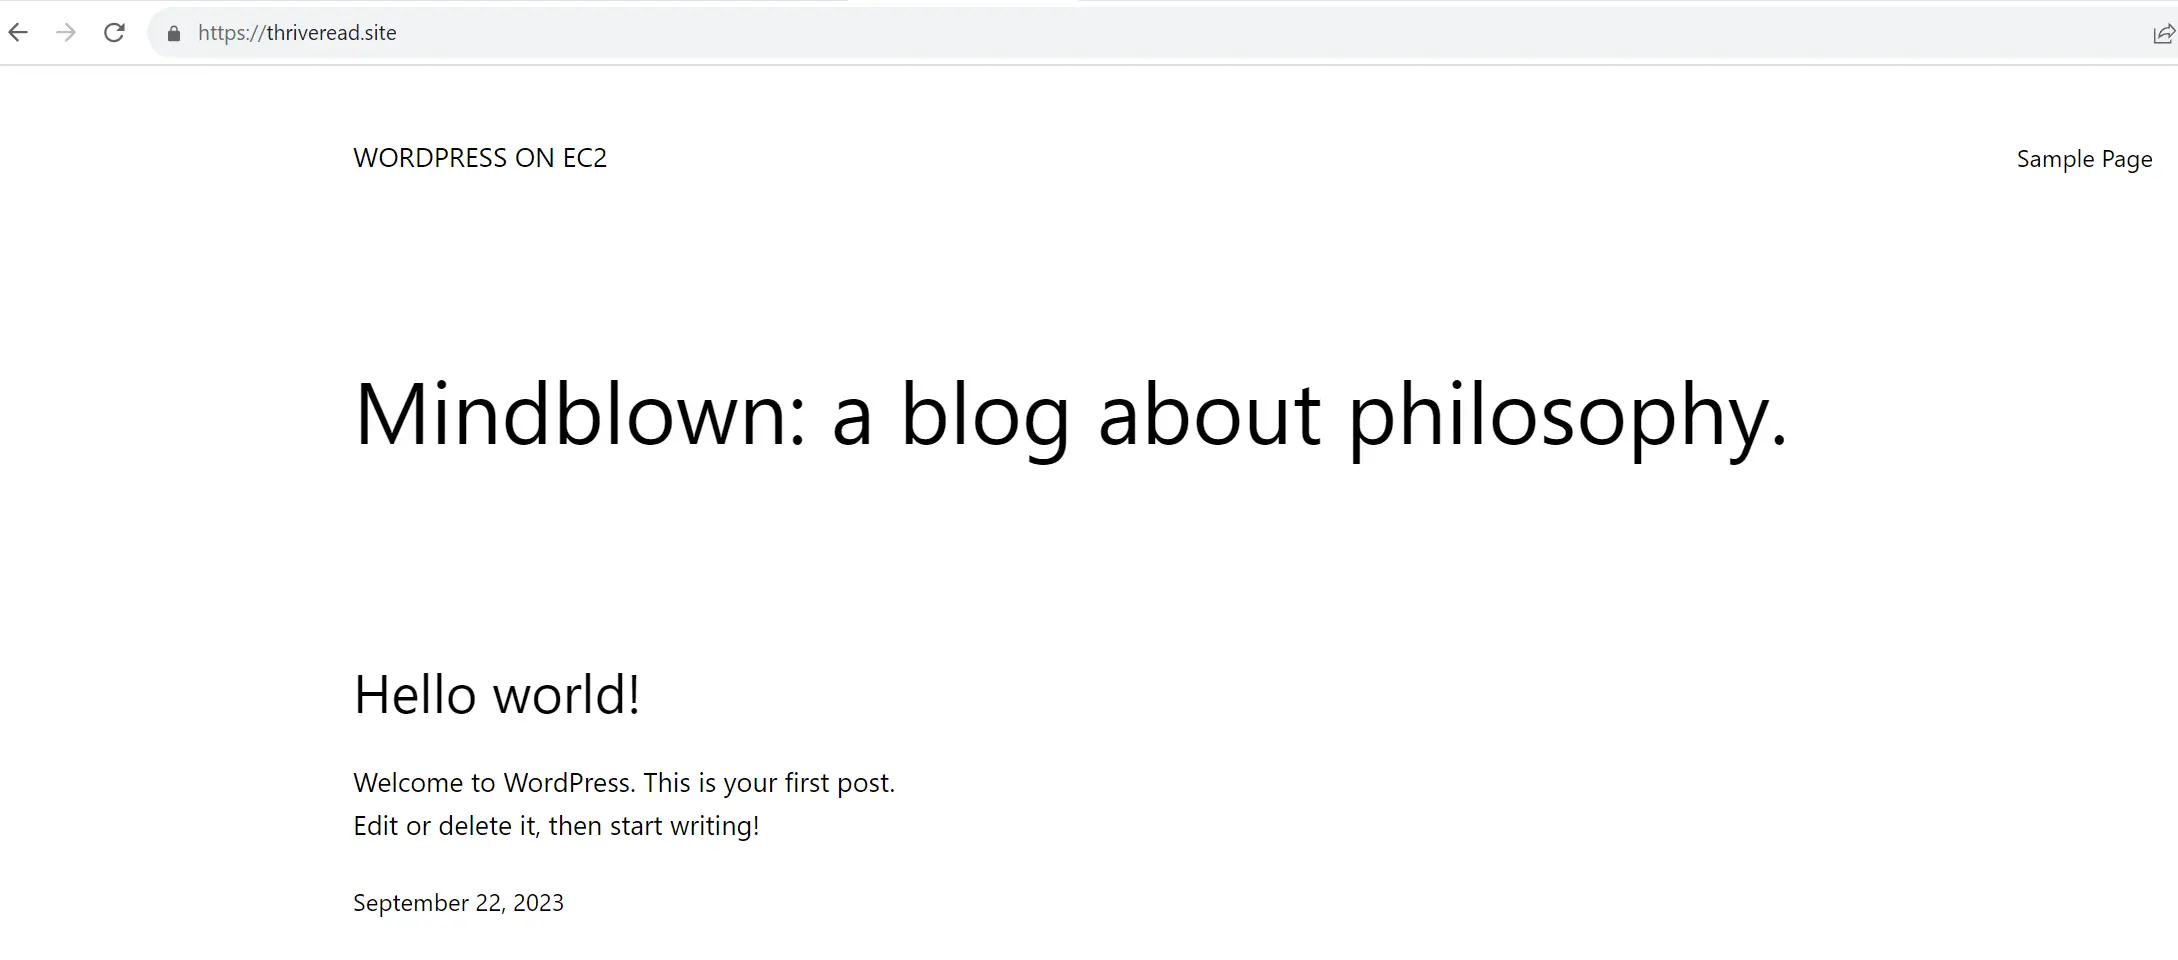
If your domain name has propagated, your site should be ready on an SSL certificate and a secure connection.
To access your Dashboard, use the URL https://your_domain_name/wp-admin/. Provide your username and password. These should be the exact details you used when running the WordPress installation.
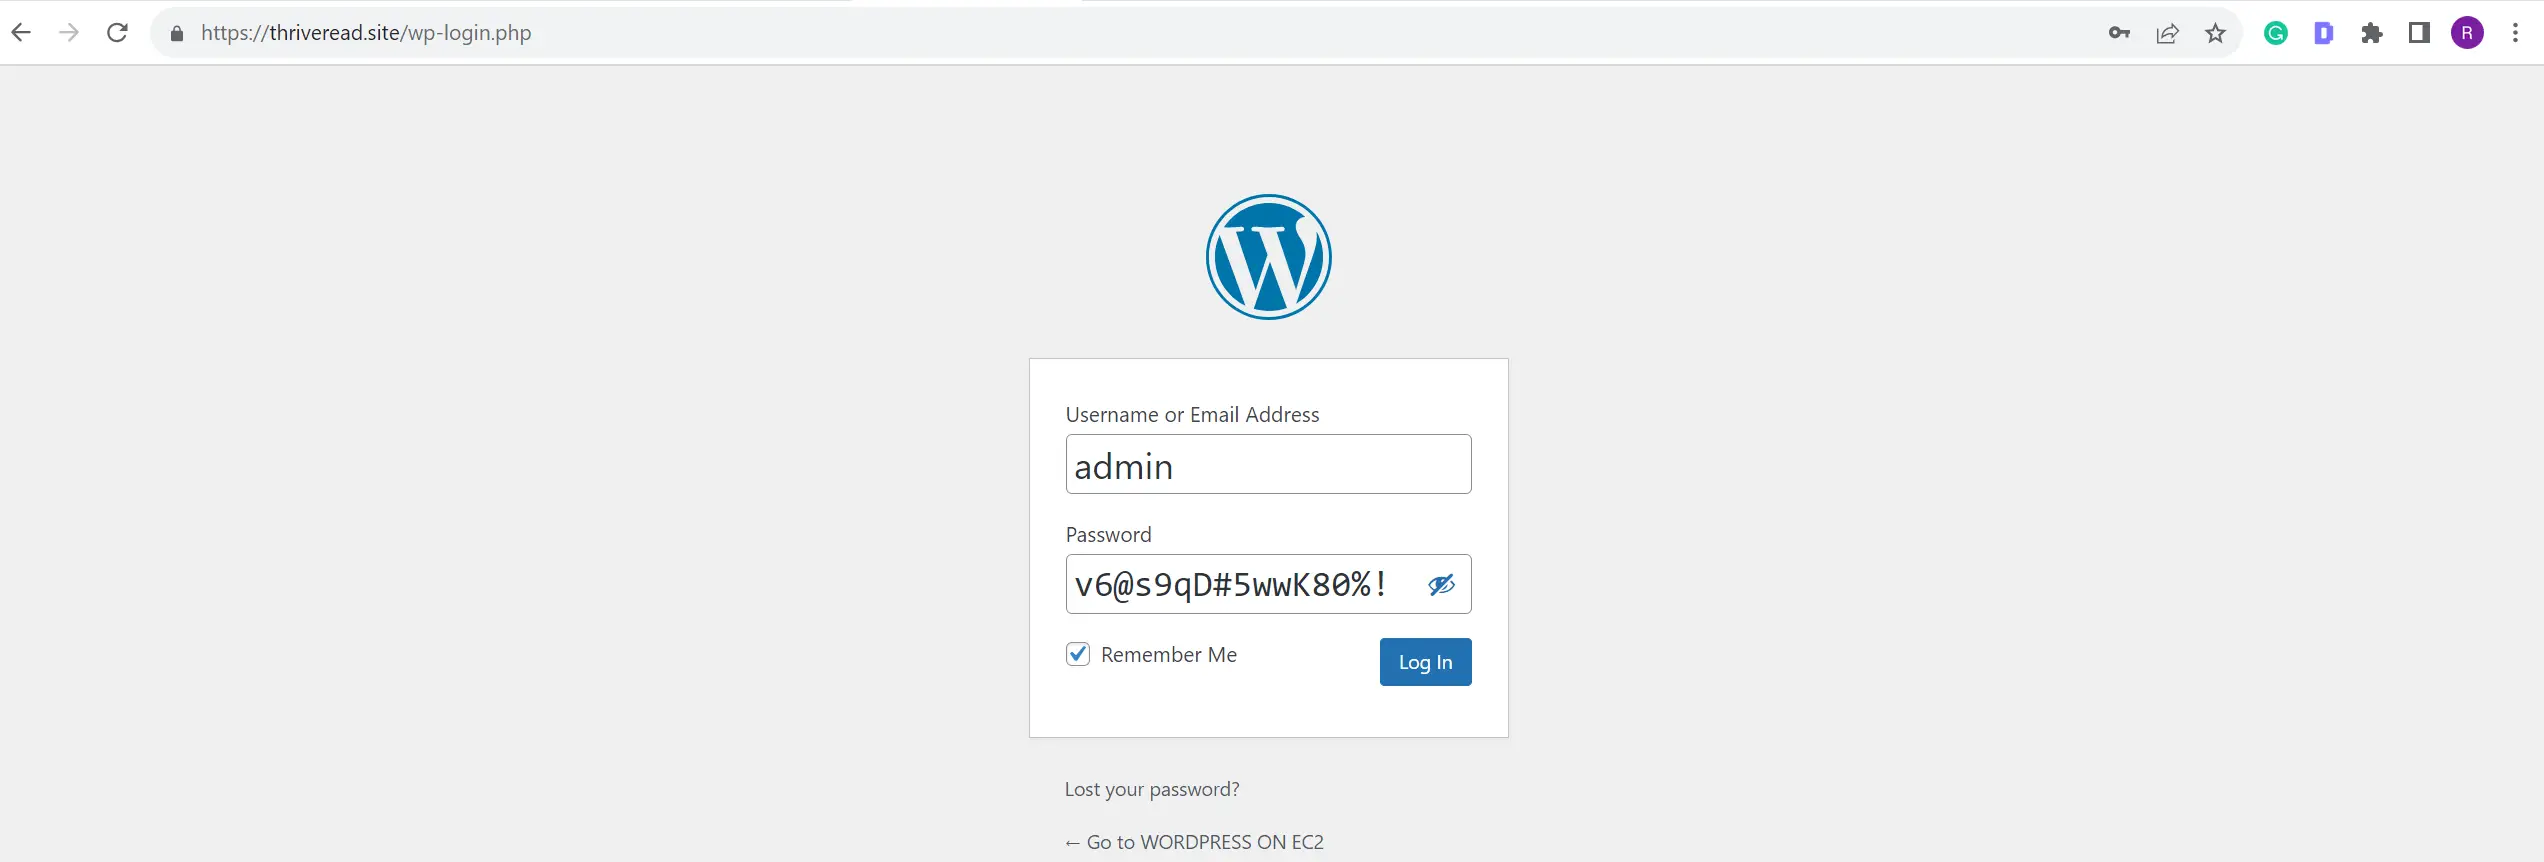
And here is your ready Dashboard, ready to add your new site configurations:

Conclusion
I hope you learned something helpful about setting up WordPress on AWS EC2 Ubuntu.
If you have any questions regarding this post, comment, and we will address them ASAP.
Written By:
Joseph Chege
More Related Articles:
-

Install Mkcert on Windows|Linux|Ubuntu with Localhost SSL HTTPS Certificates
Nov 16, 2023
-
Easily Install Python Poppler with PIP on Linux Ubuntu
Apr 11, 2024
-

Create Python3 Virtual Environment|Venv on Linux Ubuntu Virtualenv
Apr 9, 2024
-

Quickly Install|Build Python from Source on Linux Ubuntu
Apr 9, 2024