How to Connect Node-Red, Save|Select|Insert Data to MySQL Example Tutorial
Posted February 22, 2024

Node-RED is used to create IoT prototyping, Data integration, and Home automation. This means you, for example, create smart home systems by integrating IoT devices. You then use Node-RED to automate actions based on predefined conditions.
Now, these devices use data. Node-RED must point to a data store of your choice. This includes SQL databases such as MySQL. This way, you get to use Node-RED and run MySQL-related queries to manage data through Node-RED flows.
This tutorial will help you create Node-RED with MySQL and run query examples. You will learn:
- How to connect Node-RED with MySQL.
- Running Node-RED with MySQL select query to save data to MySQL server.
- How to use Node-RED and MySQL with MySQL insert query.
Ready, Now, dive and Connect Node-Red, Save, Select, and insert Data to MySQL in this Example tutorial.
Prerequisites to Using MySQL with Node-RED
- To use Node-RED, you must have Node-RED installed on your computer.
- You’ll need a working MySQL server. If not, use Docker in the following steps to set up one.
- Have basic knowledge working with Node-RED
How to Set Up MySQL Server for Node-RED
The first important step is to ensure a MySQL server is up and running. In this case, you must have the correct connection details related to your MySQL database. Node-RED will need them.
I have created the following tutorial to help you create a perfect MySQL server using Docker and Docker Compose.
Attentively, create a docker-compose.yml and run a MySQL Docker server as follows:
version: "3.9"
services:
  mysql-server:
    image: mysql:8.0
    environment:
      MYSQL_ROOT_PASSWORD: database_pass
      MYSQL_DATABASE: iot_data
      MYSQL_USER: mysql_iot_user
      MYSQL_PASSWORD: mysql_iot_user_pass
    ports:
      - "3306:3306"
  phpmyadmin:
    image: phpmyadmin/phpmyadmin
    links:
      - mysql-server
    ports:
      - "8081:80"
    environment:
      PMA_HOST: mysql-server
      MYSQL_ROOT_PASSWORD: database_pass
Use the following command to make sure the server is up and running:
docker-compose up --build -d
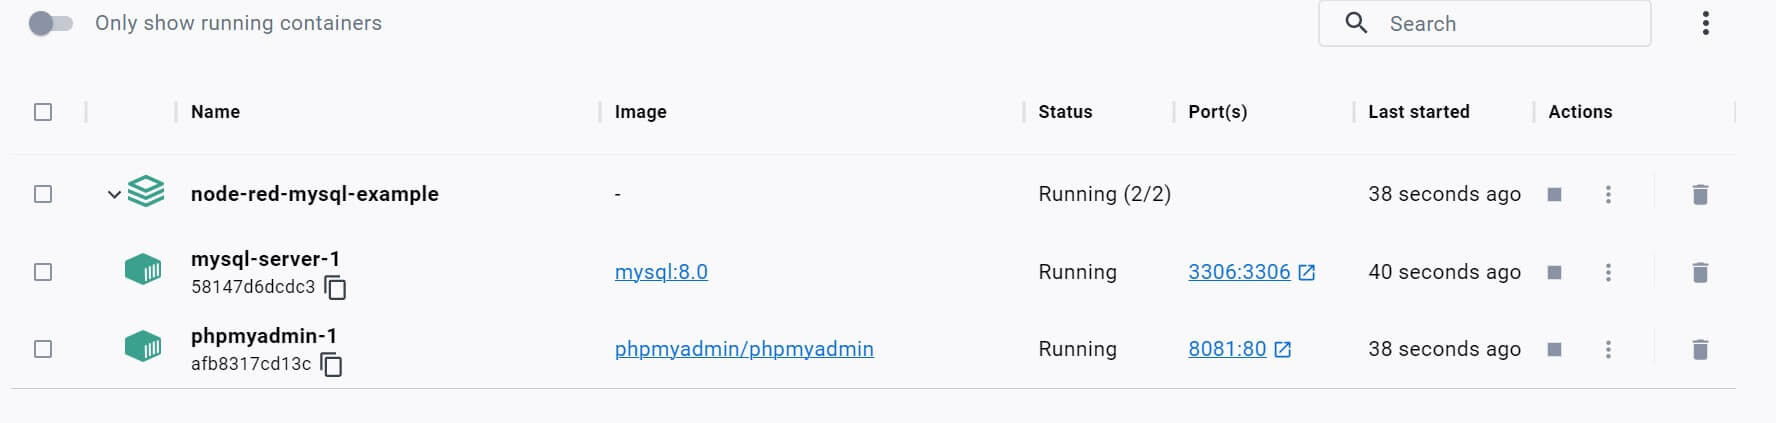
Now, you will use http://localhost:8081/ to access MySQL on the web through phpMyAdmin. User username as mysql_iot_user and password as mysql_iot_user_pass to access your server as follows:
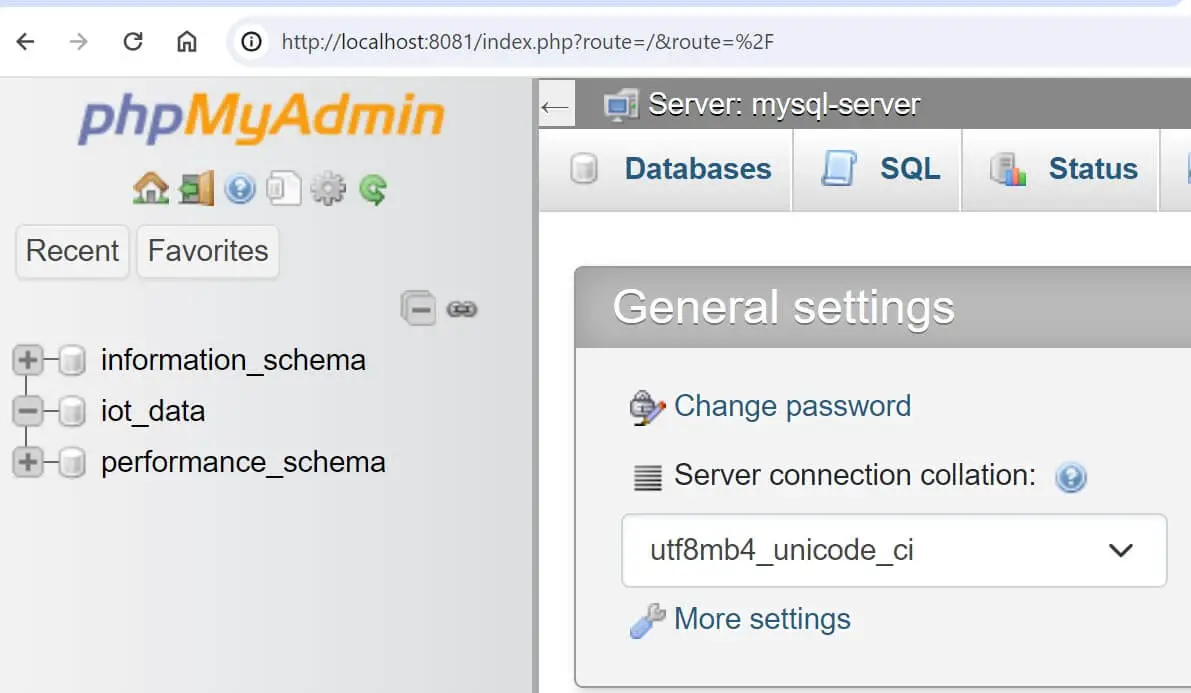
If you are not using this setup, make sure you have the iot_data database already created.
Creating a MySQL Node to Node-RED Example
The MySQL server is ready. Let’s now use Node-RED to first connect to MySQL and start running the SQL queries within Node-RED.
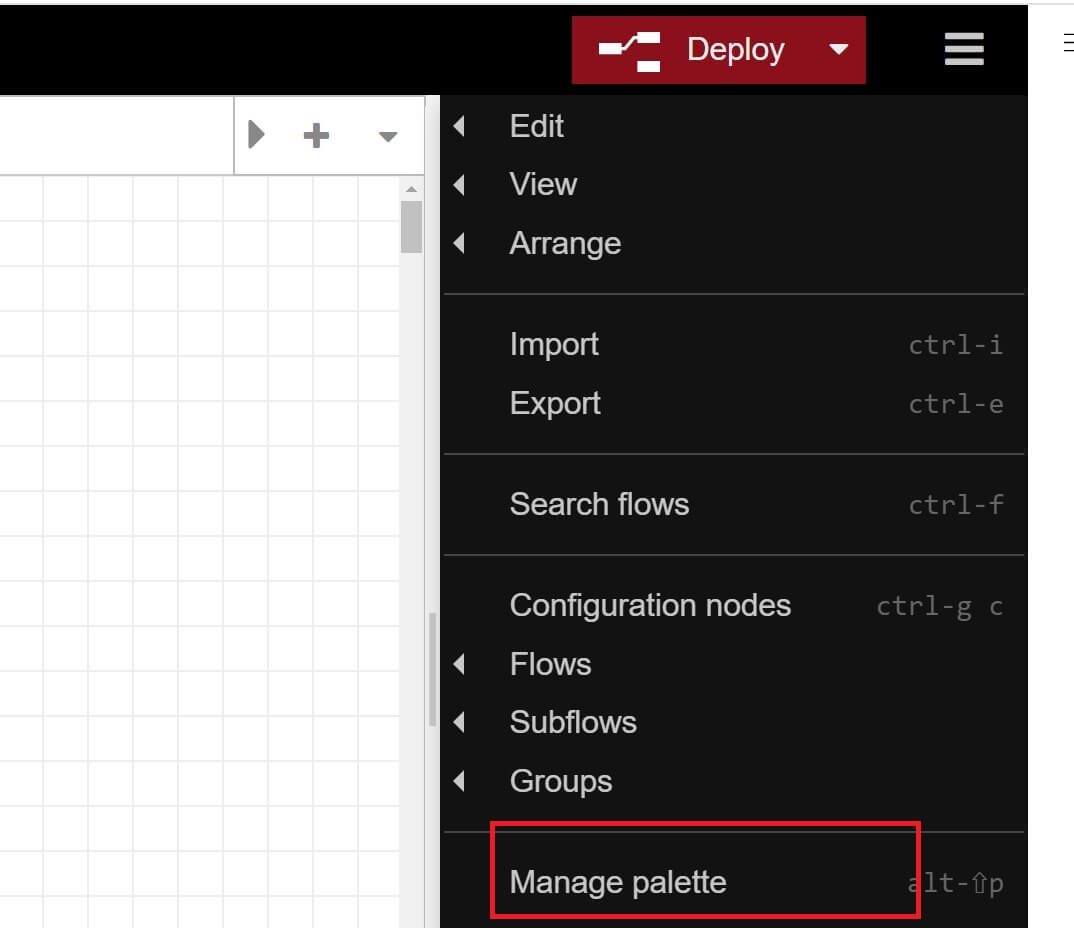
Node-RED uses MySQL drives to access the MySQL server. In your Node-RED dashboard, navigate to manage palette as follows:
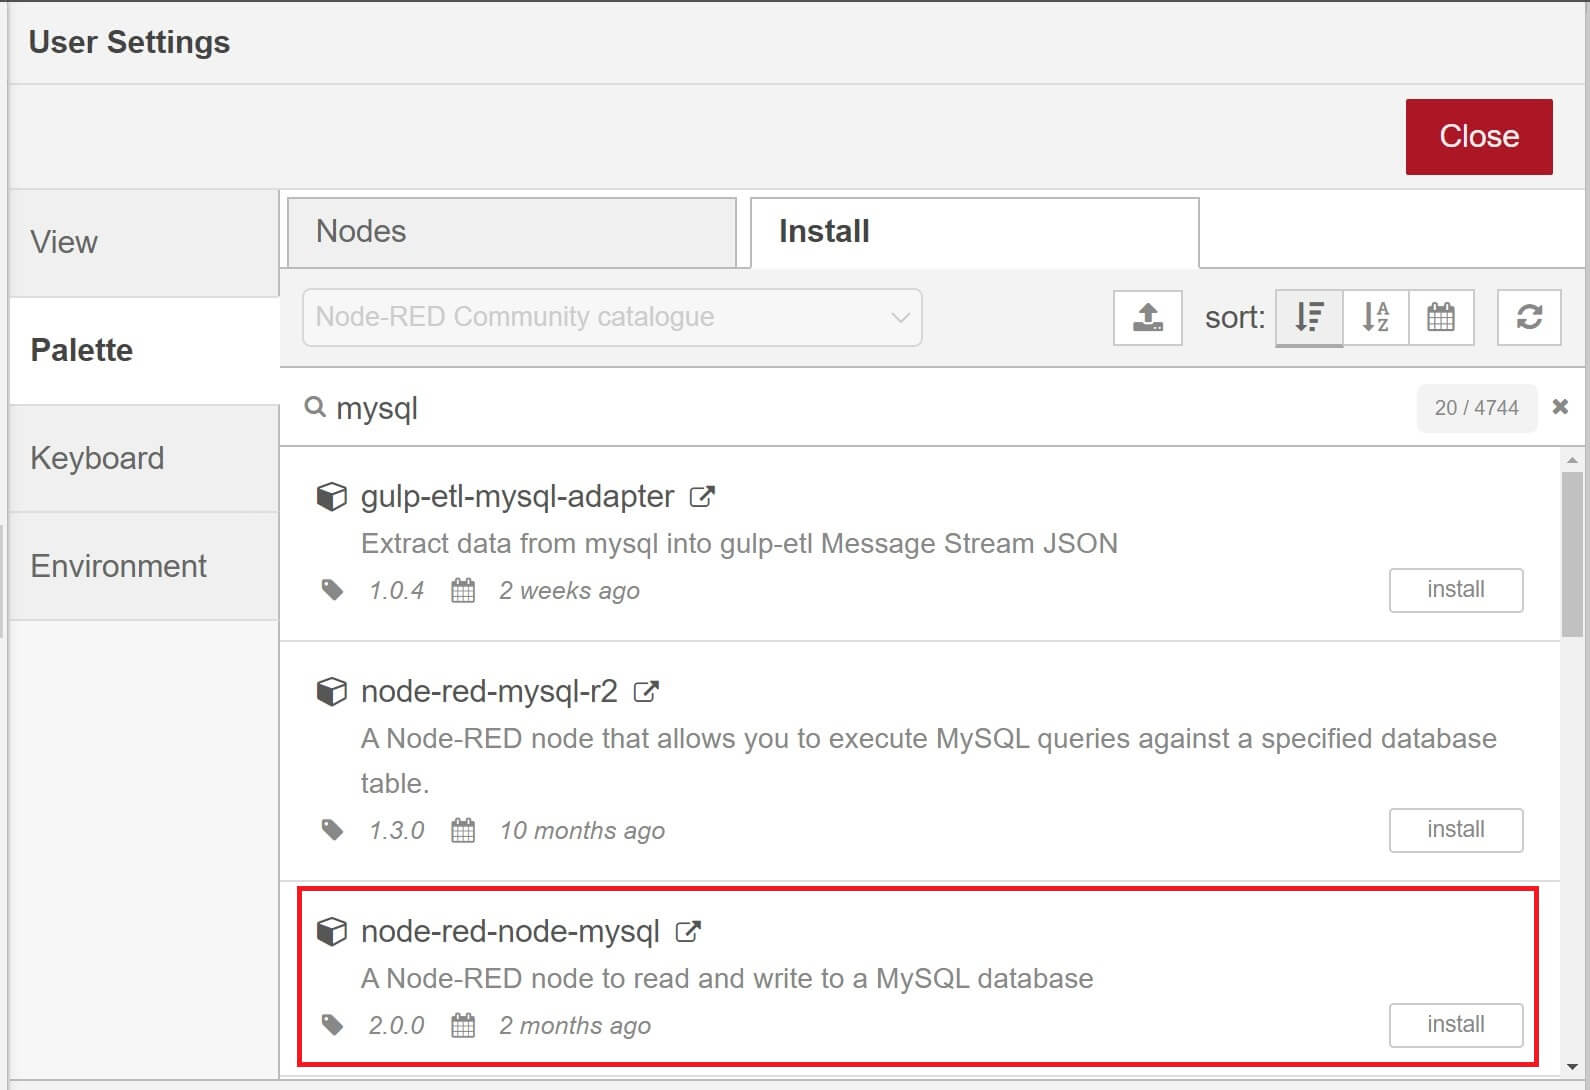
Now, navigate to Install and search MYSQL, and install the following MYSQL palette.
This should create the MYSQL Node that Node-RED will use. Close the pelette and navigate to Storage and you should have the MYSQL NODE as follows:
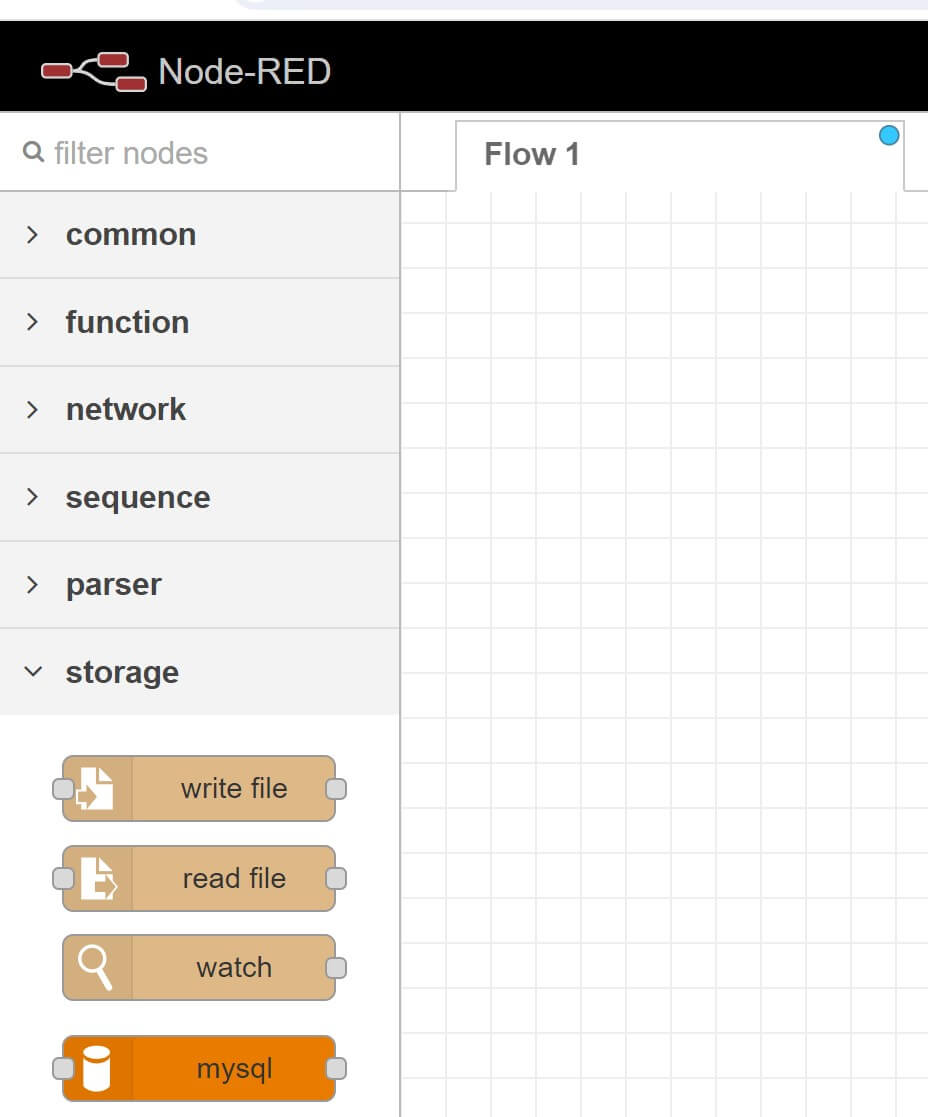
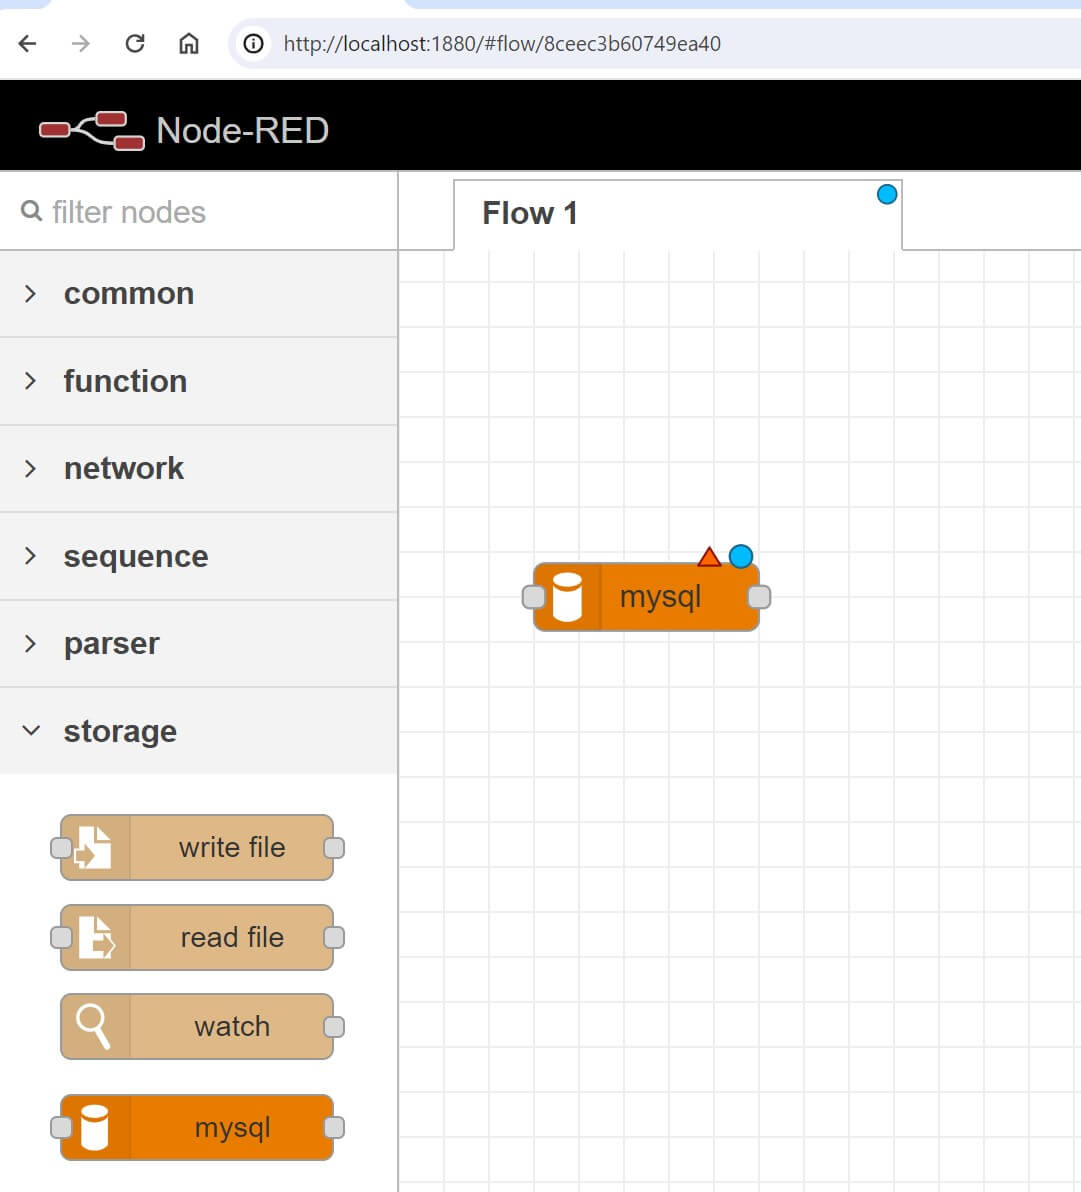
Go ahead and add the MySQL node to your flow as follows:
How to Connect Node-RED to MySQL Server
Here, you need to set a connection to the MySQL database. The Node-RED connection will use the details of your running MySQL server as follows:
- Click of MySQL node icon. It should create a Node-Red dashboard to add MySQL database as follows:
![]()
- Click on the pen icon as shown above and Node-Red will provide you with properties that you need to use and connect to MySQL as follows:
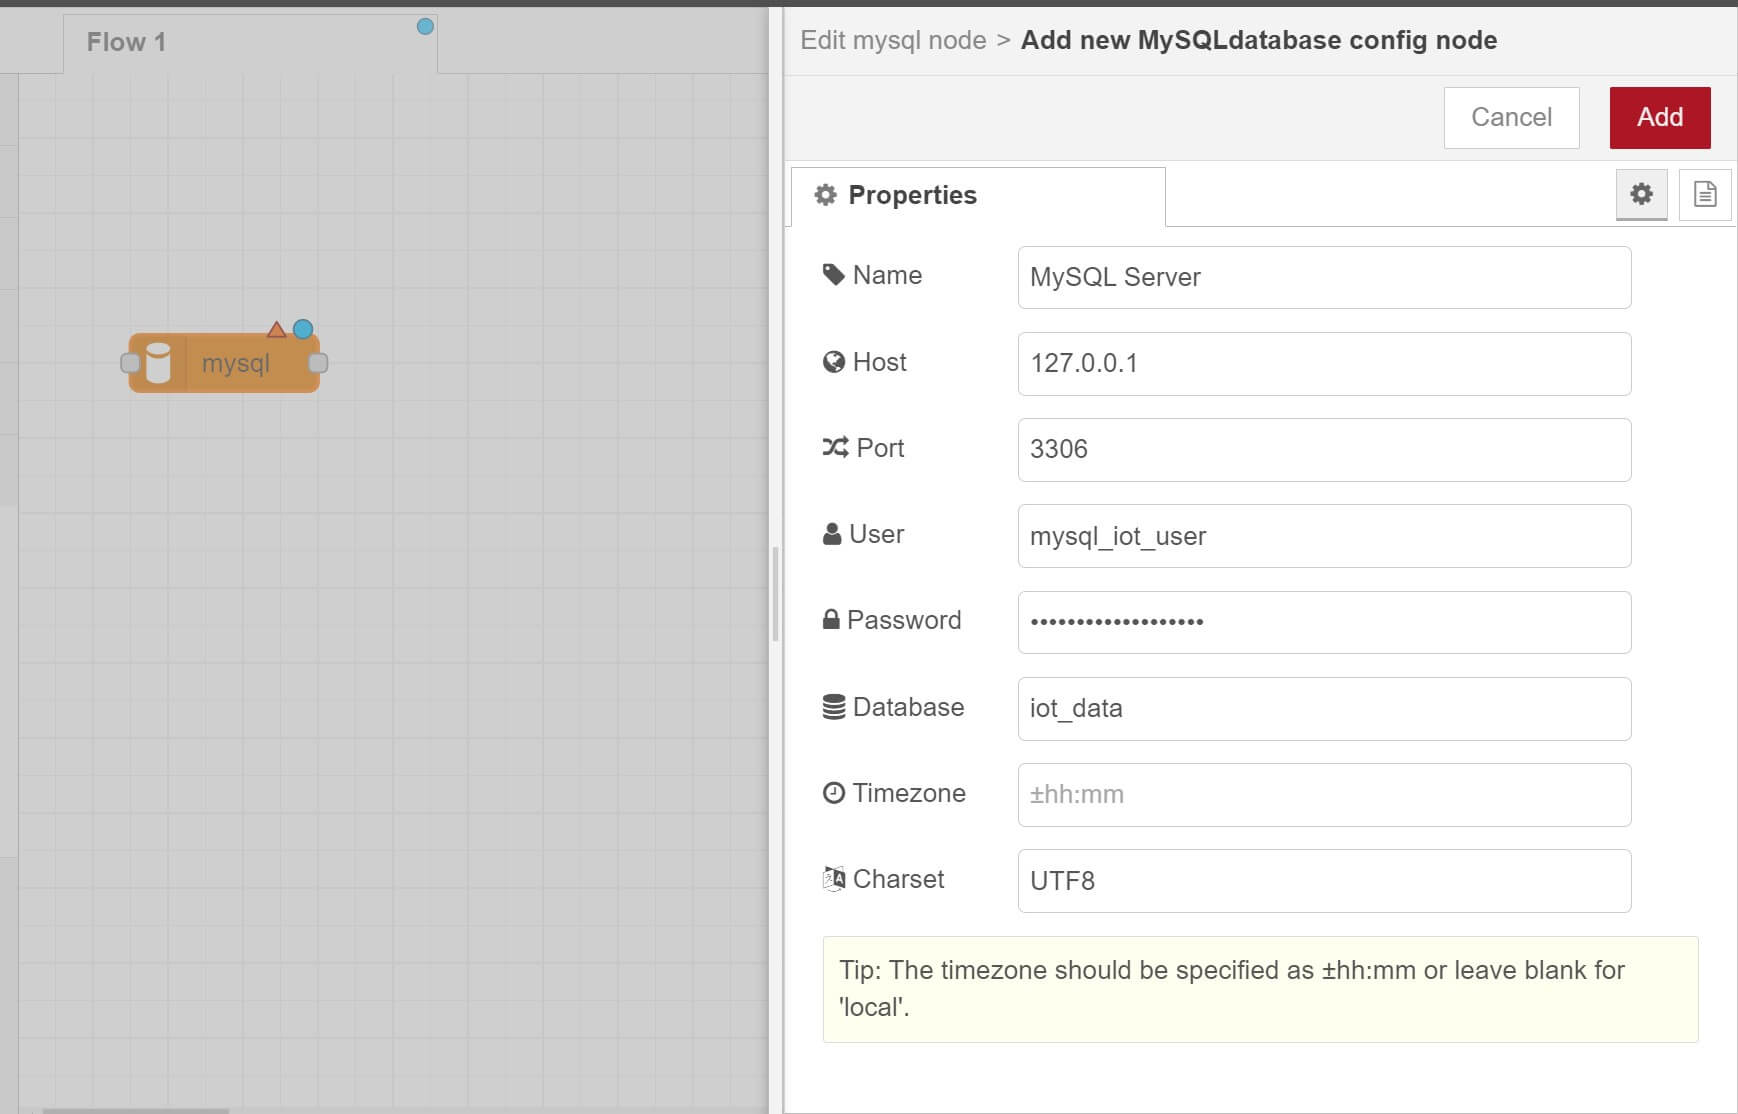
Make sure you add the above details based on your MySQL server. Any incorrect entry won’t let Node-Red connect to MySQL.
- Save the above details and Add to Node-Red MySQL Node. Now, Go ahead and deploy your Node.
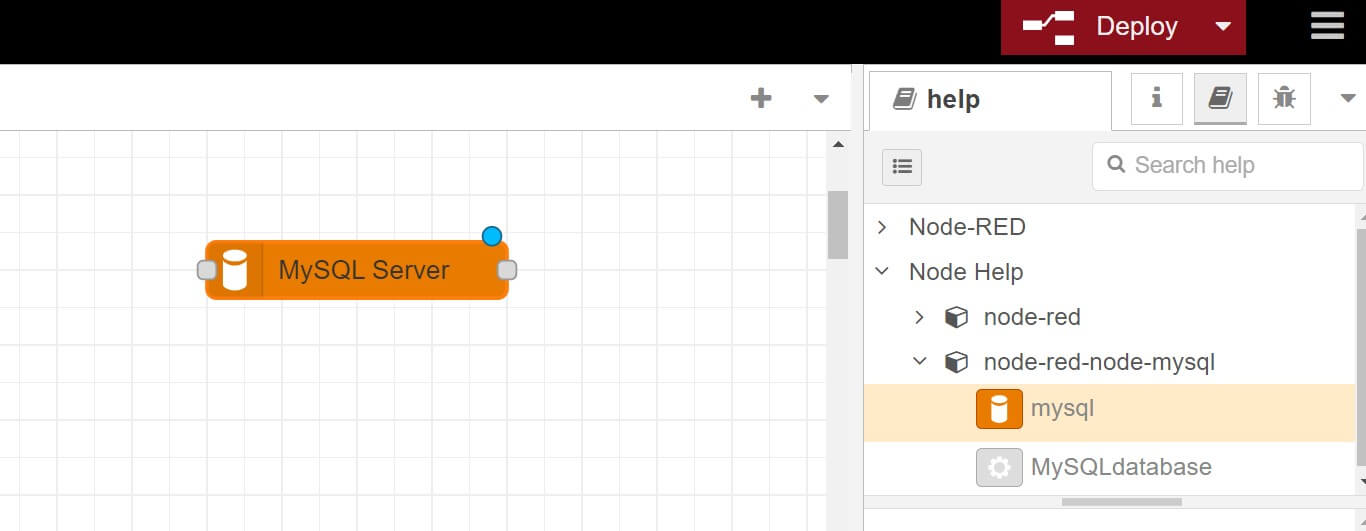
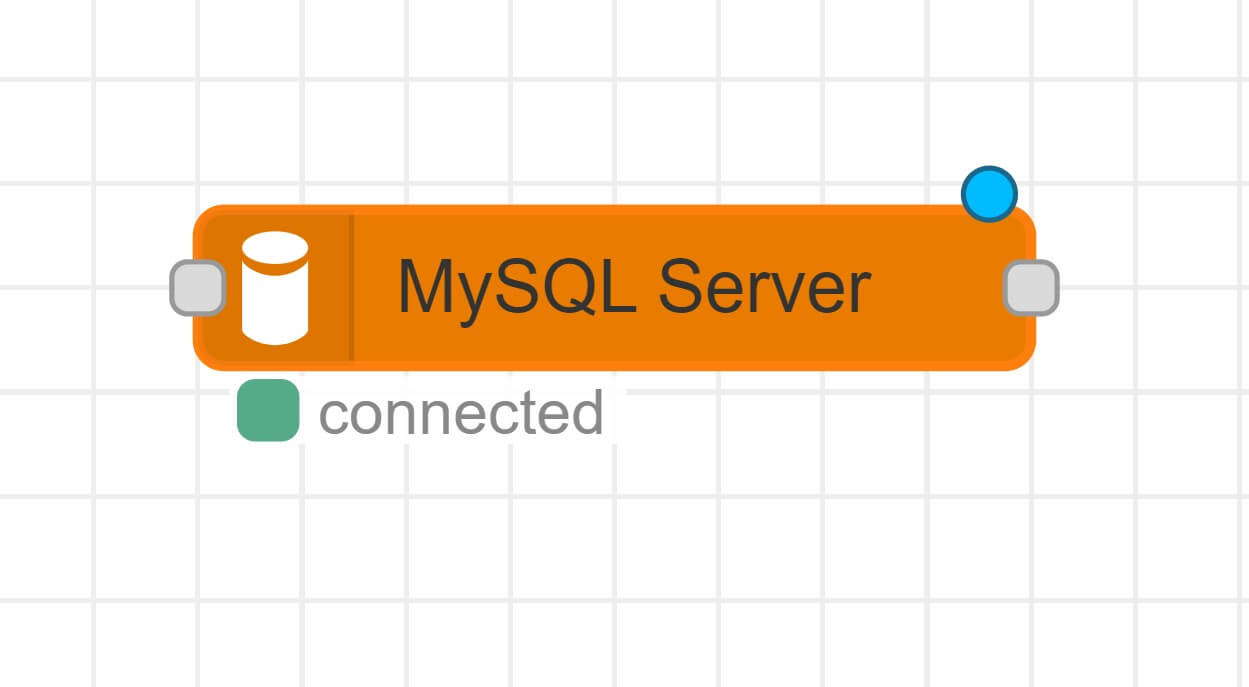
- If the connection details are correct, Node-Red should tell you that is connected to the MySQL server as follows:
Creating a MySQL Database table using Node-Red
At this point the connection is ready. You need a table to select and INSERT data. You can choose to create this setup manually and use the following query:
CREATE TABLE iot_factory (
    id SERIAL PRIMARY KEY,
    device_id VARCHAR(50) NOT NULL,
    timestamp TIMESTAMP NOT NULL,
    temperature FLOAT,
    humidity FLOAT,
    pressure FLOAT,
    status VARCHAR(20)
);
However, with Node-Red. you will follow these steps:
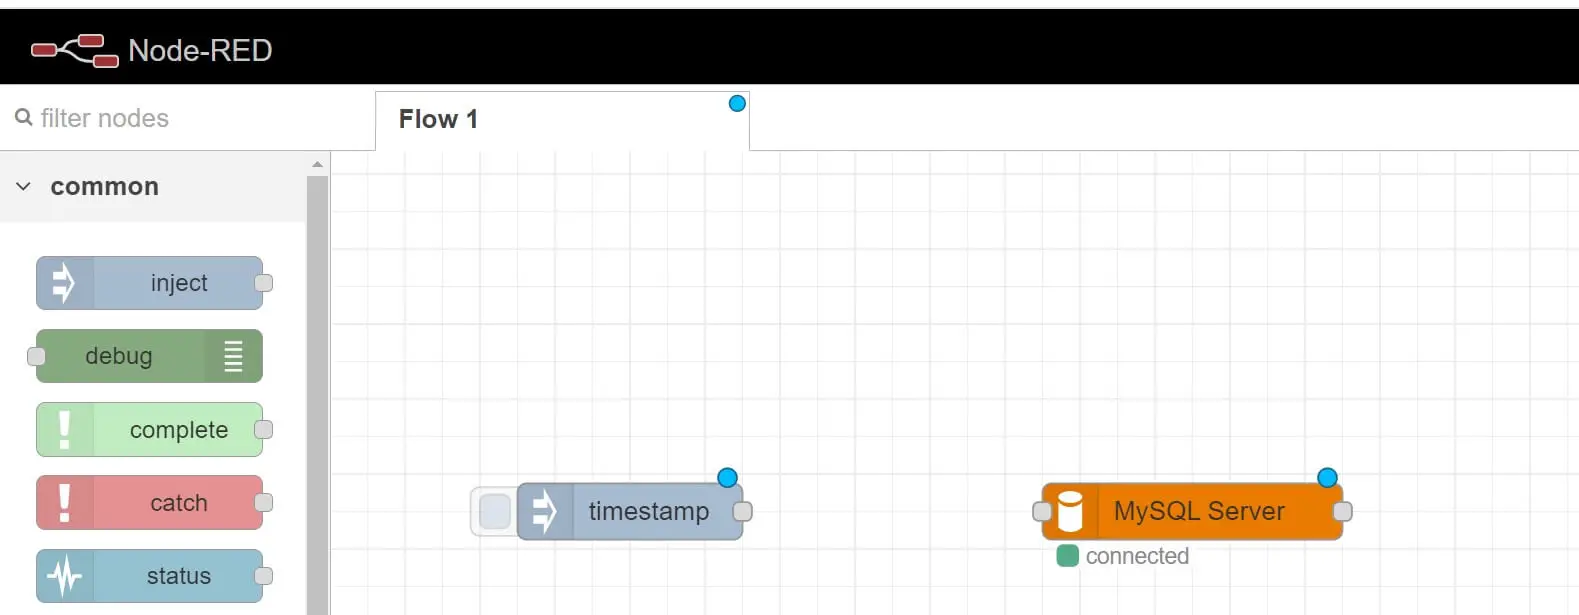
- Create an Inject Node as follows:
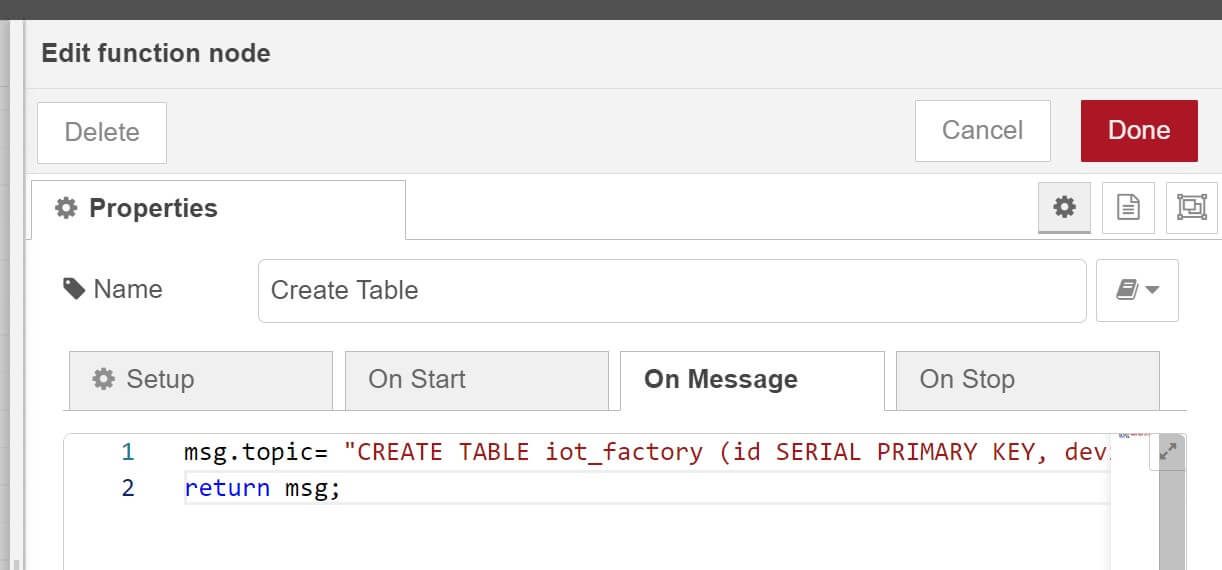
- Now, create a function node and add the following
msg.topicas the MySQL query you want the Node-Red to run:
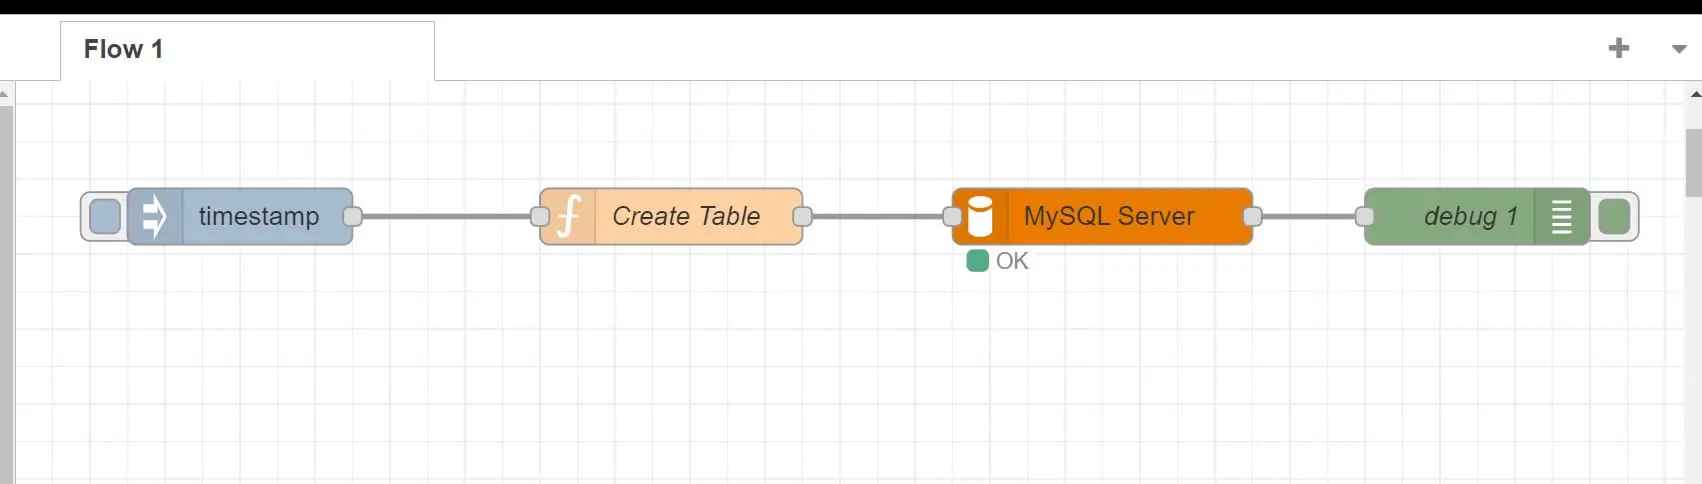
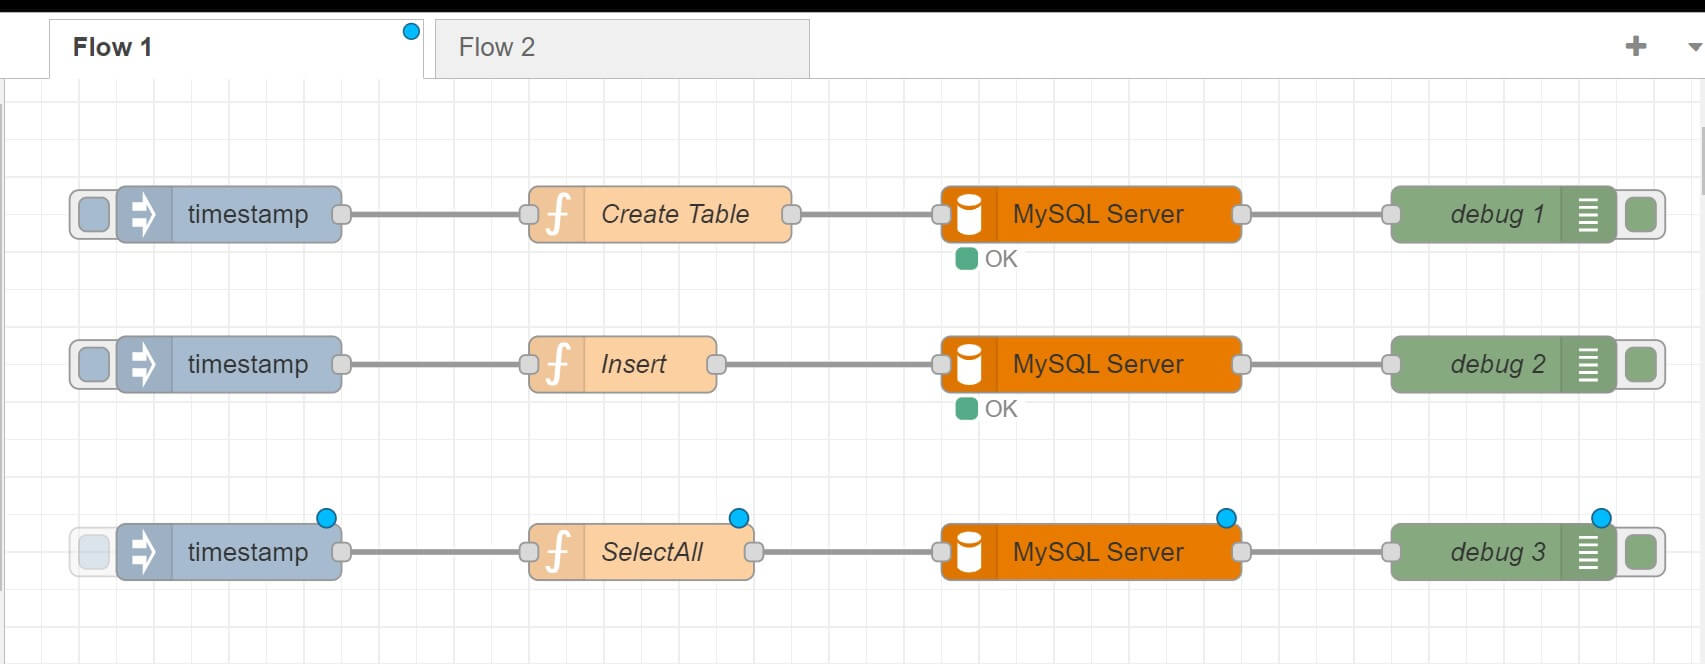
- Finally add an Inject Node that will let you know and debug what Node-Red sends to MySQL. Your workflow should be connected as follows:
- Deploy the flow.
- Once Done click Inject timestamp in the Inject Node as follows:
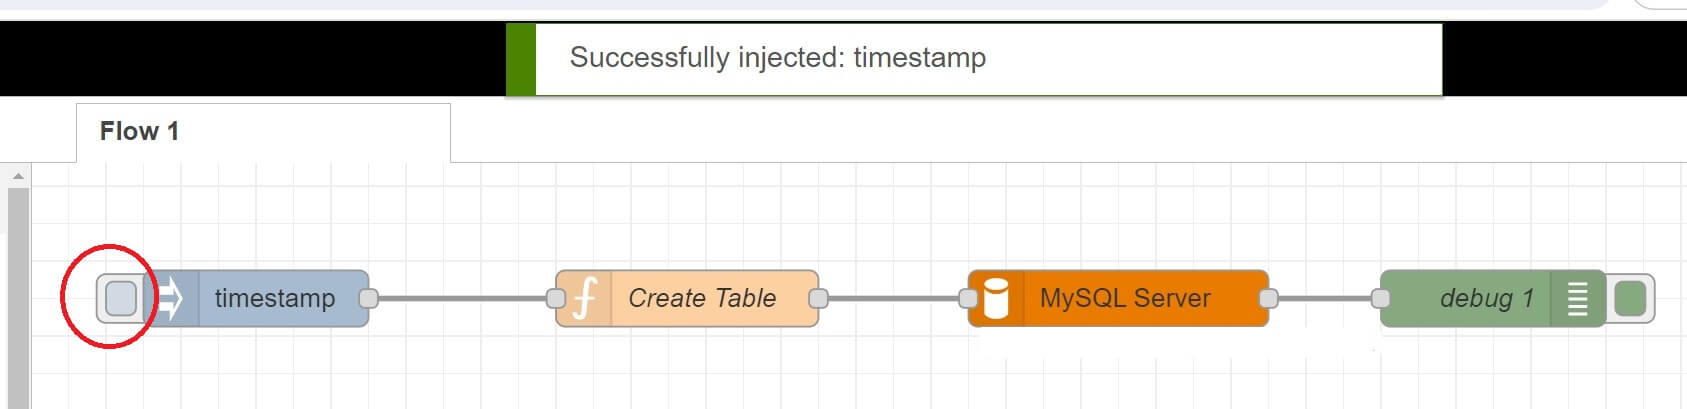
Now, the MySQL node should show an OK status. Check Debug to know what happened:
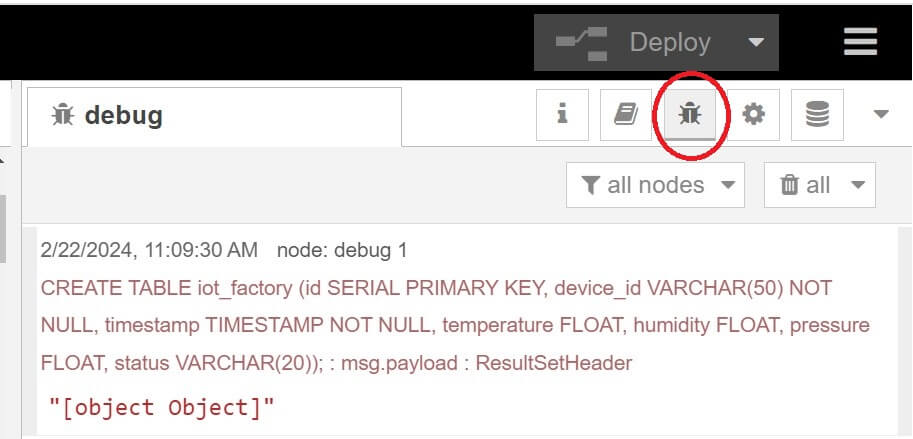
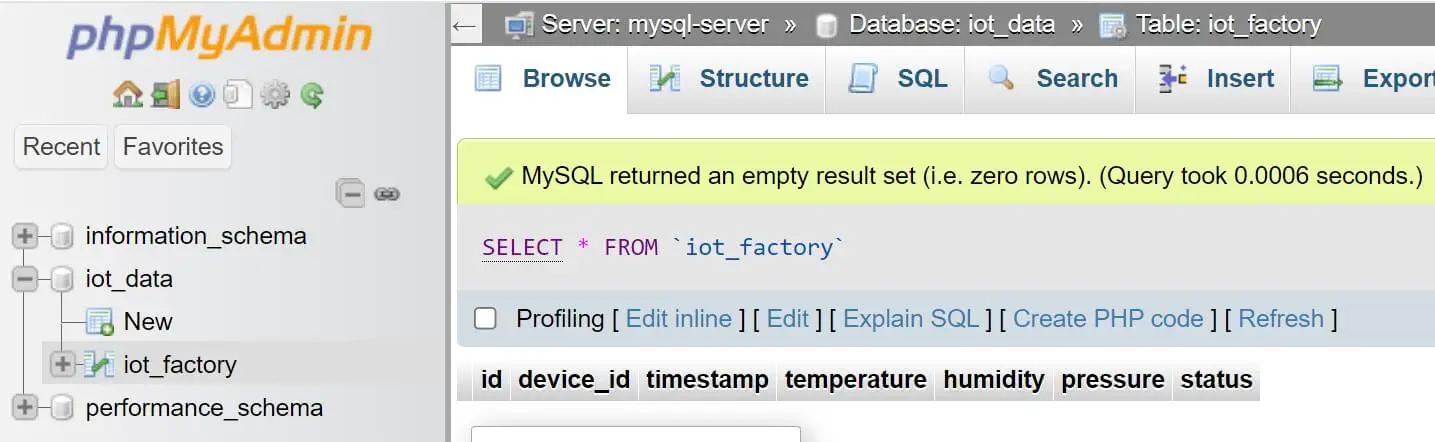
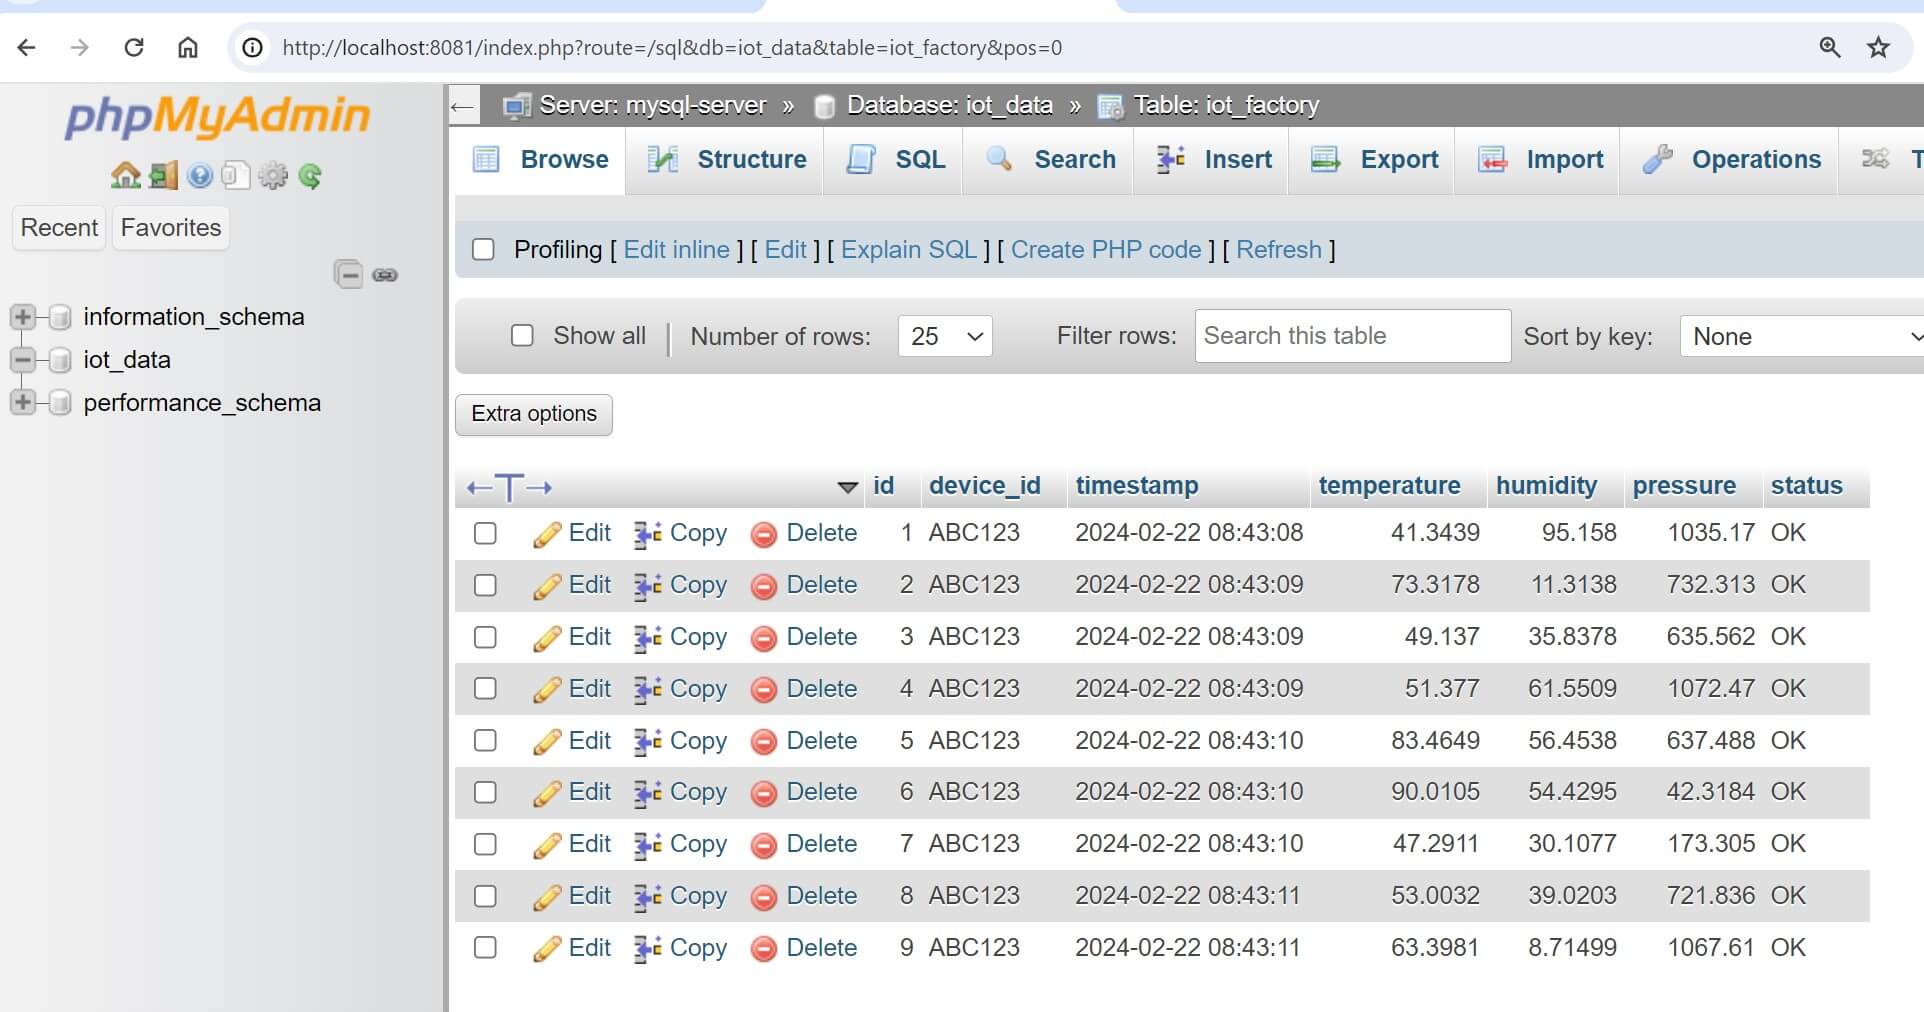
Go to your iot_data database and your table should be ready as follows:
How to Insert and Save data to MySQL using Node-Red and SQL Query
Node-Red can create a complete CRUD operation for MySQL. Now, let’s start using this setup and run an INSERT Query. In this case, you need:
msg.topicto hold the query for the database. The result is returned inmsg.payload.msg.payloadcontains an array of values to bind to the topic. It runs queries such as INSERT to execute operations against the configured MySQL database.
To able to run an INSERT query to MySQL with Node-RED, you will:
- Create an Inject Node.
- Add a function Node with the INSERT topic.

In this case, I will run the following insert query:
msg.topic= "INSERT INTO iot_factory (device_id, timestamp, temperature, humidity, pressure, status) VALUES ('ABC123', NOW(), 25.5, 60.3, 1013.2, 'OK');"
For more Node-Red information, you can add functions such as NOW() for dates or Random() JavaScript functions for generating randomized data as follows:
INSERT INTO iot_factory (device_id, timestamp, temperature, humidity, pressure, status) VALUES ('ABC123', NOW(), RAND() * 100, RAND() * 100, RAND() * 2000, 'OK');
- Add a Debug Node
- Connect the above three nodes through MySQL Node.

- Deploy the flow on Node Red and click the Inject timestamp to execute the query. Check the Debug for more details:
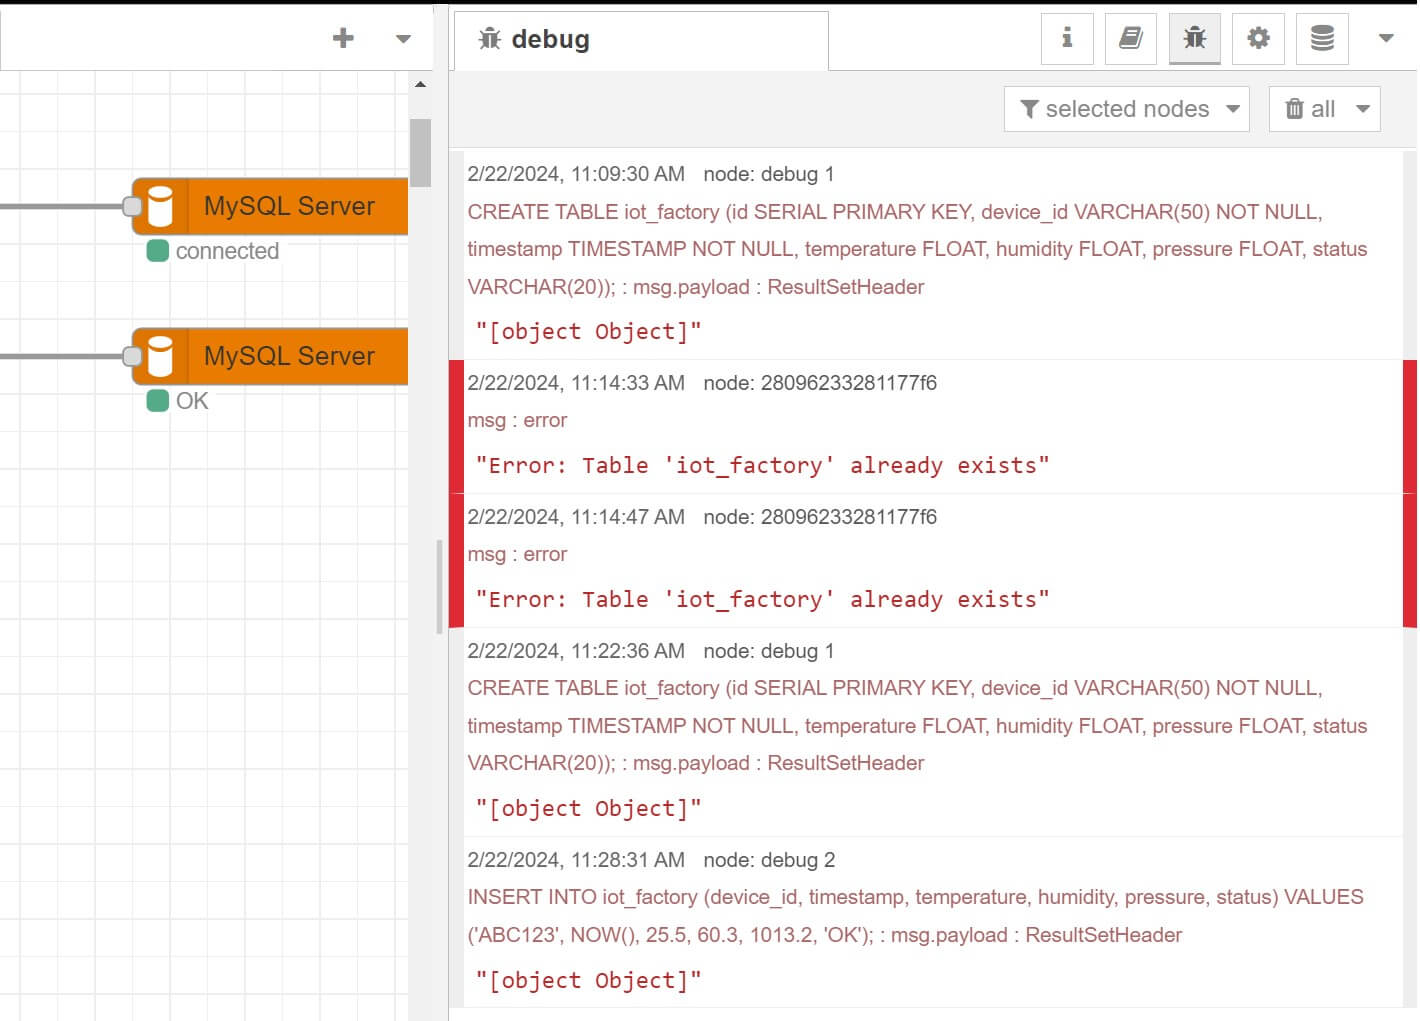
Use the same process and Insert More data. Or if use have used RAND(), click Inject timestamp to add new records to the table.
Go to the MySQL table and check if Node-Red was able to use MySQL, use Insert query, and save data to the database:
How to Read and Select MySQL Data with Node-Red
You need the same process as shown above to Select data from MySQL and use Node-Red. In this step all you need to change the query to SELECT as follows:
- Create an Inject Node.
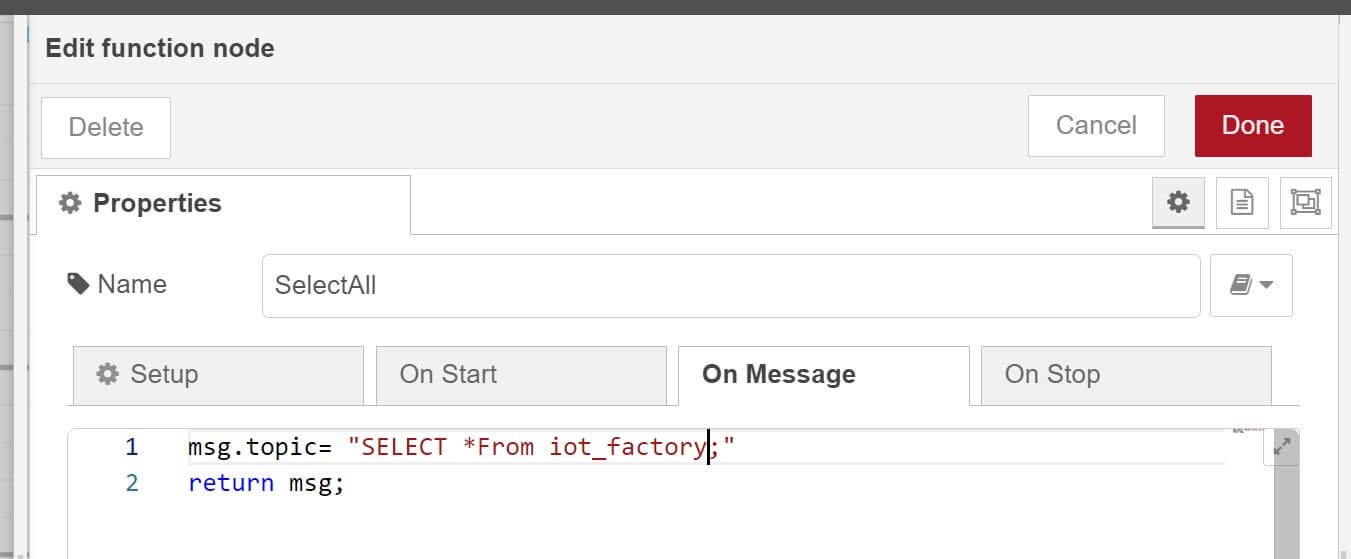
- Add a Function Node with MySQL SELECT query as follows:
msg.topic= "SELECT *From iot_factory;"
- Add a Debug Node.
- Connect them nodes through MySQL node as follows:
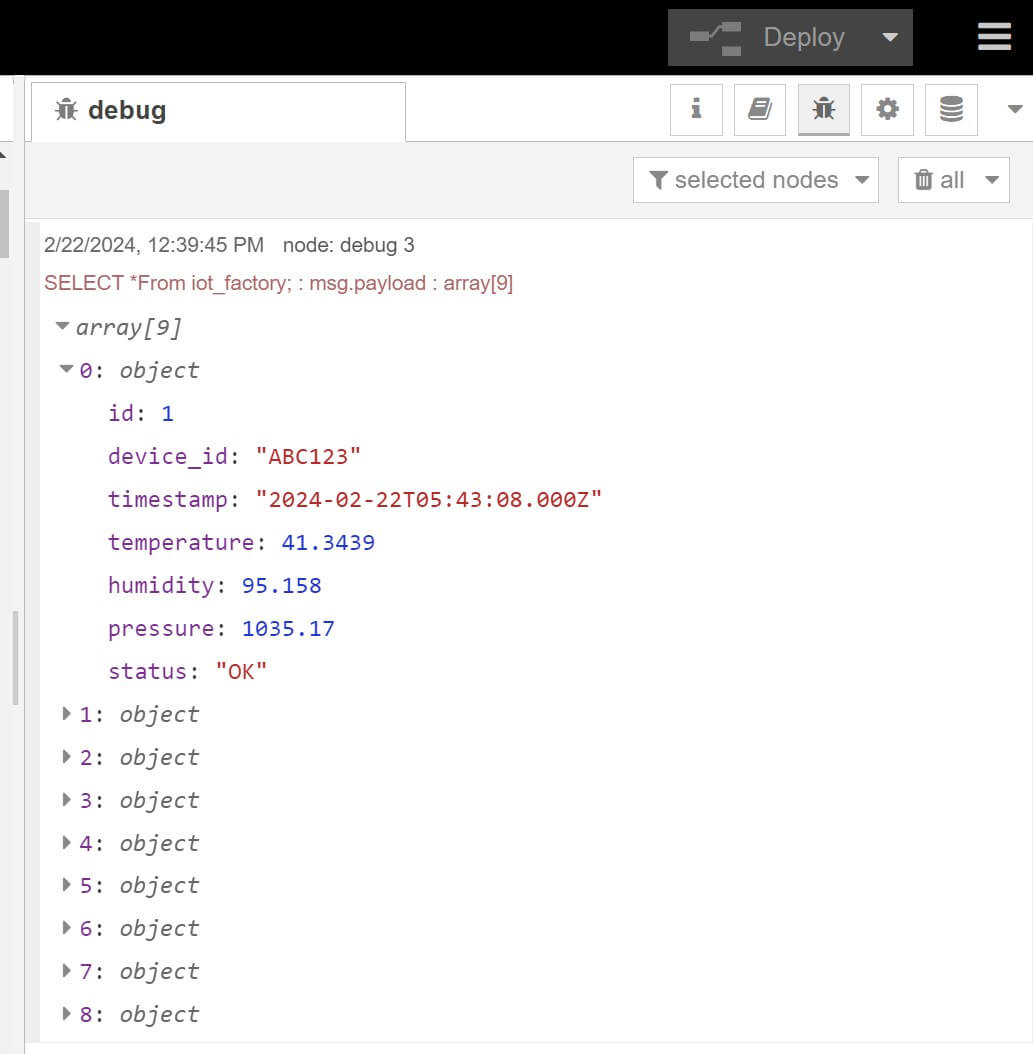
- Deploy the node and click Inject timestamp. Below are your results. You should get an array of objects. Each object is a record saved in your MySQL database table:
Conclusion
I hope you can now Insert, save, and select data to MySQL using SQL queries and Node-Red. You learned:
- How to connect Node-RED with MySQL.
- Running Node-RED with MySQL select query to save data to MySQL server.
- How to use Node-RED and MySQL with MySQL insert query.
Written By: