Ultimate Guide to NestJS with MySQL and Docker Compose
Posted July 9, 2024
This comprehensive guide dives into packaging a MySQL Nest.js API with Docker Compose. We’ll create a Nest.js API from scratch using the MySQL database and run the whole stack with Docker Compose. We’ll then use Adminer or phpMyAdmin to access MySQL and manage the Nest.js app within Docker.
You will learn:
- Packaging Nest.js and MySQL with Production-ready Dockerfile.
- The best practices to optimize Nest.js MySQL Docker setup with dockerignore and Multistage builds.
- How to perfectly connect Nest.js with MySQL databases while using Docker.
- Running ORMS like Prisma, Sequalize and TypeORM with MySQL, Nest.js, and Docker.
- Accessing MySQL with Adminer or phpMyAdmin
Ready? Dive and build Nest.js app with MySQL and Docker Compose like a Pro. Ensure you have the Docker engine installed and running on your local computer.
Setting Up Nest.js with MySQL and Docker
We first need a ready Nest.js app. This should be created on your local computer. Docker will then use this app to package and run it. If you haven’t created one yet, use the following commands:
# Add cli
npm i -g @nestjs/cli
# Run this command to bootstrap Nest.js
nest new nest-with-docker
Use the following command to access the project and test if it works as expected:
cd nest-with-docker
npm run start
Our App should be fine up to this point. We’ll build up the code base along with the guide.
Setting the Nest.js MySQL Dockerfile
The Dockerfile outlines the instructions we need to package the Nest.js app within a Docker image. The Dockerfile will be a text document. Each line of code is a command we need to assemble the Nest.js Docker image.
Docker will execute the added command-line instructions in succession until Nest.js is ready and running. Create this file in the nest-with-docker directory:
touch Dockerfile
To bundle a Nest.js Image the following Dockerfile will be perfect:
FROM node:20-alpine
## A Docker working directory for Nest
WORKDIR /usr/src/app
# dependencies files
COPY package*.json ./
# Install the packages
RUN npm install
# Copy all the Nestjs code to Docker
COPY . .
## The command ro run Nest.js on Docker
CMD [ "npm", "run", "start:dev" ]
Nest.js uses Node.js. This means node:20-alpine will be the base on the Nest.js to create that Node.js environment.
Its Docker will:
- Pull the Nod.js as the base Image.
- Create a working directory on Docker.
- Copy all code and needed files to the Docker working directory.
- Run the command to install dependencies and execute the
npm run start:devcommand to start the Nest.js server.
Optimizing Nest.js and MySQL for Production
The above Dockerfile is okay. However, we need to build an optimized Nest.js Docker image. In this example, we will implement two ways to use, the Docker Mutlistage build and the .dockerignore file.
First, create a .dockerignore file.
touch .dockerignore
The .dockerignore file adds the files and directories to be ignored by Docker. Such an approach will reduce the image size, excluding unnecessary files. For this example, the .dockerignore file will take the following shape:
# Ignore Dockerfiles
Dockerfile
.dockerignore
# Avoid node_modules directory
node_modules
# Ignore logs and temp files
*.log
*.tmp
*.temp
# Avoid build directories
dist
build
# git directory and files
.git
.gitignore
# environment variables file
.env
#  editor directories and files
.vscode
.idea
# OS-specific files
.DS_Store
Thumbs.db
Next, we will update the Dockerfile and use the Multistage build. Multi-stage builds to ensure the final Docker image contains only the necessary files and dependencies for running the application. We get a smaller and more efficient image.
This means we can update the previous Dockerfile with a detailed example of a multi-stage build as follows:
FROM node:20-alpine AS development

#Specify the working directory
WORKDIR /app

# Copy package/package-lock.json to the working directory
# This is done separately to leverage caching
COPY package*.json .

RUN npm config set registry https://registry.npmmirror.com/

RUN npm install


COPY . .

#Set default environment variables
ARG APP_ENV=development
#Expose environment variables
ENV NODE_ENV=${APP_ENV}

RUN npm run build

FROM node:20-alpine AS production

ARG APP_ENV=development
ENV NODE_ENV=${APP_ENV}

#Specify the working directory
WORKDIR /app

COPY --from=development /app/package.json ./
COPY --from=development /app/package-lock.json ./
COPY --from=development /app/dist ./dist

RUN npm config set registry https://registry.npmmirror.com/

RUN npm install --production

EXPOSE 3000

CMD ["node", "dist/main"]
Running a Nest.js MySQL DB with Docker Compose
MySQL can only run with Docker Compose. Based on our setup. Nest.js will need to connect to the MySQL database. This is where we need to spin MySQL and Nest.js as a stack with Docker Compose. We’ll create a docker-compose.yml file in the same Nest.js nest-with-docker directory:
touch docker-compose.yml
Let’s now Run MySQL and Nest.js together with Docker Compose. We will still add phpMyAdmin as a way to manage MySQL from Docker.
Add the following to the created docker-compose.yml:
version: '3.8'

services:
  nestjs-app:
    container_name: nestjs-app
    depends_on:
      - mysql-db
    build:
      context: .
      dockerfile: Dockerfile
    restart: unless-stopped
    # Map port 3000 of the container to port 3000 on the host
    ports:
      - "3000:3000"
    stdin_open: true
    tty: true
    volumes:
    # Mount the current directory to /usr/src/app in the container
      - .:/usr/src/app
      - /app/node_modules  # Persist node_modules
      # Use the default network
    networks:
      - default

  mysql-db:
    container_name: mysql-db
    image: mysql:latest
    restart: unless-stopped
    environment:
      MYSQL_ROOT_PASSWORD: root  # Set the root password for MySQL
      MYSQL_DATABASE: nest_db  # Create a database named 'nest'
      MYSQL_USER: nestjs_user
      MYSQL_PASSWORD: password
      TZ: America/New_York  # Set timezone to America/New_York
    ports:
      - "3306:3306"
    volumes:
      - db_data:/var/lib/mysql
    networks:
      - default  # Use the default network

  phpmyadmin:
    container_name: phpmyadmin
    image: phpmyadmin/phpmyadmin
    depends_on:
      - mysql-db
    restart: unless-stopped
    environment:
    # Hostname of the MySQL database container
      PMA_HOST: mysql-db
      # Root password for MySQL
      MYSQL_ROOT_PASSWORD: root
    ports:
      - "8080:80"
      # Use the default network
    networks:
      - default

# Define a named volume for MySQL data
volumes:
  db_data:
We will have the following:
- A MySQL service
mysql-db. It will set up a MySQL server with a newnest_dbdatabase and its user and password. - The Nest.js
nestjs-appcontainer will run the Docker file to package Nest.js. It depends onmysql-dbto make sure the MySQL server is running first. - The phpMyAdmin will get
mysql-dbto create a UI access to manage the databases.
Running the Nest.js MySQL Service with Docker Compose Command
The docker-compose.yml file is ready. Now, let’s run the containers. You will use the following command in the docker-compose.yml path:
docker compose up --build -d
[+] Running 5/5
 ✔ Network nest-with-docker_default   Created                                                                                      0.0s
 ✔ Volume "nest-with-docker_db_data"  Created                                                                                      0.0s
 ✔ Container mysql-db                 Started                                                                                      2.5s
 ✔ Container nestjs-app               Started                                                                                      2.9s
 ✔ Container phpmyadmin               Started
Check the Docker Engine to ensure these Container are running as such:
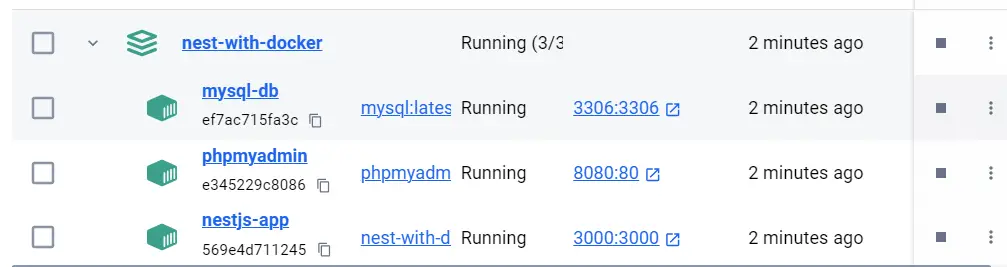
Remember Nest.js app is still a skeleton. If you open http://localhost:3000/, you will get a Hello World!. At the same time, open phpMyAdmin on http://localhost:8080/ and use the root as the user and password.
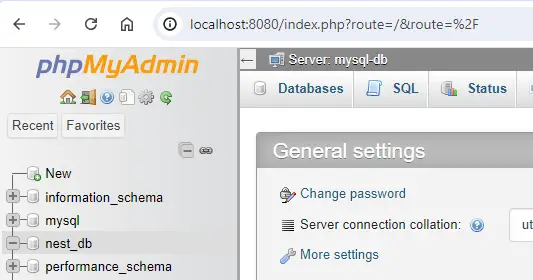
We now have nest_db ready and we can configure Nest.js to use the database.
Connecting Nest.js with MySQL on Docker
To make sure this stuck is successful, we need to create a MySQL database connection from Nest.js. This first example will do so Without ORM
For this example, we will use Sequalize, TypeORM, and Prisma. Each will have its own structure. Let’s start with connecting Nest.js to MySQL with TypeORM and Docker.
- Install these packages
npm install mysql2 @nestjs/common
Create a database.service.ts file in the src directory. We’ll provide the MySQL connection using a Nest.js Provider as follows:
import { Injectable, Logger } from "@nestjs/common";
import { createConnection, Connection } from "mysql2/promise";

@Injectable()
export class DatabaseService {
  // Holds the connection to the MySQL database
  private connection: Connection; // Logger instance to log messages and errors
  private readonly logger = new Logger(DatabaseService.name); // Initializes the service and establishes the database connection

  constructor() {
    this.connect();
  } // Establish a connection to the MySQL database

  private async connect() {
    try {
      // Create a connection to the MySQL database
      this.connection = await createConnection({
        host: "mysql-db",
        user: "nestjs_user",
        password: "password",
        database: "nest_db",
      }); // connection is successful
      this.logger.log("Connected to MySQL database");
    } catch (error) {
      // error message if the connection fails
      this.logger.error("Error connecting to MySQL database", error.stack);
    }
  } // current database connection

  getConnection(): Connection {
    return this.connection;
  }
}
Be keen on this section:
 host: 'mysql-db',
 user: 'nestjs_user',
 password: 'password',
 database: 'nest_db',
This should reflect your MySQL database environments:
    container_name: mysql-db
    environment:
      MYSQL_ROOT_PASSWORD: root  # Set the root password for MySQL
      MYSQL_DATABASE: nest_db  # Create a database named 'nest'
      MYSQL_USER: nestjs_user
      MYSQL_PASSWORD: password
- Go to Nest.js
app.module.tsfile and run the above service:
// Other Imports
import { DatabaseService } from './database.service';

@Module({
  // Rest of the code
 providers: [DatabaseService, AppService],
// Rest of the code
To test this sample:
- Drop all containers using the following command:
docker compose down
- You might as well need to Delete all the related volumes on Docker.
- Rerun the Docker Compose command:
docker compose up --build -d
- Finally go to the
nestjs-appservice on Docker and check its logs:
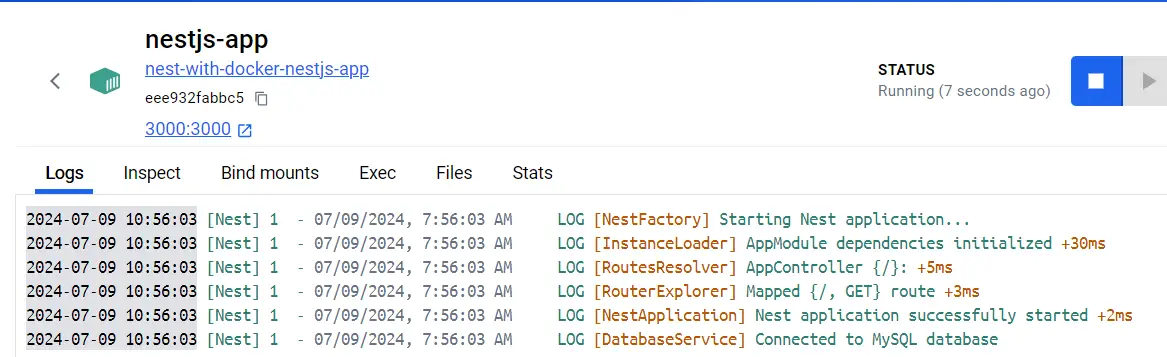
Nest.js was able to connect successfully with MySQL. For further details to enhance this API check this How to Create Nest.js MySQL CRUD API Without ORM guide.
Connecting Nest.js with MySQL using TypeORM on Docker
How about using ORM? How will Nest.js connect to this MySQL Docker service? You only need to have the following as your connection details.
npm install @nestjs/typeorm typeorm mysql2
You will just update TypeOrmModule.forRoot, forRootAsync, or configService as such:
// Other imports
import { TypeOrmModule } from "@nestjs/typeorm";

@Module({
  imports: [
    TypeOrmModule.forRoot({
      type: "mysql",
      host: "mysql-db",
      port: 3306,
      username: "nestjs_user",
      password: "password",
      database: "nest_db", // Rest of the code
    }),
  ],
  // Rest of the code
})
export class AppModule {}
The details used here should be the same as the Docker Compose instructions running the MySQL database. Note that you don’t have localhost. You will use the name of Docker MySQL service mysql-db.
For Further processing of this API example check, Guide to TypeORM with NestJS and MySQL
Connecting Nest.js with MySQL using Sequalize on Docker
If we are using Sequalize as the ORM. We can still access MySQL. Sequalize is heavily used with SQL databases such as MySQL. Your connection details will be as follows:
You will first ensure you have all Sequalize and MySQL needed dependencies:
npm i --save @nestjs/sequelize sequelize-typescript sequelize mysql2
The SequelizeModule.forRoot will connected to MySQL with these details:
// Rest of the code
@Module({
 imports: [
    SequelizeModule.forRoot({
 dialect: 'mysql',
 host: 'mysql-db',
 port: 3306,
 username: 'nestjs_user',
 password: 'password',
 database: 'nest_db',
// Rest of the code
Connecting Nest.js with MySQL using Prisma on Docker
Prisma ORM takes a very different structure. You will need a Nes.js application initialized with the Prisma-generated files. This means you must copy the same files to Docker to access Prisma.
To set up Prisma, ypu install Prisma:
npm install prisma --save-dev
npm install @prisma/client
The Initialize Prisma and its files:
npx prisma init
Here, you will get a prisma directory with schema.prisma and a .env. file on src. You will update the .env. file to connect to MySQL as follows:
DATABASE_URL="mysql://username:password@host:3306/database"
Because the MySQL Server is on Docker, our DATABASE_URL will be as follows:
DATABASE_URL="mysql://nestjs_user:password@mysql-db:3306/nest_db"
Go to schema.prisma and change the Provider to MySQL.
generator client {
  provider = "prisma-client-js"
}

datasource db {
  provider = "mysql"
  url      = env("DATABASE_URL")
}
For Prisma to work you must update the Dockerfile to copy and run Prisma files as follows:
FROM node:20-alpine AS development

#Specify the working directory
WORKDIR /app

# Copy package/package-lock.json to the working directory
# This is done separately to leverage caching
COPY package*.json .
COPY prisma ./prisma

RUN npm config set registry https://registry.npmmirror.com/

RUN npm install

RUN npm prisma generate

COPY . .

#Set default environment variables
ARG APP_ENV=development
#Expose environment variables
ENV NODE_ENV=${APP_ENV}

RUN npm run build

FROM node:20-alpine AS production


ARG APP_ENV=development
ENV NODE_ENV=${APP_ENV}

#Specify the working directory
WORKDIR /app

COPY --from=development /app/package.json ./
COPY --from=development /app/package-lock.json ./
COPY --from=development /app/dist ./dist
COPY --from=development /app/prisma ./prisma
RUN npm config set registry https://registry.npmmirror.com/

RUN npm install --production

RUN npm prisma generate

EXPOSE 3000

CMD ["node", "dist/main"]
Check this guide to Further your MySQL NestJS and Docker connection to Prisma.
Conclusion
This guide taught you to package Nest.js and MySQL with a Production ready Dockerfile. You have to use Docker Compose to:
- Perfectly connect Nest.js with MySQL databases while using Docker.
- Run ORMS like Prisma Sequalize and TypeORM with MySQL, Nest.js, and Docker.
- Access MySQL with Adminer or phpMyAdmin.
I hope you every section useful.
Written By: