Guide to Setting Up Node-Red with Portainer and Docker|HASS
Posted February 28, 2024

Node-RED is a web browser-based flow editor for creating IOT and automation with a visual programming approach. Now, setting up Node-RED with Portainer and Docker gives a convenient way to deploy and manage your Node-RED instances.
Docker will create a containerized environment and Portainer will create a UI for managing your Node-RED Docker environments. This means Portainer allows to have a graphical interface to manage Node-Red over Docker command-line tools.
In this Guide, you will learn how to perfectly set up and run Node-RED with Portainer. You will use Docker to spin a Portainer UI. Then use Portainer UI to comfortably manage a Node-RED container. Learn:
- How to run Portainer with Docker.
- Run Node-RED with Portainer and Docker.
- How to access Node-RED Portainer Setting.
- Add Node-RED Portainer Container to Home Assistant.
Ready? Dive in and learn Setting Up Node-Red with Portainer and Docker.
Prerequisites
Before running a Node-RED instance with Portainer ensure:
- You have Node.js installed on your computer to manage Node-RED Admin services.
- Prior Knowledge working with Node-Red, Portainer, and Docker.
- Ensure Docker is installed and running on your computer.
Step 1: Setting Up a Node-RED Portainer Service
If you are using Portainer for the first time, first check the first two steps before diving into using Node-Red. They will help you install Portainer correctly.
A Portainer service must be running on Docker. You don’t need to worry. Portainer is a lightweight management UI. You only need a Docker environment and follow these steps:
To Install Portainer and run Node-RED:
- Create a Docker Volume for Portainer Data. You need a Docker Volume to persist Portainer data even if the container is stopped or removed:
docker volume create portainer_data
- Next, pull the Portainer image to Docker:
docker pull portainer/portainer-ce:latest
- Now, run the following command to spin up your Portainer server:
docker run -d -p 9000:9000 --restart always -v /var/run/docker.sock:/var/run/docker.sock -v portainer_data:/data portainer/portainer-ce:latest

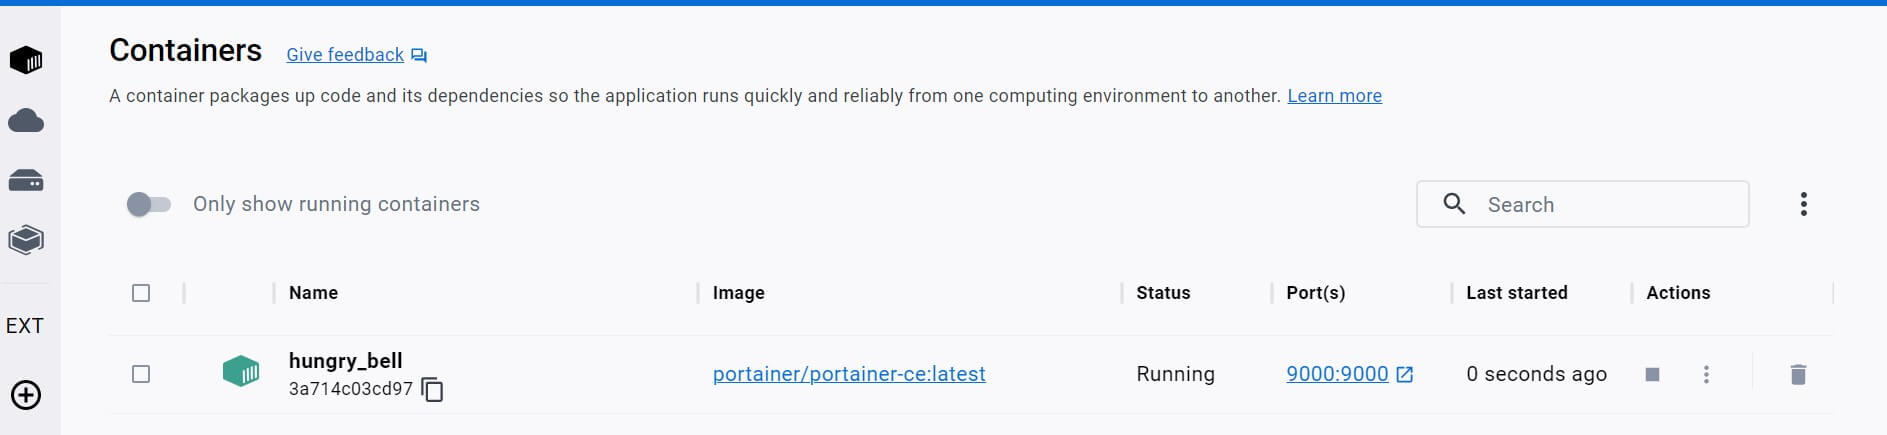
- Finally, Ensure the Portainer is running on port 9000 in your Docker Engine:
docker ps

You can do the same as follows:
If you want to use Docker Compose, all the above steps will be summarized in a docker-compose.yml file as follows:
version: '3.8'
services:
  portainer:
    image: portainer/portainer
    container_name: portainer
    restart: always
    ports:
      - "9000:9000"
    volumes:
      - /var/run/docker.sock:/var/run/docker.sock
      - portainer_data:/data
volumes:
  portainer_data:
Then run the following command in your project directory where the docker-compose.yml file is located:
docker-compose up -d
Step 2: How to Access Portainer
Once you confirm you have Portainer running open port 9000 on your browser. If on localhost use, http://localhost:9000/. You should get an Admin panel where you should set a security username and password for your portainer User:

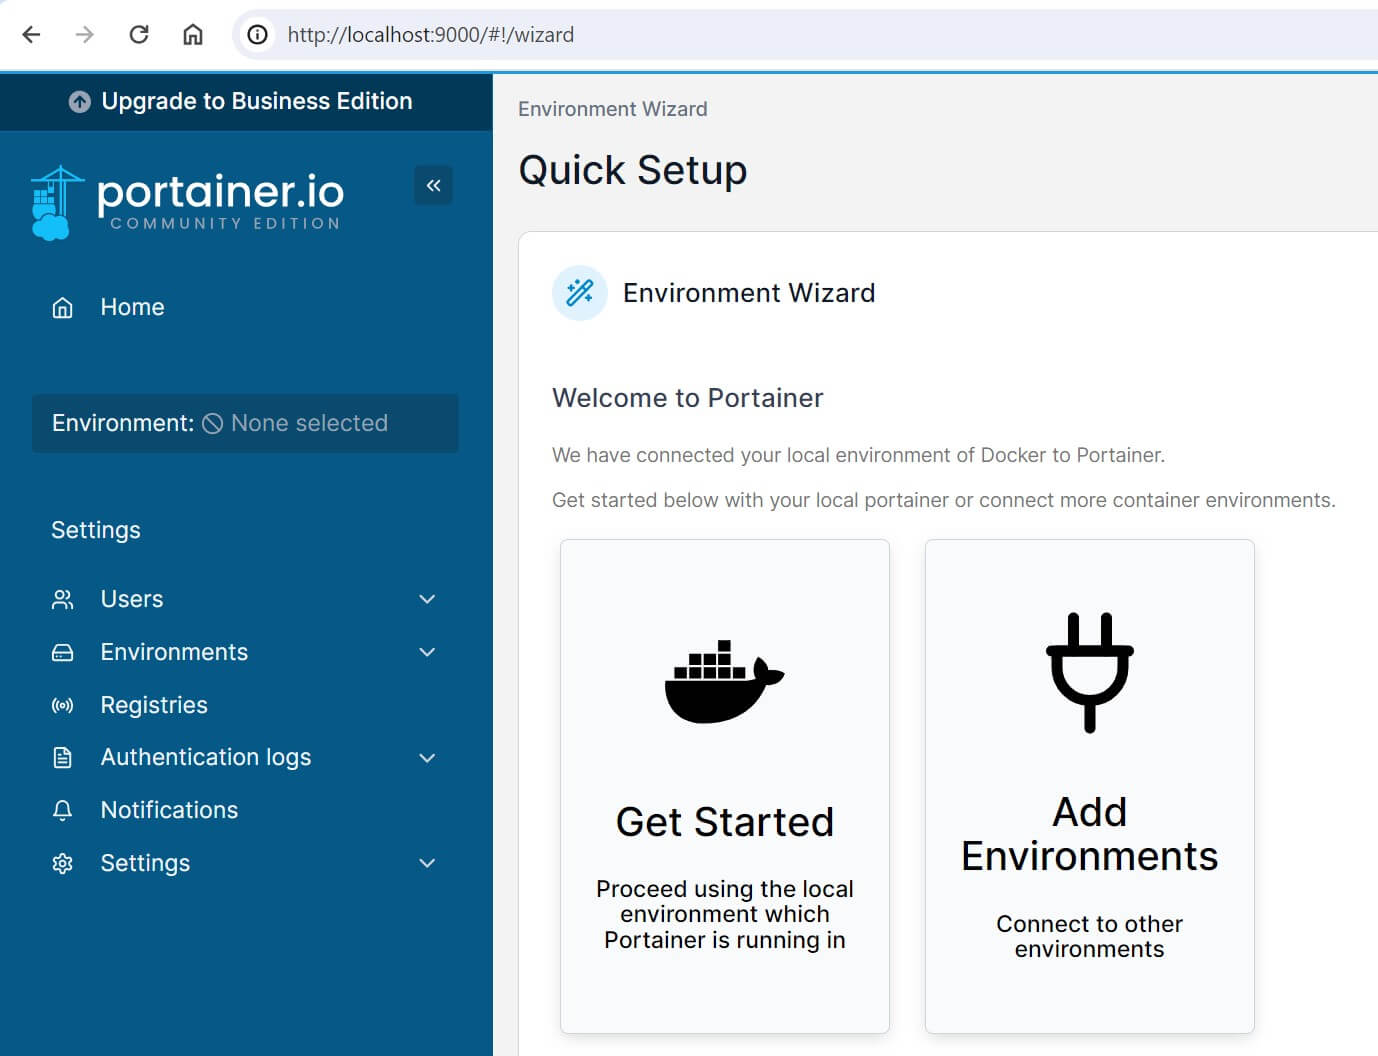
The Final step is to add the Portainer environment. You want Node-RED to run on Portainer through Docker. This means Docker will be the environment you need.
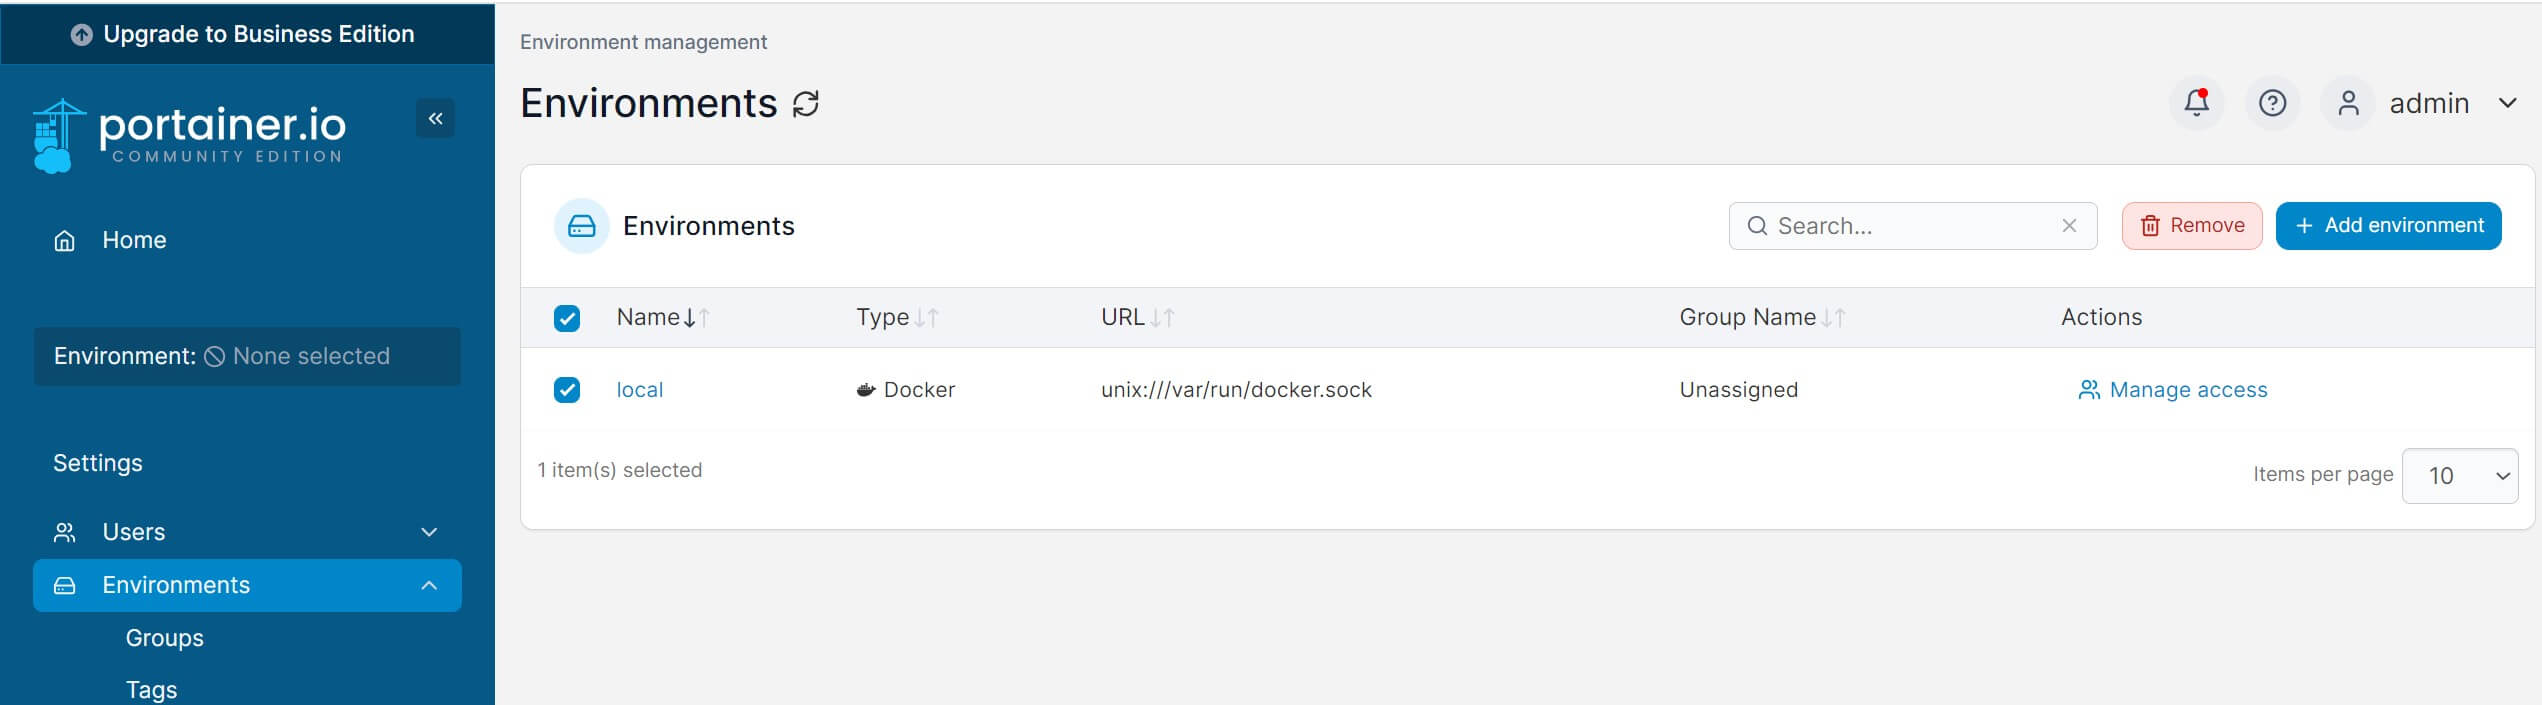
Navigate to Environments section and you should have the available environment instance you can use. Choose Docker:
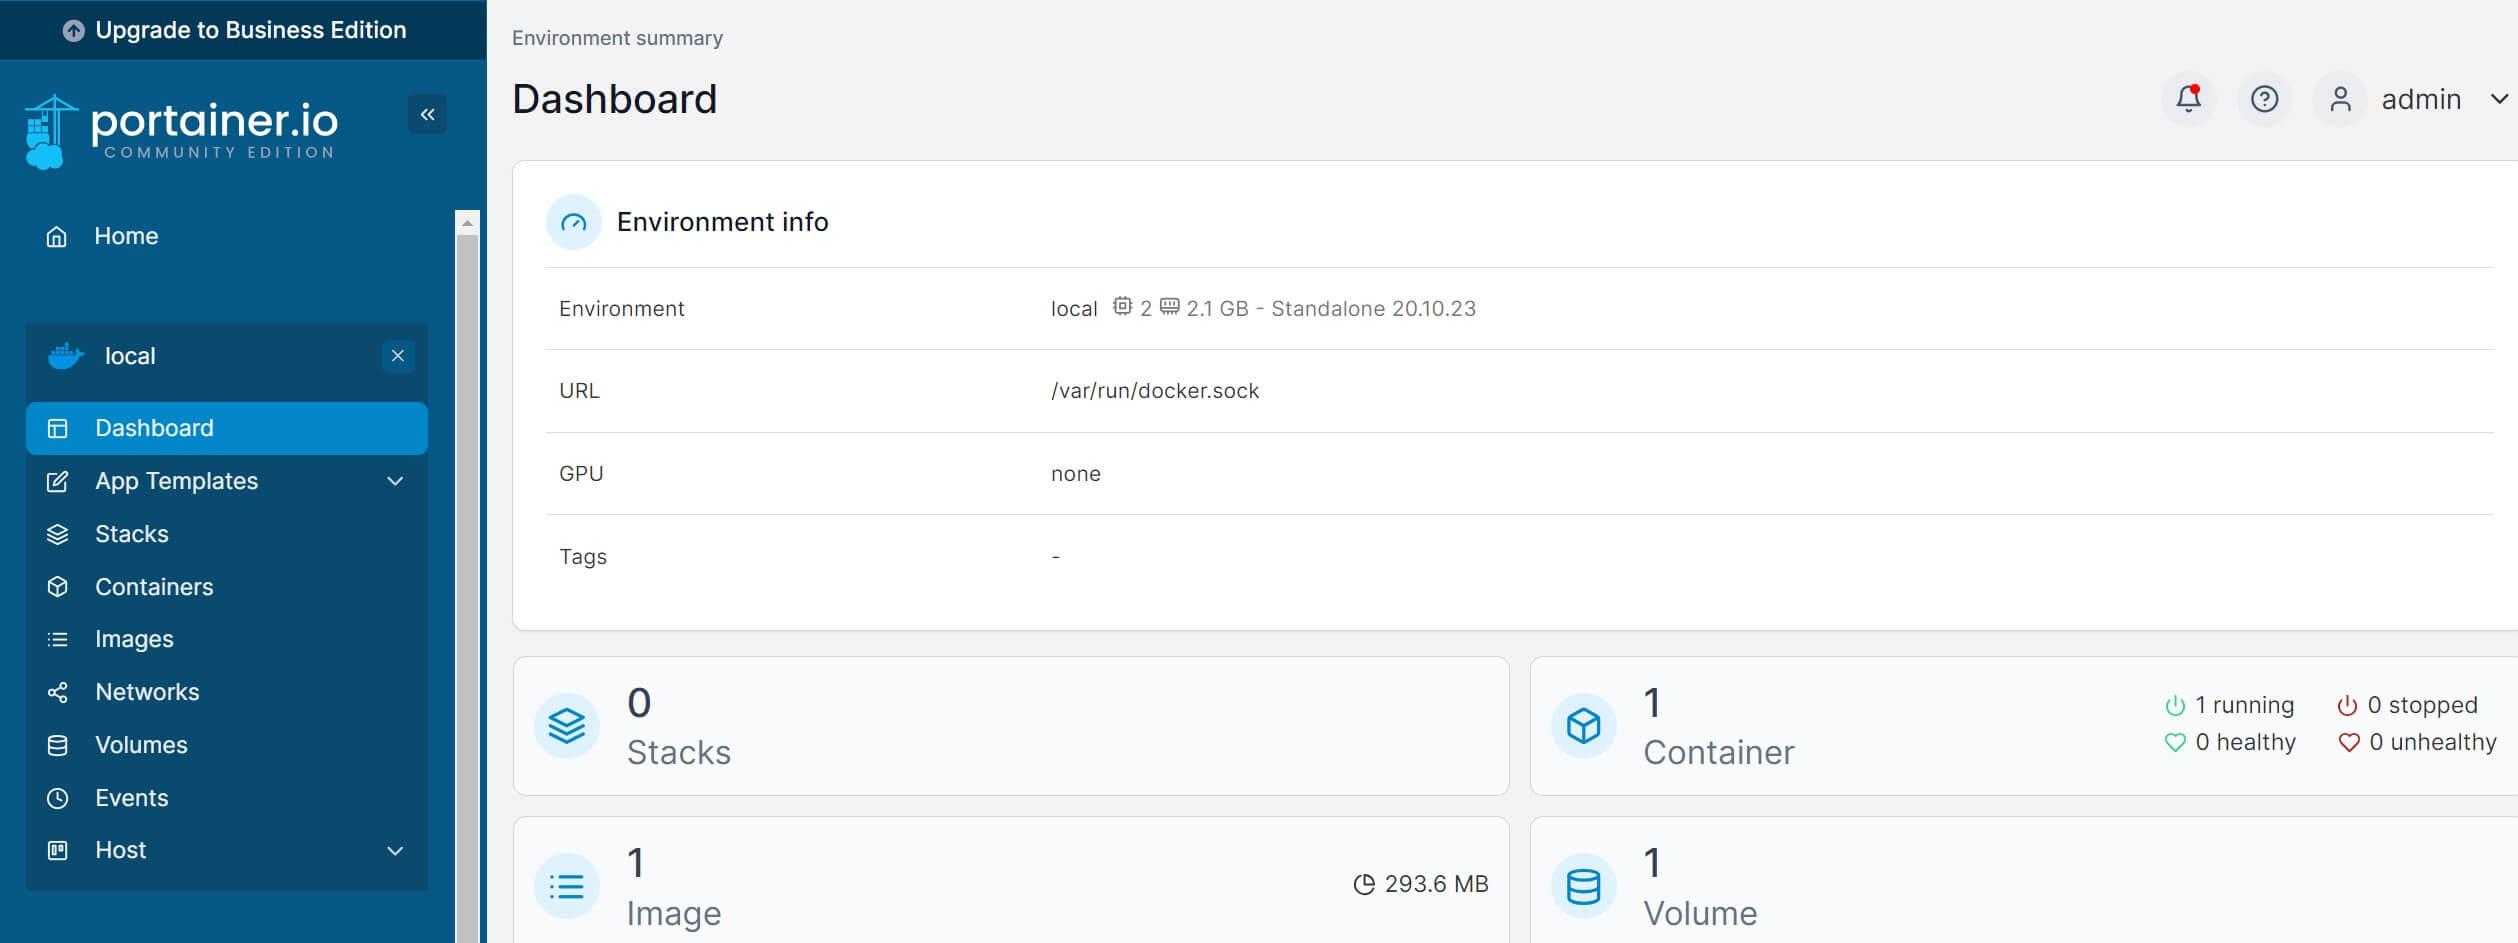
Go to the home page and Docker should be ready:
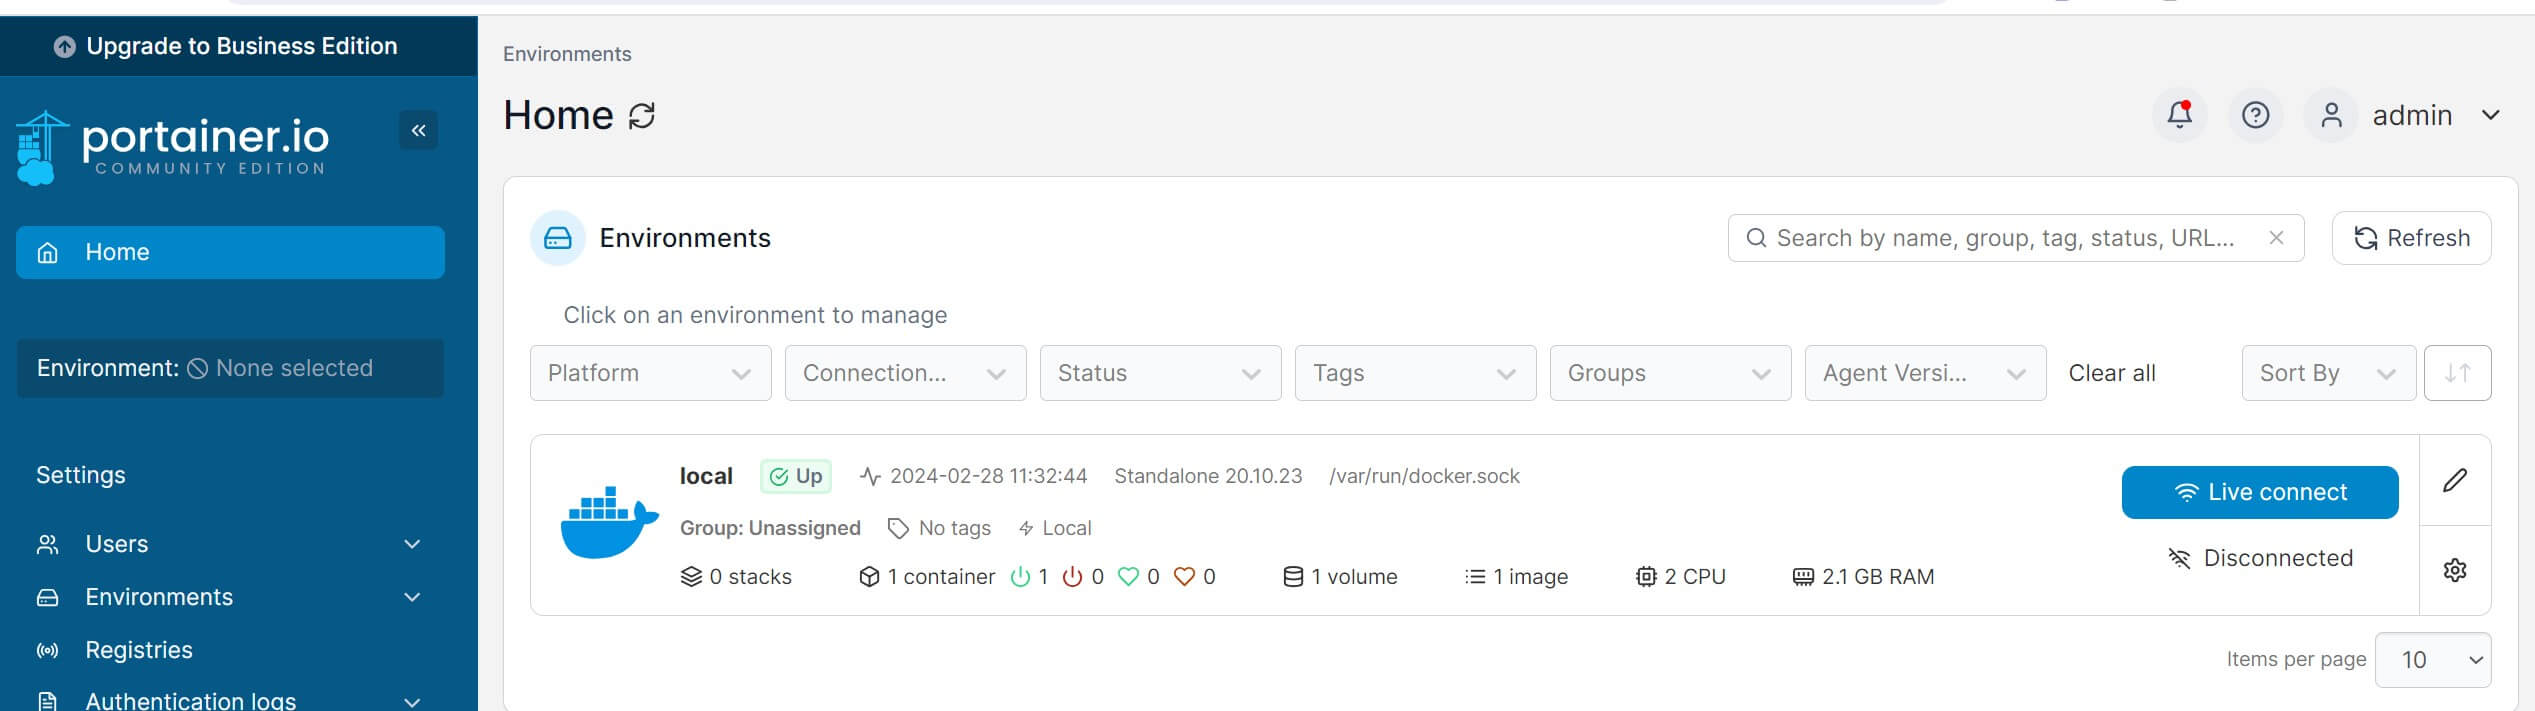
Click this Docker Environment and you should be ready to use Portainer to run Node-RED:
Step 3: How to Run Node-RED using the Portainer UI
Portainer has different ways to run a container. This way you manually add the Node-Red setting that you want the Node-RED container to inherit.
Use the Portainer UI with Node-RED as follows:
- Navigate to Container and Add container:
- This should give you a Portainer UI where you should add the container name the Node-RED as the base image as follows:

Next, go to Manual network port publishing and publish a new network port

- Finally, Deploy these Portainer Node-RED settings:

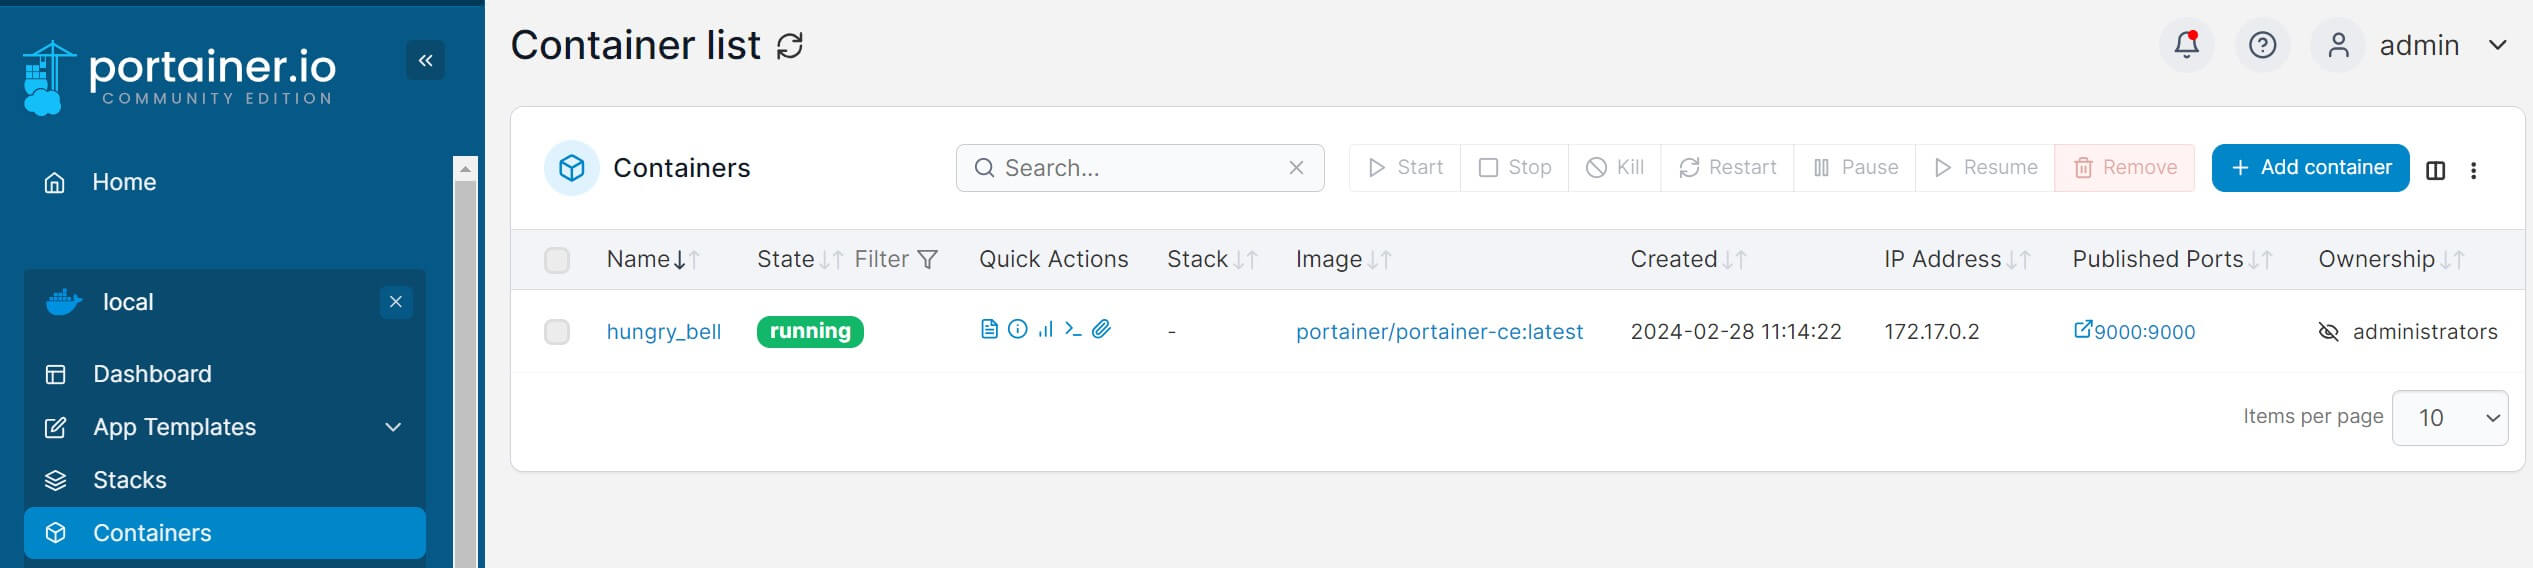
Once the Deployment is done, you should have a running Node-RED container through Portainer:
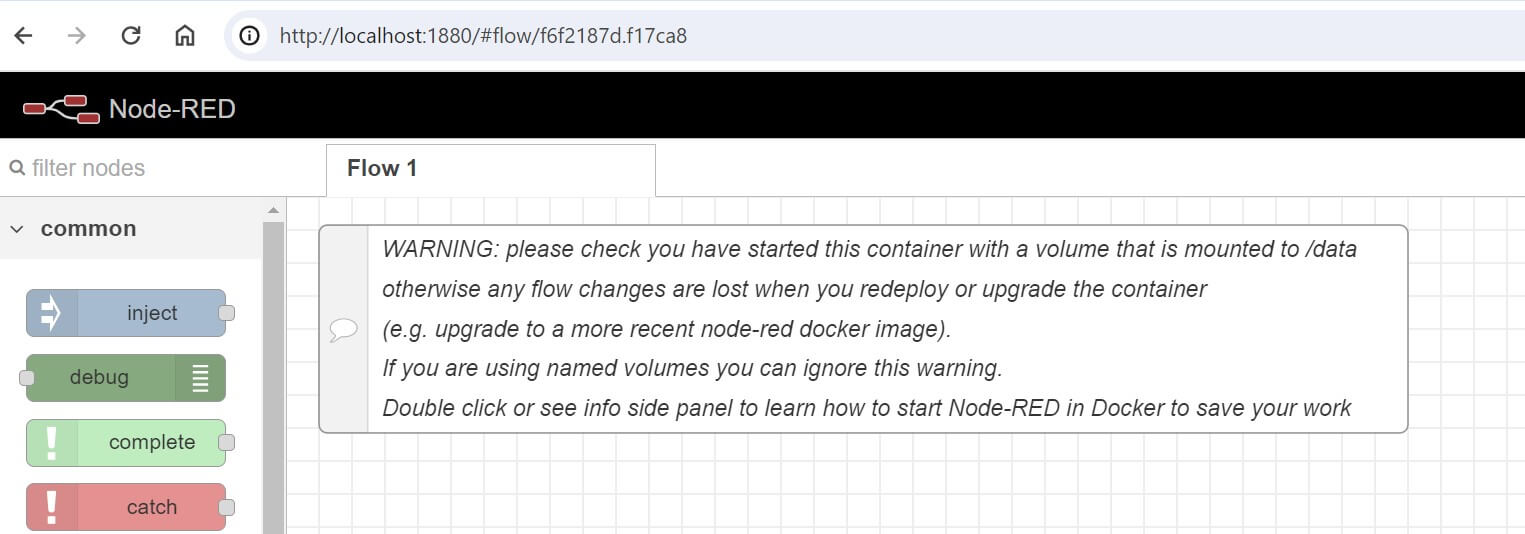
Now, open http://localhost:1880/ to access Node-RED:
Step 4: Using Docker Compose to Get Node-RED Ready On Portainer
On the above steps, you won’t have the best setting to run a Container. For example, it’s hard to manage the volumes and add persistent data for Node-RED.
Instead, Just create a single stack and run a Node-RED container. Go to the Portainer Stack and add Node-RED:
version: '3.9'
services:
  nodered:
    image: nodered/node-red
    container_name: mynodered
    restart: always
    ports:
      - "1880:1880"
    volumes:
      - nodered_data:/data

volumes:
  nodered_data:
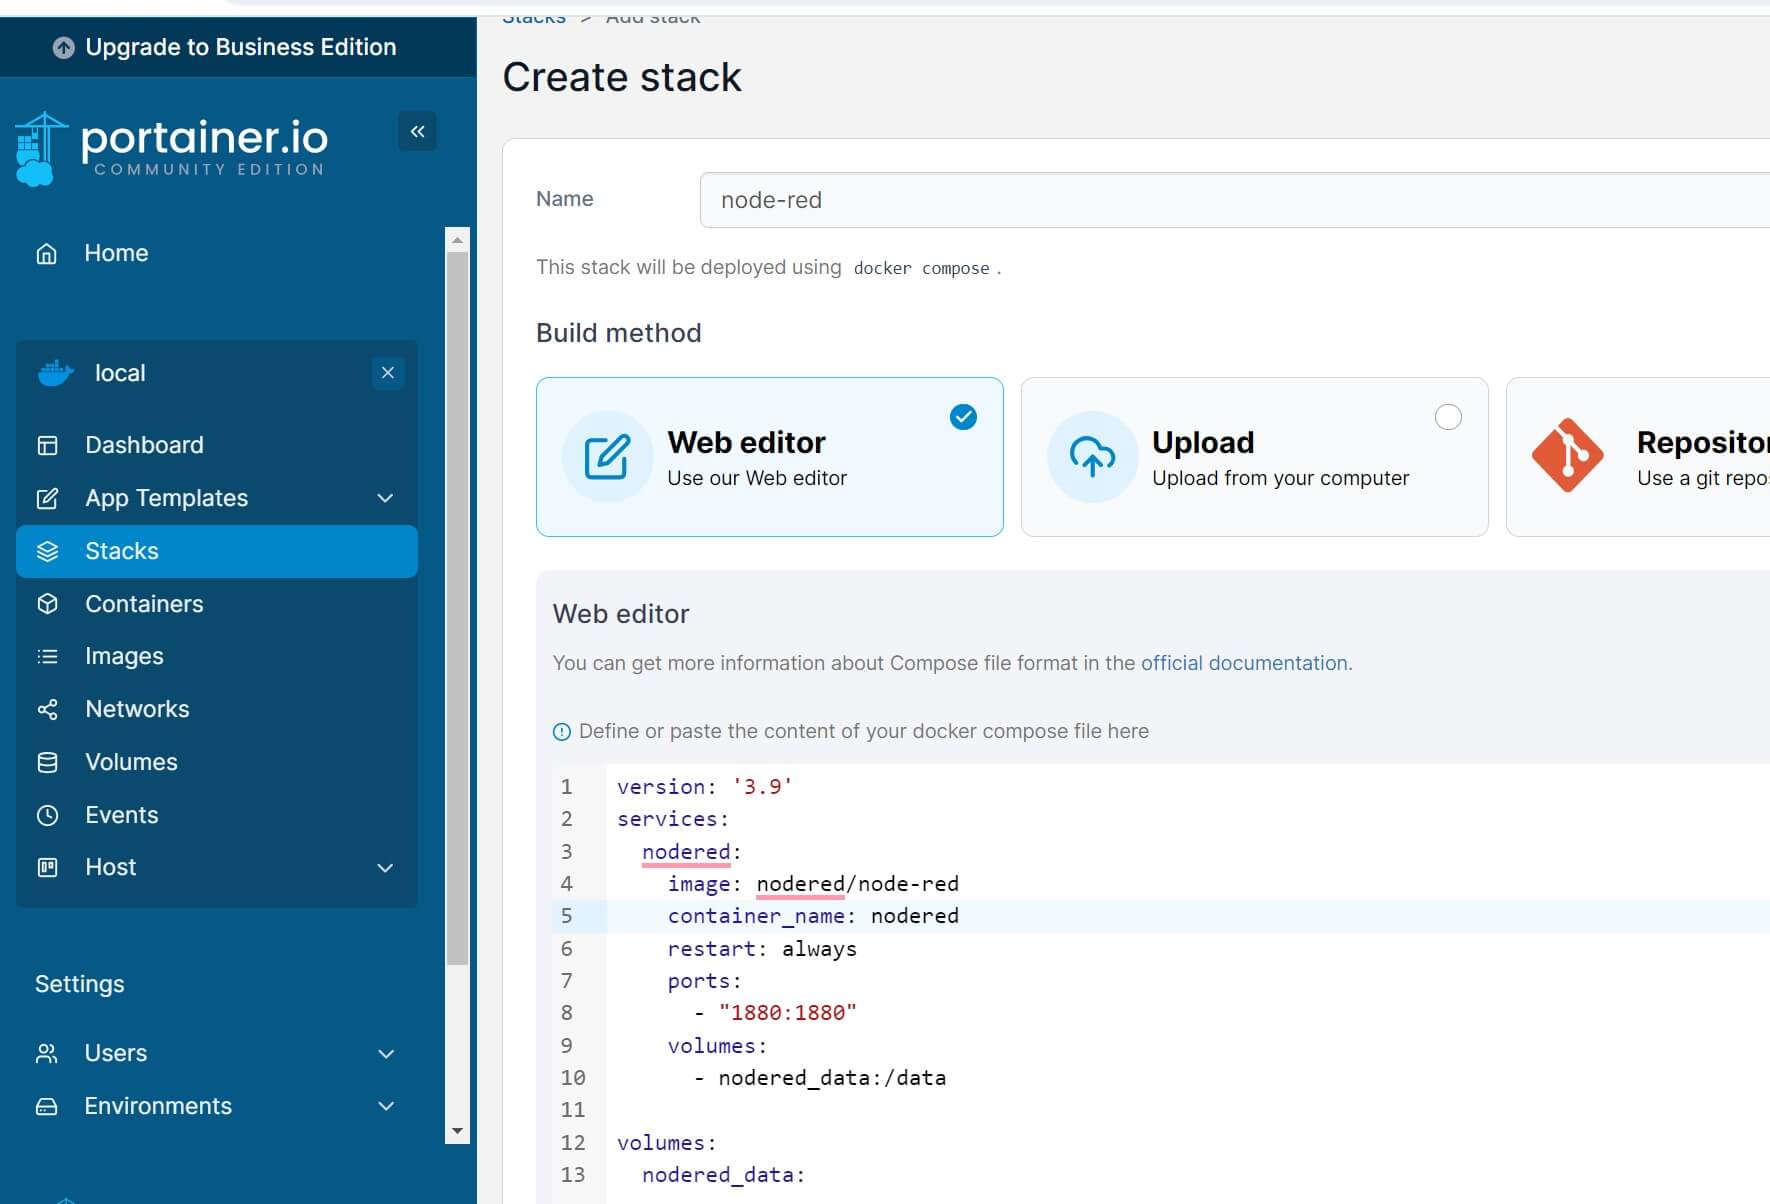
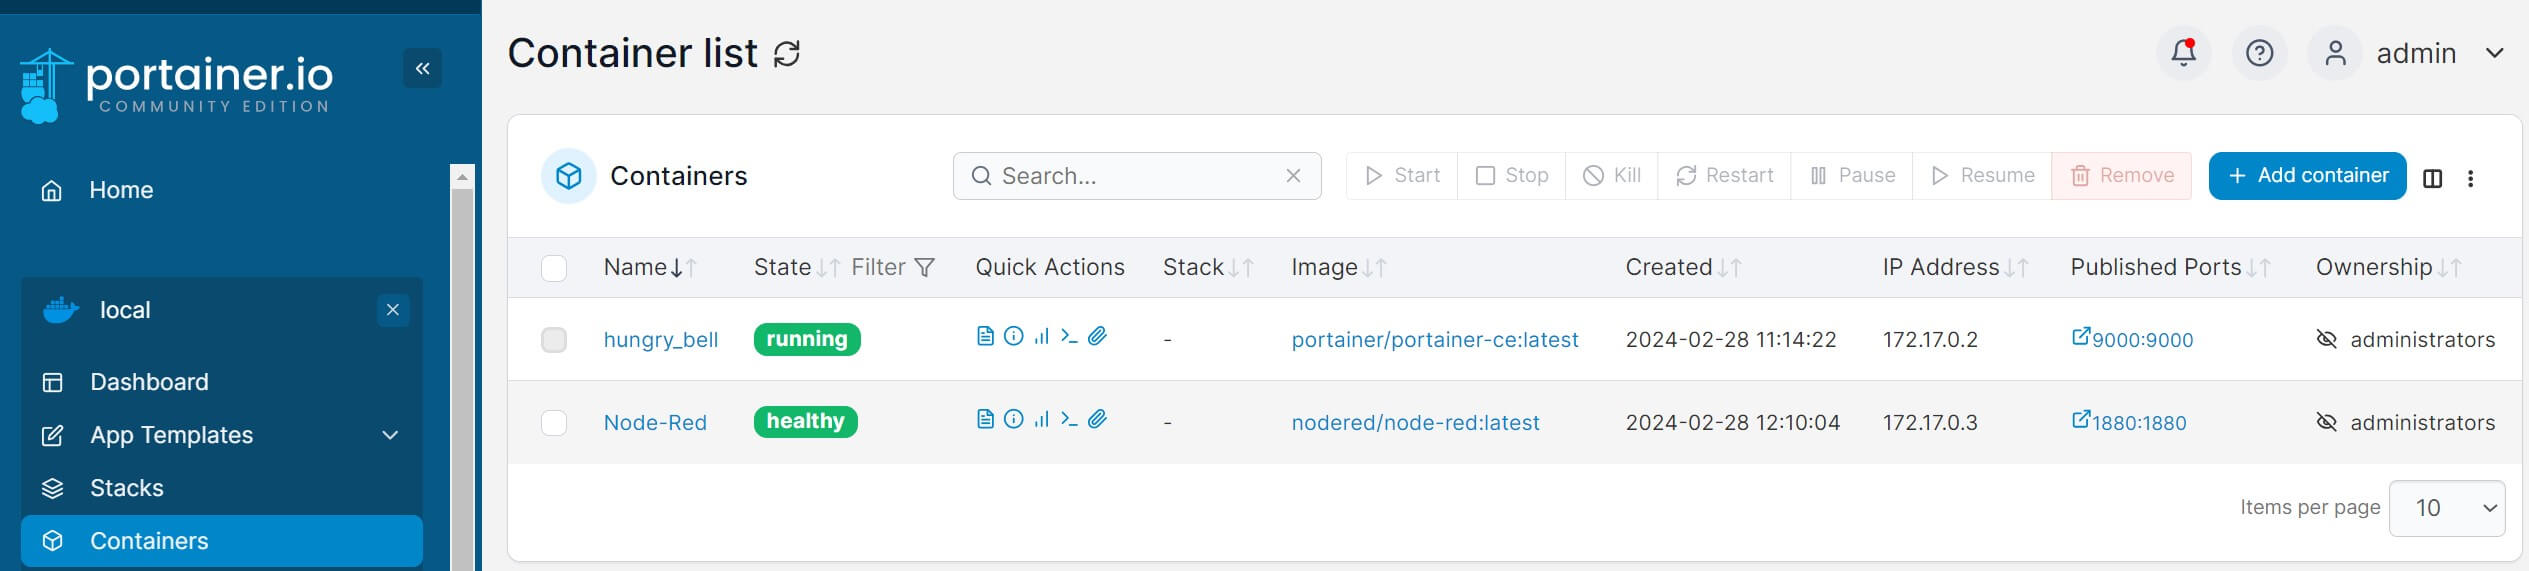
Deploy stack. At this point, go to Portainer and the Node-RED container should be ready:

Now you have the container volume mounted to /data and any Node-RED deployed flow won’t get lost.
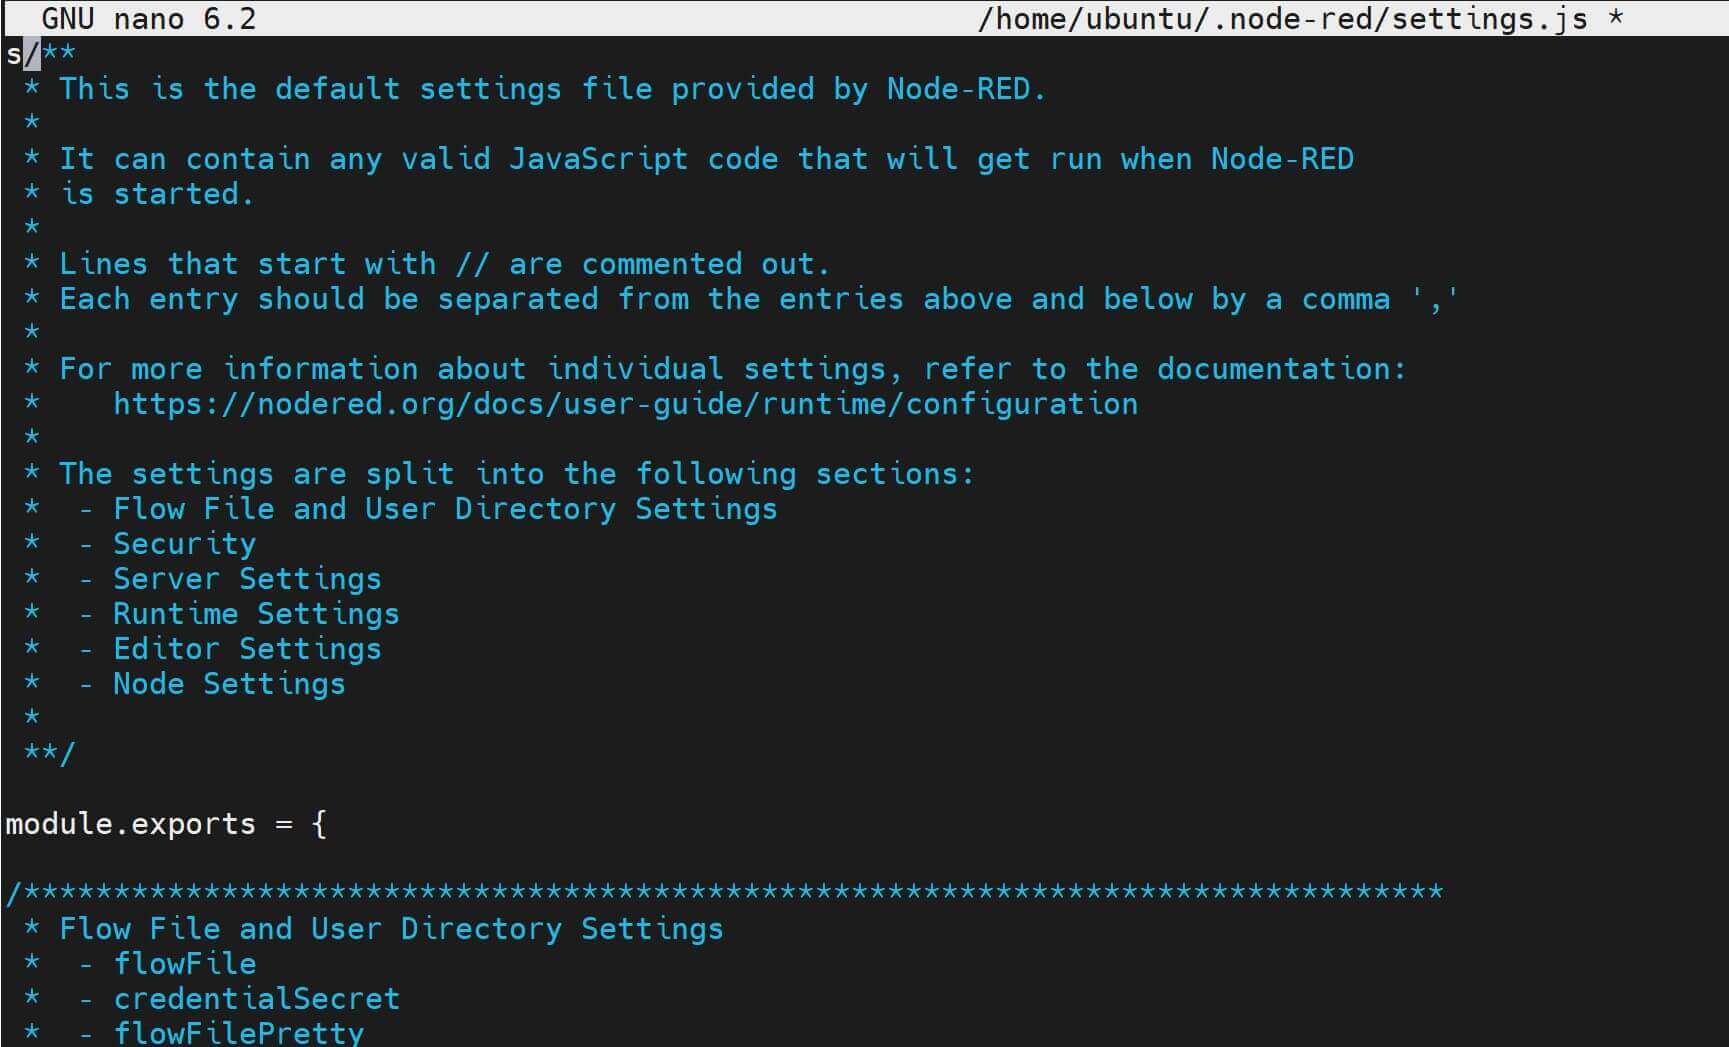
Step 5: How to Manage Node-RED Admin within Docker and Portainer
You may need to change some settings on your Node-RED server. These settings as saved on a Node-RED setting file.
Here you need to use node-red-admin tools. Ensure you have this tool installed using NPM"
sudo npm install -g node-red-admin
The Node-RED config is added to the node-red folder. Go to this directory:
cd node-red
## OR
nano ~/.node-red/settings.js
Now open, the setting file and change any setting you want to update:
Restart your container to update any changes you add. If you’re using Raspberry, check this Raspberry Pi Node-RED guide.
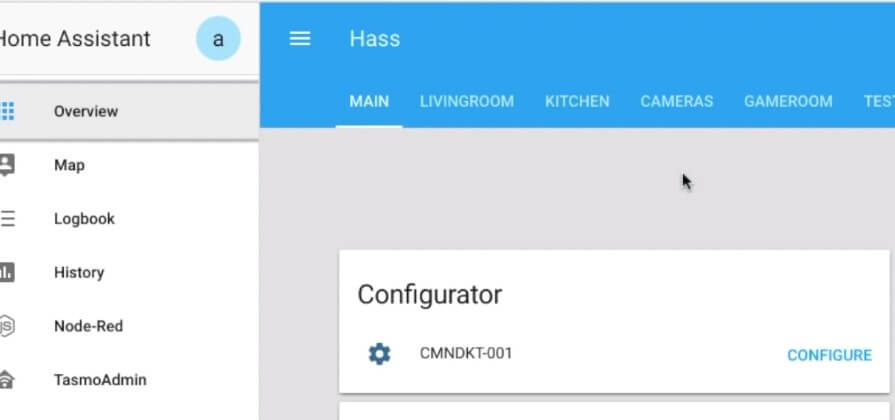
Step 6: Add Node-Red to Panel_iframe for Home Assistant
This setup is running On Docker with Portainer if you want to add it panel_iframe of your Home Assistant. it makes things easier to manage. Open panel_iframe setting file:
sudo nano panel_iframe.yaml
sudo vi panel_iframe.yaml
Add Node-Red as follows:
nodered:
  title: 'Node-Red'
  url: 'http://10.10.10.5:1880'
  icon: mdi:nodejs
Now, save the changes and restart Home Assistant From portainer and you should now have a menu selection for Node-Red.
For this Panel_iframe section, check more details here
Conclusion
I hope you have learned:
- How to run Portainer with Docker.
- Run Node-RED with Portainer and Docker.
- How to access Node-RED Portainer Setting.
- Add Node-RED Portainer Container to Home Assistant.
Written By: