Run Portainer Behind Nginx Reverse Proxy Manager and HTTPS
Posted March 2, 2024

Nginx is a Reverse Proxy server. A reverse proxy server sits between clients and the servers. This way an Nginx Reverse Proxy forwards client requests to the servers and returns the server responses to the clients. This means Portainer will run Behind Nginx as the proxy server manager. You will run Portainer Behind Nginx Reverse Proxy Manager and add HTTPS
Now, Portainer runs on Port 9000. You need to use a Nginx Reverse Proxy to forward Requests to URL paths, domain names, or other request parameters. Portainer will use the Nginx Proxy server to predefined rules and send an HTTP request to access port 9000. You will get SSL/TLS encryption, URL Rewriting, and Redirection.
On the same, Nginx Reverse Proxy Manager will let you create Nginx reverse proxy configurations for Portainer. Here you will use the proxy manager UI to create Nginx reverse proxy rules that run Behind Portainer. In this guide you will learn:
- How to set up a Portainer server.
- What you need to Run Portainer Behind Nginx Reverse Proxy Manager.
- How to use Nginx Reverse Proxy Manager to run rules Behind Portainer.
- Using Nginx Reverse Proxy and Nginx Reverse Proxy Manager to add HTTPS SSL/TLS to Portainer.
Ready? Dive and learn how to Run Portainer Behind Nginx Reverse Proxy Manager with HTTPS SSL/TLS certificates.
Step 1: Requirements to Run Portainer Behind Nginx Reverse Proxy Manager with HTTPS
Before diving into this guide, you will need:
- Docker installed and running on your computer.
- Basics of how to use Portainer UI
- How to use and run Nginx Reverse Proxy Manager
Step 2: Set up Portainer Behind Nginx Reverse Proxy
Now, you need a running Portainer server. Once you have confirmed Docker is up and running:

Next, you need to install and configure Portainer on your machine. In this example, Ensure Portainer is running on port 9000 and accessible. If you don’t have Portainer Ready, use the following commands to get one running:
# Docker volume for Portainer data persistence
sudo docker volume create portainer_data

# Run Portainer on port 9000
sudo docker run -d -p 9000:9000 -v /var/run/docker.sock:/var/run/docker.sock -v portainer_data:/data --name portainer portainer/portainer

Finally, confirm there is a Portainer container running:
sudo docker ps

You should be able to access Portainer on http://your_server_ip:9000 on the web.

Step 3: Setting Up Nginx Reverse Proxy
This step will Install the Nginx Reverse Proxy server on your machine. If Nginx is not already installed, use the following commands:
sudo apt update
sudo apt install nginx -y

Along this configuration file, I will let Nginx run Portainer behind thriveread.site and the domain name. If you are using a Domain name, ensure you have an A DNS record pointing to your server IP address:

At the same time, I like to direct each service to a specific subdomain. In this, I will use portainer.thriveread.site. You should have the portainer ready in your working Domain name DNS:

Step 4: How to Run Portainer Behind Nginx Reverse Proxy
Nginx uses a configuration file for your Portainer reverse proxy. This is where you will set the rules you want Nginx Proxy server you run Behind Portainer.
Once you have The Nginx server installed, use the following command to create a Portainer Nginx configuration file:
sudo nano /etc/nginx/sites-available/portainer
This should open a new file. This file should look as follows:
# Listen for incoming HTTP requests on port 80
# Handle requests for portainer.your_domain.com
server {
    listen 80;
    server_name portainer.your_domain.com;

    # Proxy settings that forward requests to Portainer
    location / {
        # Forward requests to Portainer running on IP (your_server_ip) and port 9000
        proxy_pass http://your_server_ip:9000;
        # Use HTTP version to 1.1
        proxy_http_version 1.1;  # Set
        # Upgrade header to support WebSocket
        proxy_set_header Upgrade $http_upgrade;
        proxy_set_header Connection 'upgrade';
        # Set Host header as original host
        proxy_set_header Host $host;
        # Bypass proxy cache
        proxy_cache_bypass $http_upgrade;
    }
}
In this case:
server: Defines a Nginx server block and adds the port Nginx should listen on.server_namesets the server’s name. In this case, replaceportainer.example.comwith your domain name. If not use the Server IP address.locationsets the rules Nginx Proxy server should run Behind Portainer.proxy_passpasses requests to your Portainer instance running onhttp://your_server_ip:9000- Other rules such as
proxy_http_version,proxy_set_header, andproxy_cache_bypassensure Nginx has a good Connection Behind the Portainer server.

Step 5: Enabling Nginx Reverse Proxy Portainer Configuration
To use the above-created file, Nginx must have portainer available in sites-available to sites-enabled.
Run the following command and add Portainer to the Nginx sites-enabled config:
sudo ln -s /etc/nginx/sites-available/portainer /etc/nginx/sites-enabled/
Check this as such:
cd etc/nginx/sites-enabled/

ls

Next, check that this Configuration has the correct config that the Nginx Proxy server will consider OK and that your configuration syntax is correct:
sudo nginx -t

Step 6: Accessing Portainer Behind Reverse Proxy Server
If your Nginx configuration test is successful, reload Nginx to apply the new configuration:
sudo systemctl reload nginx
At this point, ensure your domain name has prorogated your server IP address. Now open your Portainer UI with http://portainer.your_domain.com and Log In with your details:

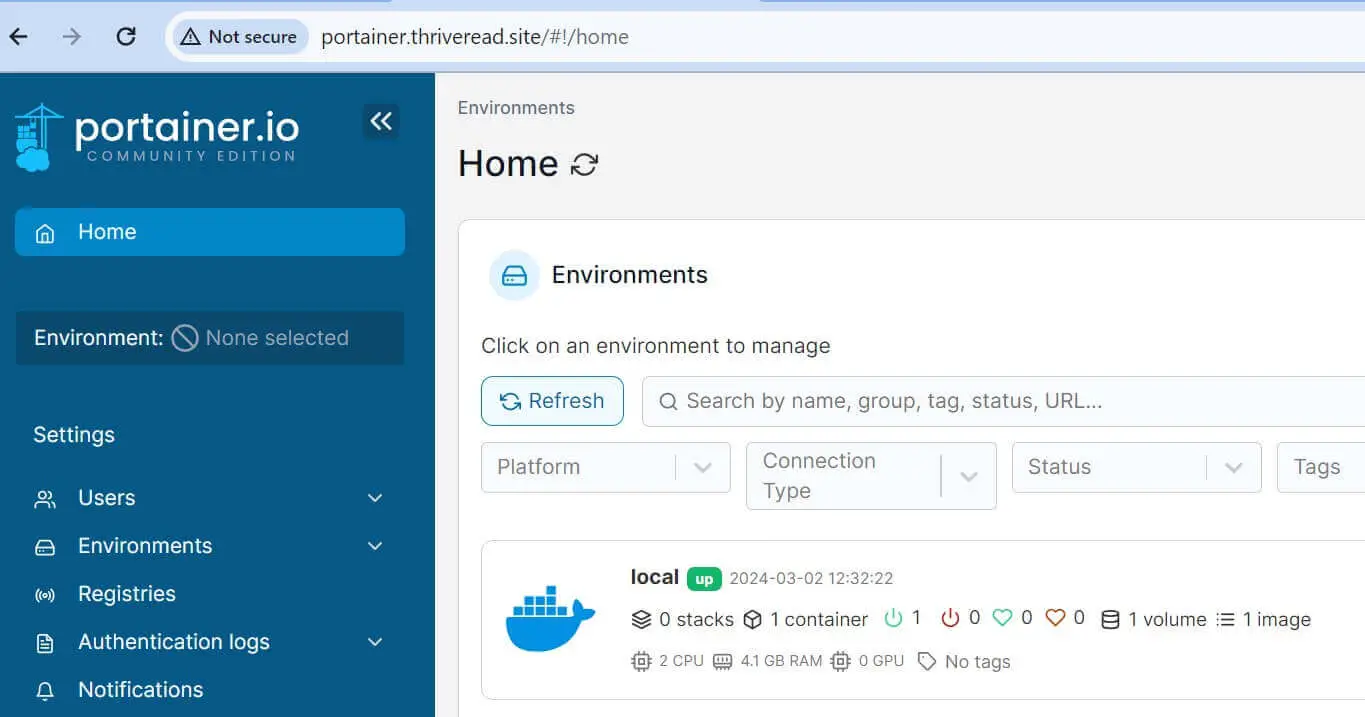
And there you have Portainer running Behind Nginx Reverse Proxy Manager:
Step 7: How to Run Portainer Behind Reverse Proxy Server with HTTPS
Up to this point, you have successfully used Nginx to expose Portainer Port 9000. However, it only works with HTTP. Let’s in this step Add HTTPS to Portainer.
Here, I will use Certbot to generate the SSL/TLS certs and keys as follows:
- Install Certbot as the Let’s Encrypt client:
sudo apt install certbot python3-certbot-nginx -y
- Obtain the SSL certificate for your domain using Certbot.
sudo certbot certonly --nginx -d portainer.your_domain.com
Remember to add an email and other required prompts
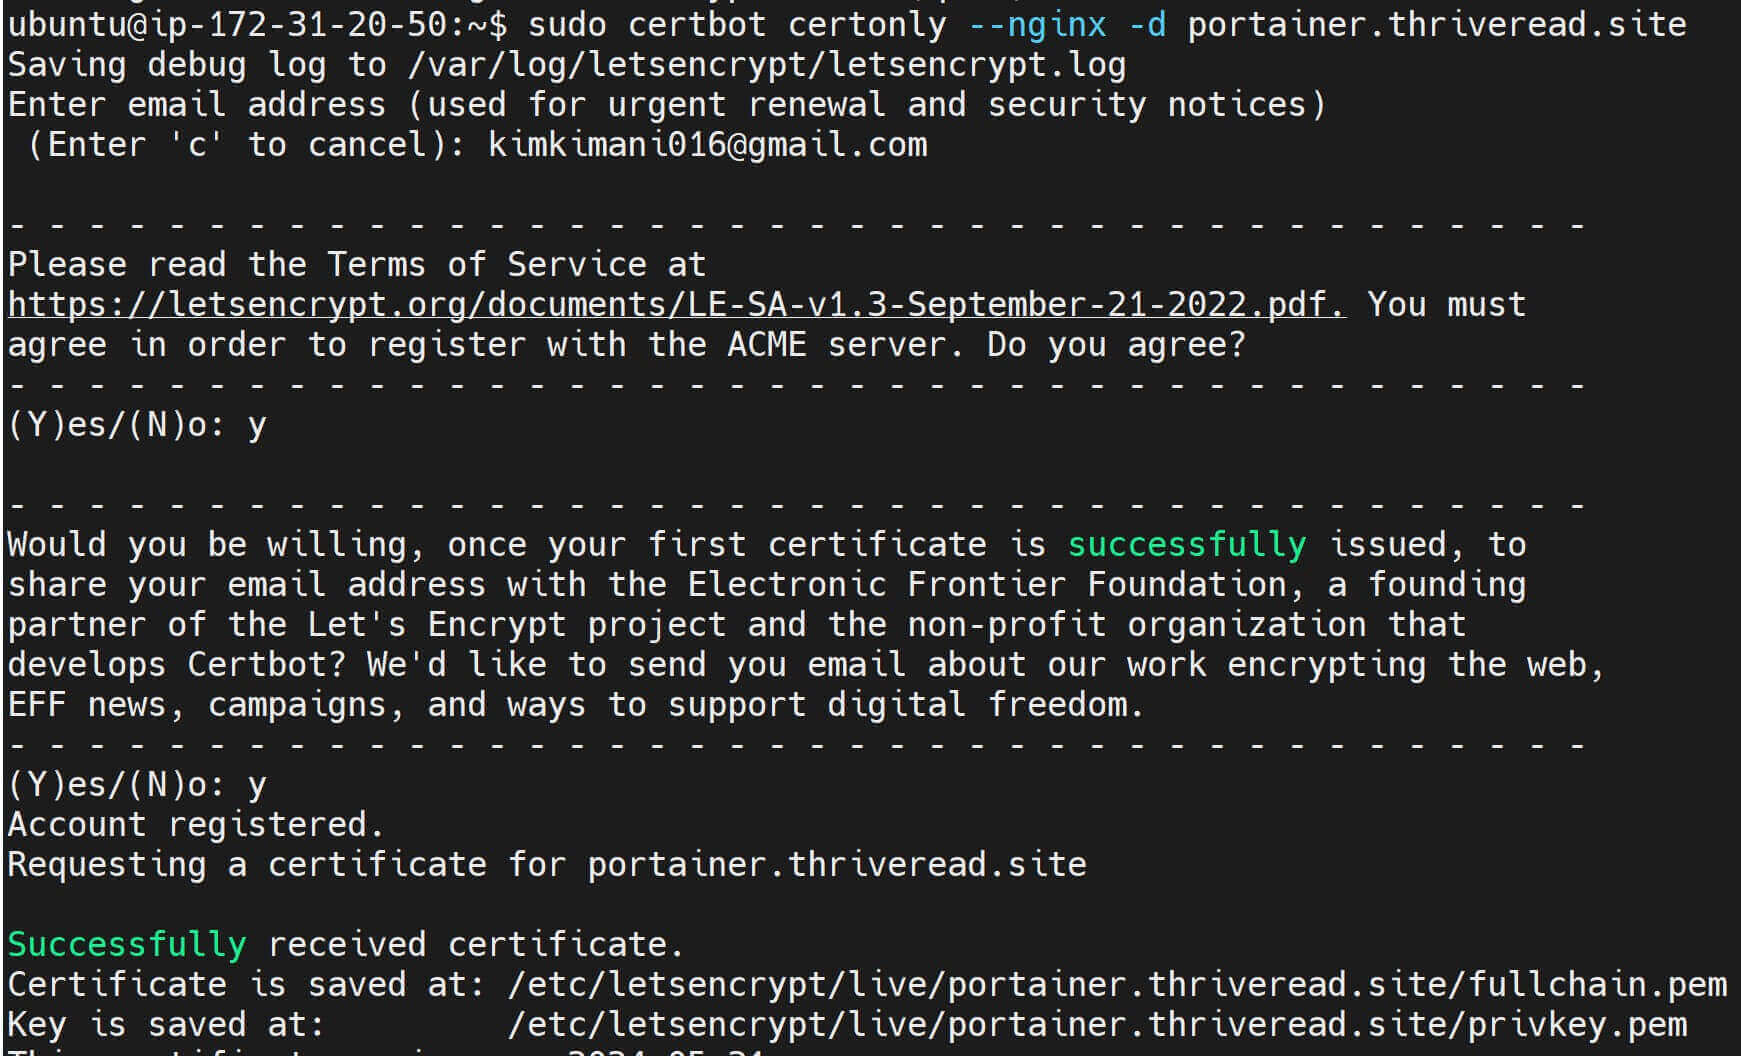
Once you have successfully received the certificate, you will add the following paths to the Nginx server:
- Certificate is saved at:
/etc/letsencrypt/live/portainer.your_domain.com/fullchain.pem - Key is saved at:
/etc/letsencrypt/live/portainer.your_domain.com/privkey.pem
Now, reopen /etc/nginx/sites-available/portainer
sudo nano /etc/nginx/sites-available/portainer
You will add the following changes:
# Redirect HTTP requests to HTTPS
server {
    listen 80;  # Listen for incoming HTTP requests on port 80
    server_name portainer.your_domain.com;  # Replace with your actual domain

    # Redirect all HTTP requests to HTTPS
    return 301 https://$host$request_uri;
}

# HTTPS configuration for Portainer
server {
    listen 443 ssl;  # Listen for incoming HTTPS requests on port 443
    server_name portainer.your_domain.com;  # Replace with your actual domain

    # SSL certificate paths
    ssl_certificate /etc/letsencrypt/live/portainer.your_domain.com/fullchain.pem;
    ssl_certificate_key /etc/letsencrypt/live/portainer.your_domain.com/privkey.pem;

    # Proxy settings for forwarding requests to Portainer
    location / {
        proxy_pass http://your_server_ip:9000;  # Forward requests to Portainer running on port 9000
        proxy_http_version 1.1;
        proxy_set_header Upgrade $http_upgrade;
        proxy_set_header Connection 'upgrade';
        proxy_set_header Host $host;
        proxy_cache_bypass $http_upgrade;
    }
}
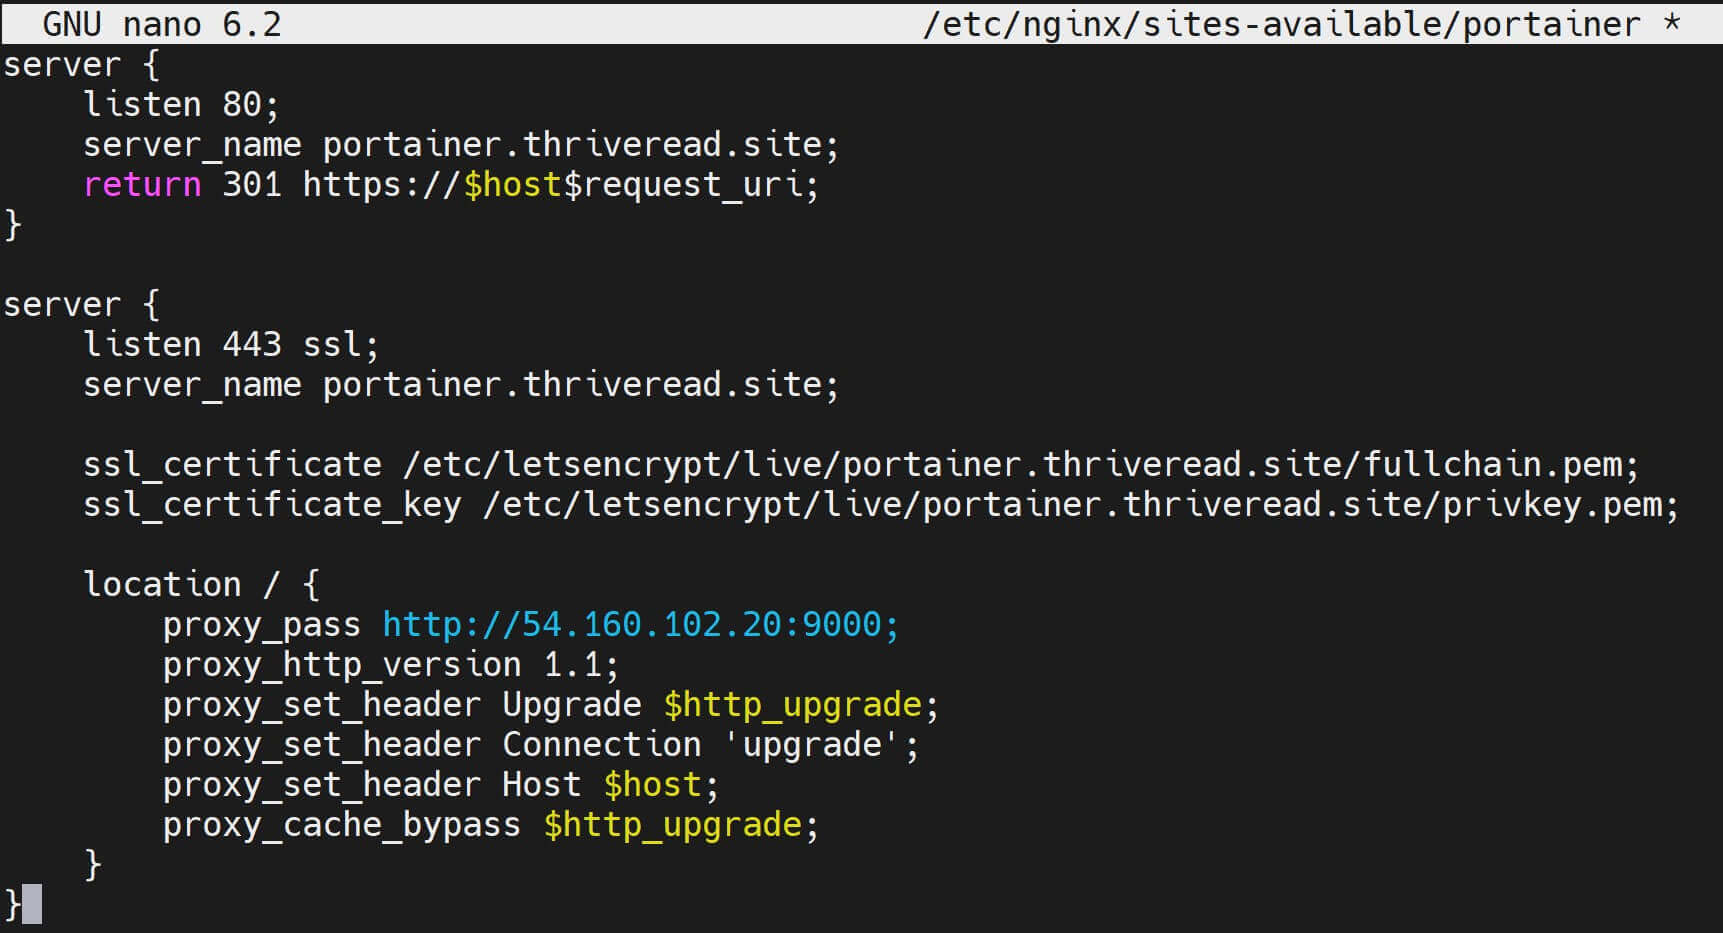
To make these changes available, restart the Nginx proxy server:
# Check if the new config is valid
sudo nginx -t
# restart Nginx
sudo systemctl reload nginx

This time use HTTPS to access Portainer behind the Nginx Proxy server https://portainer.your_domain.com
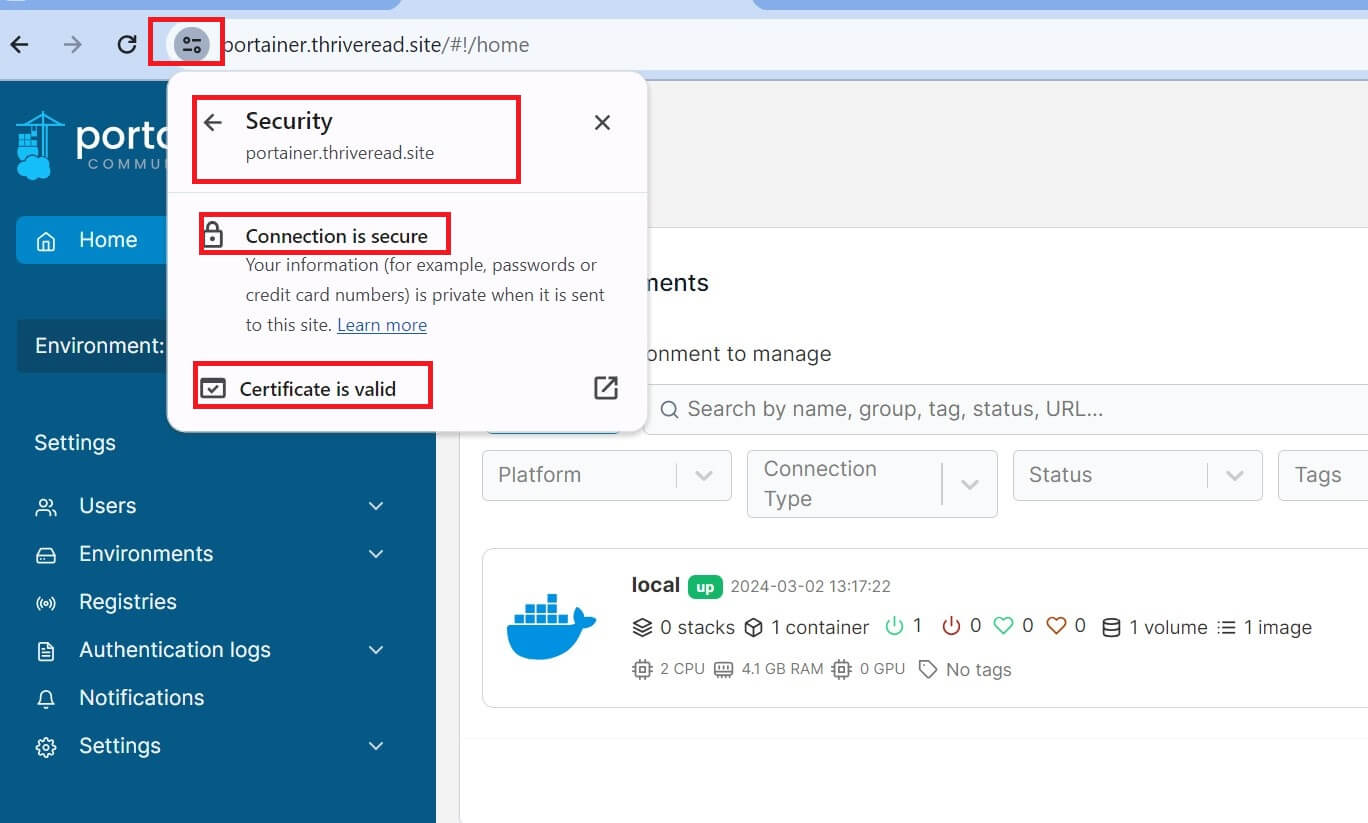
Finally, Force Portainer to always use HTTPS. Go to Portainer settings and make the following change:

⚠️ This failed to work on my side and I didn’t get the reasons why.

Step 8: How to use Portainer Nginx Proxy Manager
Nginx Proxy Manager is the UI for managing Nginx Host. In this case, to add HTTP and SSL to Portainer, You must have a running Nginx Proxy Manager. Check the Install Nginx Proxy Manager with Docker Compose guide to set up one.
Once you have the Nginx Proxy Manager as follows:

Go ahead and add a New Proxy Host:

Now, Add Portainer Behind Nginx Proxy Manager Proxy as follows:
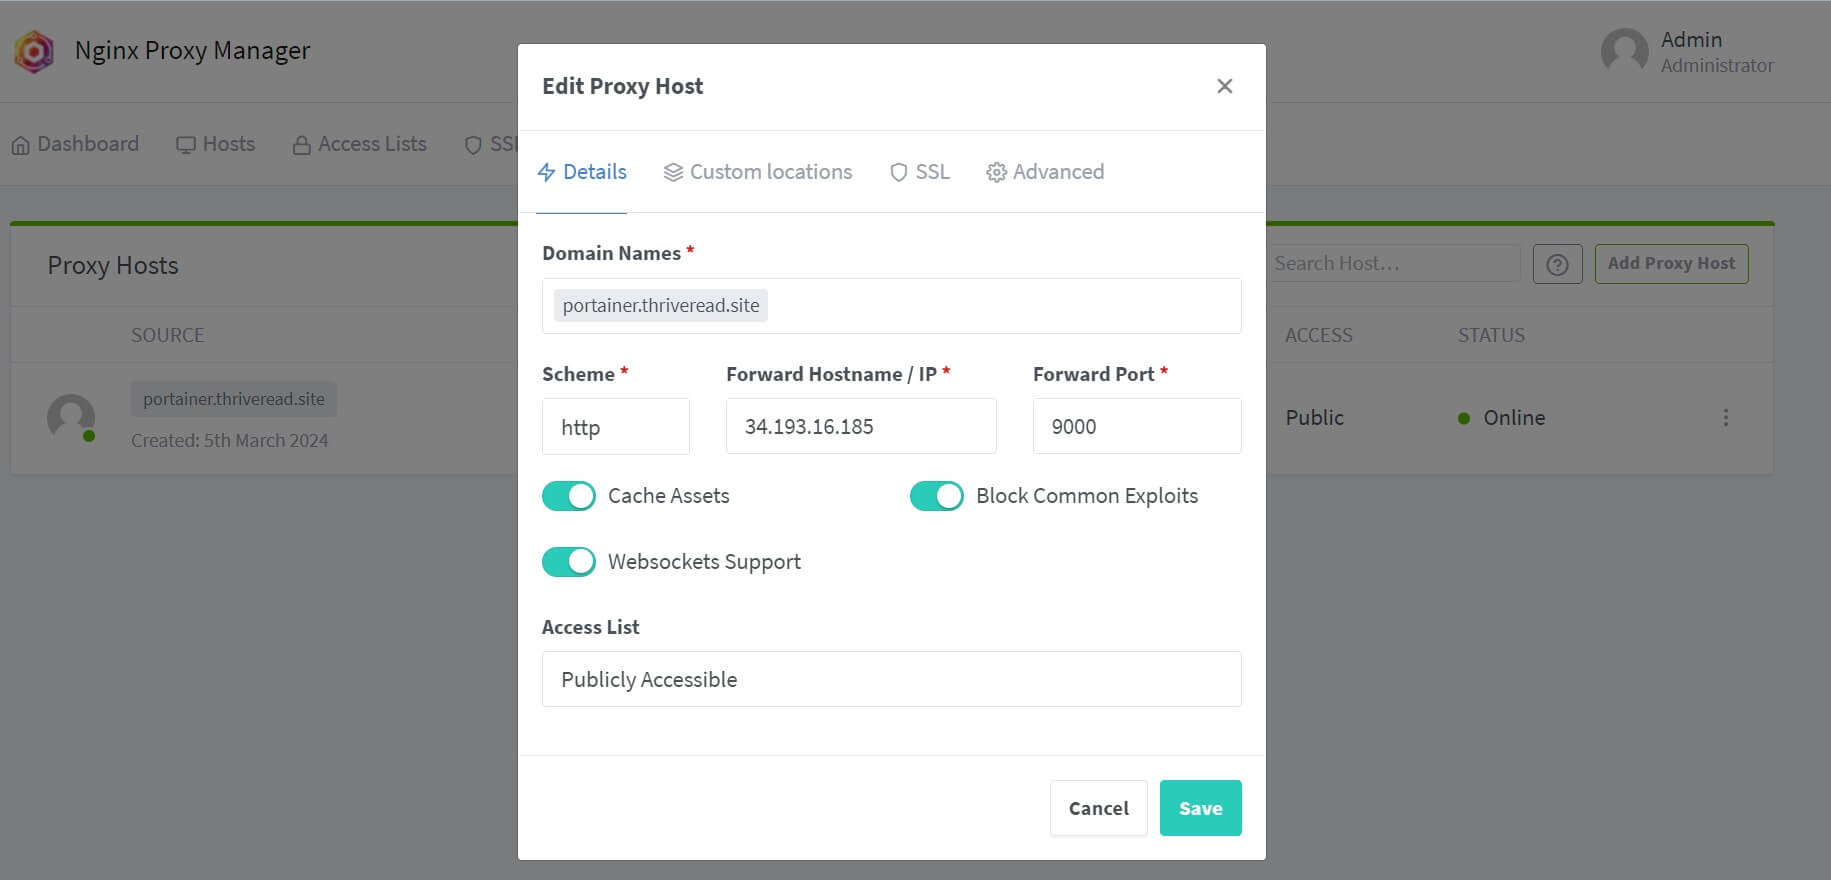
Go to the SSL table and add HTTPS and certs with let’s encrypt:

You will add a Portainer proxy should be ready as such:

If you want to use the Nginx reverse Proxy file, you can use the custom configurations and add it as follows:
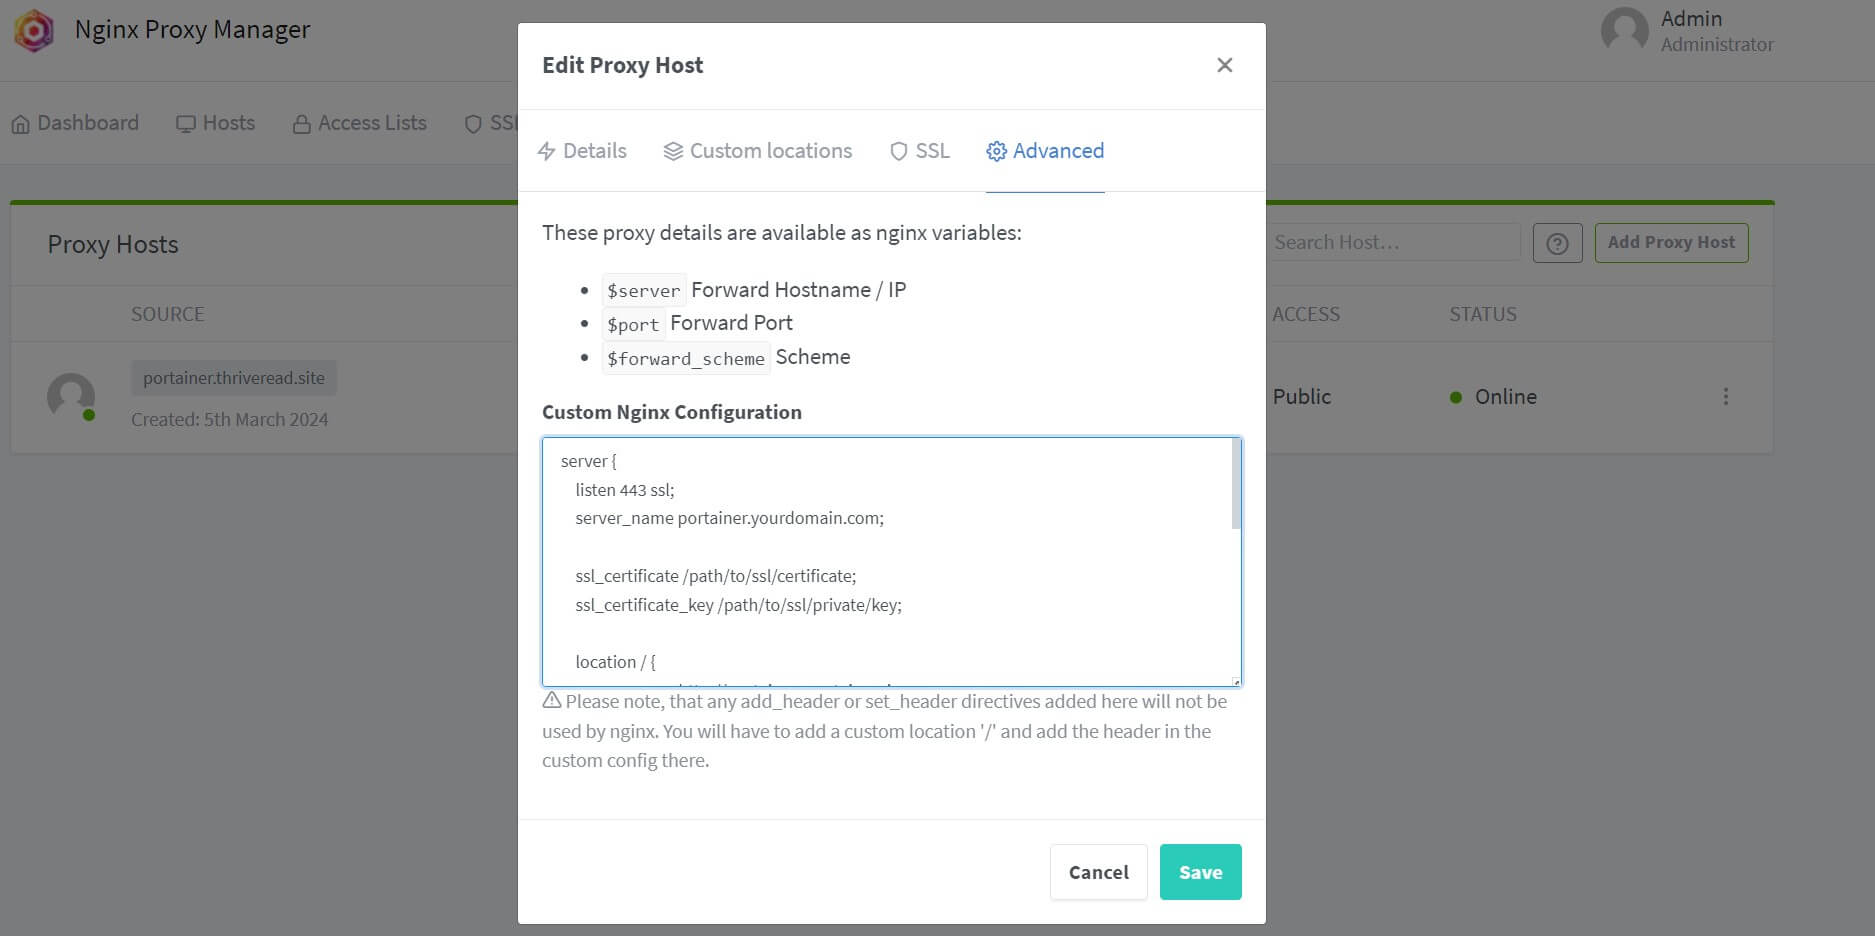
Your Portainer server should be accessible through your subdomain or Domain over a valid SSL.
Conclusion
You have successfully run Portainer behind the Nginx Reverse Proxy manager/server. You learned:
- How to set up a Portainer server.
- What you need to Run Portainer Behind Nginx Reverse Proxy Manager.
- How to use Nginx Reverse Proxy Manager to run rules Behind Portainer.
- Using Nginx Reverse Proxy and Nginx Reverse Proxy Manager to add HTTPS SSL/TLS to Portainer.
More Related Articles:
-

How to Install Nginx Proxy Manager on Ubuntu 22.04|20.04
Mar 23, 2024
-

Install jc21 Nginx Proxy Manager w/ Docker Compose/MariaDB Aria Container
Mar 5, 2024
-

Perfect PHP Web Server Dockerfile Example with Nginx
Apr 22, 2024
-

Caddy 2 Reverse Proxy Server with Docker and Docker Compose Example
Mar 23, 2024