How to Install and Run WordPress with Portainer
Posted March 1, 2024

WordPress CMS runs on different environments. If you are on Docker, Portainer is a Good UI to manage a Docker environment. This means you can use Portainer to install and run your WordPress CMS.
In this guide, you will learn all you need to install and get WordPress ready using Portainer. You will learn:
- How to set up Portainer.
- Using Portainer stack to run WordPress and MySQL.
- Installing and accessing WordPress running on Portainer.
Ready? Now dive and learn How to Install and Run WordPress with Portainer
Step 1: Requirements to Install WordPress with Portainer
Before using the WordPress Portainer setup, ensure:
- You have Docker installed and running on your computer.
Related: How to Install Docker and Portainer on Ubuntu Server
- Have basic of working with WordPress and Docker.
What is Portainer
Portainer is a container management tool Docker environment. It gives you an intuitive UI. This way, you easily deploy, manage, and monitor containers and container clusters.
Portainer supports Docker environments like Docker Desktop, Docker Swarm, and Kubernetes.
Reasons for Installing WordPress with Portainer
You can use Docker to directly run a WordPress site. So why install WordPress with Portainer?
- Portainer has authentication and access control features for security.
- Portainer manages all your containers from a single interface. You get Centralized control for a whole WordPress stack.
- You don’t need to write complex Docker Compose commands
Step 2: How to Setup Portainer for WordPress
When creating a Portainer container, I like to use Docker Compose. It gives you the ability and more control over your container. Go ahead and create a docker-compose.yml file and create a Portainer Docker container to run Portainer Community Edition as follows:
version: '3.9'

services:
  portainer:
    # Use this Portainer Community Edition Base image
    image: portainer/portainer-ce
    # Assigning your container name here
    container_name: portainer
    restart: always
    ports:
      - "9000:9000"
    volumes:
      # volume for Docker API access (socket)
      - /var/run/docker.sock:/var/run/docker.sock
      # Mounting the Portainer volume
      - portainer_data:/data
volumes:
  portainer_data:
In the Path where you have this docker-compose.yml file, run the following command to run the container:
docker compose up -d
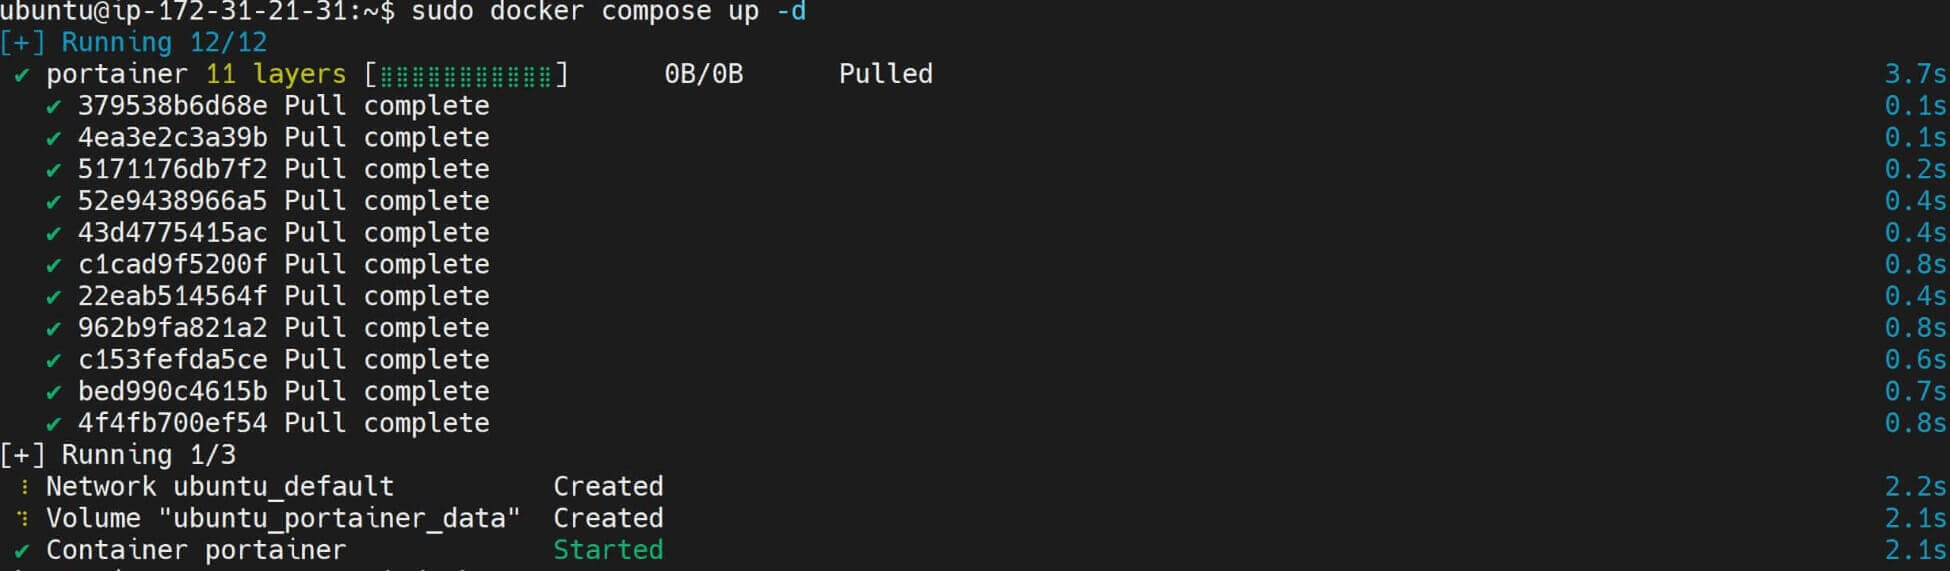
If you run the following command, you should have the Portainer container ready:
docker ps

Step 3: How to Access Portainer
Now, Open http://your_server_ip:9000 or http://localhost:9000. You should have Portainer running:
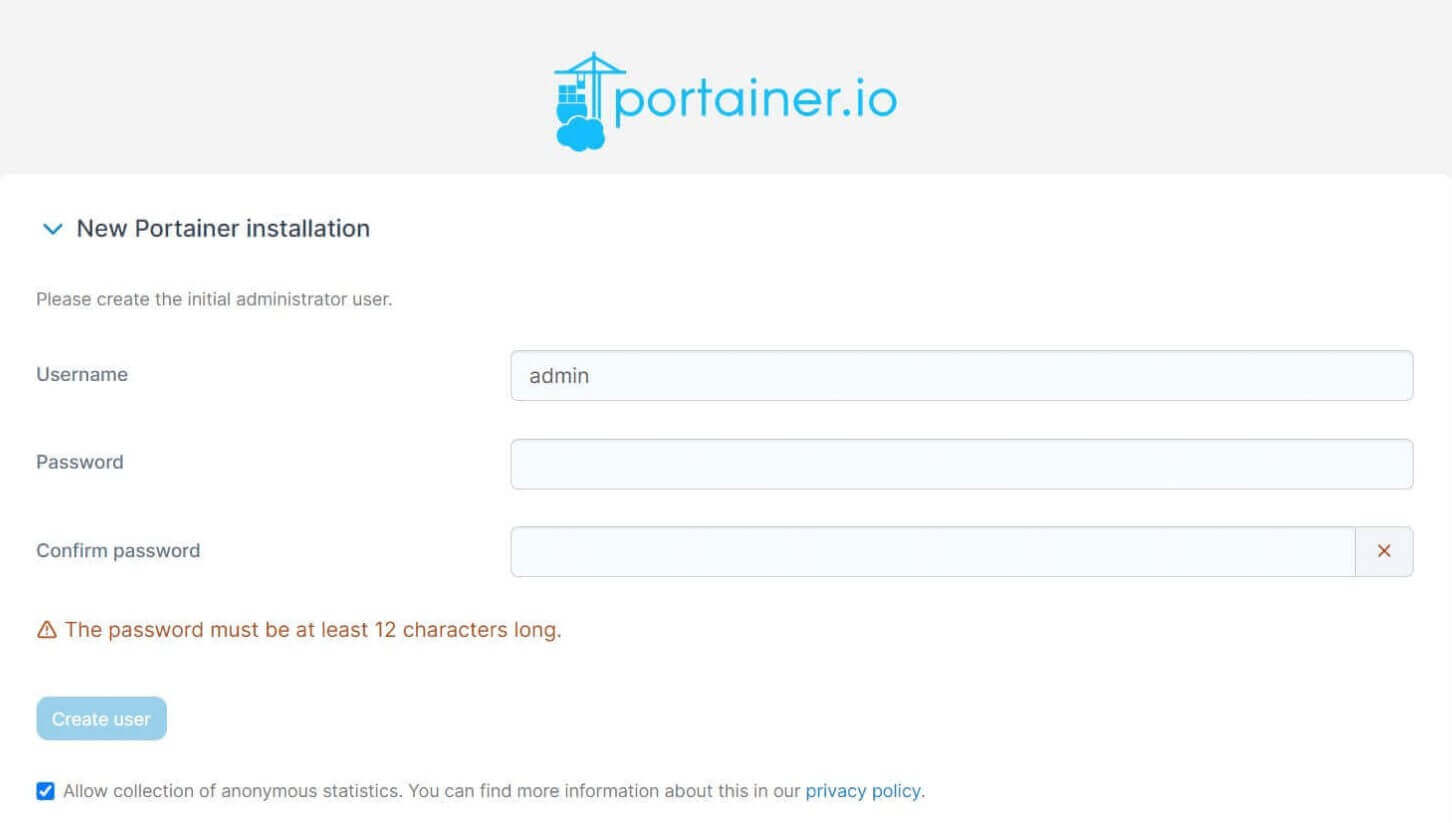
Add a New user to access the Dashboard as follows:
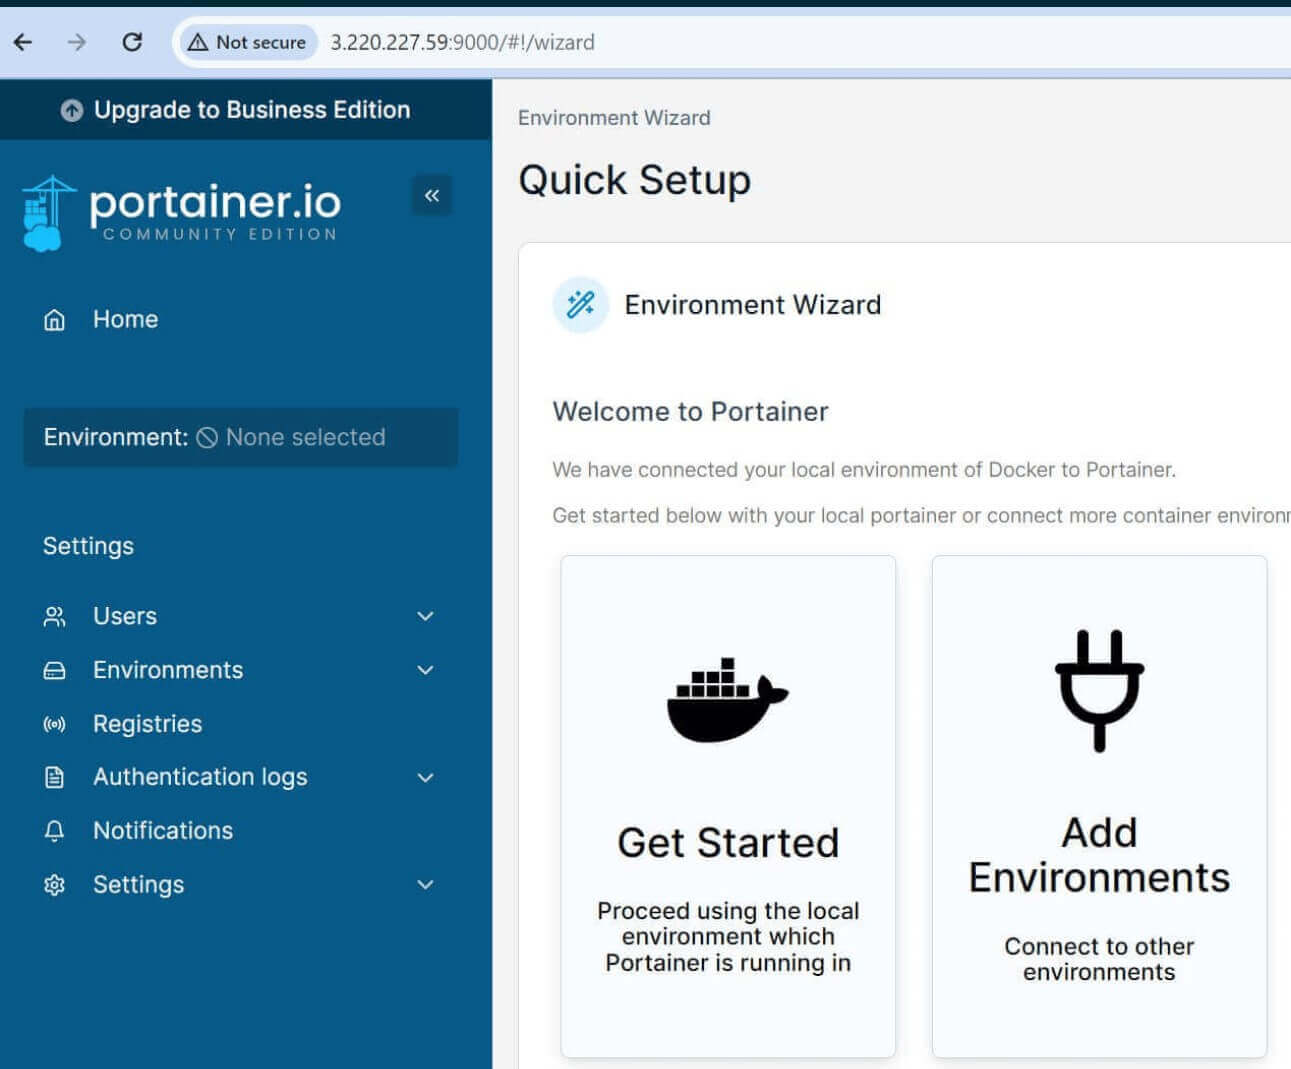
Now, Select Get Started to access the Portainer and add the local Docker environment:
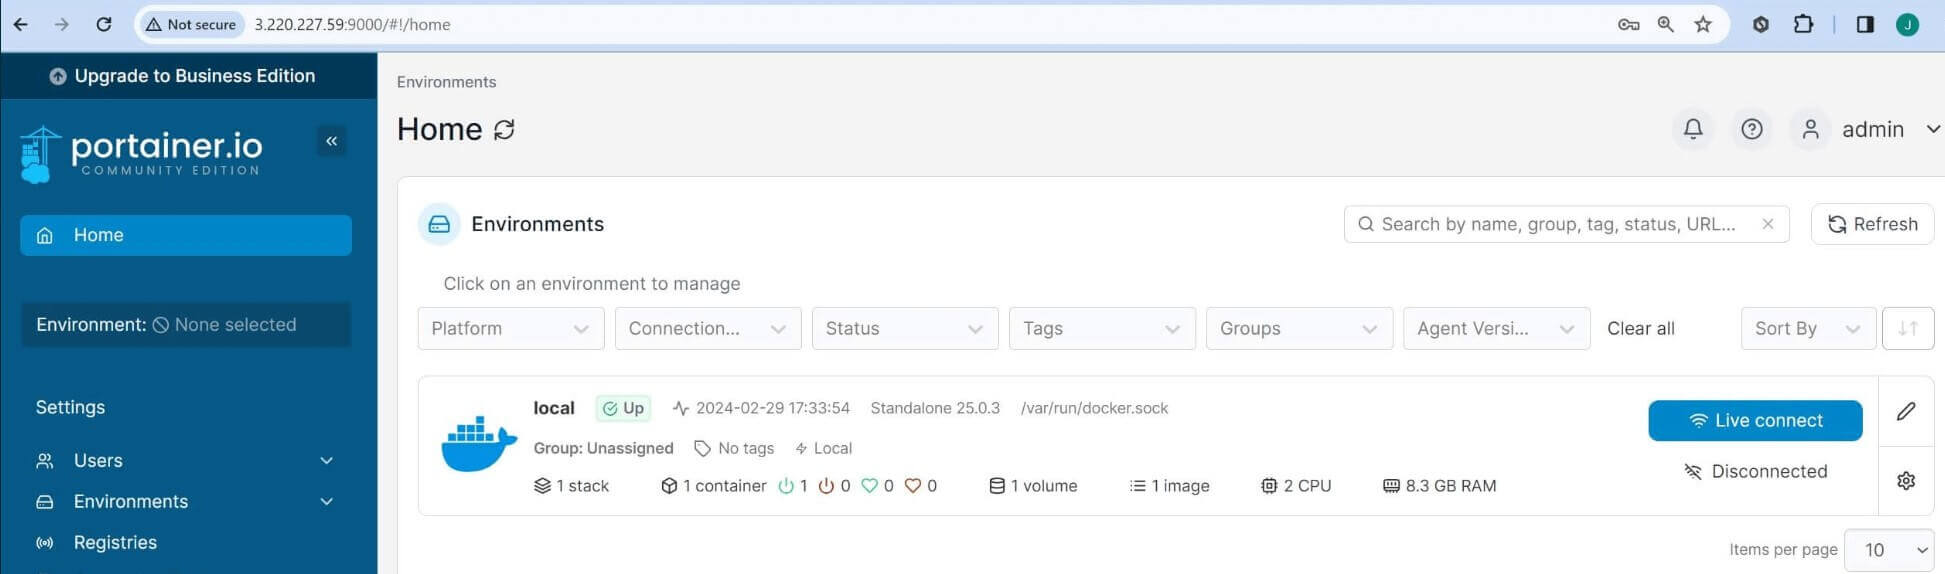
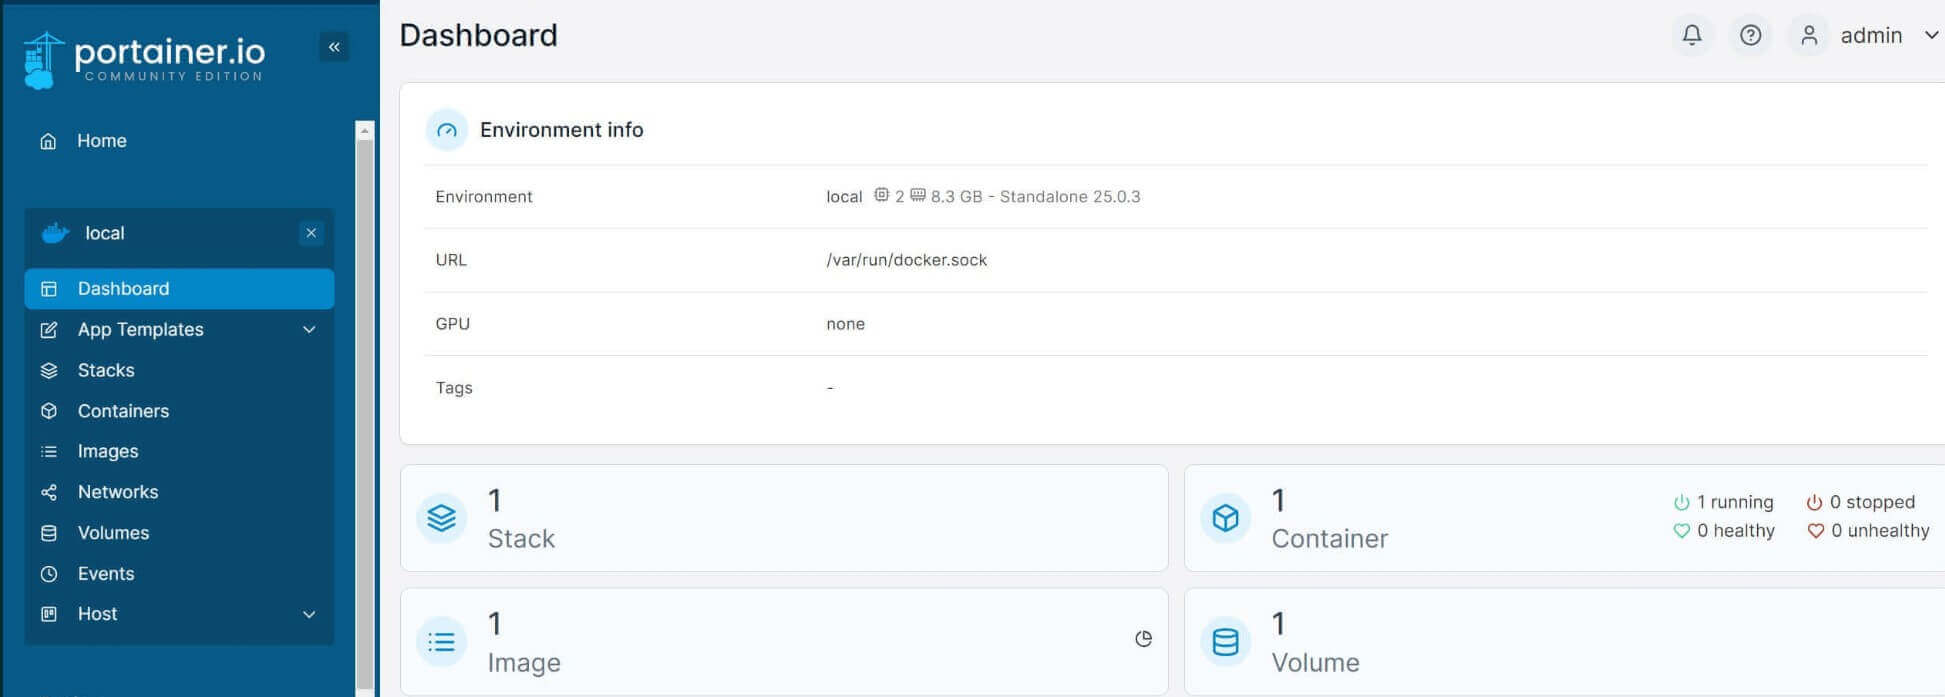
Once you click the above local environment, you have the Dashboard ready to run WordPress in the next steps:
Step 4: Installing WordPress using Portainer
WordPress uses the WordPress image and an SQL database. In this case MySQL. This means you can only run WordPress along with Portainer using Docker Compose.
However, with Portainer you don’t have to create a Docker Compose file and run Docker commands. You only need to use the Portainer UI to run a whole WordPress stack.
Once WordPress is running, you will need a GUI to access MySQL. I will use Portainer to run PhpMyAdmin.
Now, take the following WordPress MySQL stack:
version: '3.9'

services:
  wordpress:
    image: wordpress:latest
    ports:
      # Expose WordPress on port 8080
      - "8080:80"
    environment:
      # Set up WordPress to connect to the MySQL database
      WORDPRESS_DB_HOST: mysql_db
      WORDPRESS_DB_NAME: wordpress_db
      WORDPRESS_DB_USER: wordpress_user
      WORDPRESS_DB_PASSWORD: wordpress_password
    volumes:
      # Mount local directory for WordPress files
      - "./wordpress:/var/www/html"
      # Mount volume for persistent WordPress data
      - wordpress_data:/var/www/html
    depends_on:
      - mysql_db
    networks:
      - portainer_network

  mysql_db:
    image: mysql:5.7
    environment:
      # Set up MySQL database and user credentials
      MYSQL_DATABASE: wordpress_db
      MYSQL_USER: wordpress_user
      MYSQL_PASSWORD: wordpress_password
      MYSQL_ROOT_PASSWORD: root_password
    volumes:
      # Mount volume for persistent MySQL data
      - db_data:/var/lib/mysql
    networks:
      - portainer_network

  phpmyadmin:
    image: phpmyadmin/phpmyadmin:latest
    ports:
      # Expose PHPMyAdmin on port 8181
      - "8181:80"
    depends_on:
      - mysql_db
    environment:
      # Set up PHPMyAdmin to connect to the MySQL database
      PMA_HOST: mysql_db
      PMA_USER: root
      MYSQL_ROOT_PASSWORD: root_password
    networks:
      - portainer_network

networks:
  portainer_network:

volumes:
# Persistent volume of WordPress data
  wordpress:
  wordpress_data:
  db_data: # Persistent volume for MySQL data
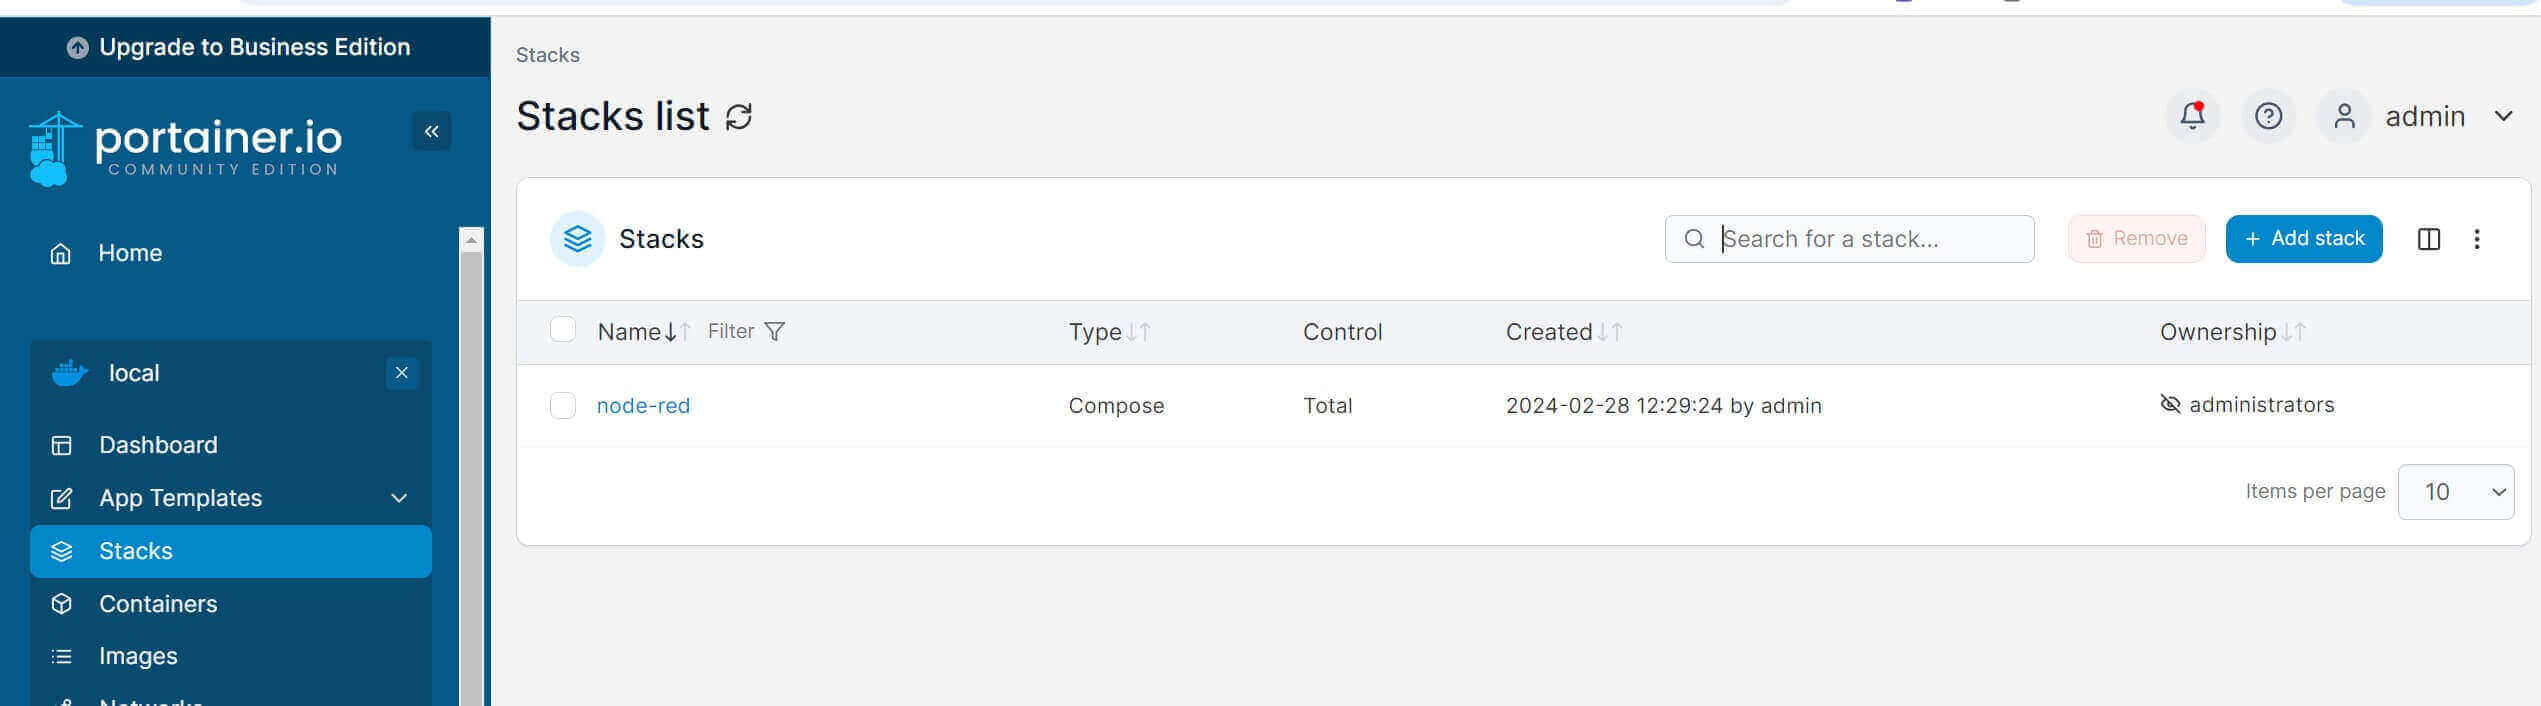
Go to Portainer and run WordPress. You will navigate to the Stack Section as follows:
Name your New Stack WordPress:
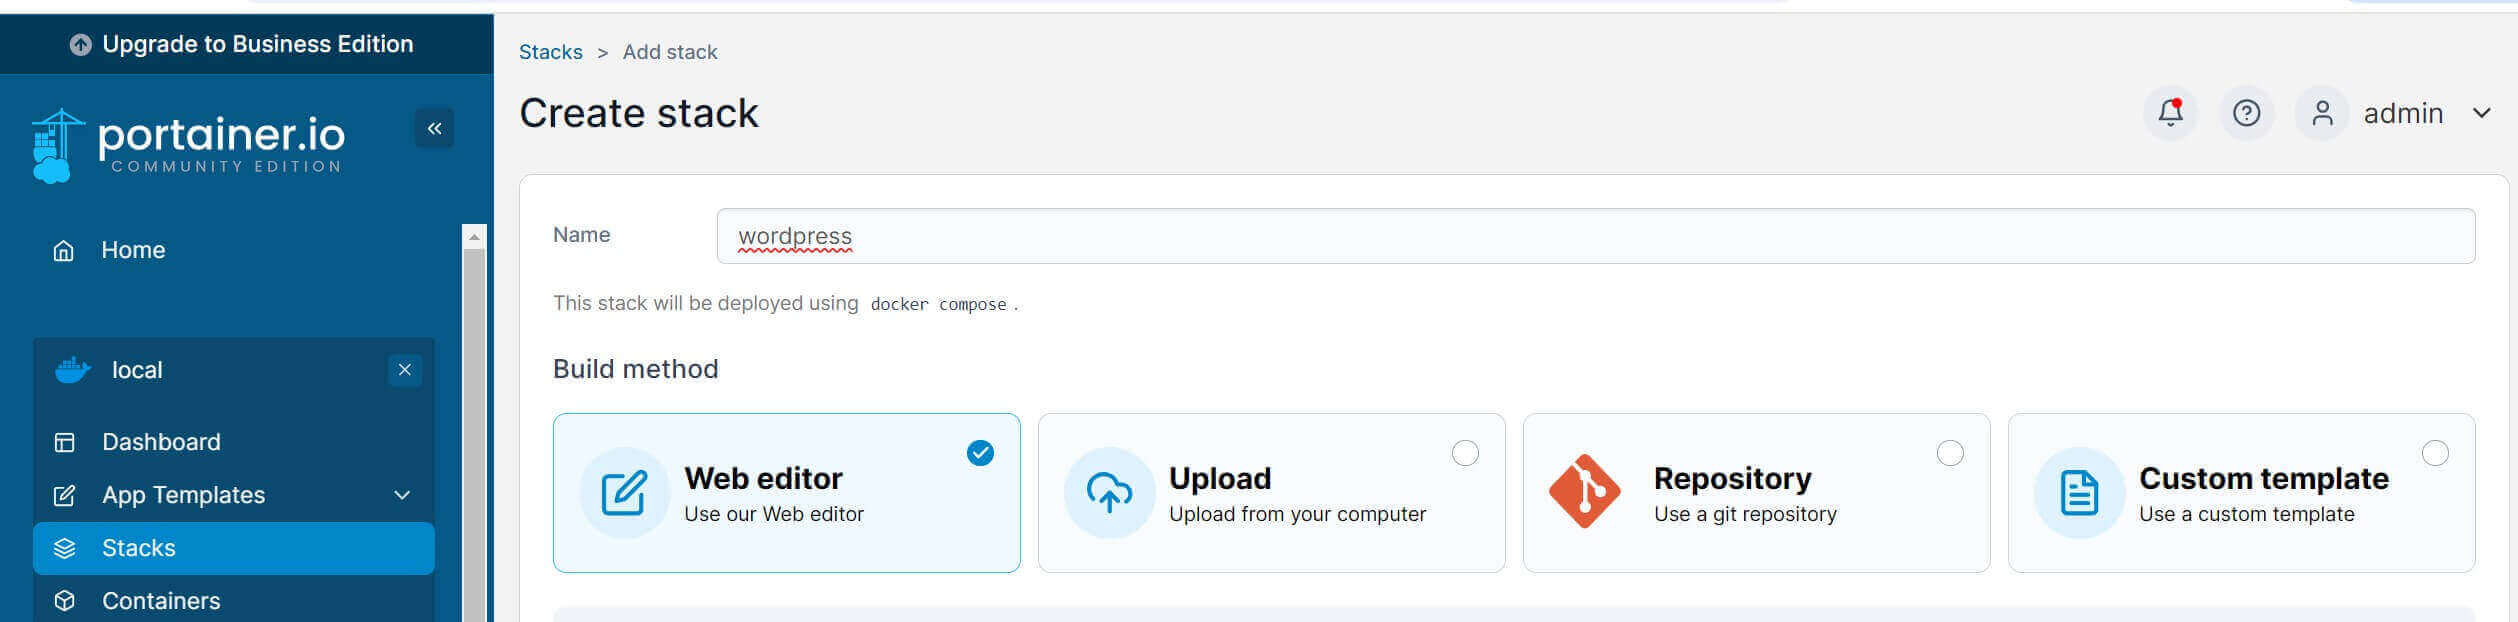
Now, use the Portainer Web Editor and add the above WordPress Docker Compose Stack as follows (Add MySQL, WordPress, and PhpMyAdmin):
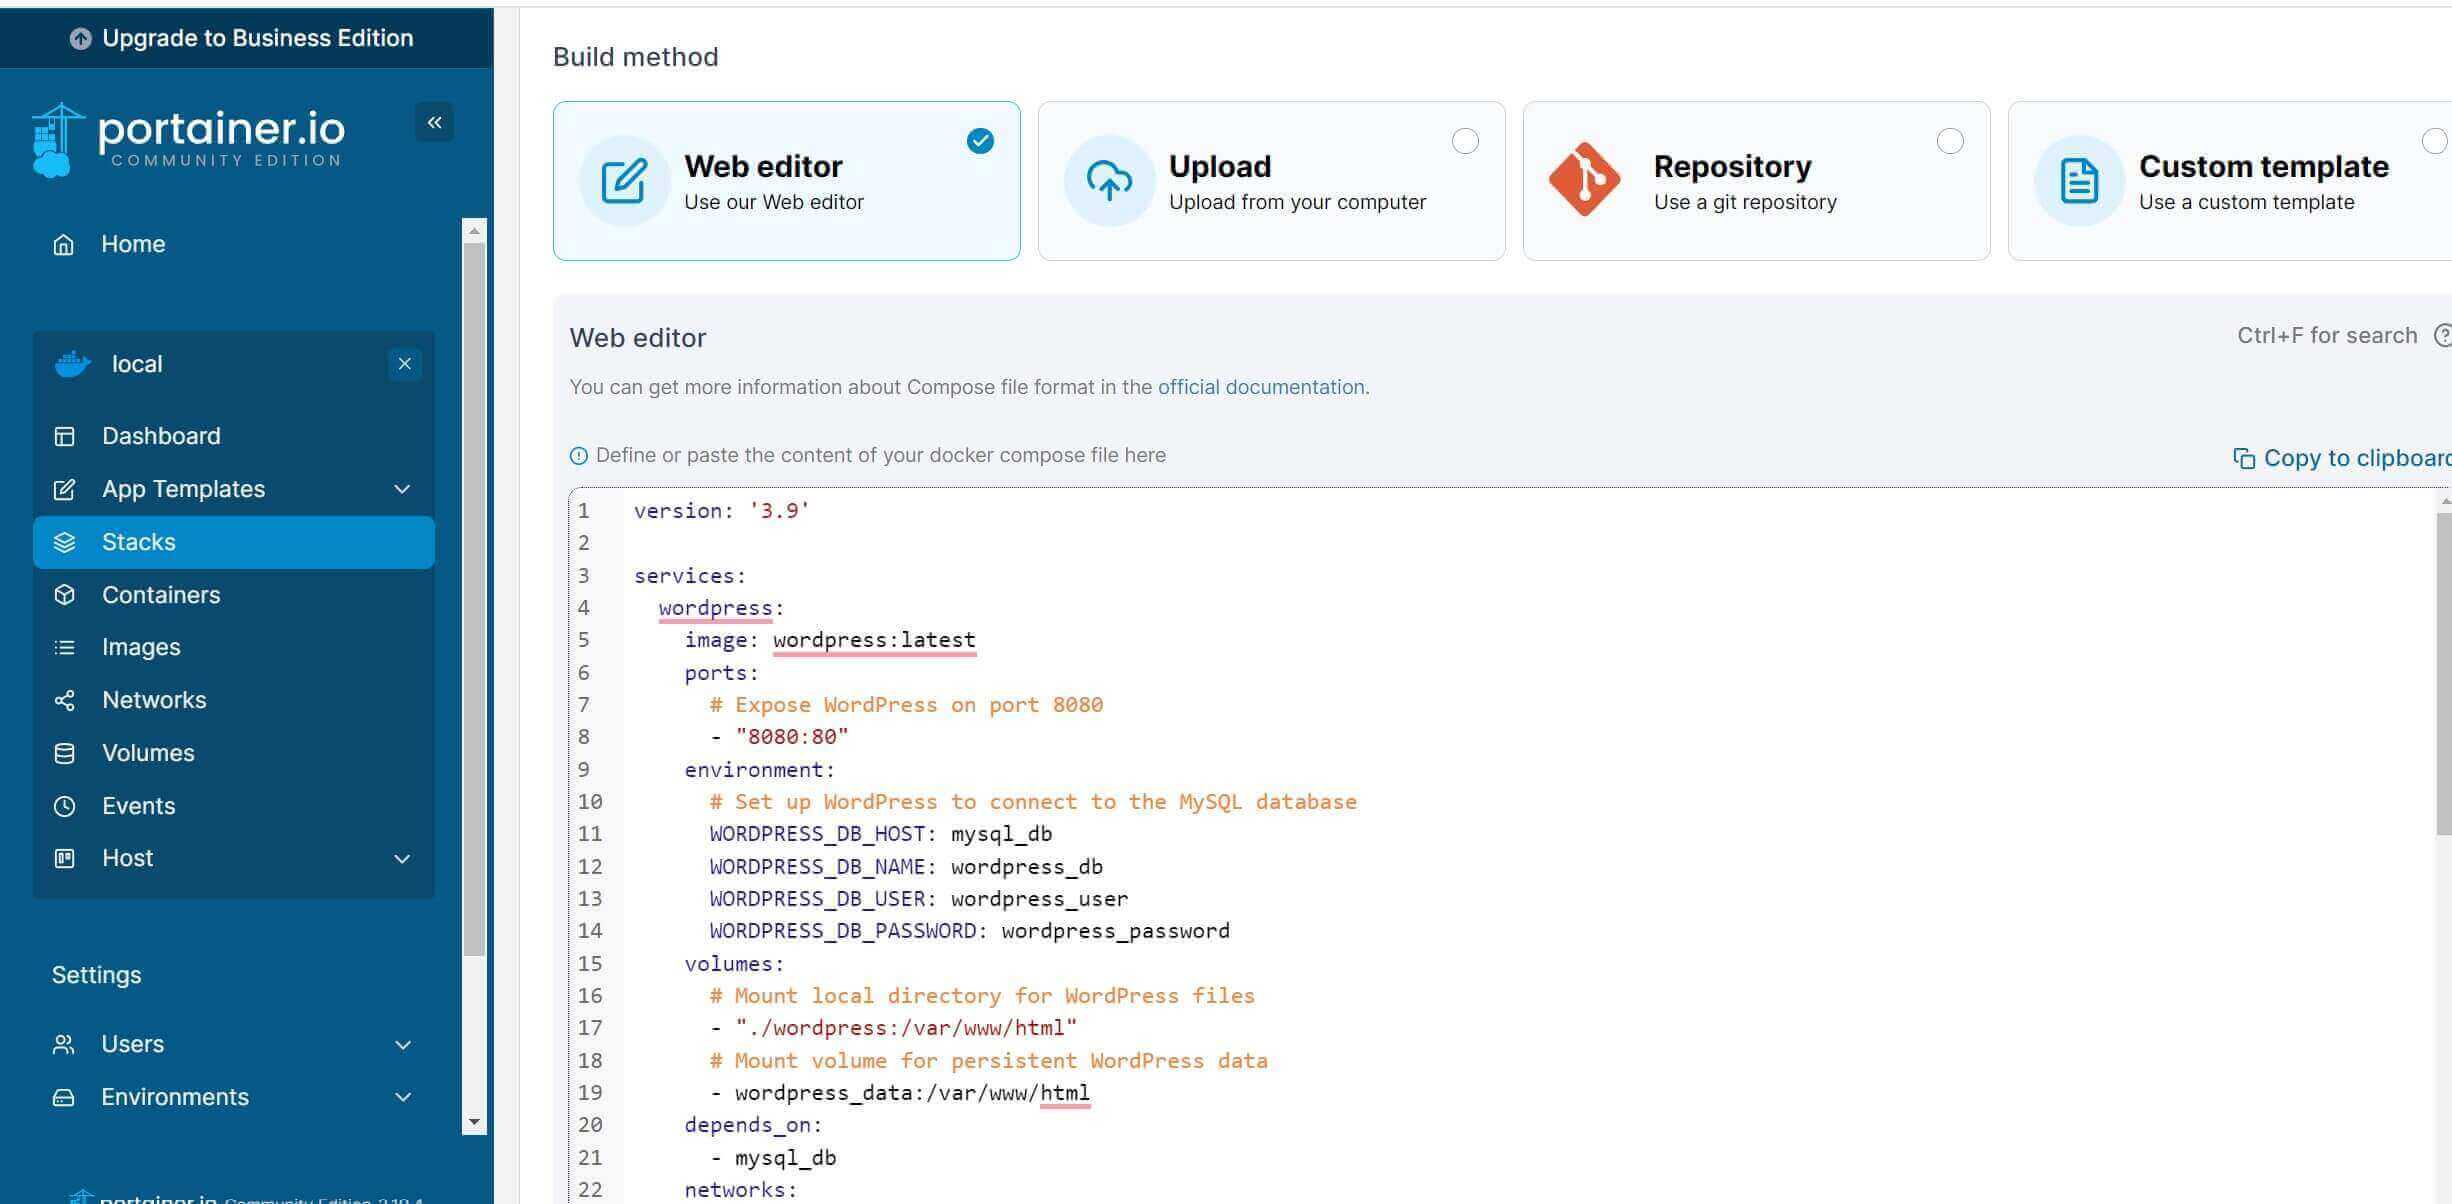
Finally, go to Actions and Deploy Stack:

You should give Portainer time to pull all WordPress settings and run the containers.
Step 5: Accessing WordPress on Portainer
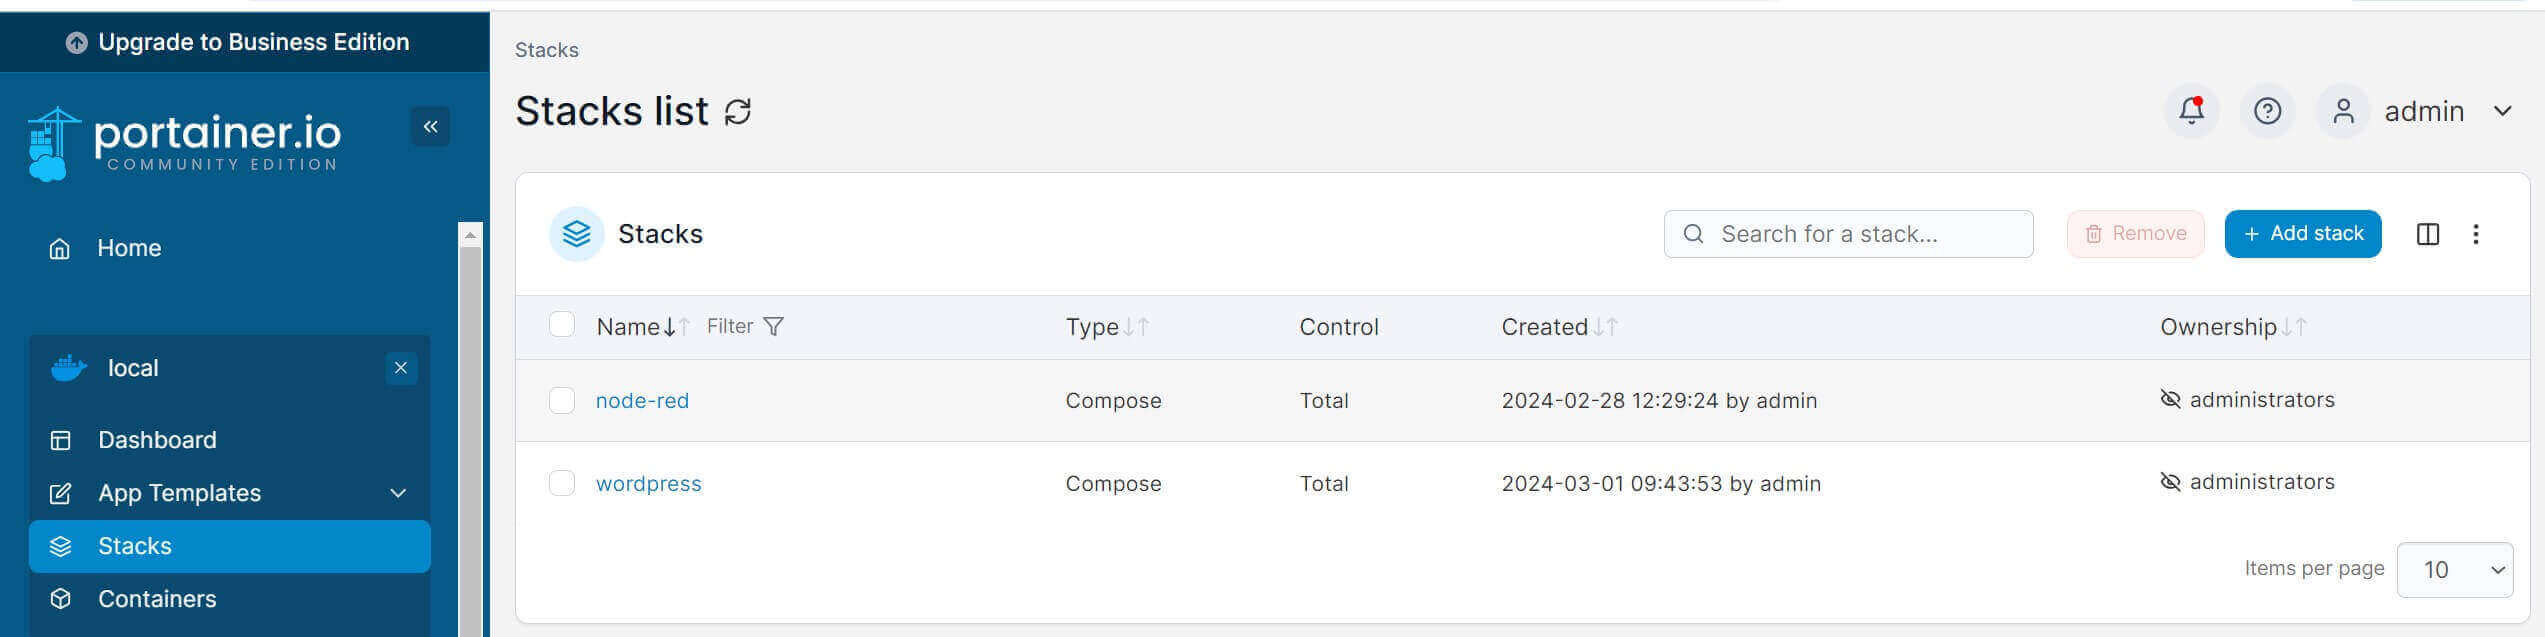
Once the stack is deployed, Portainer will direct you to the created stack as follows:
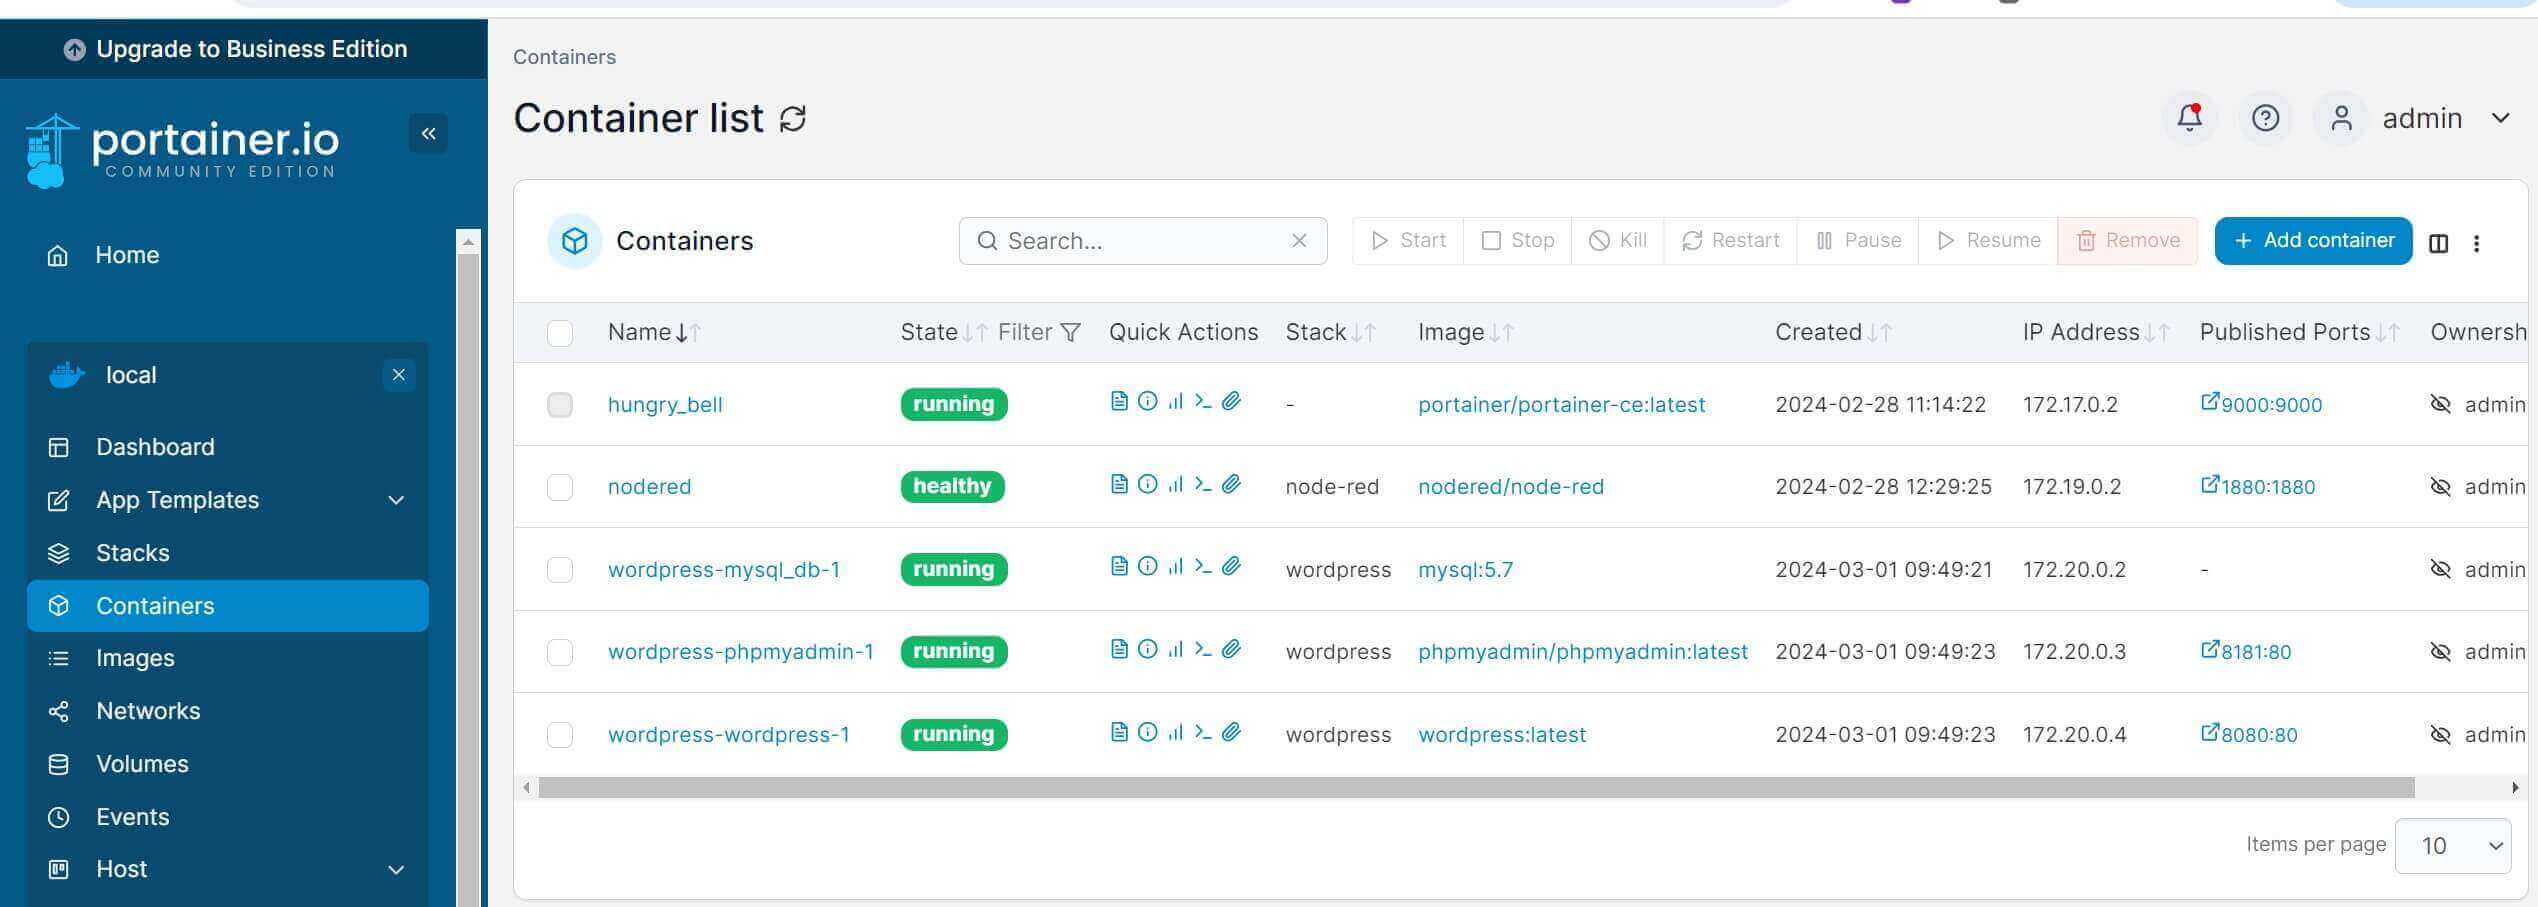
Go to the container section and make sure all the Portainer WordPress services are running:
Step 6: Installing WordPress CMS with Portainer
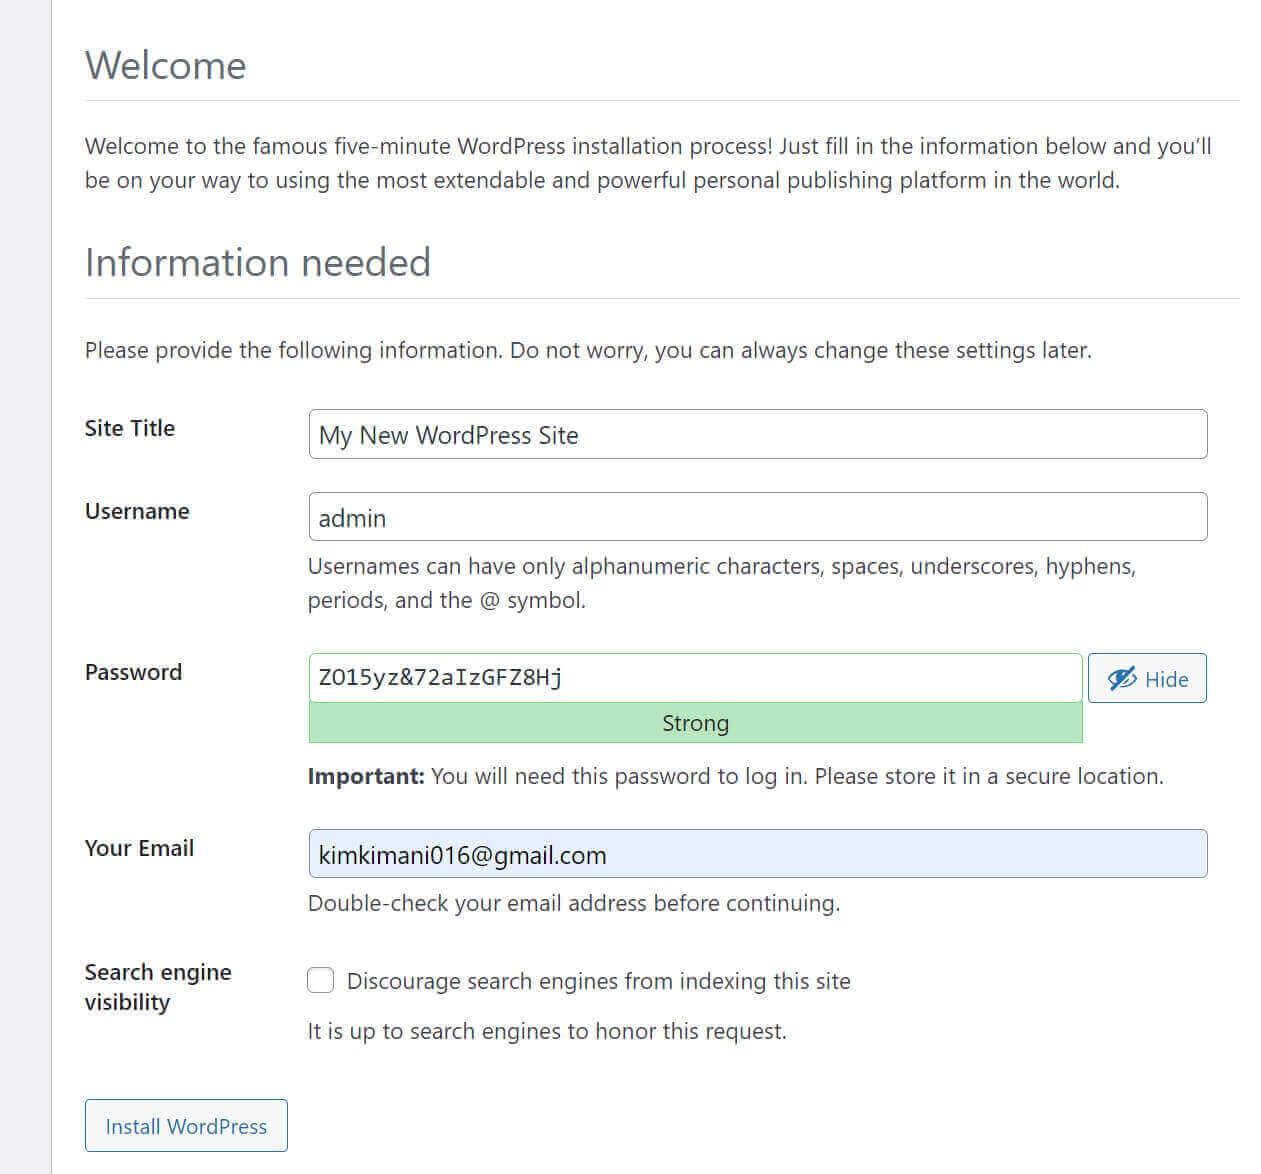
All the services are running. To Install WordPress, open port 8080 on your browser (http://localhost:8080/). You should WordPress as follows:
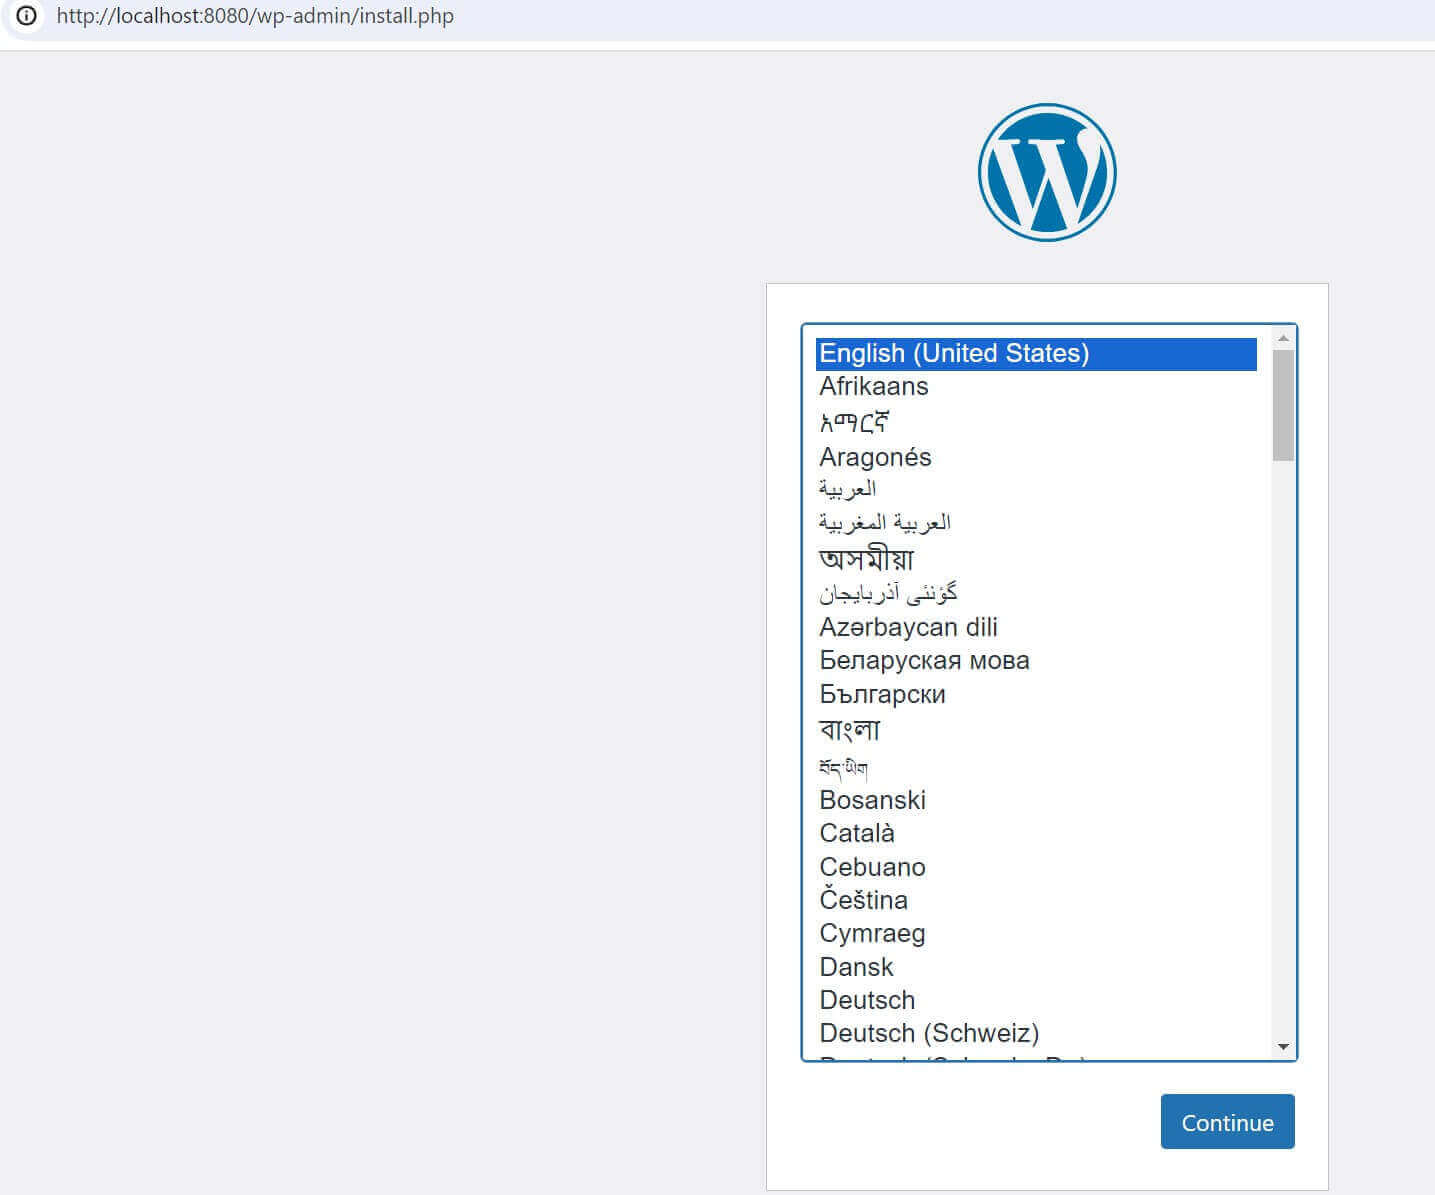
Click Continue and set up your WordPress as follows:
Once you Install, Login with the added details, and WordPress should be ready and running perfectly with Portainer:

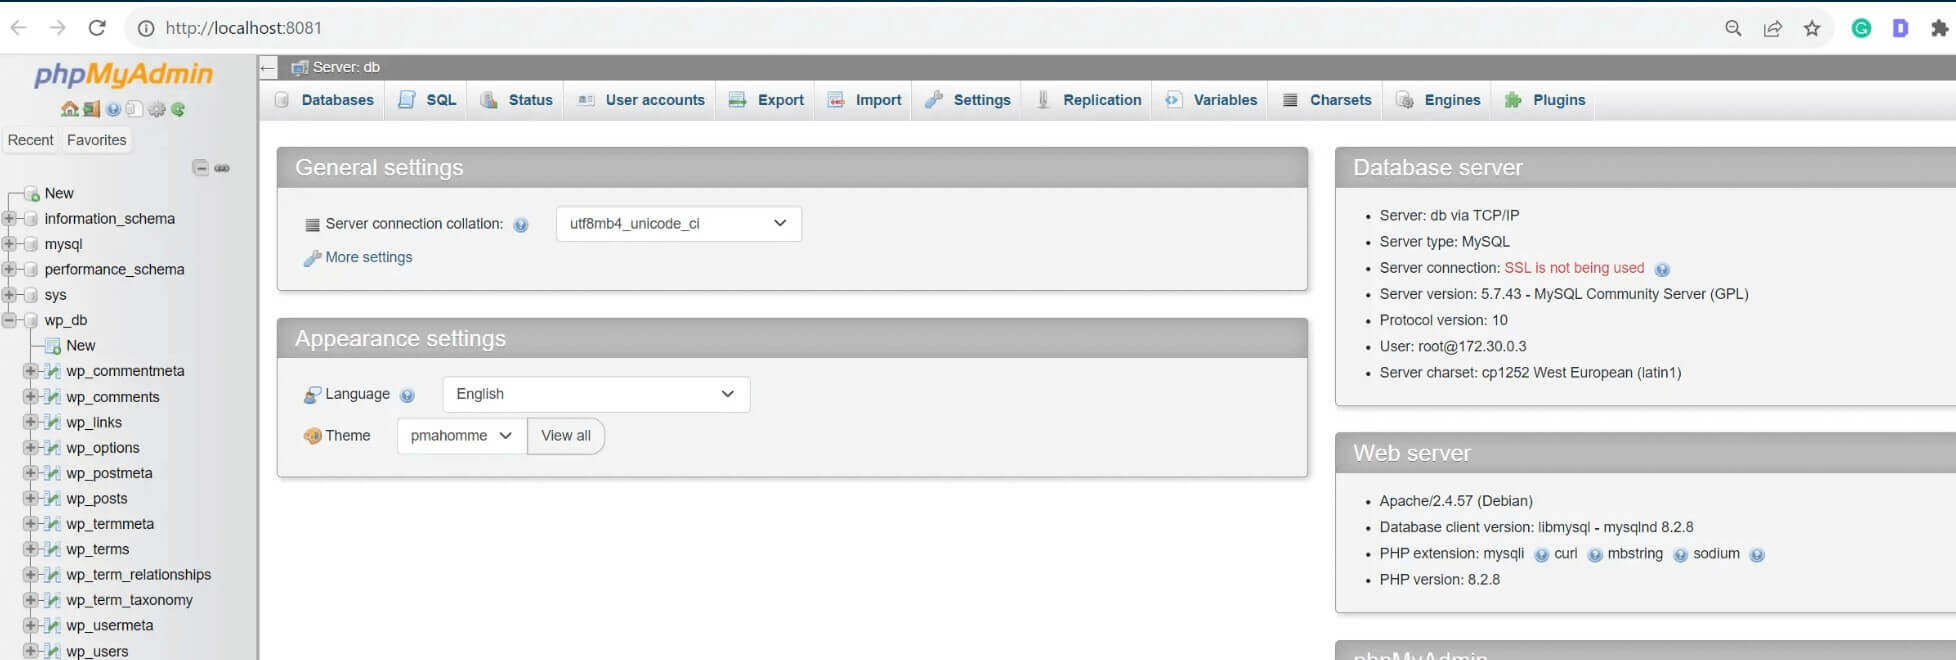
Step 7: Accessing WordPress Portainer MySQL DB with PhpMyAdmin
If you want to access the database host this WordPress, open port 8181 (http://localhost:8181/) to access PhpMyAdmin:
Conclusion
You now have WordPress CMS running alongside Portainer. I hope you’ve learned:
- How to set up Portainer.
- Using Portainer stack to run WordPress and MySQL.
- Installing and accessing WordPress running on Portainer.
Written By: