How to Install|Run Node-RED on Linux Ubuntu 20.04|22.04 LTS
Posted February 19, 2024

Let’s learn how to get Node-Red installed on a Linux Ubuntu 20.04|22.04 LTS. Node-RED is an open-source flow-based tool. It will let you easily create event-driven apps. Node-RED is created on top of Node.js. This way, you get a browser-based editor to visually wire together nodes to create flows to process data in real-time.
Node-RED is available to almost every Linux distribution. In this guide, you will learn all the steps you need to get Node-RED installed and running on a Linux Ubuntu 20.04|22.04 LTS machine. You will learn:
- What you need to get Node-RED ready on Ubuntu.
- How to install Node-RED on a Linux Ubuntu 20.04|22.04 LTS
- How to locally run and access Node-RED on Ubuntu
- Optional Node-RED Ubuntu configurations such as Change Node-RED Port, Enable Flow Encryption, and AutoStart Node-RED on boot.
Related: How To Install and Run Node-RED on Debian 9|10|11|12
Step 1: Node-RED Linux Ubuntu Requirements
To install Node-RED on Linux Ubuntu 20.04 or 22.04 LTS, you’ll need:
- This setup is made to work for all Linux Ubuntu 20.04 LTS (Focal Fossa) or 22.04 LTS (Jammy Jellyfish). Node-RED will be installed using the same commands and steps.
- Node-RED does not require extensive resources. Your Ubuntu system will likely handle Node-RED services.
- You must have Node.js version
>=14.16'. - You will install Node-RED on top of Node.js. This means you must have Node.js and NPM ready on your Ubuntu machine. Check the following steps:
Step 2: Get Node.js and NPM Ready on Ubuntu for Node-RED
Node-RED requires Node.js to be installed on your system. The easiest way to install Node.js is to use the apt package manager for the Ubuntu system as follows:
On your Ubuntu, ensure your system cache is up to date:
sudo apt update
sudo apt upgrade

Next, start installing Node.js using the following installation script to add the Nodesource repository to the sources list:
curl -fsSL https://deb.nodesource.com/setup_18.x | sudo -E bash -
Note: change
18based on the Version of Node.js you need.
Now use apt to install Node.js:
sudo apt-get install -y nodejs build-essential
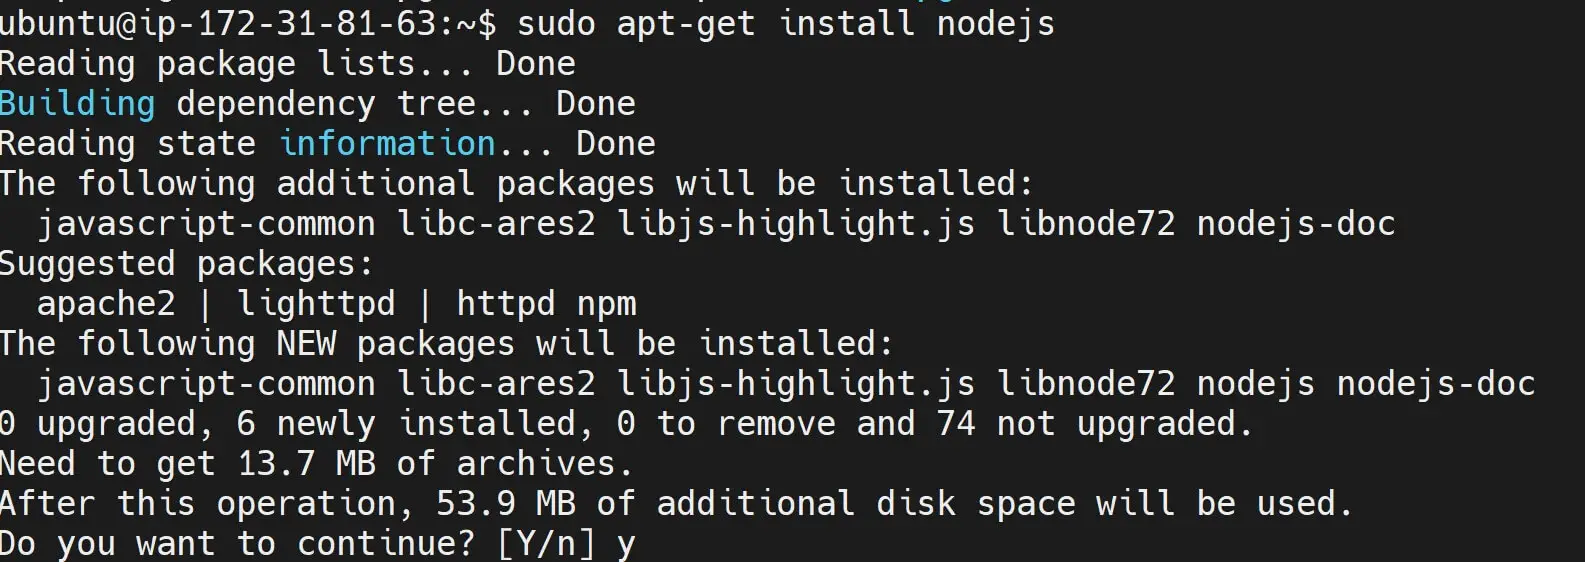
If, prompted to add your password, do so and press y to continue with the Node.js installation:

In case running sudo apt-get install nodejs has errors:

- Force the installation using the –force-overwrite flag with dpkg:
sudo dpkg -i --force-overwrite /var/cache/apt/archives/nodejs_18.19.1-1nodesource1_amd64.deb
- Clean up and fix any broken packages and dependencies:
sudo apt-get install -f
- Retry the installation of Node.js:
sudo apt-get install -y nodejs build-essential
Now, run the nodejs –version command to confirm that Node.js is available on your Ubuntu system. You should get the current version of Node.js installed:
nodejs --version

Use npm --version to check if NPM is ready. Now, let’s dive in and get Node-RED installed and running on top of the installed Ubuntu Node.js runtime.
Step 3: Installing Node-RED on Linux Ubuntu 20.04|22.04 LTS
Ubuntu will need Node-RED installed globally. This way, it makes it easier to access and run Node.js in any of your Ubuntu directories.
Run the following command to get Node-RED installed on Ubuntu:
sudo npm install -g --unsafe-perm node-red
npm installtells NPM to install Node-Red package.-g(--global) install the package globally.--unsafe-permtells NPM to not set the –user and –group to root while running scripts.node-redis the package that NPM is being instructed to install.

Step 4: Node-RED on Ubuntu: Error Alert
Using sudo with NPM sometimes leads to permission issues. Installing packages globally may interfere with system-wide dependencies.

If you have such errors, use NVM to install Node.js and npm without using sudo. Check this guide to get NVM ready. Once ready, use the following command to Node-RED installed without sudo:
npm install -g --unsafe-perm node-red
Step 5: How to Run Node-RED with Ubuntu
You only need one command to get Ubuntu to run your Node-RED service. Use the following command in the terminal:
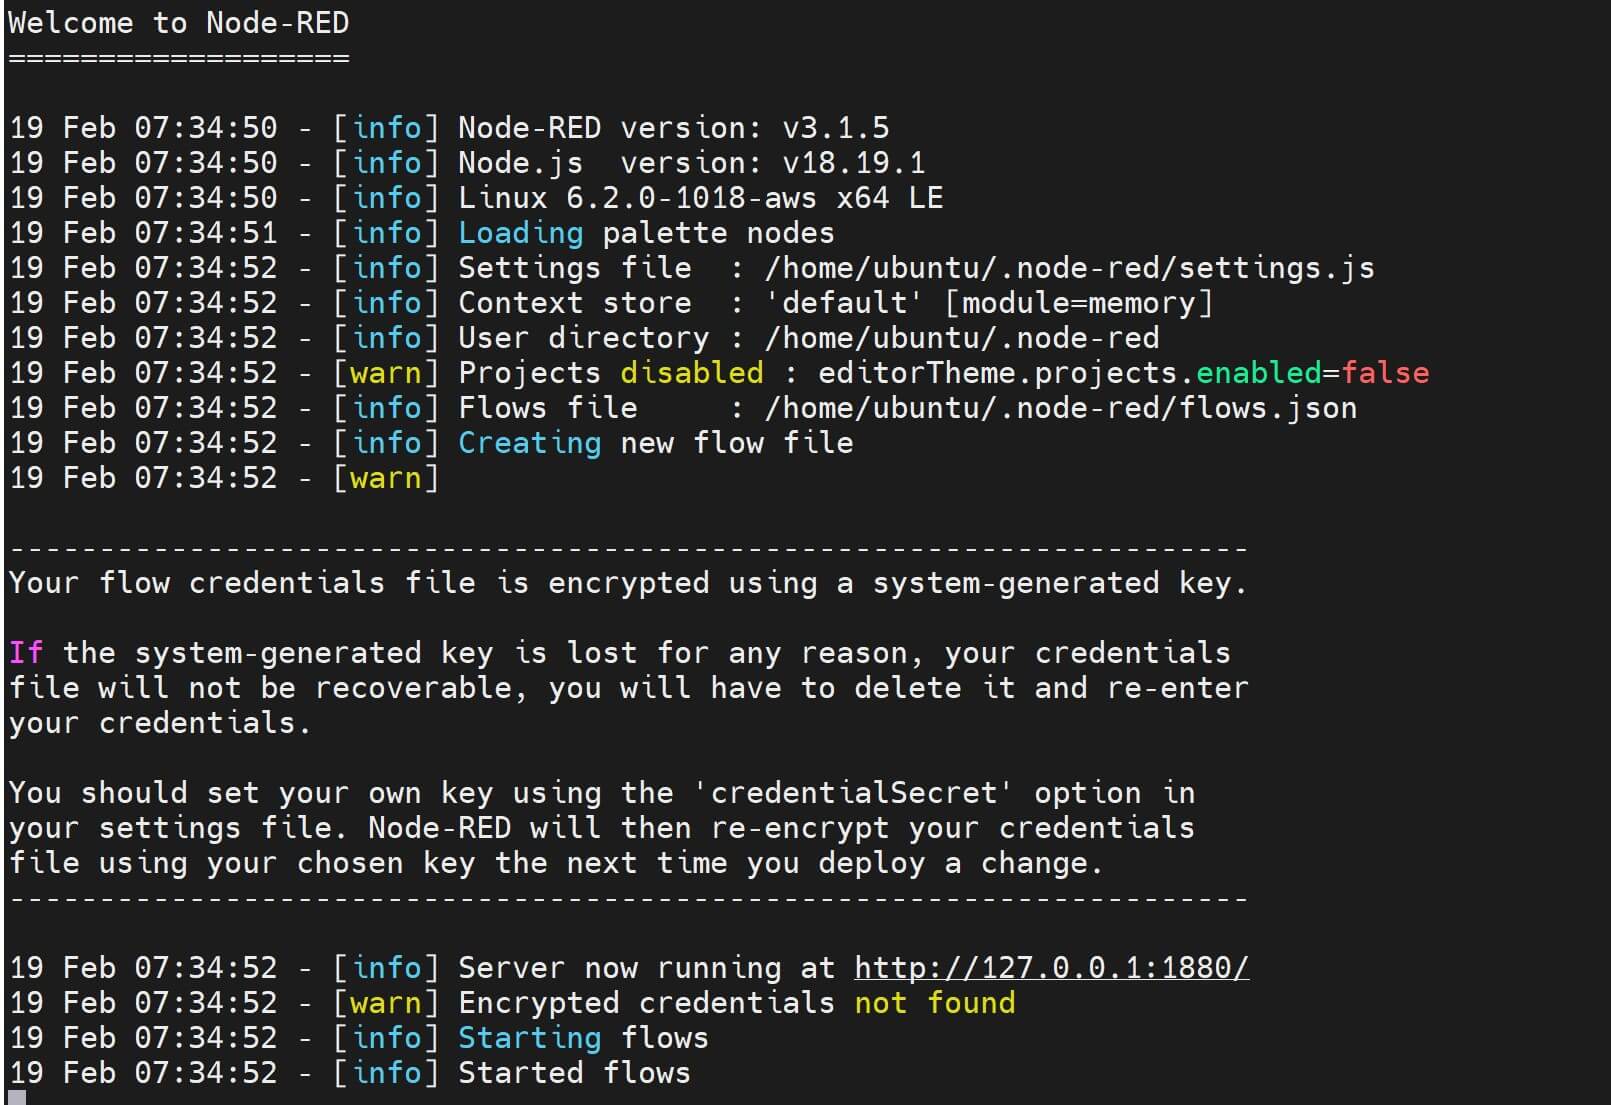
node-red
Running the command node-red starts the Node-RED server. Node-RED initializes and begins running on your Ubuntu machine. Here’s what happens:

Step 6: Accessing Installed Node-RED on Ubuntu
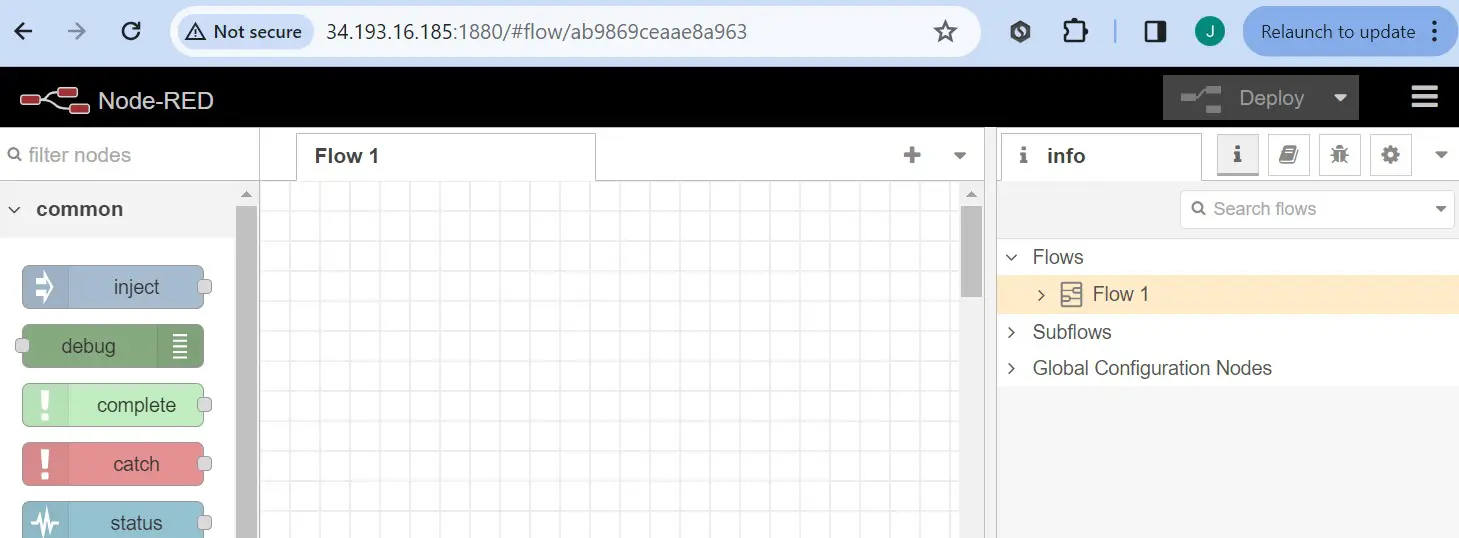
Your Ubuntu system is now ready to use Node-RED. Node-RED is running. Access it using a web browser and navigate to http://localhost:1880 or (http://server_ip:1880/).

Note: My Node-RED failed to be accessed when I had firewall enabled. I had to disable the Ubuntu firewall
sudo ufw disable
Step 7: AutoStart Node-RED with PM2 On the Ubuntu server
To handle Node-RED well, you will need to exit the node-red terminal. You must run this command every time you need to access Node-RED. We can change this using PM2 and Node-RED will always run the background as follows:
- Install PM2:
sudo npm install -g --unsafe-perm pm2
- Start node-red with PM2:
pm2 start `which node-red` -- -v
- Save the PM2 node-red session:
pm2 save

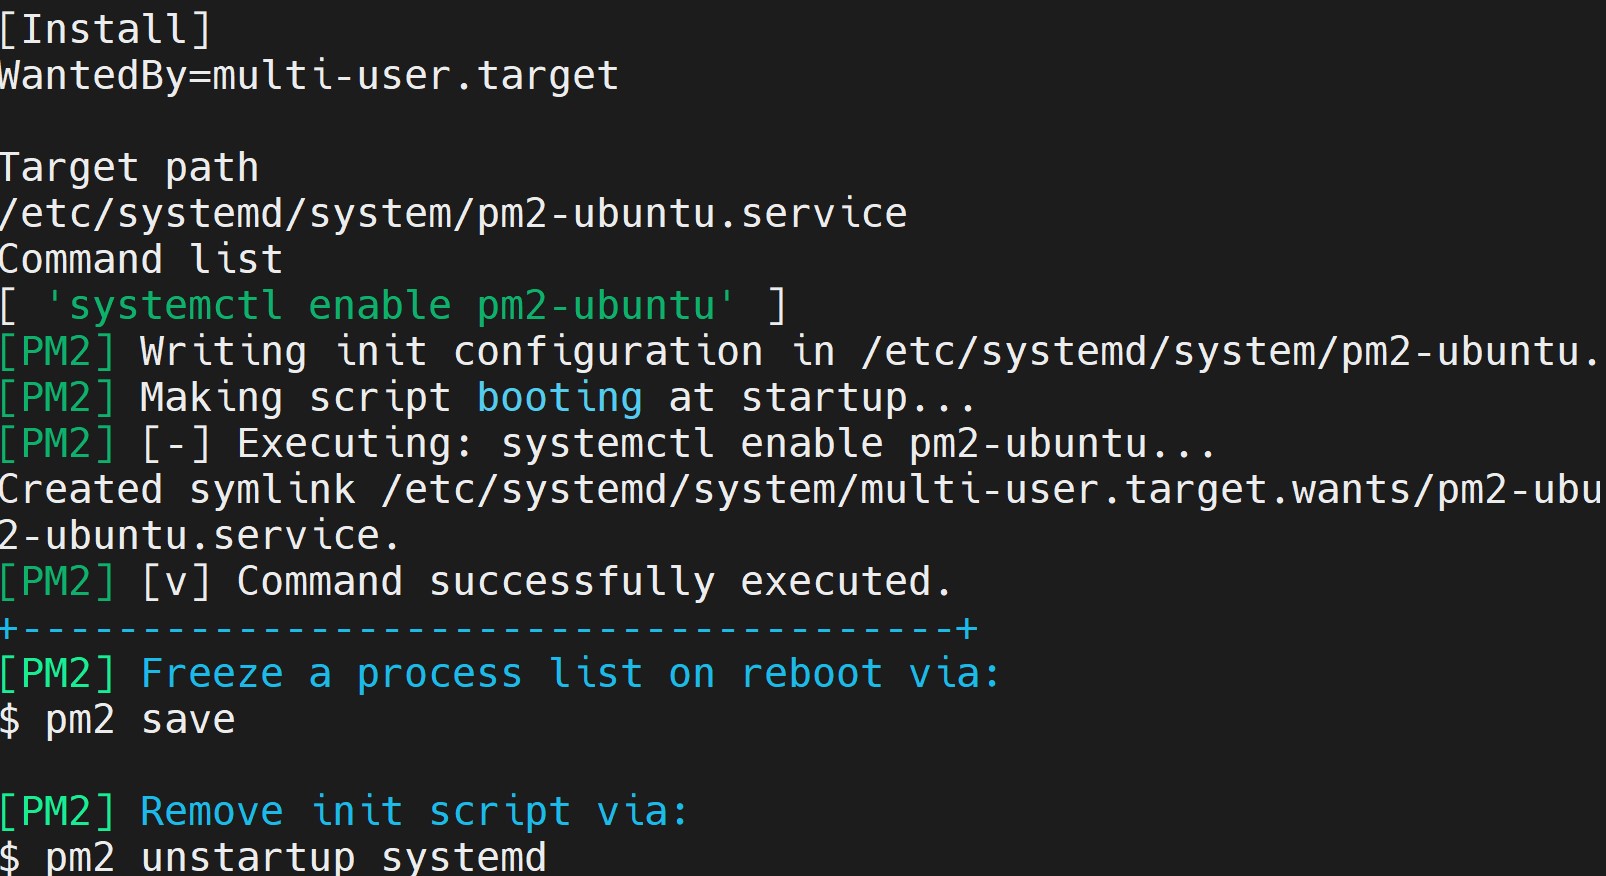
- Check the pm2 startup:
pm2 startup

- Copy your above specific Node-Red PM2 Start-Up script and run it:
## This is an example of the Start-Up script
sudo env PATH=$PATH:/usr/bin /usr/lib/node_modules/pm2/bin/pm2 startup systemd -u ubuntu --hp /home/ubuntu

Your Ubuntu Node-Red server is ready. It will always be running on the backgrould on port 1880.
Step 8: How to Access Node-RED with HTTPS on Ubuntu
Let’s say you want to use HTTPS protocol. You will need to add SSL certificates I have the following guide that shows how to add Node-RED to HTTPS based on:
- Certbot and Let’s Encrypt.
- Nginx Reverse Proxy and Nginx Proxy Manager.
- Using OpenSSL self-signed SSL HTTPS ca-certificates.
Step 9: How to Enable Node-RED Ubuntu Flow Encryption
Based on the above step, you have Encrypted credentials not found:

If you want to encrypt your flows to enhance security.
- Open your Node-RED settings file by running:
nano ~/.node-red/settings.js

- Uncomment the following line to enable encryption:
//credentialSecret: "a-secret-key",

Step 10: Configuring Node-RED Ubuntu Data Persistence
Node-RED allows you to configure data persistence. Your flows are saved even after Node-RED is restarted.
You set up a directory to store your flow files by modifying the settings file:
nano ~/.node-red/settings.js
Remove the comment on:
//flowFile: 'flows.json',
Look for the userDir property. Add the directory path where you want Node-RED to store its data:
// The file containing the flows. If not set, it defaults to flows_<hostname>.json
flowFile: 'flows.json',
// Custom directory for Node-RED user data
userDir: '/path/to/custom/data/directory',
Save your changes and restart Node-RED for the configurations to take effect.
Step 11: How to set Node-RED systemd Service on Ubuntu 20.04 Only
If you’re using Ubuntu 20.04, you can set up Node-RED as a systemd service. This way, Node-RED starts automatically on the Ubuntu system boot.
To do so:
- Create a systemd service file for Node-RED:
sudo nano /etc/systemd/system/node-red.service
- Add the following content to the file:
[Unit]
Description=Node-RED
After=network.target

[Service]
ExecStart=/usr/bin/node-red
Restart=on-failure
KillSignal=SIGINT

[Install]
WantedBy=multi-user.target
- Save and close your file. Reload Ubuntu systemd to read the new Node-RED service file:
sudo systemctl daemon-reload
- Start Node-RED and enable it to start on boot:
sudo systemctl start node-red
sudo systemctl enable node-red
Conclusion
This guide helped you Install Node-RED on Linux Ubuntu 20.04|22.04 LTS. I hope you can now:
- Access Node-RED within Linux Ubuntu 20.04|22.04 LTS
- Add additional options to your Ubuntu Node-RED server.


