How to Create and Run Sequelize Migrations with Nest.js
Posted February 13, 2024

Sequelize Migrations doesn’t provide an out-of-the-box setup within Nest.js. In this guide, you will learn how to use Nest.js apps to run Sequelize Migrations.
Nest.js is Typescript-based. This makes it challenging to get Sequelize Migrations up and running. Sequelize CLI will always allow you to create Migrations files from a JavaScript perspective. How do you make this setup work with a Typescript-based Nest.js app?
Ready? Dive into this guide and learn how to create and run Sequelize Migrations with Nest.js.
Related: Create|Generate|Run Sequelize CLI db Migrations With Nodejs
How to Set Up Nest.js with Sequelize Migrations
Before running a Migration with Nest.js, you need a working application. I will use a task app to create this demo. Run the following command to get the app ready:
nest new nestjs-task-manager
cd nestjs-task-manager
This task manager will require some libraries that will let Nest.js have the ability to run Sequelize Migrations with a Sequelize CLI. You will need:
- Database Drivers. This app will use Postgres.
- Sequelize for Nest.js and Sequelize CLI to run Migrations.
Run the following command to get them ready.
npm install sequelize-typescript sequelize sequelize-cli pg-hstore pg @types/sequelize @nestjs/sequelize
Configuring Nest.js With Sequelize Migrations
To use Migrations, you just run a create command. However, here you will need to use a special file that Sequelize will use to create special Migration configurations.
In your project directory, create a .sequelizerc file and add the following code:
// path module from Node.js standard library
const path = require('path');

// Exporting an object containing paths for database-related files
module.exports = {
   // directory containing database seeders (data population scripts)
   'seeders-path': path.resolve('src/database', 'seeders'),
   // Path to the directory containing database migrations (schema change scripts)
   'migrations-path': path.resolve('src/database', 'migrations'),
   // Database configuration file
   'config': path.resolve('src/database', 'config.js'),
}
In your current working directory, the root directory of the project, these paths will resolve to:
src/database/seedersseeders-path where the database seeders (data population scripts) are saved.src/database/migrationspath where the database migration scripts are located. Migrations are scripts that define changes to the database schema.src/database/config.jsthe path to the configuration file for the database
Generating Nest.js Migrations with Sequelize CLI.
Once you have the above file ready, you can now start to work on the core migrations. In this case, you want to create a task migration. Go ahead and run the following command to first initialize Sequelize Migrations within Nest.js:
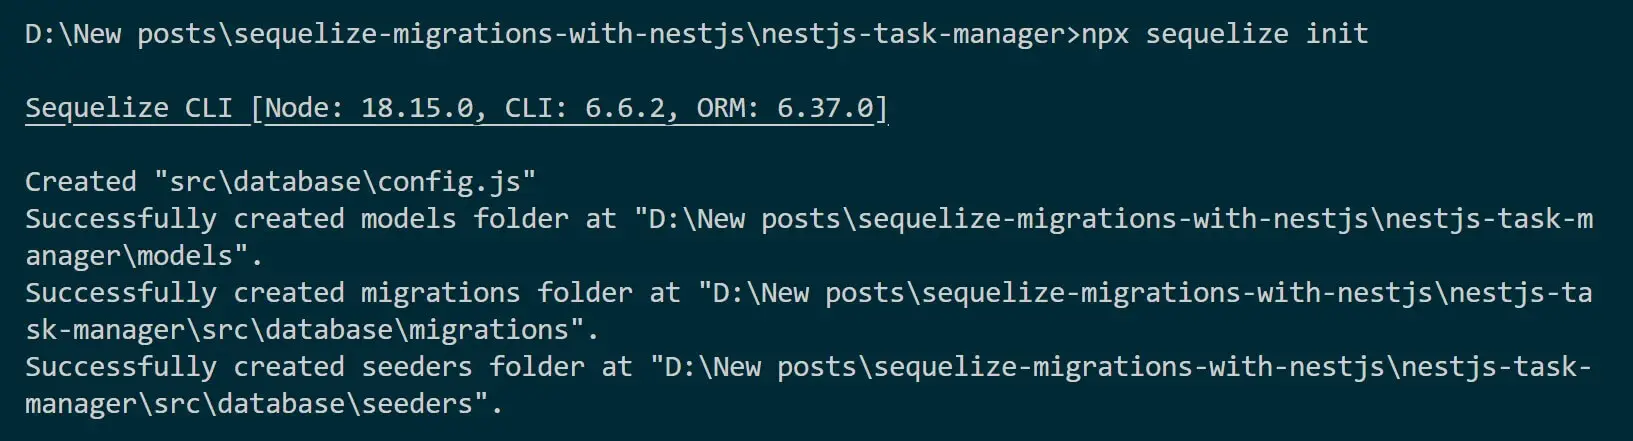
npx sequelize init
This should access 'src/database' and create the right files for your app:
Based on the application task, use the following command to generate the migrations:
npx sequelize-cli migration:generate --name create-tasks

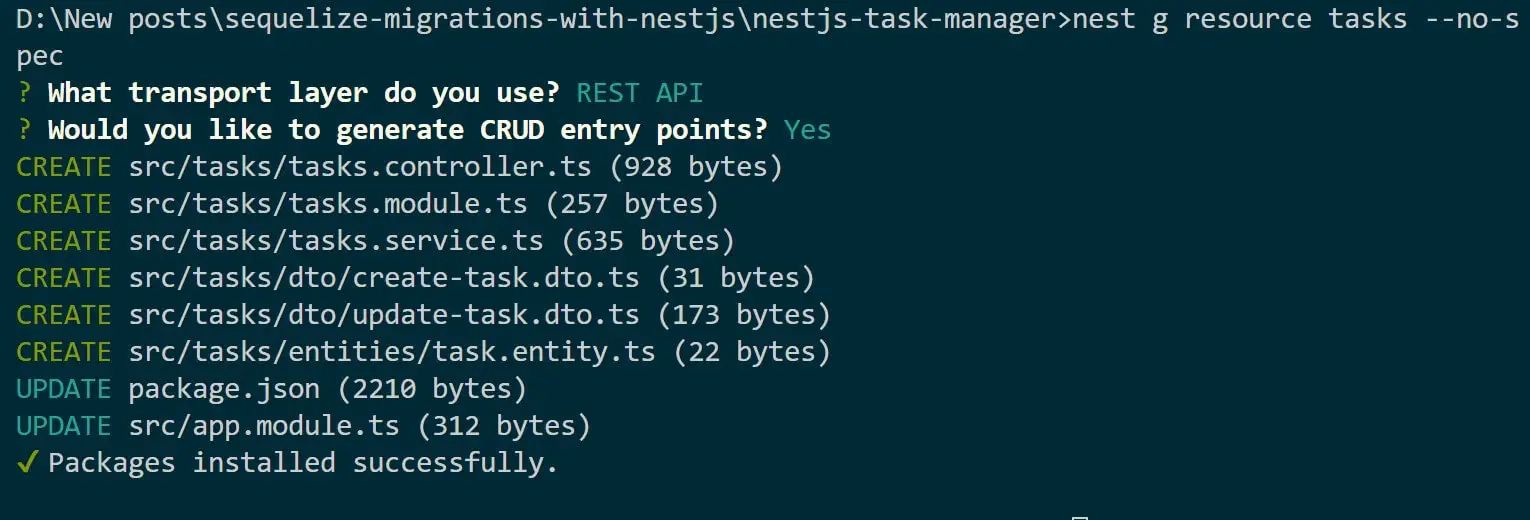
At the same time, use Nest.js to create a task module:
nest g resource tasks --no-spec
Connecting Nest.js with Sequelize
Before running the generated migration, ensure Sequelize has access to your database through Nest.js. First, go to the src\database\config.js file and add database connections as follows:
module.exports = {
  development: {
     dialect: 'postgres',
     host: 'localhost',
     port: 5432,
     username: 'postgres',
     password: 'pass',
     database: 'taskApp',
  }
}
Ensure you update these details based on your database connection. Be sure you have created the database taskApp.
Go to the src\tasks\entities\task.entity.ts file and create a Nest.js task model using Sequelize-typescript as follows:
import { Table, Column, Model } from 'sequelize-typescript';

@Table
export class Task extends Model<Task> {
  @Column
  name: string;

  @Column
  description: string;

  @Column
  status: string;
}
For your model to work, the Tasks module must be able to access it using SequelizeModule.forFeature. In your src\tasks\tasks.module.ts file make sure @Module has the following import:
imports: [SequelizeModule.forFeature([Task])],
Go to src\app.module.ts and add Sequelize Nest.js database connections as follows:
  imports: [
    SequelizeModule.forRoot({
      dialect: 'postgres',
      host: 'localhost',
      port: 5432,
      username: 'postgres',
      password: 'pass',
      database: 'taskApp',
      models: [Task],
      autoLoadModels: true,
    }),
    TasksModule],
Modifying Sequelize Migrations within Nest.js
Migration tasks was generated in src\database\migrations\20240213171733-create-tasks.js as follows:
'use strict';

/** @type {import('sequelize-cli').Migration} */
module.exports = {
  async up (queryInterface, Sequelize) {
    /**
     * Add altering commands here.
     *
     * Example:
     * await queryInterface.createTable('users', { id: Sequelize.INTEGER });
     */
  },

  async down (queryInterface, Sequelize) {
    /**
     * Add reverting commands here.
     *
     * Example:
     * await queryInterface.dropTable('users');
     */
  }
};
Based on your src\tasks\entities\task.entity.ts model, let Sequelize have up and Down methods for creating database migrations as follows:
'use strict';

module.exports = {
  up: async (queryInterface, Sequelize) => {
    return queryInterface.createTable('Task', {
      id: {
        type: Sequelize.INTEGER,
        allowNull: false,
        autoIncrement: true,
        unique: true,
        primaryKey: true,
      },
      name: {
        type: Sequelize.STRING,
        allowNull: false,
      },
      description: {
        type: Sequelize.TEXT,
        allowNull: true,
      },

      status: {
        type: Sequelize.BOOLEAN,
        allowNull: false,
        defaultValue: false,
      },

      createdAt: {
        type: Sequelize.DATE,
        allowNull: false,
      },
      updatedAt: {
        type: Sequelize.DATE,
        allowNull: false,
      }
    });
  },

  down: async (queryInterface, Sequelize) => {
    return queryInterface.dropTable('Task');
  }
};
Running your First Nest.js Sequelize Migrations
Your app is now ready. Nest.js can now use Sequelize Migrations. However, you need to run a migrate command as follows:
npx sequelize-cli db:migrate

Sequelize NestJS Migration should be ready as shown above. Go to your database and confirm the following:

Conclusion
If you want to dive deeper, extend this tutorial and use Sequelize to create Complete CRUD APIs with Postgres and MySQL. I hope this guide prepares you to get Sequelize Migrations Running in Nest.js apps.
Written By: