Easy Guide to Nest.js with Auth0 and Passport JWT|AuthGuard
Posted February 7, 2024

Auth0 is an authentication and authorization platform. Auth0 adds identity and access management to your apps. It allows developers to add authentication, authorization, and user management features to their applications quickly and securely. In this guide, you will learn how to use Auth0 with Nest.js alongside Passport and JWT.
Along this guide, you will set up a Nest.js server with Auth0 and Passport JWT/AuthGuard. You will learn:
- How to configure Auth0 to use Nest.js as your SDK.
- Using Passport to carry out NestJS Auth0 authentication strategies
- How to add Passport JWT to Auth0.
- Testing your Nest.js API will Auth0 socials and username/passport.
Related: https://thriveread.com/nestjs-oauth-serve-with-google-and-passport/
To follow along ensure you have:
- Node.js installed on your computer.
- A
auth0.comdeveloper account
What is Auth0 and How it Works with Nest.js and Passport
When using Auth0, you don’t need complex authentication systems from scratch. Auth0 will handle identity and access management for you. This way you can use Nes.js and Passport to add username/password and social logins (Google, Facebook, etc.).
Let’s learn how Auth0 works with Nest.js and Passport. First, need an SDK. In this case, you will Node.js. You will then use the Node.js Auth0 SDK within Nest.js and create an Authentication Flow.
Auth0 authenticates a Nest.js user (Server) using the configured authentication. This way, if a user attempts to access any protected resource, they are redirected to Auth0’s authentication servers to log in.
Now, Passport is good at adding restricted authenticated resources using Nest.js endpoints. It uses the @nestjs/passport module to create a Passport Auth0 strategy. The passport Auth0 strategy handles all communications to with Auth0 servers and validates the JWT tokens issued by Auth0.
I hope you now understand the need to use Nest.js with Auth0 and Passport JWT. Ready? Let’s Now dive deeper add Auth0 SDK to Nest.js and let Passport handle the complex authentication process for us.
How to Set up Nest.js Auth0 SDK
Before creating your app, you need to integrate an Auth0 SDK into Nest.js. First, ensure you have an auth0.com account that you are logged into:
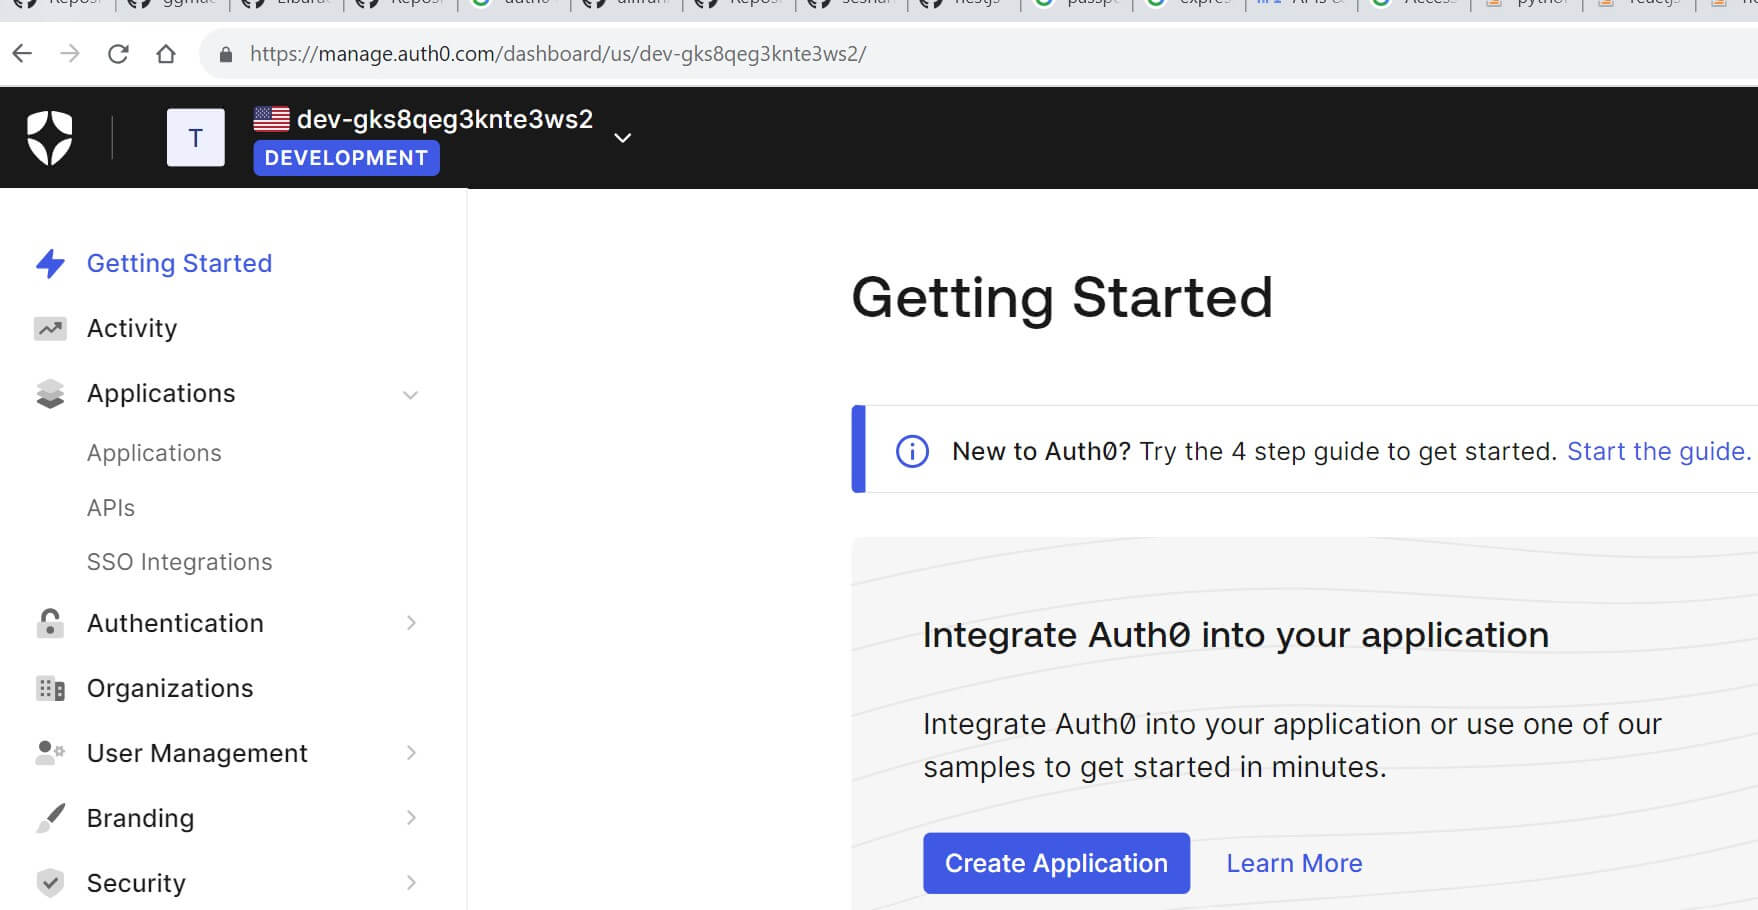
Go to Applications and Create New Application:

You have to choose an SDK. In this case, select Regular Web Applications and Create your app:
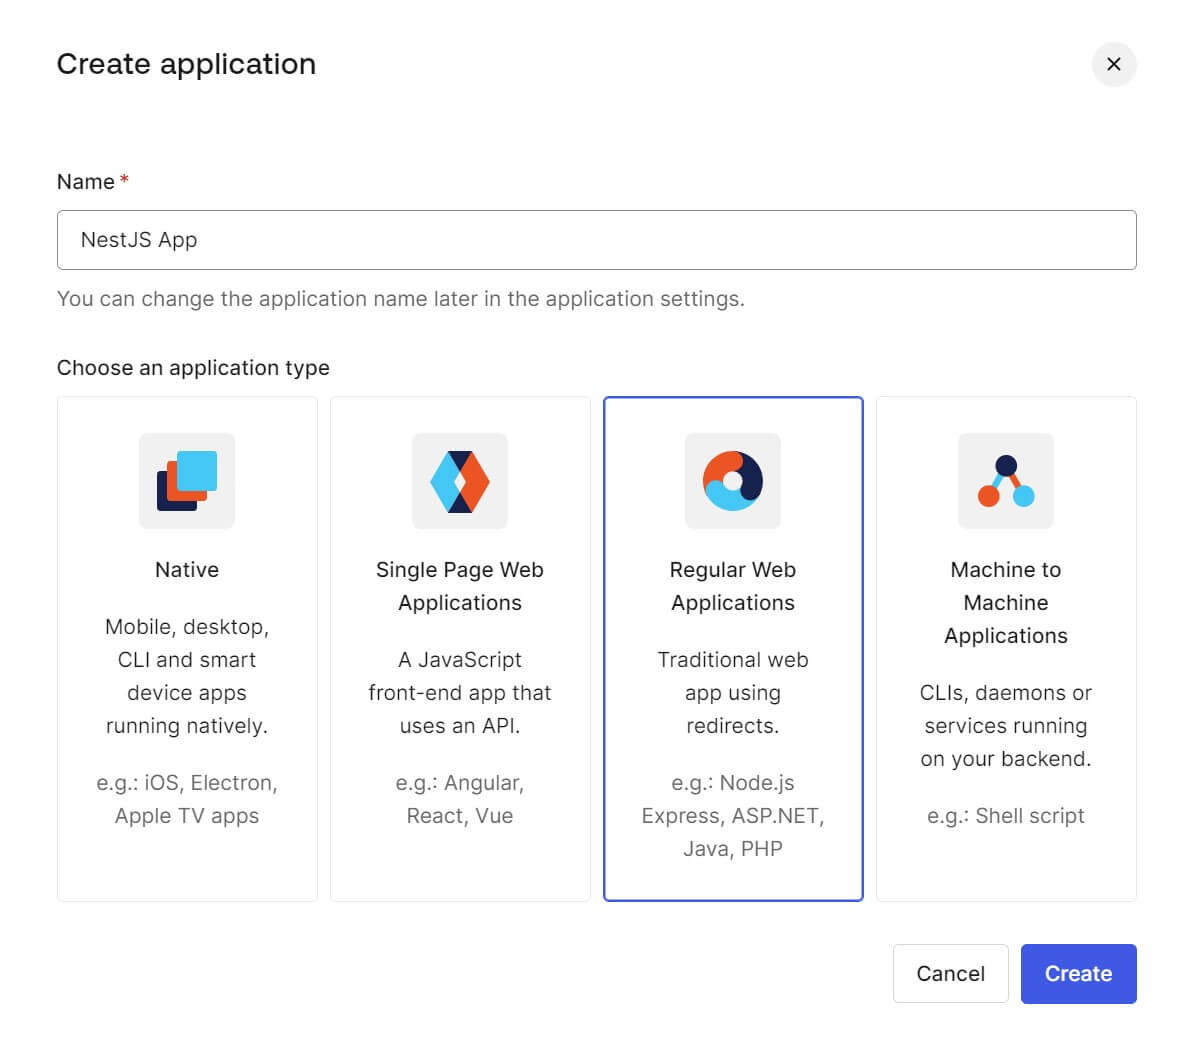
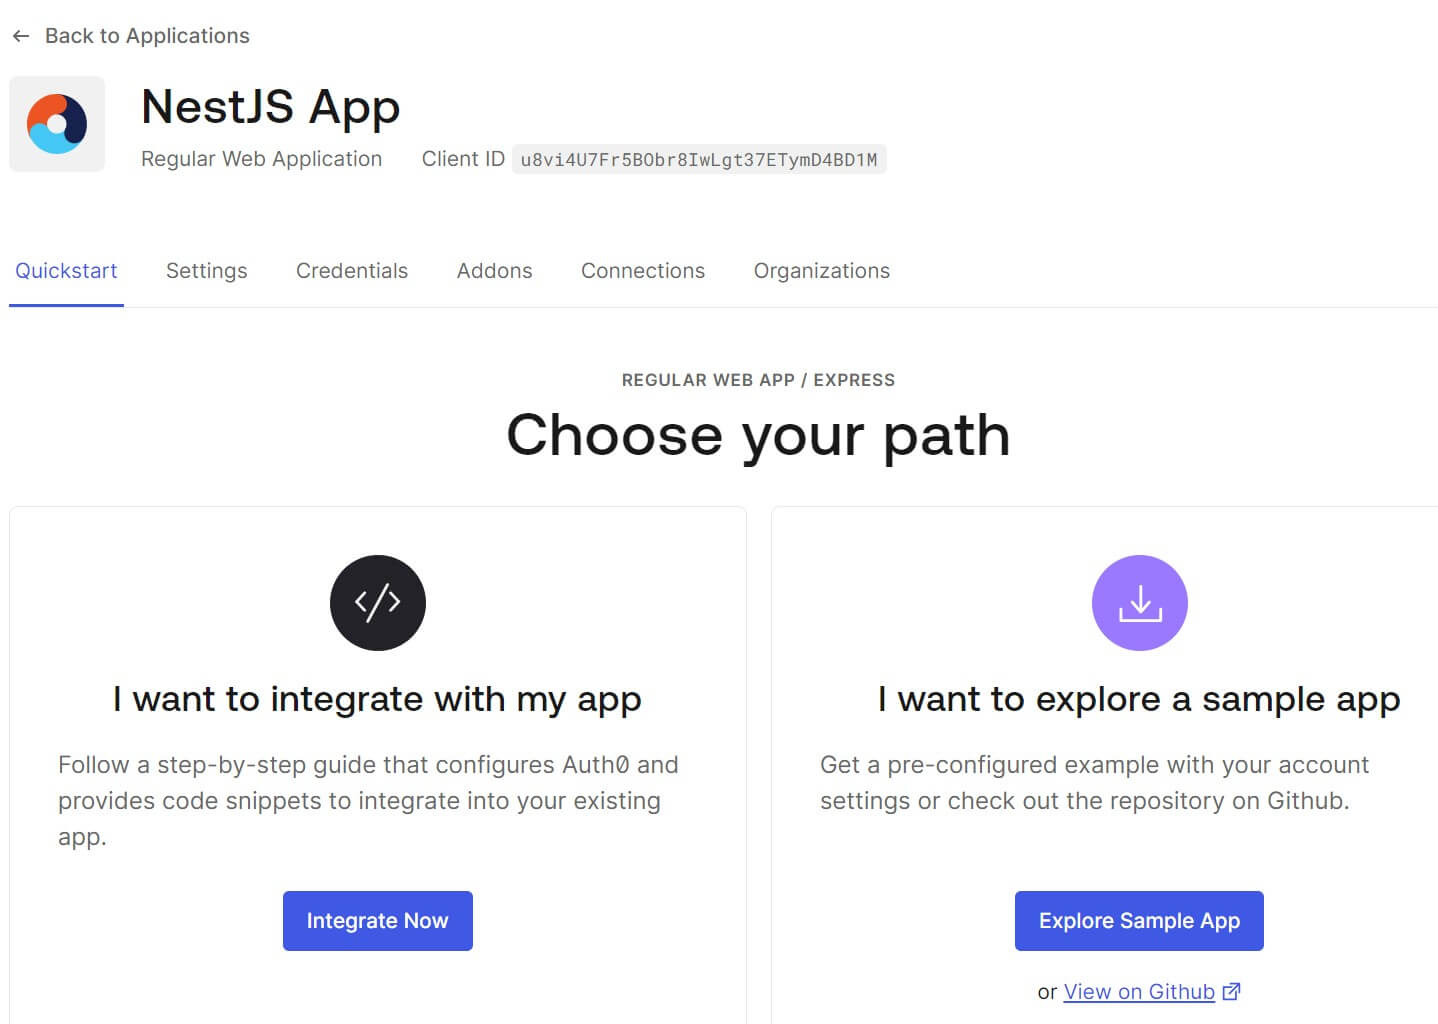
NestJS uses Node.js. This means on Auth0, you will select Node.js as your technology. Make sure you do so. Then QuickStart and Integrate your application:
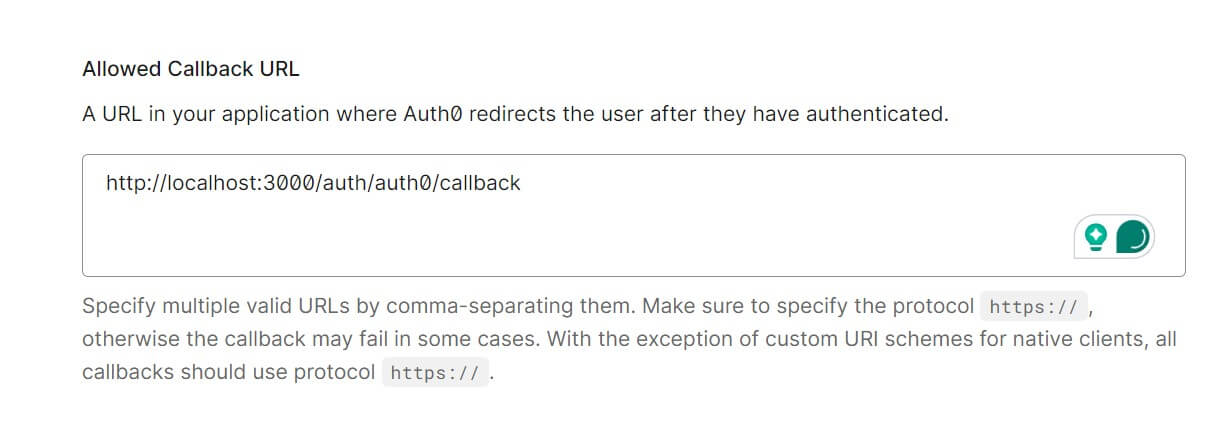
To configure Auth0 with Nest.js, you need to add your localhost URL where Auth0 redirects the user after they have authenticated. Add http://localhost:3000/auth/auth0/callback as your Callback URI as follows:
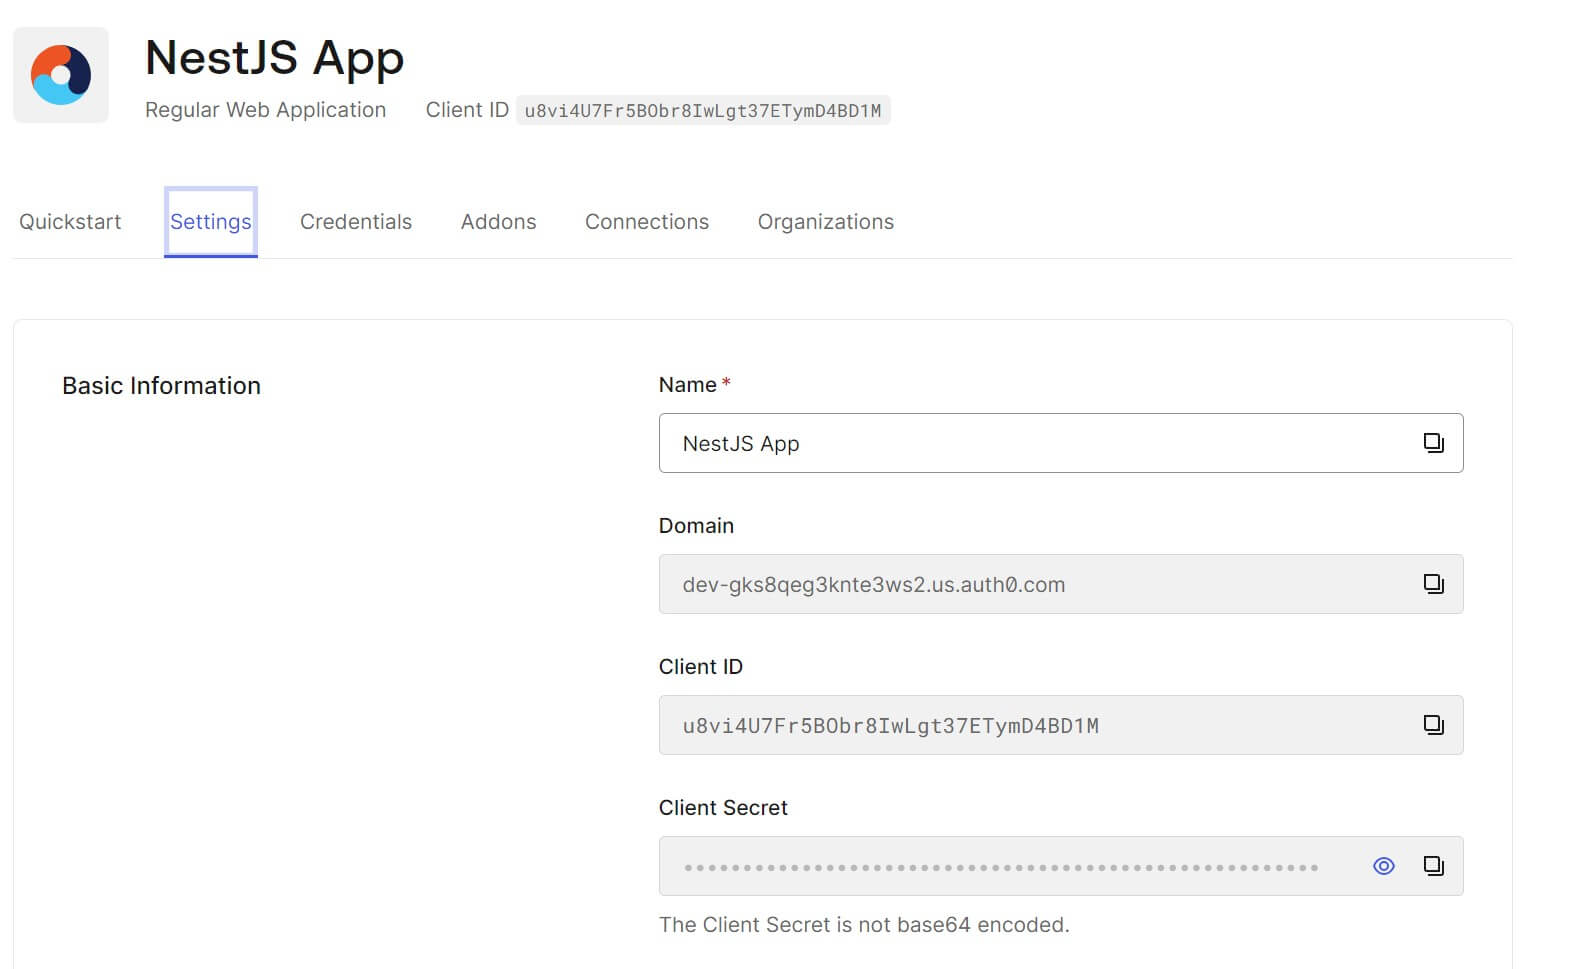
Save Settings and Continue. Navigate to settings and you should have the Auth0 keys ready:
You need an Auth0 authentication strategy. Navigate to Authentication and select the Passwordless strategy. Ensure Email is checked:

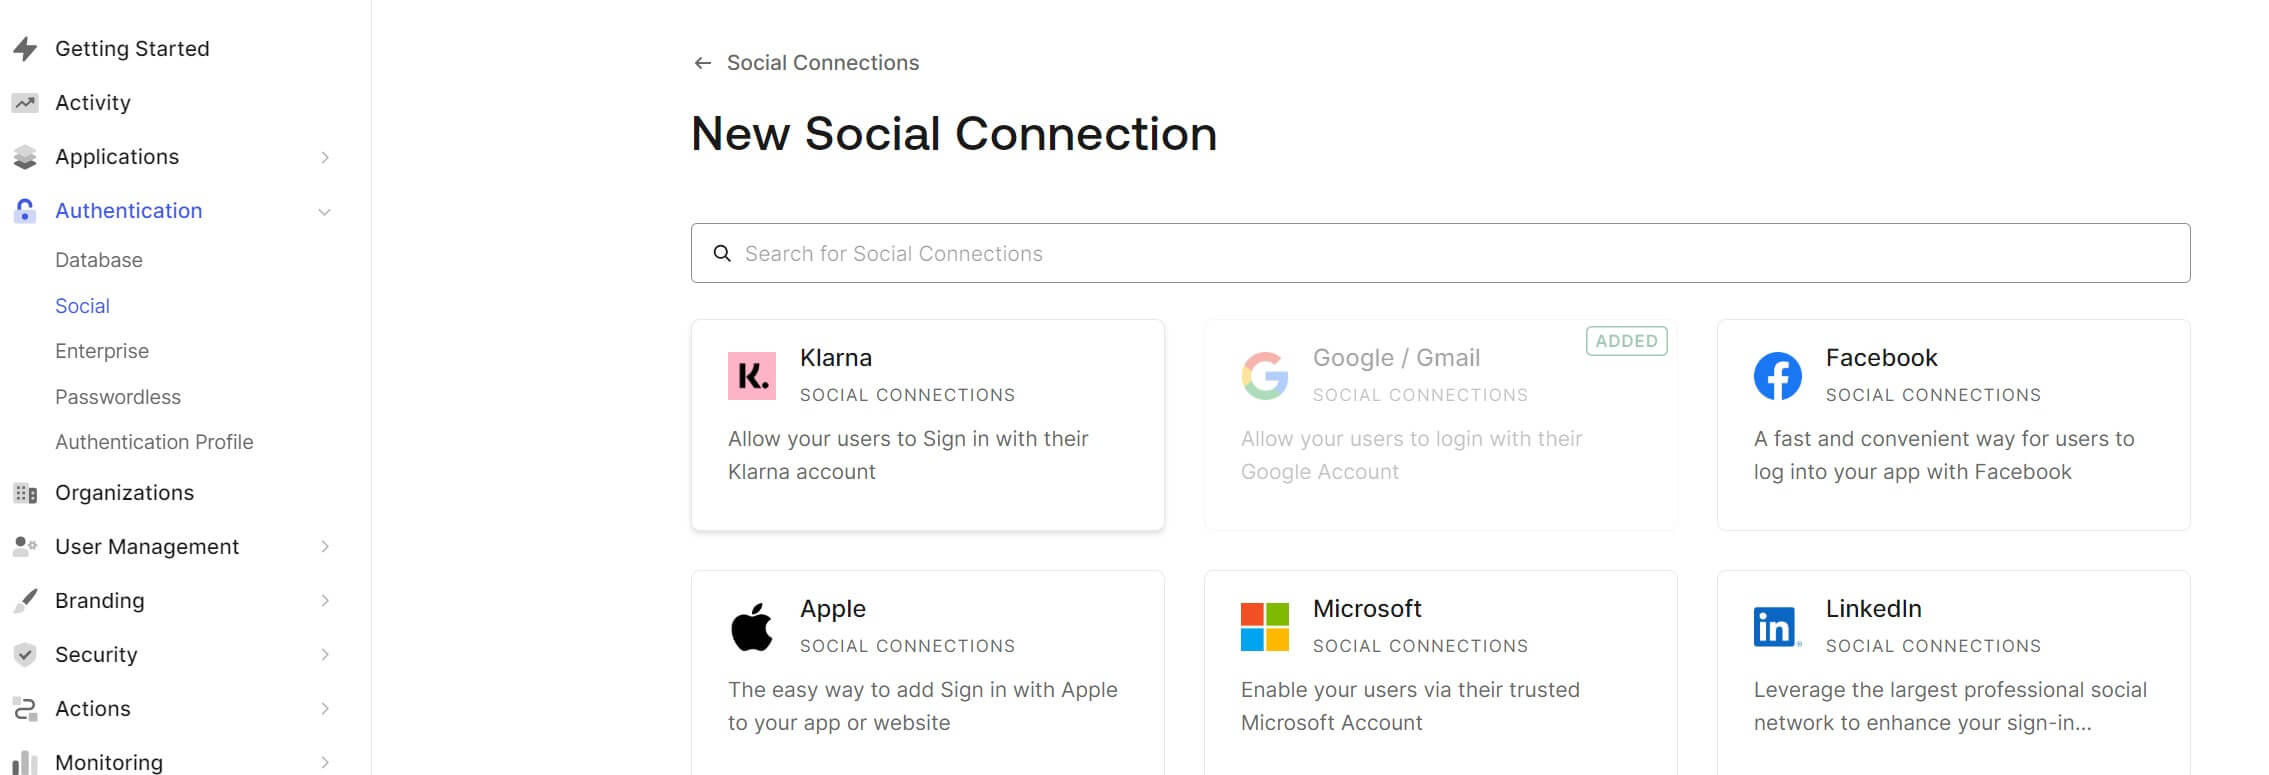
At the same time, you need to add social Au Authentication to Nest.js such as Facebook, Google, and Twitter. Go to Authentication and select the Social strategy. Create the Social Connections of your choice:
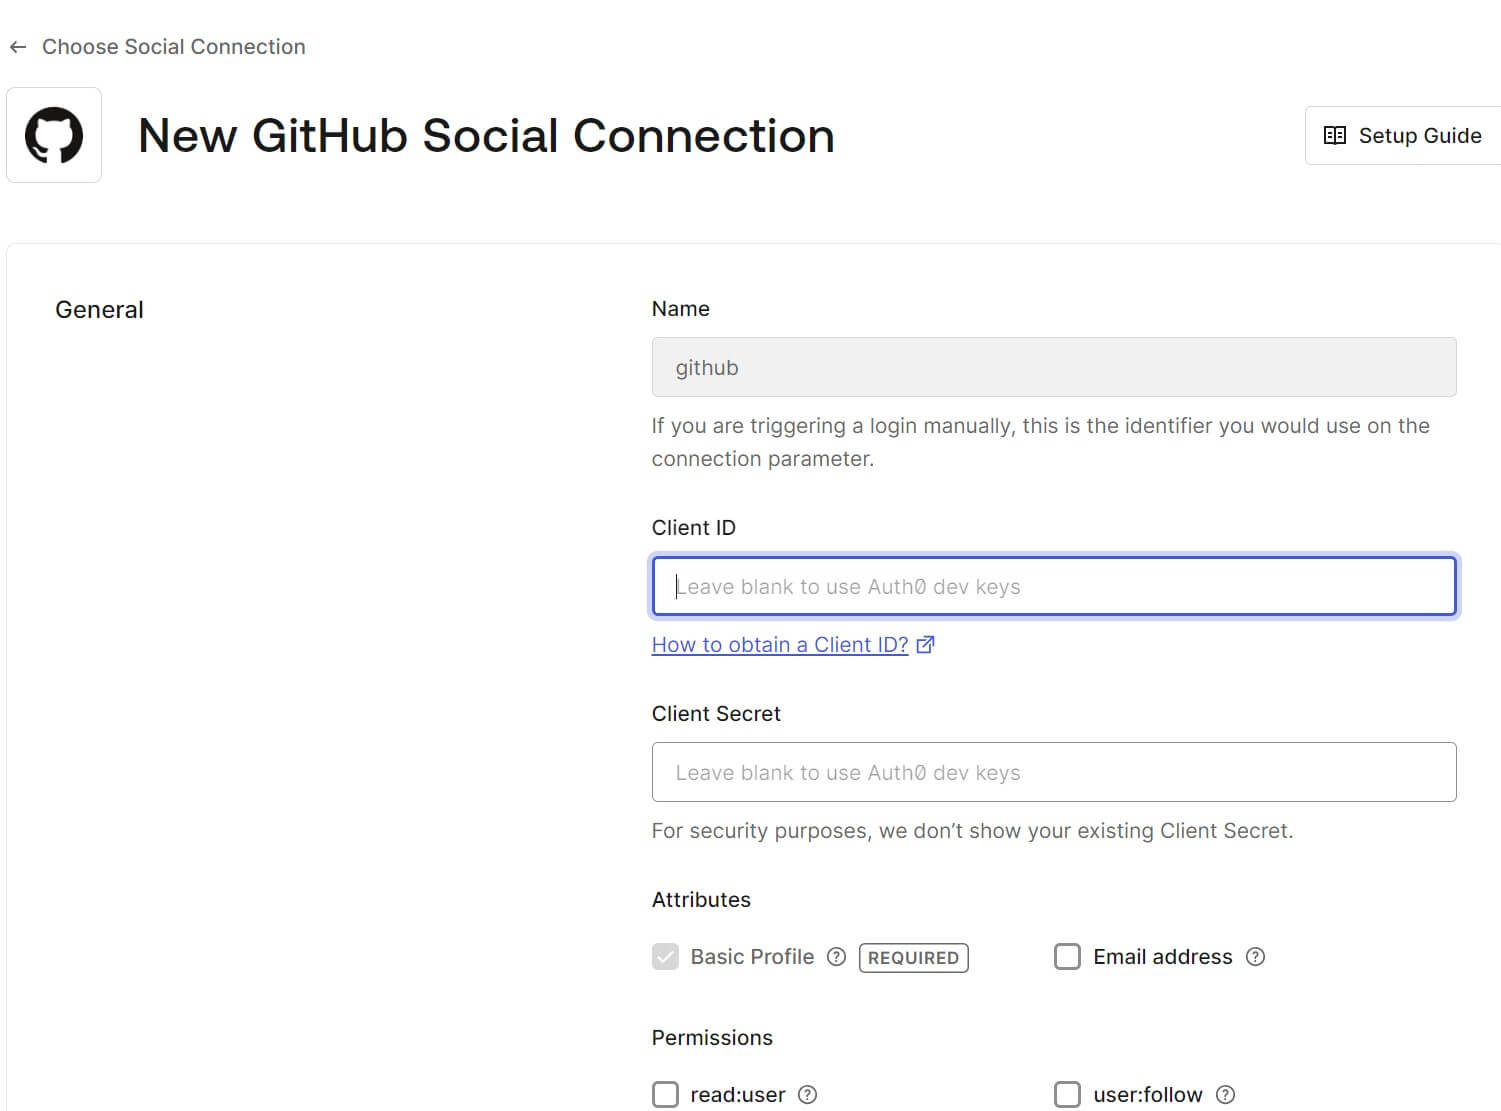
For example, to add GitHub, ensure you add your App client ID and secret while selecting the Permissions as follows:
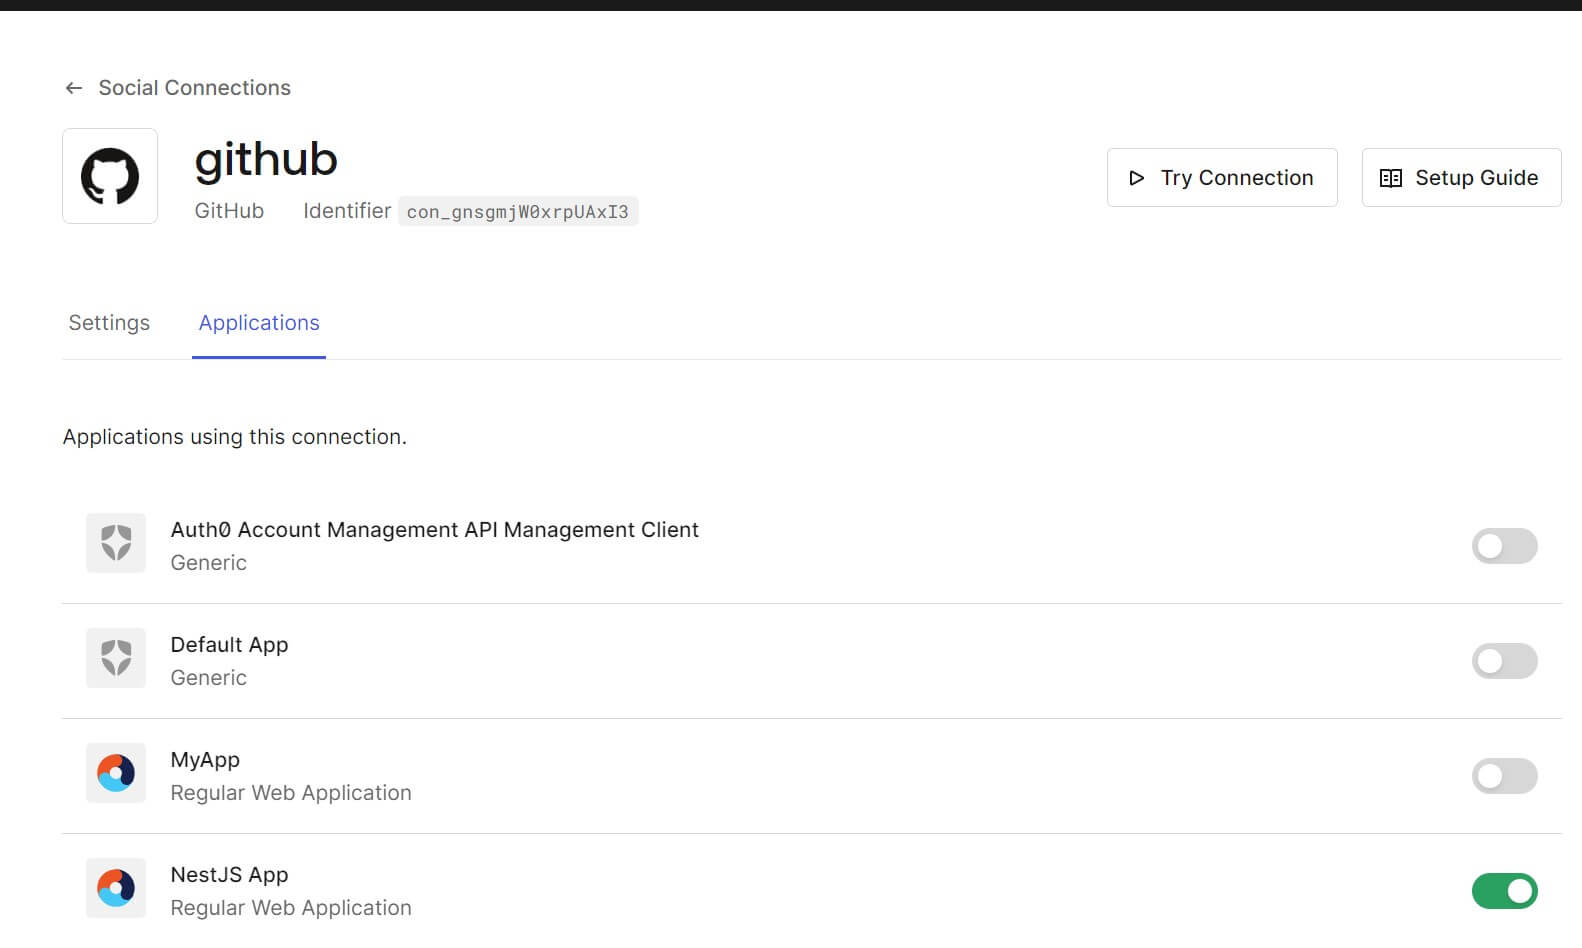
Make sure your Nest.js is selected to use the new GitHub Social Connections within Auth0:
The Auth0 setup is ready, Let’s use it within Nest.js with Passport JWT.
Creating a Nest.js Passport App with Auth0
To create a Nest.js app, ensure you have a Nest.js CLI installed. Use the following command to create a Nest.js Auth0 app:
# Make the Nest.js ready
npm install -g @nestjs/cli
# This Command will create NestJS App
nest new nestjs-auth0
Once the app is created, you can now change the directory and point your terminal to nestjs-auth0:
cd nestjs-auth0
Along with this guide, you will need libraries that will let Nest.js be able to access Auth0. You will use:
- passport-auth0 as a Passport.js strategy for authenticating Nest.js with Auth0.
- passport-local, passport, @nestjs/passport, and @types/passport-local to create local Nest.js strategy using Passport.js
- passport-jwt, @types/passport-jwt, and @nestjs/jwt for creating Nest.js JWT strategies with a secret key or public key using Auth0.
- dotenv to load environment variables from a
.envfile intoprocess.envof Nest.js.
npm install passport-auth0 passport-local passport @nestjs/passport @types/passport-local passport-jwt @types/passport-jwt @nestjs/jwt dotenv
Creating a Nest.js User Module for Auth0
An Auth0 Module handles user-related functionalities like registration, login, profile management, and token validation.
However, you need a user model that you will reference to the Auth0 module. In your Nest.js create a user Module as follows:
nest g resource user --no-spec

This module has a src\user\entities\user.entity.ts file. Navigate to it and add a User entity as follows:
export type User = {
  userId: number;
  username: string;
  password: string;
  provider: 'local' | 'auth0';
  provider_id?: string;
};
At the same time, you need to create your module using the src\user\user.service.ts file as follows:
import { Injectable } from '@nestjs/common';
import { User } from './entities/user.entity';

@Injectable()
export class UserService {
  private readonly users: User[] = [
    {
      userId: 1,
      username: 'emily',
      password: 'ewrtyuii',
      provider: 'local',
    },
    {
      userId: 2,
      username: 'joseph',
      password: 'lkgrtyuiohg',
      provider: 'local',
    },
  ];

  async findOne(filterFn: (user: User) => boolean): Promise<User | undefined> {
    return this.users.find(filterFn);
  }

  async add(user: Omit<User, 'userId'>) {
    const lastId = this.users.sort((a, b) => a.userId - b.userId)[0].userId;
    const userData = { ...user, userId: lastId + 1 };
    this.users.push(userData);
    return userData;
  }
}
The UserService and User entity represent the data we need to send to the Auth0 module and start the authorization and Authentication process.
Make sure you update the src\user\user.module.ts file to maintain the modular pattern as follows:
import { Module } from '@nestjs/common';
import { UserService } from './user.service';

@Module({
  providers: [UserService],
  exports: [UserService],
})

export class UserModule {}
Connection Auth0 with Nest.js
For Nest.js to access Auth0, you must add the Auth0 domain client ID and secret keys.
Navigate to your app settings and get these details:
In the root directory of your project create a .env file and add these keys as follows:
# Replace with your keys
AUTH0_DOMAIN=dev-gks8q.us.auth0.com
AUTH0_CLIENT_ID=rt564U7FsdfgghObr8asdfg4BD1M
AUTH0_CLIENT_SECRET=fge4ysdfgty35yyYa4YZdZ-pC_8KergthOA43Bd-Yefg5Grdfgfg
AUTH0_CALLBACK_URL=http://localhost:3000/auth/auth0/callback
Validating an Auth0 User with Nest.js
Before the user gets authenticated, the correct data must be presented to the Auth0 API.
The key point here is to:
- Create a
validateAuth0Usermethod. Nest.js will check if the user exists based on their Auth0 ID. The same method should Return user information. - Generates a JWT token upon successful authentication using the JwtService.
Now create an auth module using the following command:
nest g resource auth --no-spec
Navigate to the src\auth\auth.service.ts file and validate the user as follows:
import { Injectable } from '@nestjs/common';
import { JwtService } from '@nestjs/jwt';
import { UserService } from 'src/user/user.service';

@Injectable()
export class AuthService {
  constructor(
    private usersService: UserService,
    private jwtService: JwtService,
  ) {}

  // Method to validate username and password
  async validateUser(username: string, pass: string): Promise<any> {
    const user = await this.usersService.findOne(
      (user) => user.username === username,
    );
    if (user && user.password === pass) {
      const { password: _, ...result } = user; // Remove password from the returned user object
      return result; // Return user information excluding the password
    }
    return null; // Return null if user is not found or password doesn't match
  }

  // Method to generate JWT token upon successful login
  async login(user: any) {
    const payload = { username: user.username, sub: user.userId };
    return {
      access_token: this.jwtService.sign(payload), // Generate JWT token using user information
    };
  }

  // Method to validate Auth0 user
  async validateAuth0User({ username, id }: { username: string; id: string }) {
    let user = await this.usersService.findOne(
      (user) => user.provider === 'auth0' && user.provider_id === id,
    );
    if (!user) {
      // If user doesn't exist, add the user to the database
      user = await this.usersService.add({
        password: '', // No password since it's an Auth0 user
        provider: 'auth0',
        username: username,
        provider_id: id,
      });
    }
    const { password: _, ...result } = user; // Remove password from the returned user object
    return result; // Return user information excluding the password
  }
}
Using Passport AuthGuard with Auth0 and NestJS
AuthGuard adds protections to routes. Any route with an AuthGuard must have a successful user authentication before the user accesses the resource.
In Nest.js, you use a controller to create these routes. The controller handles authentication-related HTTP requests with Auth0 callback routes.
Here, you will use AuthController in your Nest.js app. You will create three endpoints:
/auth/loginwith AuthGuard(’local’) that uses a local authentication strategy (username/password)./auth/auth0/callbackdenoted with AuthGuard(‘auth0’) so you can use Nest.js with Auth0 authentication strategy. If the user successfully authenticates with Auth0 and is redirected back to this route to generate a JWT token./auth/auth0/loginuses AuthGuard(‘auth0’) to initiate Auth0 authentication flow. Users will be redirected to the Auth0 login page to authenticate.
Go to the src/auth/auth.controller.ts file and represent Auth0 with Passport AuthGuard in the AuthController as follows:
import { Controller, Get, Post, Request, UseGuards } from '@nestjs/common';
import { AuthGuard } from '@nestjs/passport';
import { AuthService } from '../auth/auth.service';

@Controller('auth')
export class AuthController {
  constructor(private readonly authService: AuthService) {}

  // Login route using local authentication strategy
  @UseGuards(AuthGuard('local'))
  @Post('login')
  async login(@Request() req) {
    return this.authService.login(req.user);
  }

  // Auth0 callback route
  @Get('auth0/callback')
  @UseGuards(AuthGuard('auth0'))
  async callback(@Request() req) {
    return this.authService.login(req.user);
  }

  // Auth0 login route
  @Get('auth0/login')
  @UseGuards(AuthGuard('auth0'))
  async auth0Login() {
    // No explicit implementation is needed here as AuthGuard handles the authentication flow
  }
}
Creating Nest.js Local Strategy with Auth0
Auth0 uses a Local Strategy authenticating users using a username and password. This approach uses the Passport Local Strategy.
Within this app, you will create a Nest.js customized Local Strategy to fit various authentication requirements. Nest.js will use passport-local to access Auth0 while extending to PassportStrategy.
In your src/auth folder, create a local.strategy.ts file, then add Auth0 LocalStrategy as follows:
import { Strategy } from 'passport-local';
import { PassportStrategy } from '@nestjs/passport';
import { Injectable, UnauthorizedException } from '@nestjs/common';
import { AuthService } from './auth.service';

@Injectable()
export class LocalStrategy extends PassportStrategy(Strategy) {
  constructor(private authService: AuthService) {
    super();
  }

  // validate user credentials
  async validate(username: string, password: string): Promise<any> {
    // Call the AuthService to validate the user's credentials
    const user = await this.authService.validateUser(username, password);

    // If the user is not found or the password doesn't match, throw UnauthorizedException
    if (!user) {
      throw new UnauthorizedException();
    }

    // Return user object if validation is successful
    return user;
  }
}
Why Create a NestJS Auth0 LocalStrategy
LocalStrategy creates a separation of concerns of authentication from other parts of the application.
This approach is good for carrying out tests and ensuring your Nest.js app behaves as expected when validating user credentials.
Creating a Nest.js Auth0 Strategy
On top of LocalStrategy, Nest.js needs a custom Passport.js strategy for authenticating users with Auth0.
Auth0Strategy will directly use Auth0 based on the App SDK you created using your .env file content (keys)
Here, you will handle validations to access centralized Auth0 handle user authentication, and retrieve user information from Auth0.
Go to src\auth and create an auth0.strategy.ts file as follows:
import { Strategy } from 'passport-auth0';
import { PassportStrategy } from '@nestjs/passport';
import { Injectable } from '@nestjs/common';
import { AuthService } from './auth.service';

@Injectable()
export class Auth0Strategy extends PassportStrategy(Strategy, 'auth0') {
  constructor(private authService: AuthService) {
    super({
      domain: process.env.AUTH0_DOMAIN,
      clientID: process.env.AUTH0_CLIENT_ID,
      clientSecret: process.env.AUTH0_CLIENT_SECRET,
      callbackURL: process.env.AUTH0_CALLBACK_URL,
      scope: 'openid email profile',
      state: false,
    });
  }

  // validate Auth0 user and return user information
  async validate(
    _accessToken: string,
    _refreshToken: string,
    profile: { displayName: string; user_id: string },
  ): Promise<any> {
    console.log('calling validate');
    // Call the AuthService to validate the Auth0 user
    const user = await this.authService.validateAuth0User({
      username: profile.displayName,
      id: profile.user_id,
    });

    // Log access token and profile (optional)
    console.log(_accessToken);
    console.log(profile);

    return user; // Return user information
  }
}
Registering Passport JWT to Nest.js
To initiate the Auth0 authentication process, LocalStrategy, JwtModule, PassportModule, and Auth0Strategy must run.
You are using Nest.js. Therefore, you must maintain modular architecture and separation of concerns. This means all these modules must run in your AuthModule.
AuthModule will centralize the configuration of authentication middleware, strategies, JWT token handling signing, and verifying tokens.
Go to src\auth\auth.module.ts and make the following changes:
import { Module } from '@nestjs/common';
import { AuthService } from './auth.service';
import { LocalStrategy } from './local.strategy';
import { PassportModule } from '@nestjs/passport';
import { JwtModule } from '@nestjs/jwt';
import { Auth0Strategy } from './auth0.strategy';
import { UserModule } from 'src/user/user.module';
import { AuthController } from './auth.controller';

@Module({
  imports: [
    // UserModule to access user-related functionalities
    UserModule,
    // Import PassportModule for setting up authentication middleware
    PassportModule,
    // JwtModule for handling JWT tokens
    JwtModule.register({
      // the secret key for signing JWT tokens
      secret: 'werferfe',
      // token expiration time
      signOptions: { expiresIn: '60s' },
    }),
  ],
  providers: [
    // Define providers for the AuthService and authentication strategies
    AuthService,
    LocalStrategy,
    Auth0Strategy,
  ],
  // App controllers
  controllers: [
    AuthController
  ],
  // Export AuthService. it makes it available for dependency injection in other modules
  exports: [AuthService],
})
export class AuthModule {}
Testing the Nest.js with Auth0 and Passport JWT App
The application should be ready. Use the following command to run it:
npm run start:dev
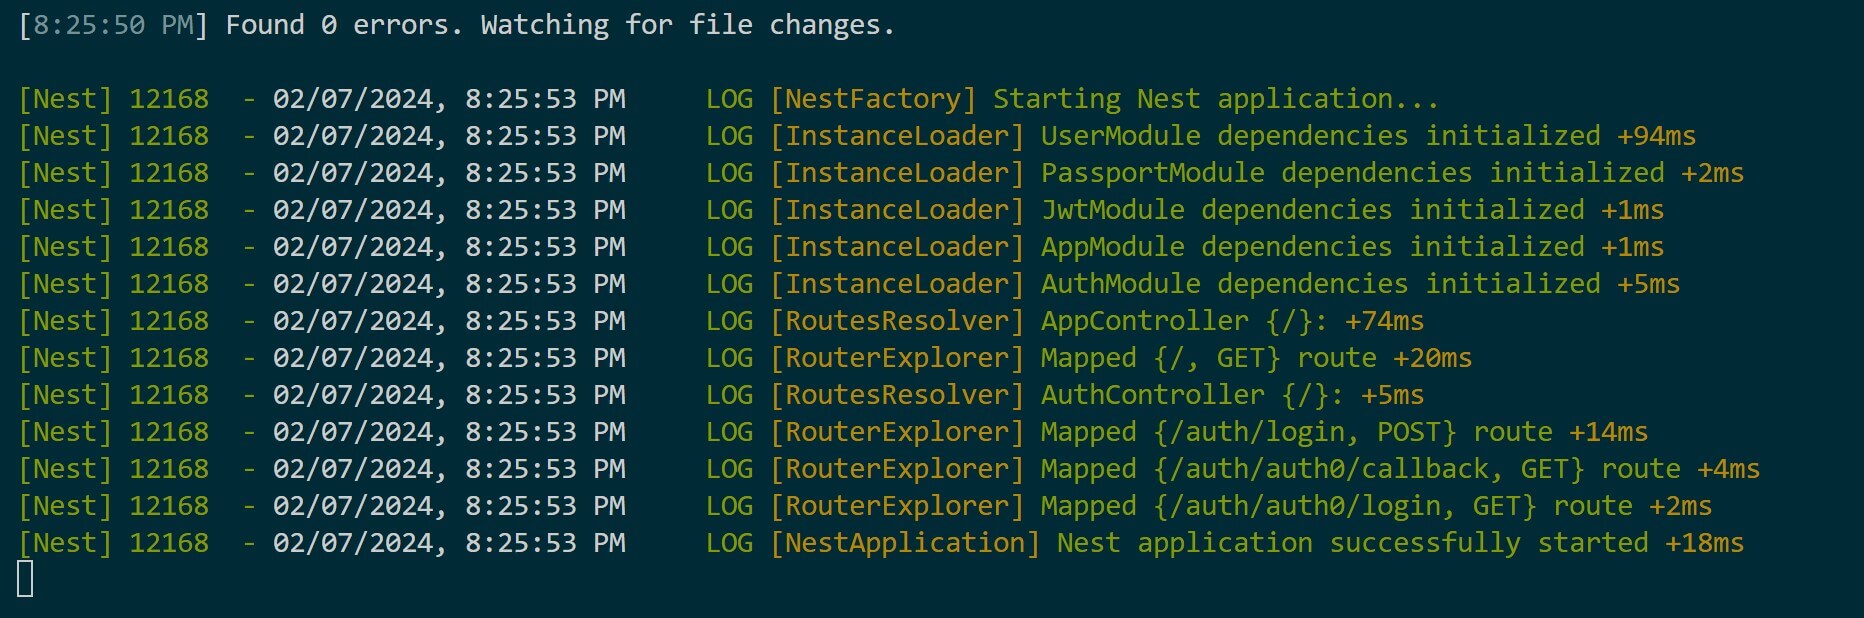
Open http://localhost:3000/auth/auth0/login and access you NestJS Auth0 app as follows:
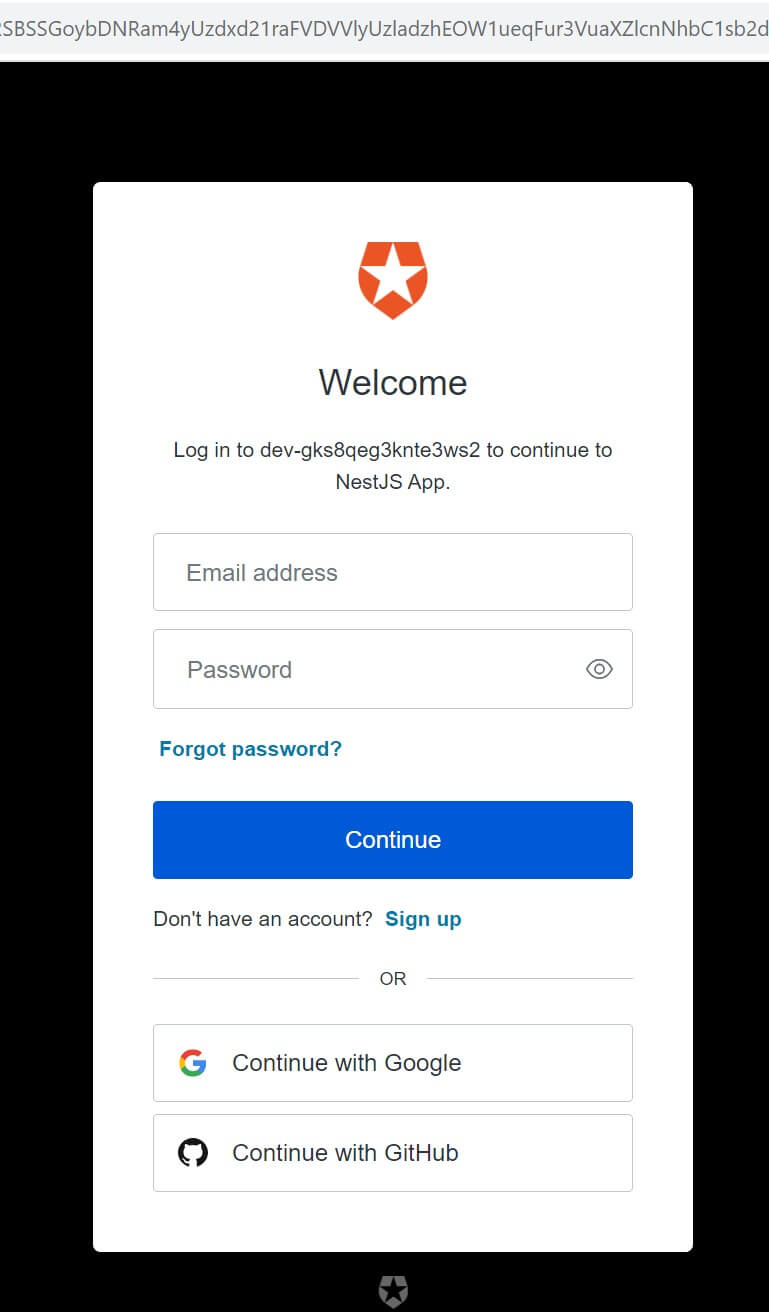
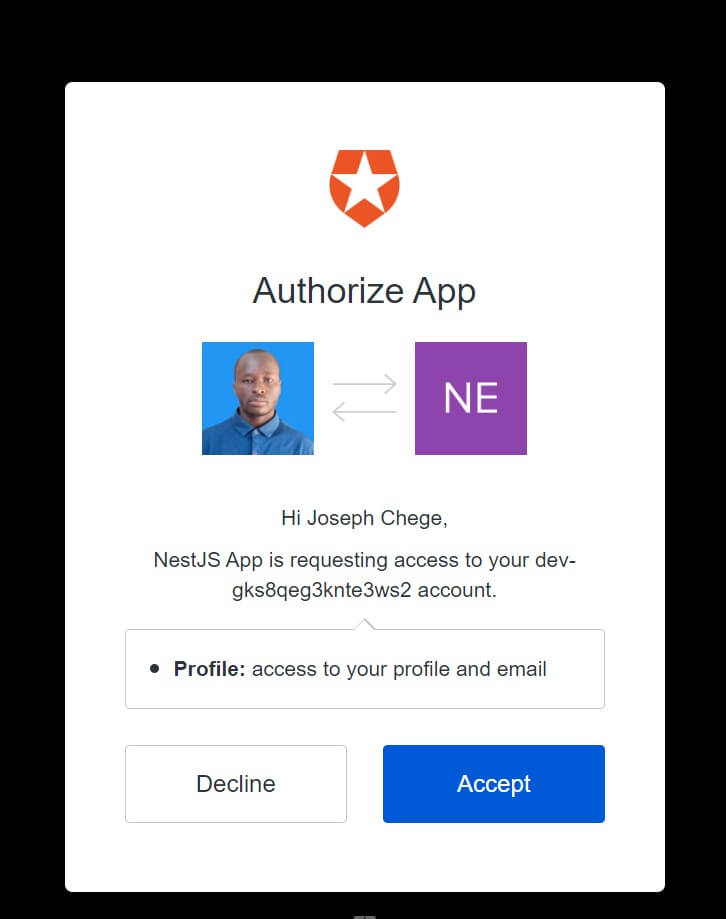
Social authentications such as GitHub are added based on how selected in the Auth0 dashboard. I will use Continue with Google as follows:
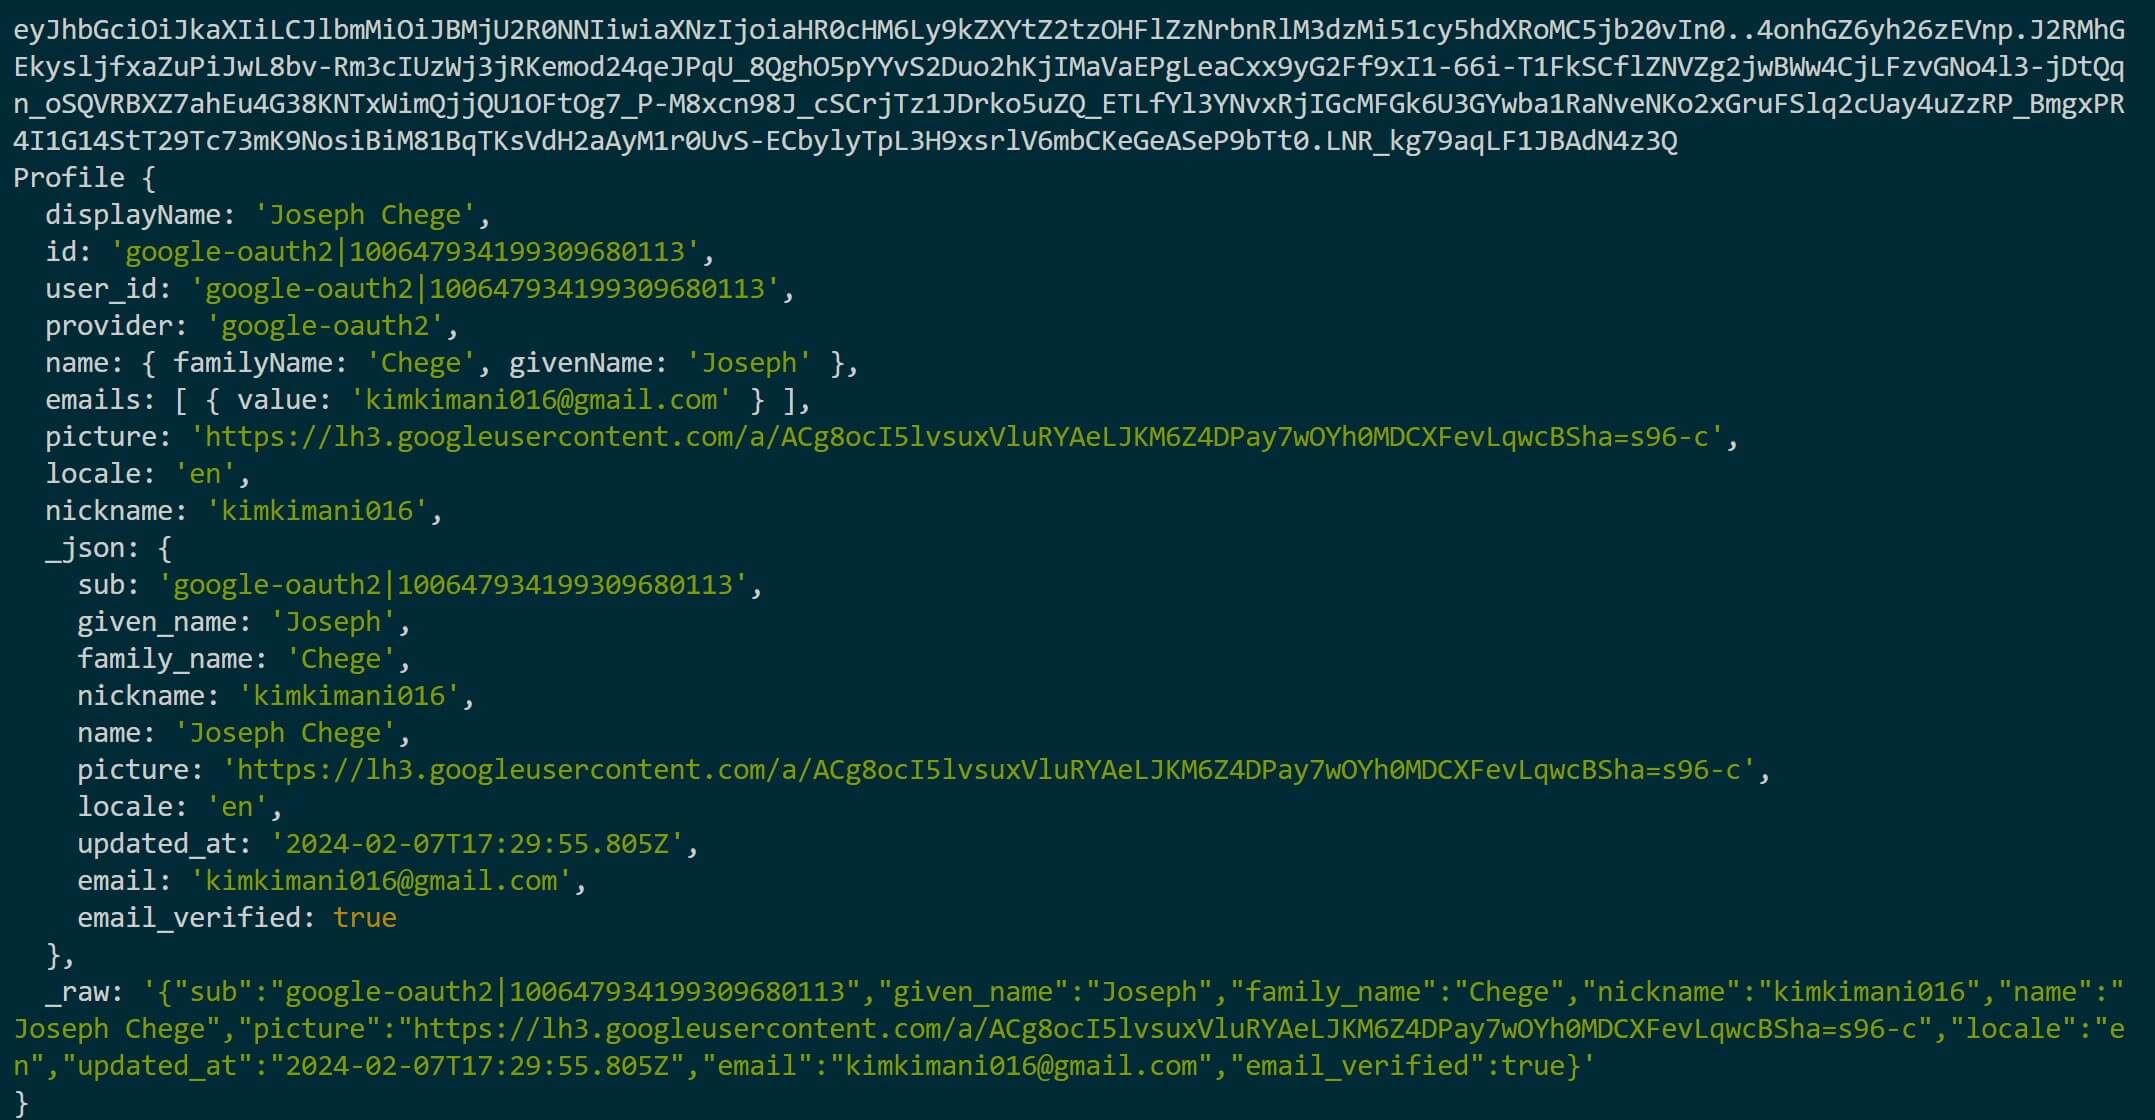
If successful, you be redirected to the /auth/auth0/callback and get the JWT Access token:

User details should be ready on your console as follows:
Check the code on this GitHub repo.
Conclusion
You have now learned:
- How to configure Auth0 to use Nest.js as your SDK.
- Using Passport to carry out NestJS Auth0 authentication strategies
- How to add Passport JWT to Auth0.
- Testing your Nest.js API will Auth0 socials and username/passport.
I hope you found the guide helpful 🚀💥
Written By: