Build NestJS oauth2 Server | Passport FT Google 2.0 Example
Posted February 7, 2024

OAuth (Open Authorization) creates secure authorization between different parties. Its approach allows users to give third-party apps such as Google. This way Google will use OAuth2.0 to access resources without sharing their credentials directly.
In this guide, you will use Google OAuth2 alongside passport to create a Nest.js authorization server with code examples. You will integrate Google OAuth2 with NestJS to authenticate users using their Google accounts with Passport.js (passport-google-oauth20).
In summary, you will learn:
- To set up Google OAuth2.0 API and access authorization Keys.
- The right way to set up Google OAuth2 with Passport AuthGuard within Nest.js.
- How to save Google OAuth2 API user credentials to a database.
- Using TypeORM integrations alongside Google OAuth2.0 and Nest.js.
What you Need to Use Google OAuth2 with Passport and NestJS
To follow along with this example tutorial, ensure you have:
- Node.js runtime ready on your computer.
- You will use the PostgreSQL database. Ensure you have it installed.
- Have a Google account.
- You need a basic understanding of Nest.js.
- If you are familiar with TypeORM, it’s a bonus.
Introducing the Nest.js Google OAuth2 Components
OAuth 2.0 is available from providers such as Google, Facebook, Twitter, and GitHub. In this NestJS app, you will use Google OAuth2 then and passport to manage the Nest.js authorization server.
Your OAuth 2.0 Nest.js app will have these components:
- Resource Owner being Google as the entity owning end-user resources being shared.
- Client to request access to the resources on behalf of the resource owner.
- The Authorization Server will be the Nest.js server for authenticating the resource owner and granting access tokens to the client.
- Resource Server will be localhost. It will host resources the client wants to verify the access token and grant access if the token (generated through passport-google-oauth20) is valid.
Mastering Google OAuth 2.0 Flow with Nest.js
To make this application successful, you will need Authorization Code Flow. This way Nest.js will use Google OAuth2 to redirect users to the authorization server. You will use:
- Access Token issued by the authorization server to represent the authorization granted to the client as they access any protected resources on behalf of the resource owner.
- Refresh Token to obtain a new access token when the current user authorization session expires. Nest.js will do so without requiring the resource owner to re-authenticate.
- The Google OAuth2 API Scope provides what actions the access token can perform.
Setting up Google OAuth2 Nest.js Credentials
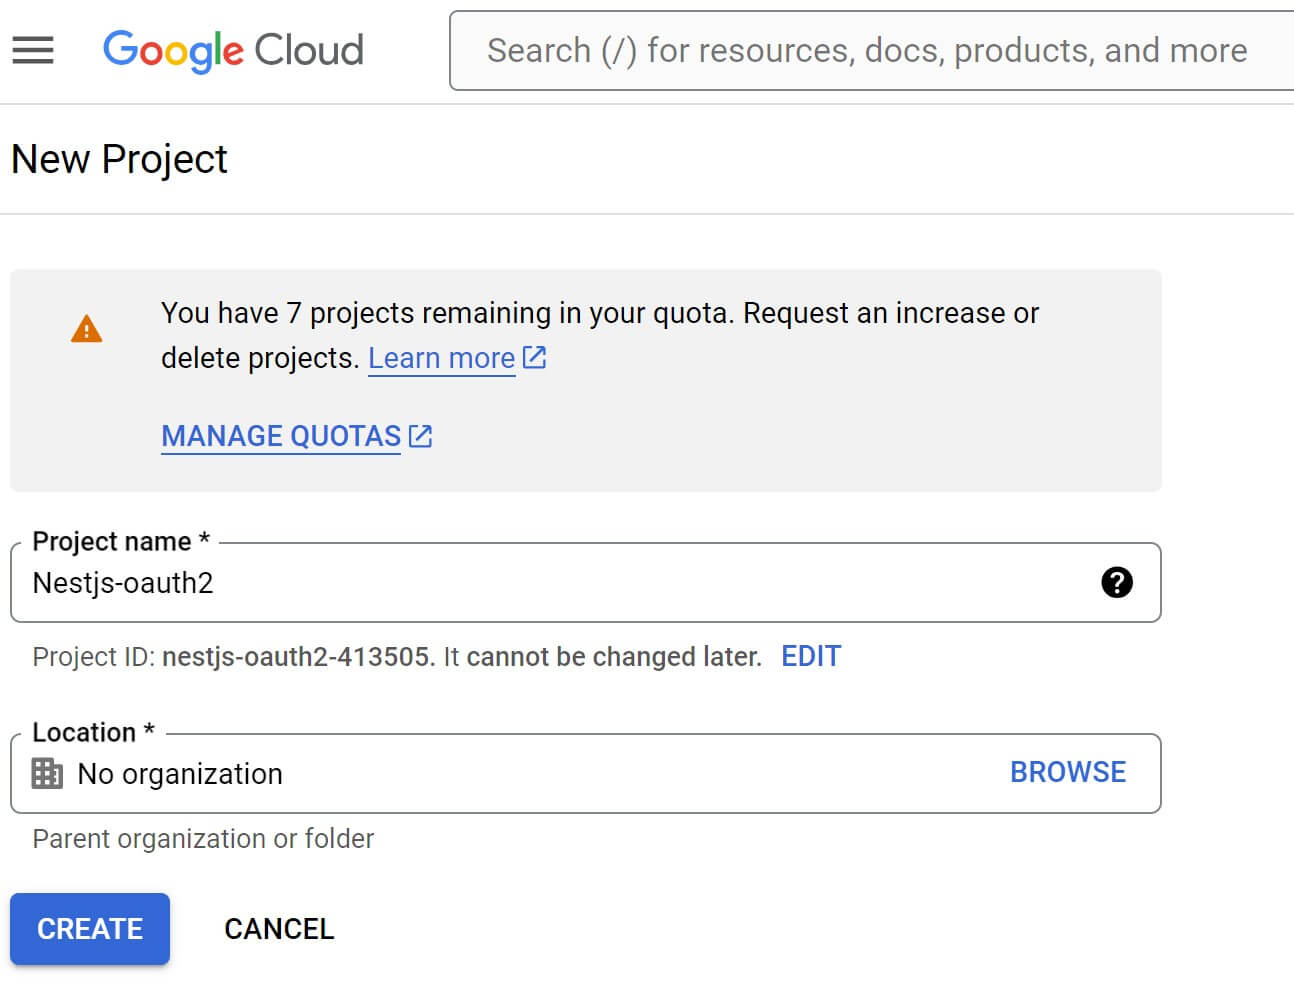
Before attempting to Build a NestJS OAuth2 Server with Google and Passport, you need a Google Cloud Platform (GCP) Project. Head over to https://console.cloud.google.com/projectcreate and create one:
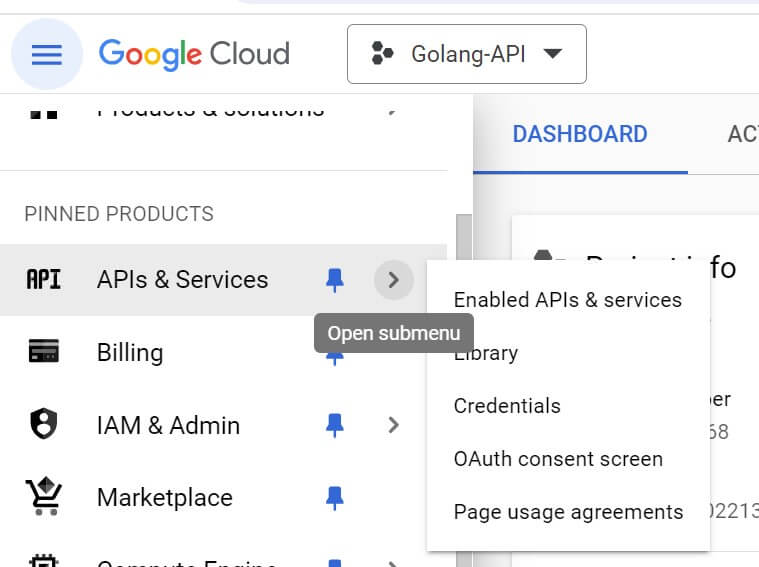
Navigate to APIs & Services > Credentials.
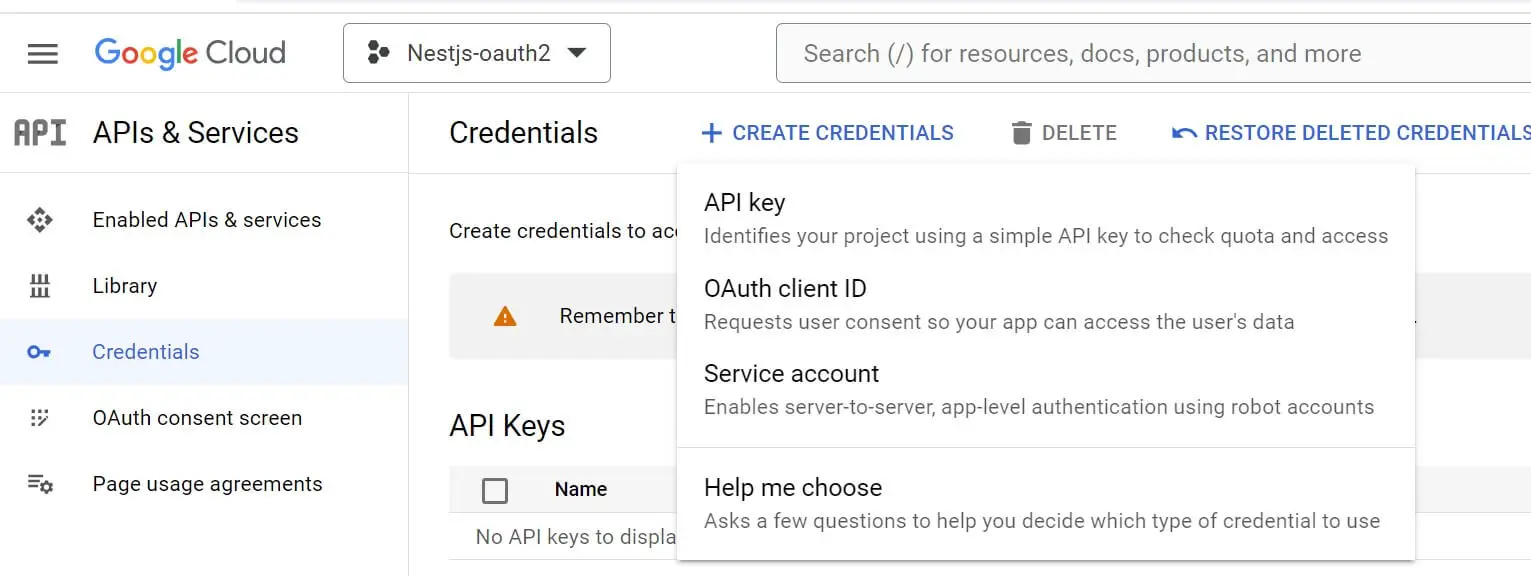
Click on “Create Credentials” and select “OAuth client ID” as such:
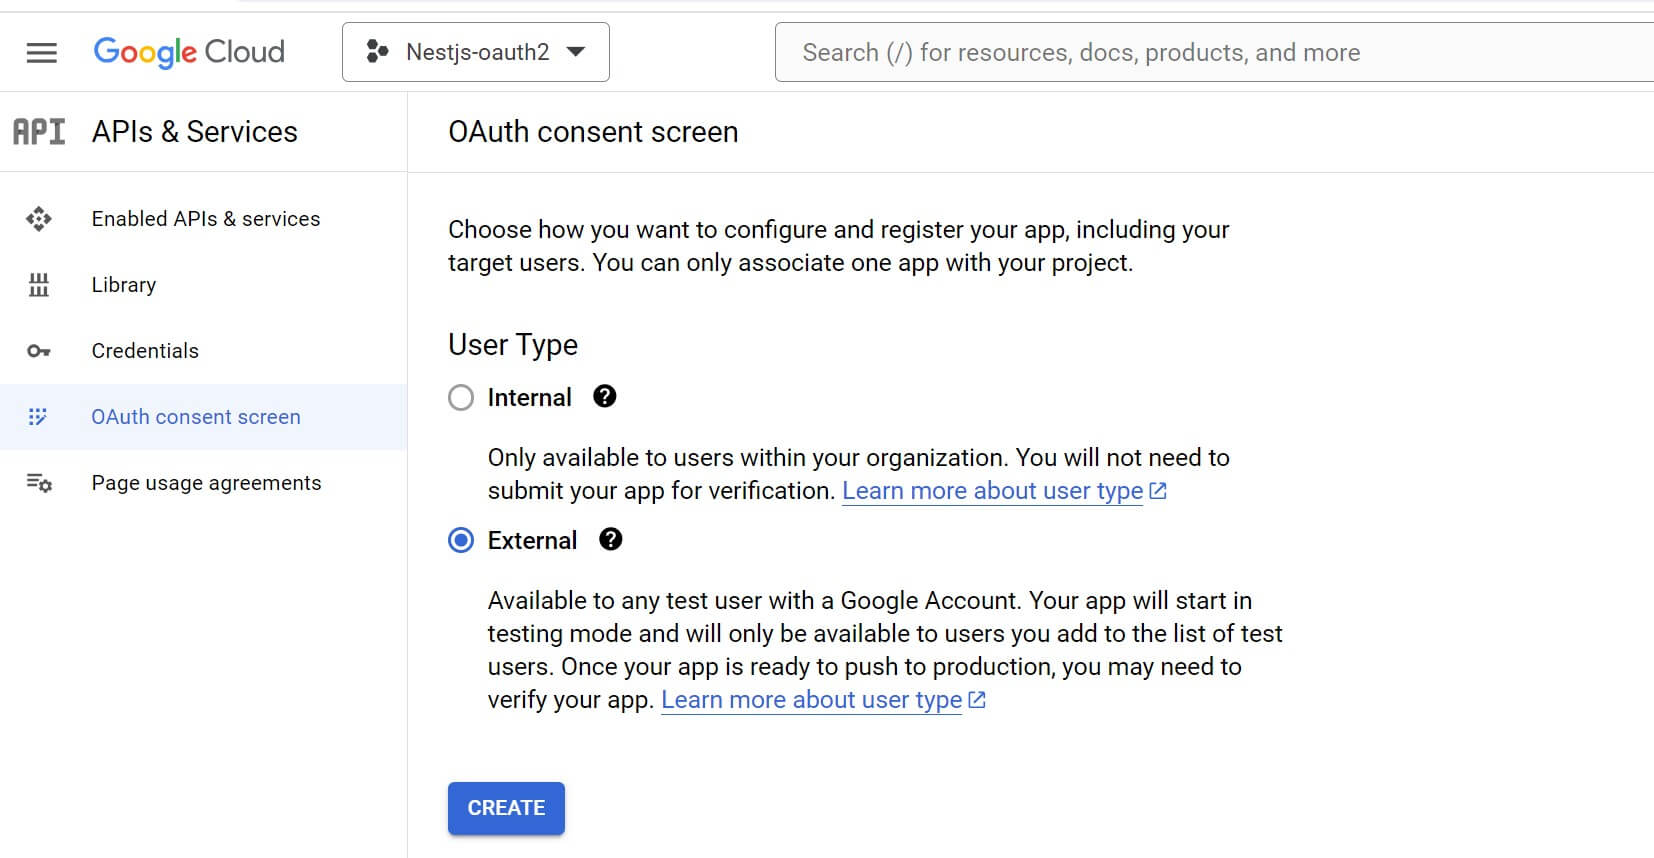
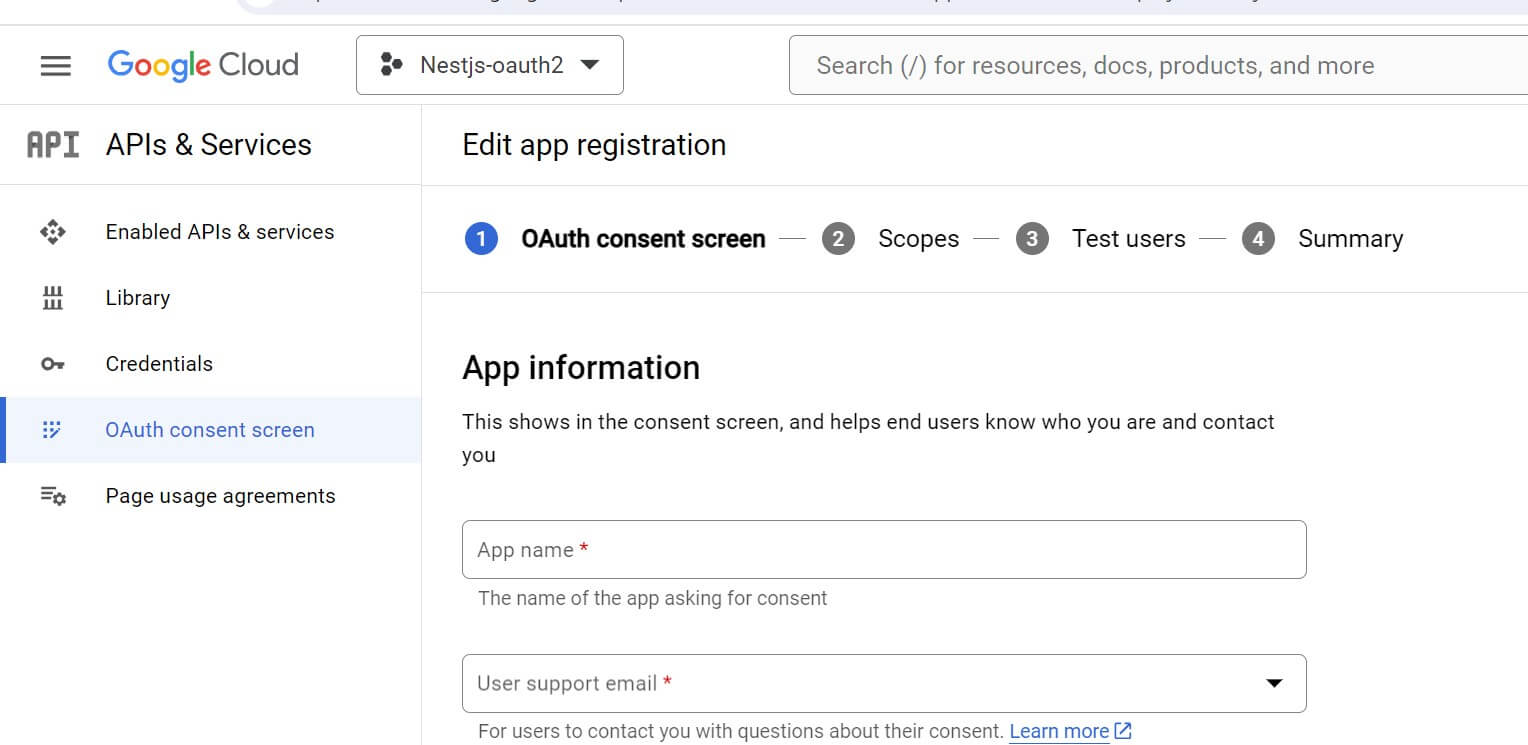
You First need to set up the OAuth consent screen. Navigate to OAuth consent screen and select External and Create:
Now fill in the proceeding form with your details and the name of your Google OAuth2 app:
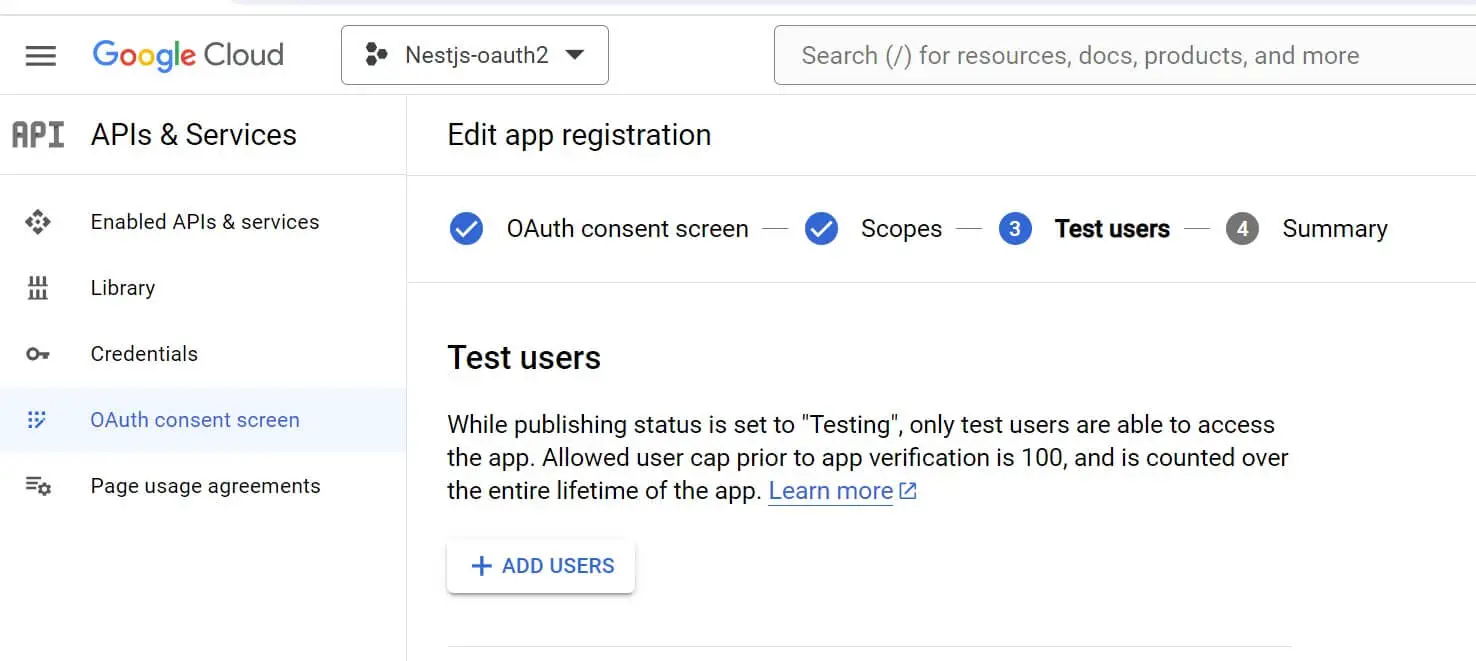
At the same time make sure you Add Users (Test users). you are in Testing mode and only test users can access the app. Click Add Users:
Then add a Google email of the user you want to use. (Make sure this Google user is logged in on your computer):
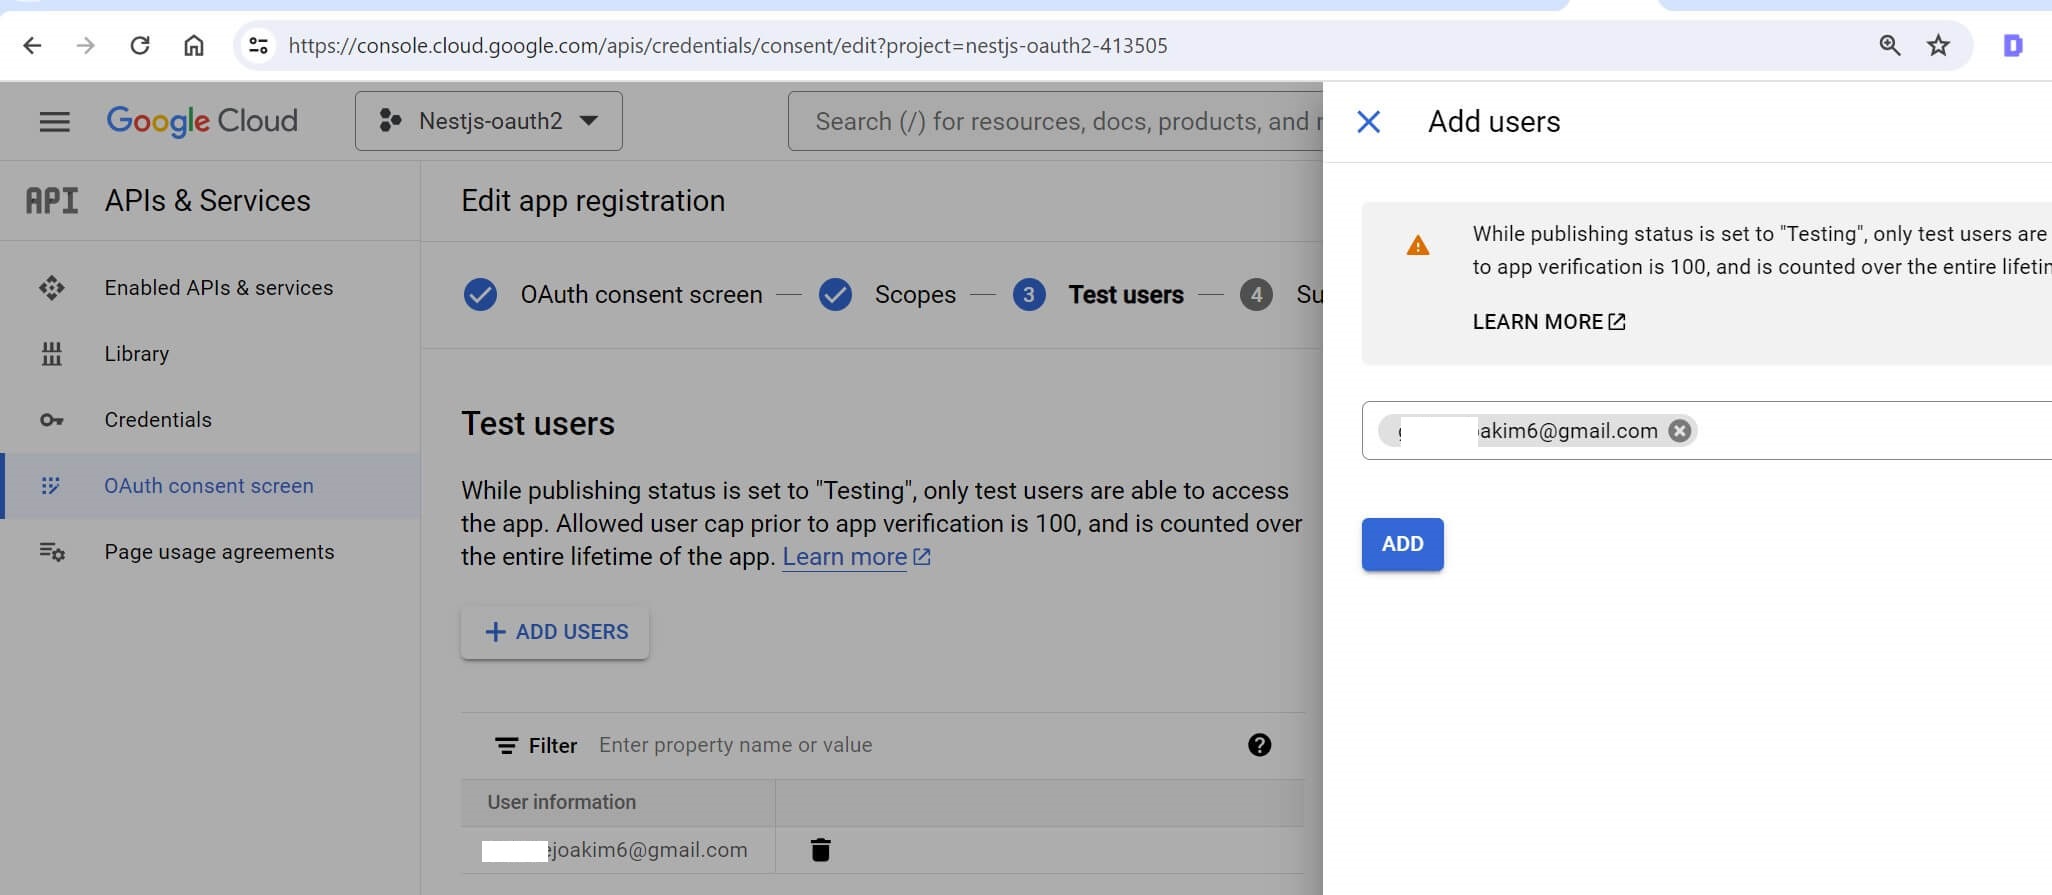
Don’t forget to click Add.
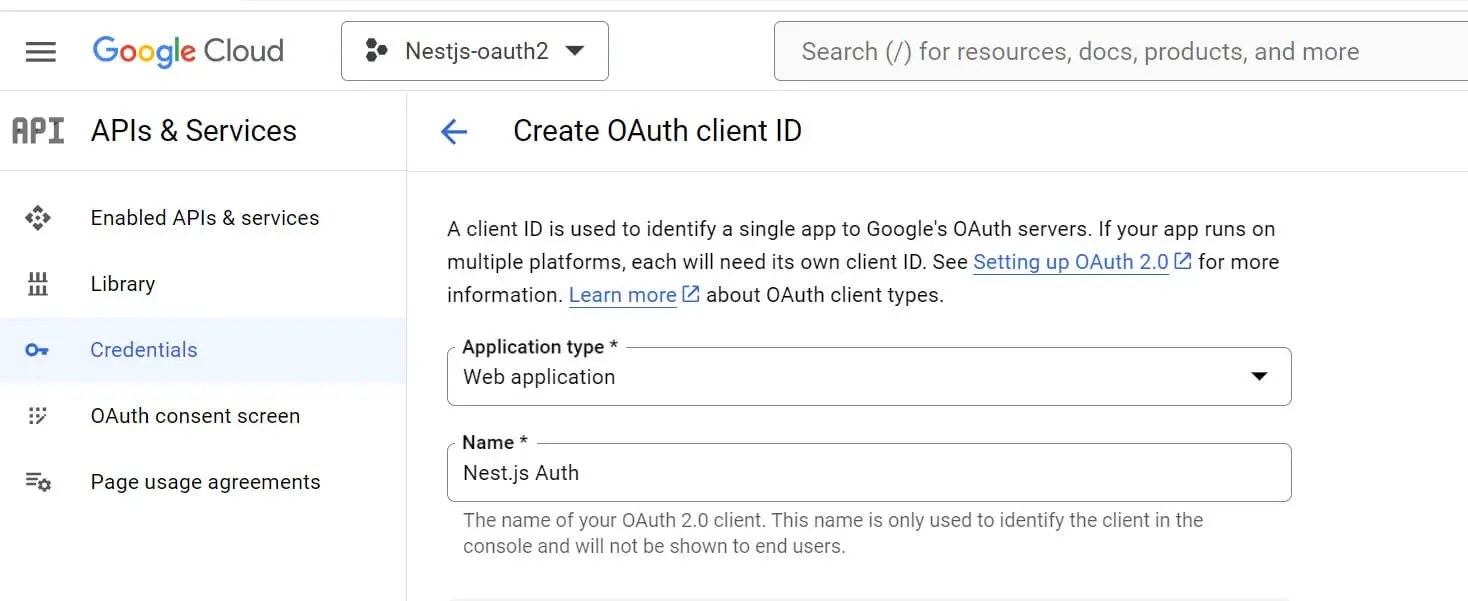
Now, proceed to Credentials. Click on “Create Credentials” and select “OAuth client ID”.
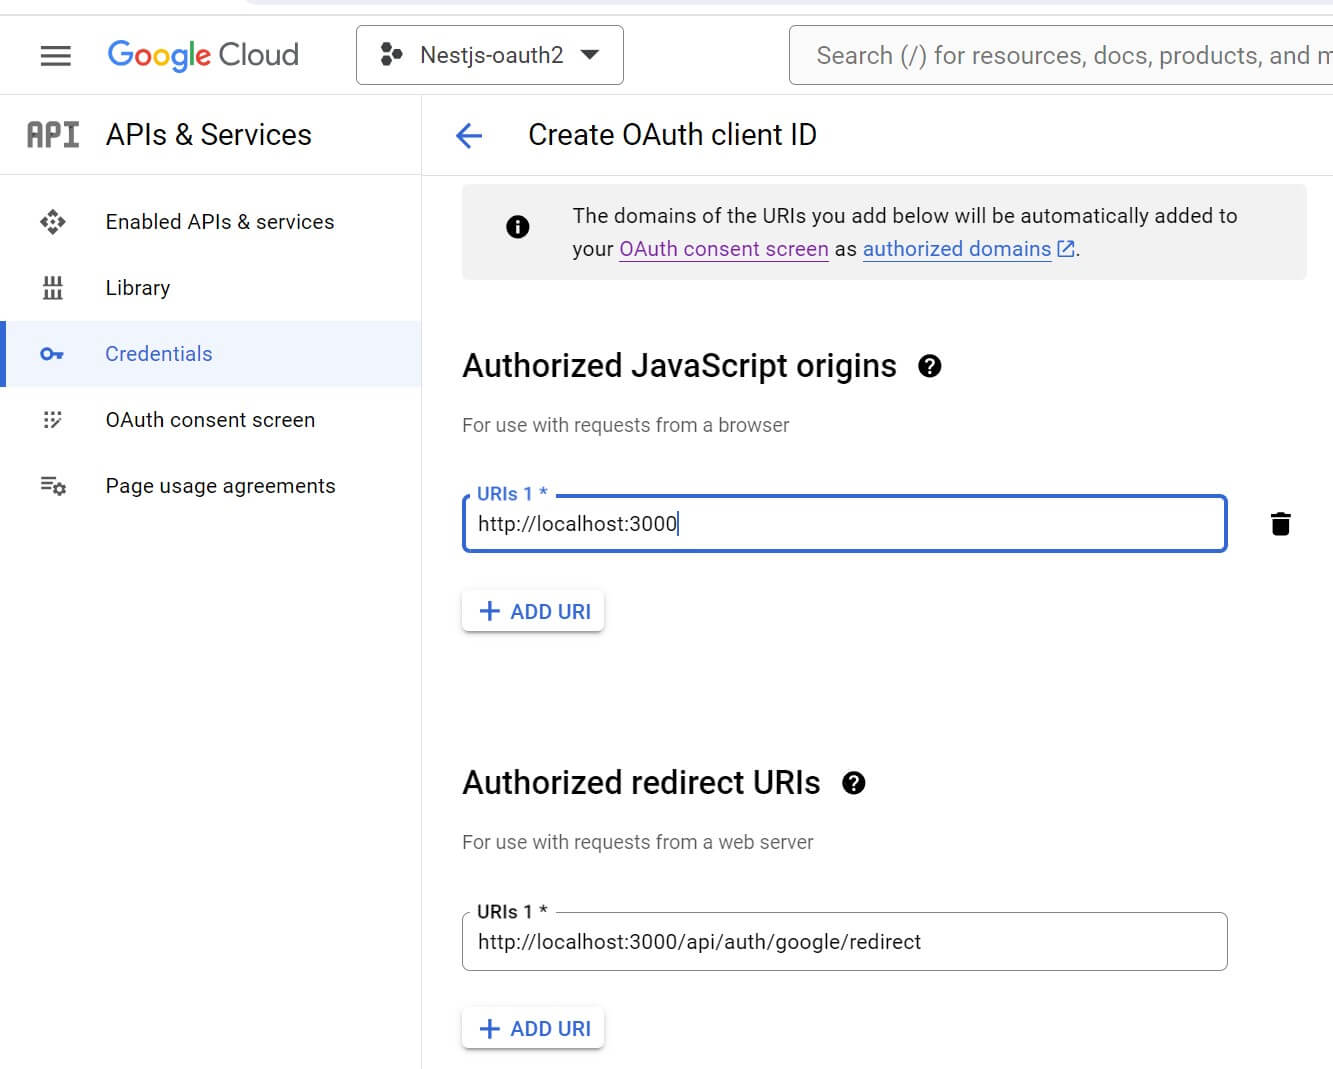
Fill in your application details. You should select a Web application:
Scroll down and add the authorized redirect URIs as http://localhost:3000/api/auth/google/redirect. Also, add authorized JavaScript Origins as http://localhost:3000:
Your Google OAuth2 app should be ready. Make sure you have the following keys.
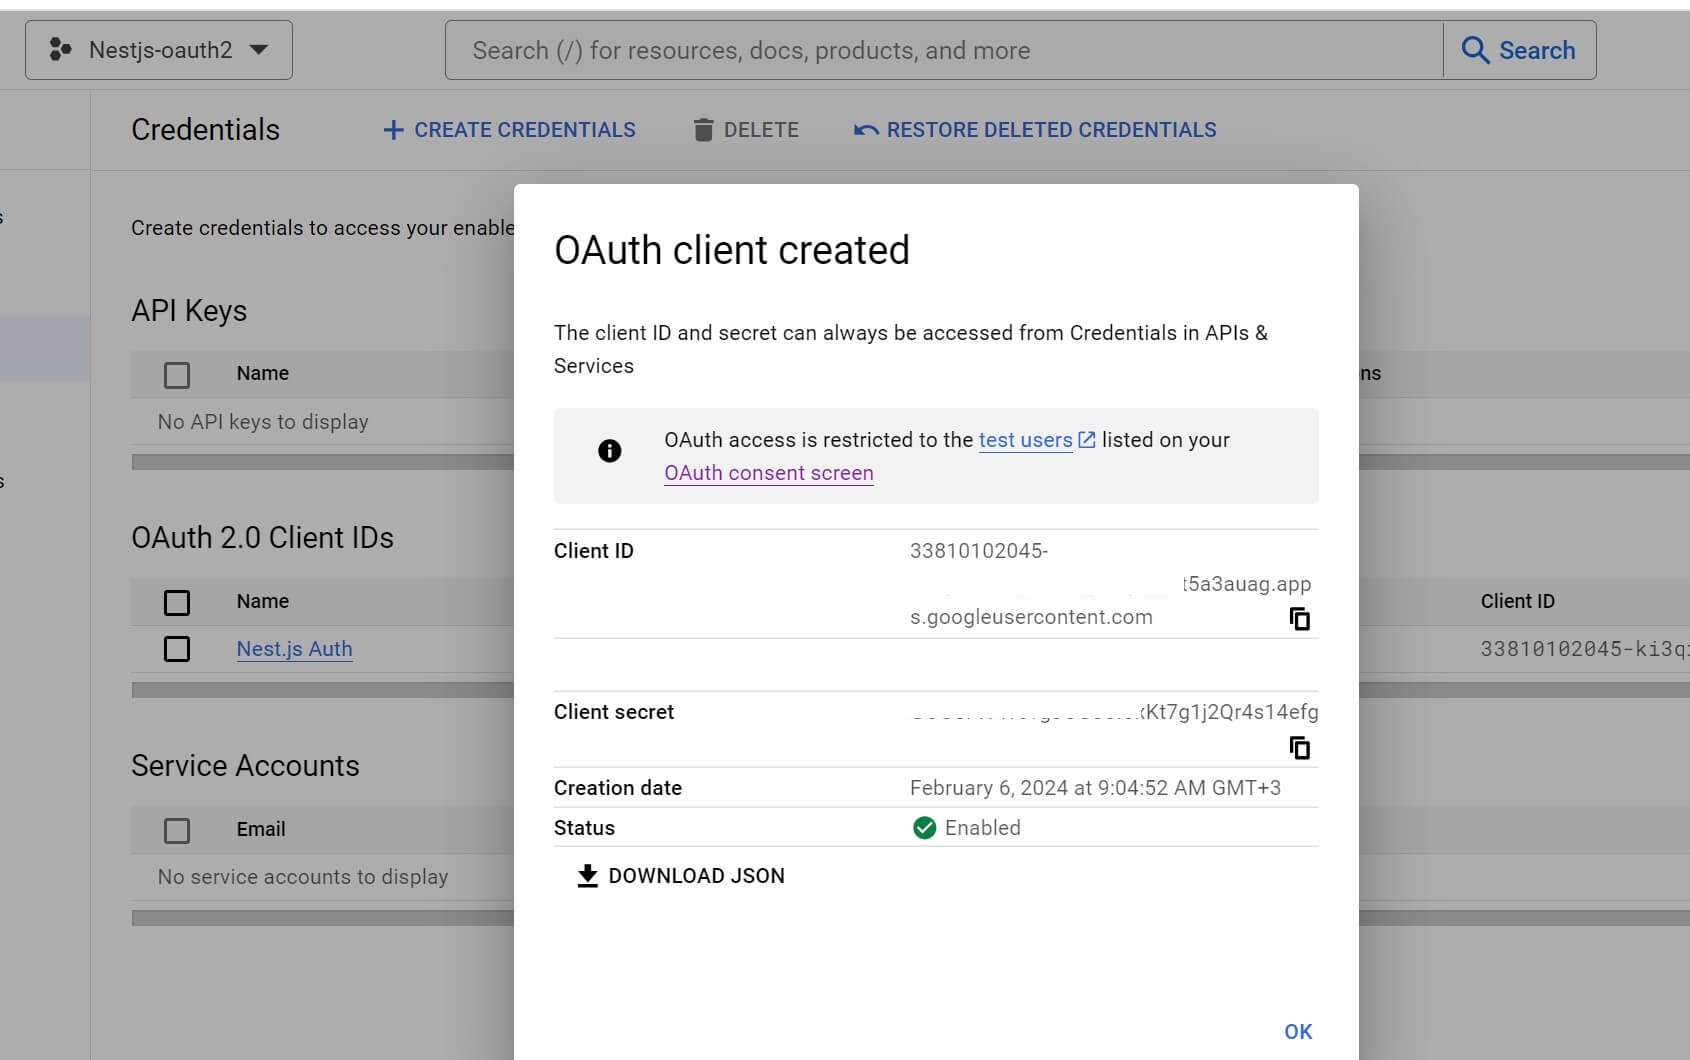
Copy Client ID and Client secret. You need them to get the Nest.js Server ready with passport and Google OAuth2.
Creating a Nest.js OAuth2 Server with Google and Passport
Let’s now get the Nest.js server ready. Ensure you have the CLI ready and create the app as follows:
# Add the CLI first
npm install -g @nestjs/cli
# Run this command to create the NestJS App
nest new nestjs-oauth2
You need dependencies that will connect NestJS to Google OAuth2 and use Passport along the way. You will use the following packages:
passport-google-oauth20 and @types/passport-google-oauth20provides a Passport.js strategy for authenticating Nest.js with Google using the OAuth 2.0 API. It works alongside @nestjs/passport to implement Google OAuth 2.0 authentication.passport, @nestjs/passport and @types/passportto Passport authentication middleware to NestJS module with@AuthGuard()decorators.@nestjs/configas a configuration module for NestJS to load environment variables such as Client ID and Client secret keys.
Related: Guide to NestJS env variables with ConfigModule and dotenv
express-session and @types/express-sessionfor adding sessions and storing session data while handling session-based authentication.pg- PostgreSQL client for Node.js that you will access with TypeORM and save authenticated users.TypeORM and @nestjs/typeormORM library to set up the connection to the database, define entities, and manage transactions.
First, change the directory and point to your nestjs-oauth2 Nestjs app:
cd nestjs-oauth2
Now, run the following command to them:
npm install typeorm @nestjs/typeorm @nestjs/config passport @nestjs/passport @types/passport pg express-session @types/express-session passport-google-oauth20 @types/passport-google-oauth20
Creating Google OAuth2 User Details with TypeORM and Nest.js
Nest.js needs to understand what user details it needs from Google OAuth2 API. Here, you will create a Nest.js Module for users and use TypeORM to connect the user to the database. Use the following command to get a user module ready:
nest g resource user --no-spec

You should have a src\user\entities\user.entity.ts file. Go ahead and define a User entity using TypeORM. It should contain the data you need from Google OAuth2 and get Nest.js to save them in your database:
import { Column, Entity, PrimaryGeneratedColumn, Unique } from "typeorm";

@Entity('user')
@Unique(['email'])
export class User {

    @PrimaryGeneratedColumn('uuid')
    id: string

    @Column()
    email: string

    @Column()
    displayName: string
}
To use this Entity update the src\user\user.module.ts file as follows:
import { Module } from '@nestjs/common';
import { UserService } from './user.service';
import { UserController } from './user.controller';
import { TypeOrmModule } from '@nestjs/typeorm';
import { User } from './entities/user.entity';

@Module({
  imports: [TypeOrmModule.forFeature([User])],
  controllers: [UserController],
  providers: [UserService],
})
export class UserModule {}
Now you only need to update your TypeOrmModule within AppModule. This is the Nest.js Entry point and it should create a connection to your PostgreSQL database as follows:
import { Module } from '@nestjs/common';
import { AuthModule } from './auth/auth.module';
import { UserModule } from './user/user.module';
import { TypeOrmModule } from '@nestjs/typeorm';
import { User } from './user/entities/user.entity';

@Module({
  imports: [
    TypeOrmModule.forRoot({
      type: 'postgres',
      port: 5432,
      host: 'localhost',
      username: 'postgres',
      password: 'pass',
      database: 'nestjs-oauth2',
      entities: [User],
      synchronize: true,
    }),
    // Make sure you have AuthModule
    // You will create it later in this guide

    AuthModule,
    UserModule,
  ],
})
export class AppModule {}
Make sure the PostgreSQL server is running and that you have created the nestjs-oauth2 database. TypeORM will handle the table creation for you.
Creating a Nestjs Auth Module
Let’s create an Auth module and start handling the Google OAuth2 Nestjs Authorization and Authentication. Use the following command to create an Auth module:
nest g module auth
nest g service auth --no-spec
nest g controller auth --no-spec
Once you have the files ready, you’ll add the Google OAuth2 API keys that you copied earlier. In your root working directory, create a .env file and add these keys as follows:
CLIENT_ID='Add the Client ID key here'
CLIENT_SECRET='Add the Client secret key here'
CALL_BACK_URL='http://localhost:3000/api/auth/google/redirect'
To load this env file, Nest.js uses the config package we installed earlier. It will use ConfigModule to load it. Therefore, navigate to the src\auth\auth.module.ts file and load the env file and User entity as follows:
import { Module } from '@nestjs/common';
import { AuthService } from './auth.service';
import { AuthController } from './auth.controller';
import { ConfigModule } from '@nestjs/config';
import { TypeOrmModule } from '@nestjs/typeorm';
import { User } from '../user/entities/user.entity';

@Module({
  imports: [

    ConfigModule.forRoot({
      isGlobal: true,
      envFilePath: '.env',
    }),
    TypeOrmModule.forFeature([User]),
  ],
  controllers: [AuthController],
  providers: [ AuthService],
})
export class AuthModule {}
Creating Google OAuth2 AuthGuard Strategy with Passport
To use Google OAuth2 API, you need a guard specifically configured to authenticate requests using the Google OAuth 2.0 strategy.
Here you will create a class that uses Passport and extends AuthGuard('google'). This means you’ll inherit the AuthGuard and configure it to use the Google OAuth 2.0 strategy for authentication.
The AuthGuard will be used to check if authentication was successful or not and proceed to initiate a login session for the authenticated user.
To create Google OAuth2 AuthGuard Strategy, navigate to the src\auth\ folder and create a guard directory. Add the google.guard.ts file. Then proceed and create a class extending Passport AuthGuard to customize the Google OAuth2 authentication logic as follows:
import { ExecutionContext, Injectable } from "@nestjs/common";
import { AuthGuard } from "@nestjs/passport";

@Injectable()
export class GoogleGuard extends AuthGuard('google') {

    async canActivate(context: ExecutionContext) {
        const activate = (await super.canActivate(context)) as boolean
        const request = context.switchToHttp().getRequest()
        await super.logIn(request)
        return activate
    }
}
Here:
canActivateexecutes the authentication logic from parent AuthGuard.canActivatewill return the value of activate. It represents whether the authentication was successful or not.
Validating Google OAuth2 authentication with NestJS
When a user attempts to log in, Nest.js should validate the user. Through Google OAuth2, it should get user datils based on the User entity and save the validated user in the database.
Navigate to the src\auth\auth.service.ts file and add the following code:
import { Injectable } from '@nestjs/common';
import { InjectRepository } from '@nestjs/typeorm';
import { User } from '../user/entities/user.entity';
import { Repository } from 'typeorm';

@Injectable()
export class AuthService {
  constructor(
    @InjectRepository(User) private readonly userRepo: Repository<User>,
  ) {}

  async validateUser(email: string, displayName: string) {
    const user = await this.userRepo.findOne({ where: { email: email } });

    if (user) {
      return user;
    }

    const newUser = this.userRepo.create({ email, displayName });
    await this.userRepo.save(newUser);
    return newUser;
  }

  async findUser(id: string) {
    const user = await this.userRepo.findOne({ where: { id } });
    return id;
  }

  handlerLogin() {
    return 'handlerLogin';
  }

  handlerRedirect() {
    return 'handlerRedirect';
  }
}
validateUser is validating a user based on their email and displayName. Its First attempt is to find if a user exists in the database. If not, a new user will be created and the details saved on your database.
The handlerLogin and handlerRedirect methods will be used later to return a string based on the user current authentication cycle.
Adding authentication Routes using AuthGuard and Passport
The GoogleGuard method created in the google.guard.ts file will configure Google OAuth 2.0. Now, each route needs to be authenticated and will refer to GoogleGuard to execute the AuthGuard. This is how the user will be instructed to initiate a login session.
The routes will be created in the src\auth\auth.controller.ts file as follows:
import { Controller, Get, UseGuards, Req } from '@nestjs/common';
import { AuthService } from './auth.service';
import { GoogleGuard } from './guard/google.guard';
import { Request } from 'express';

@Controller('auth')
export class AuthController {

  constructor(private readonly authService: AuthService) { }

  @UseGuards(GoogleGuard)
  @Get('google/login')
  handlerLogin() {
    return this.authService.handlerLogin()
  }

  @UseGuards(GoogleGuard)
  @Get('google/redirect')
  handlerRedirect() {
    return this.authService.handlerRedirect()
  }

  @Get('status')
  user(@Req() req: Request) {
    if (req.user) {
      return { message: 'Authenticated', user: req.user }
    } else {
      return { message: 'Not Authenticated' }
    }
  }
}
You will use Passport Nest.js decorator @UseGuards to execute Google OAuth2 AuthGuard based on your GoogleGuard method.
Each endpoint will initiate Google OAuth 2.0 authentication
/auth/statuschecks if the user is authenticated. If a user does not exist, the user is not authenticated.google/redirectandgoogle/loginmust use AuthGuard. These methods are prefixed with ‘google’ to indicate that they are specific to Google OAuth 2.0 authentication.@UseGuards(GoogleGuard)ensures authentication is required to access these routes.
Creating Google Oauth2.0 Session Serializer with Passport
Session Serializer serializes and deserializes user objects during NestJS session management. Here, you need Passport.js to handle user authentication. You must first retrieve user information from the database and serialize and deserialize according.
In your src\auth folder, create a serializer directory and add the session.serializer.ts file as follows:
import { Inject, Injectable } from '@nestjs/common';
import { PassportSerializer } from '@nestjs/passport';
import { AuthService } from '../auth.service';
import { User } from '../../user/entities/user.entity';

@Injectable()
export class SessionSerializer extends PassportSerializer {
  constructor(
    @Inject('AUTH_SERVICE') private readonly authService: AuthService,
  ) {
    super();
  }

  serializeUser(user: User, done: Function) {
    done(null, user);
  }

  async deserializeUser(payload: any, done: Function) {
    const user = await this.authService.findUser(payload.id);
    return user ? done(null, user) : done(null, null);
  }
}
The serializeUser Method serializes the user object into the session. deserializeUser will deserialize the user object from the session from the findUser injected from the AuthService instance.
Creating a Google Strategy with Passport and Nest.js
Your app should be almost done. However, you need to create an authentication strategy for Google OAuth 2.0 within the NestJS. This way, you will:
- Run Passport.js to handle authentication using Google credentials.
- Leverages the
AuthServicefor user validation and authentication-related operations.
In your src\auth folder, create a strategy directory and add a google.strategy.ts file as such:
import { Inject, Injectable } from '@nestjs/common';
import { Profile, Strategy, VerifyCallback } from 'passport-google-oauth20';
import { PassportStrategy } from '@nestjs/passport';
import { ConfigService } from '@nestjs/config';
import { AuthService } from '../auth.service';

@Injectable()
export class GoogleStrategy extends PassportStrategy(Strategy, 'google') {
  constructor(
    private readonly configService: ConfigService,
    @Inject('AUTH_SERVICE') private readonly authService: AuthService,
  ) {
    super({
      clientID: configService.get('CLIENT_ID'),
      clientSecret: configService.get('CLIENT_SECRET'),
      callbackURL: configService.get('CALL_BACK_URL'),
      scope: ['email', 'profile'],
    });
  }

  async validate(
    accessToken: string,
    refreshToken: string,
    profile: Profile,
    done: VerifyCallback,
  ) {

    console.log(accessToken);
    console.log(profile);
    console.log(done);

    const user = await this.authService.validateUser(
      profile.emails[0].value,
      profile.displayName,
    );

    return user || null;
  }
}
This GoogleStrategy extends PassportStrategy with the Google OAuth 2.0 strategy.
GoogleStrategywill initialize the Google OAuth 2.0 strategy with client ID, client secret, callback URL, and scope.- It will then use
validateUserfrom AuthService to validate the user after successful authentication with Google. - This is where Nest.js receives parameters accessToken, refreshToken, and profile, and done from Passport.js and saves the users in the database, based on the validated email and display name.
- To debug if Google OAuth2 API can use Passport and NestJS to carry out a successful authentication, you need to console log the accessToken, profile, and done objects.
How to run GoogleStrategy and GoogleGuard
You have created these two methods, GoogleStrategy and GoogleGuard. To run then AuthModule must access them as your module providers. Go to the src\auth\auth.module.ts file and add the following changes:
// ... other imports ...

import { GoogleStrategy } from './strategy/google.strategy';
import { PassportModule } from '@nestjs/passport';
import { SessionSerializer } from './serializer/session.serializer';

@Module({
  imports: [
    PassportModule.register({ session: true }),
    ConfigModule.forRoot({
      isGlobal: true,
      envFilePath: '.env',
    }),
    TypeOrmModule.forFeature([User]),
  ],
  controllers: [AuthController],
  providers: [ AuthService,GoogleStrategy,
    { provide: 'AUTH_SERVICE', useClass: AuthService },
    SessionSerializer,
  ],
})
export class AuthModule {}
This AuthModule will now encapsulate authentication functionality, database, Passport.js, and session management.
Testing NestJS Google Oauth 2.0 Passport App
your app is now ready. Go ahead and run the following command to start it.
npm run start:dev
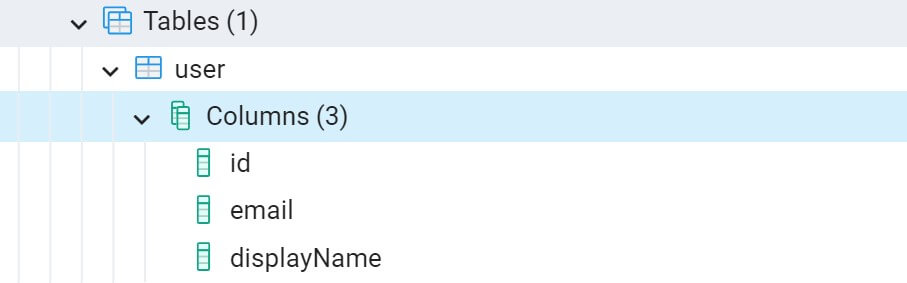
At first, Nest.js will access the nestjs-oauth2 database and create the User table as follows:
To test Google OAuth2, go to the google/login endpoint. It should be http://localhost:3000/api/auth/google/login in full:
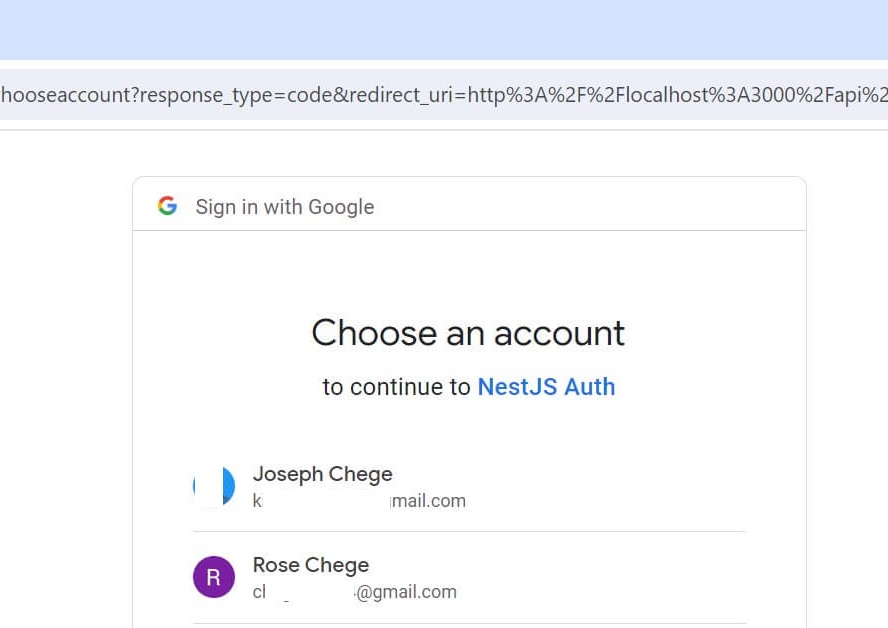
At this point, make sure you select the Google User you added as a test.
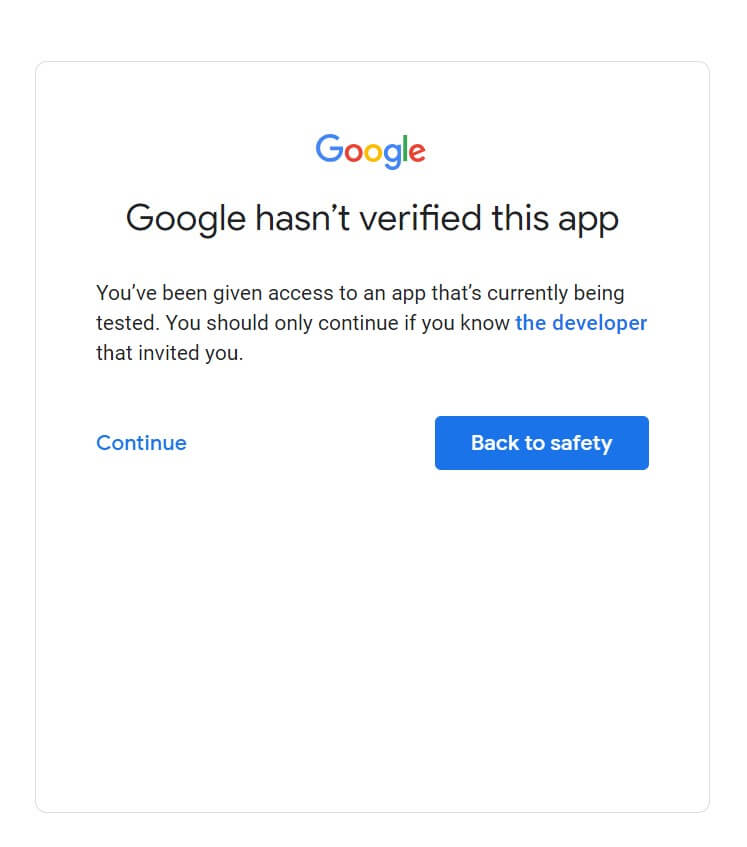
You will be asked to continue and Google may detect a localhost server as not verified domain:
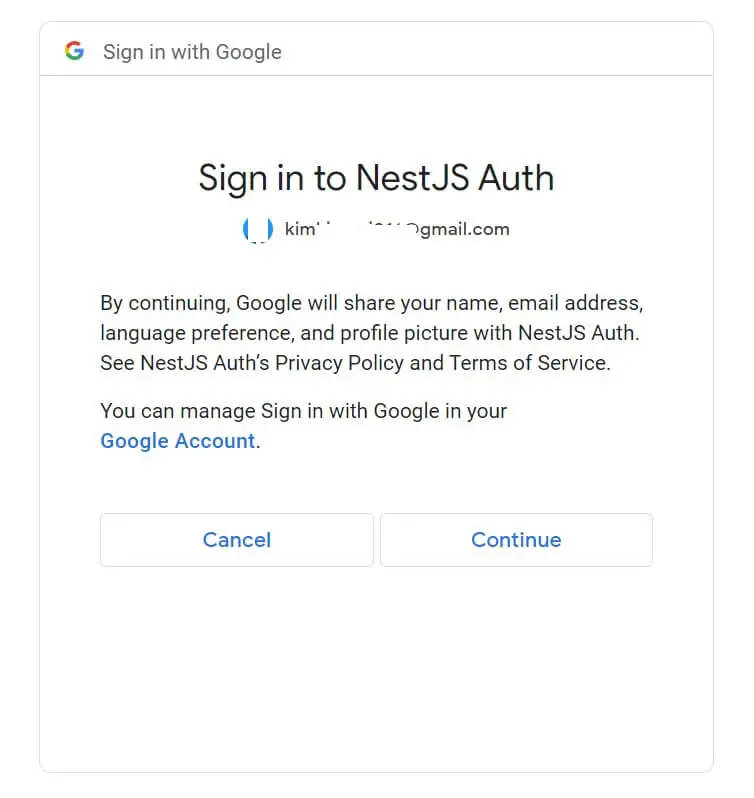
Now, you can sign in to your app. You will see the name of your App based on the name you added in the Credentials section:
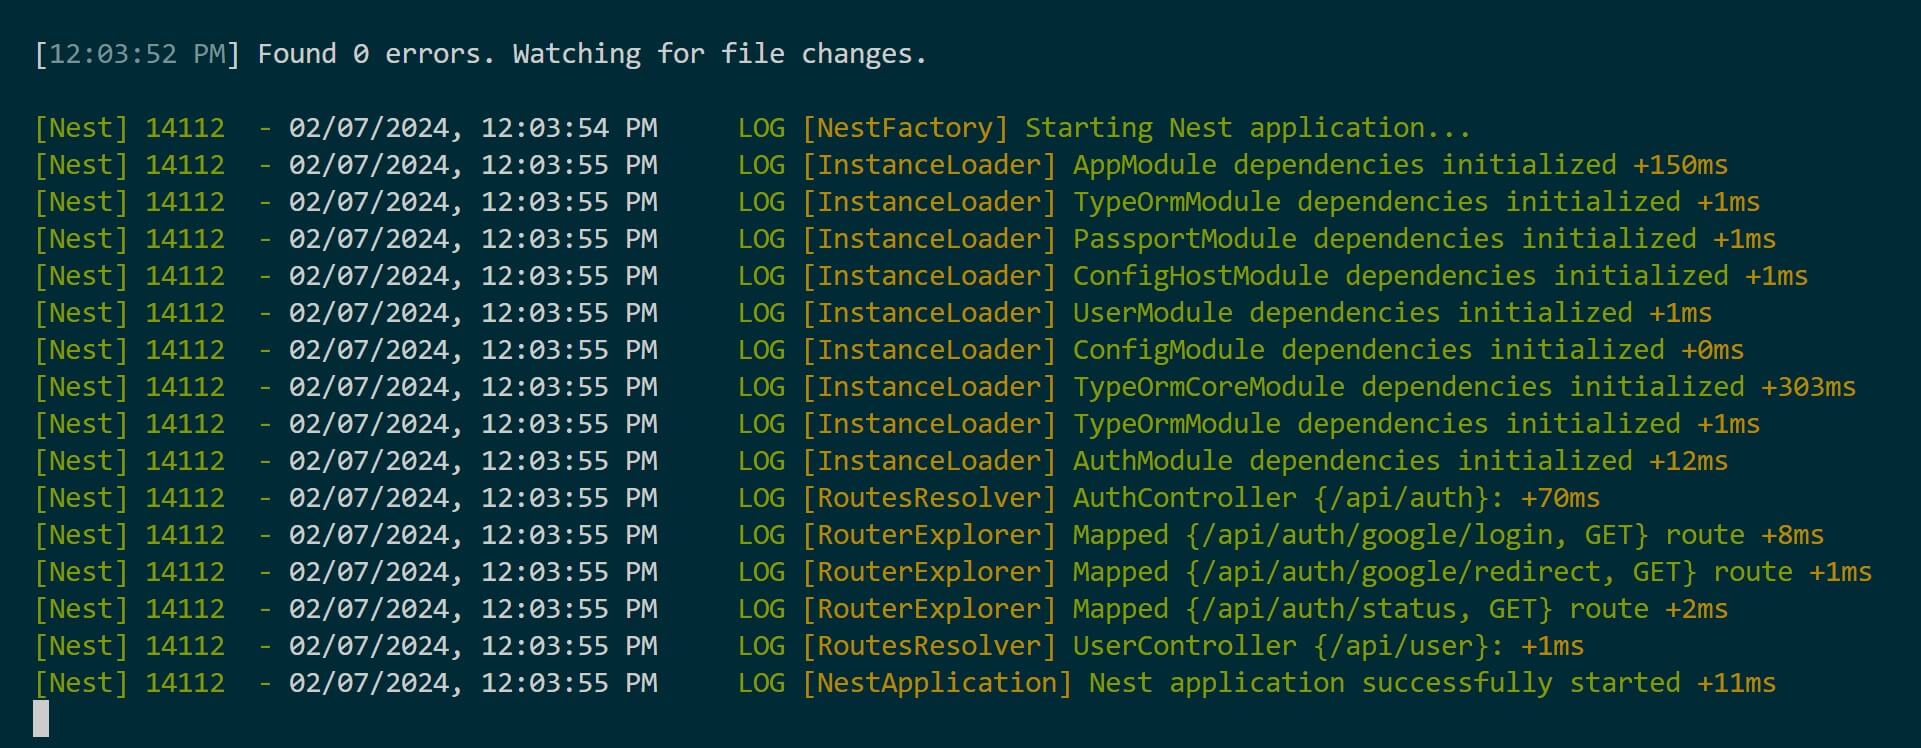
Once you have signed in you will be redirected to handlerRedirect or handlerLogin. At this time check your console. Use the status endpoint http://localhost:3000/api/auth/status to check if indeed you are authenticated:

You should have the authenticated access token. This should be part of the details Google OAuth2 API will send and you can access them in your app:
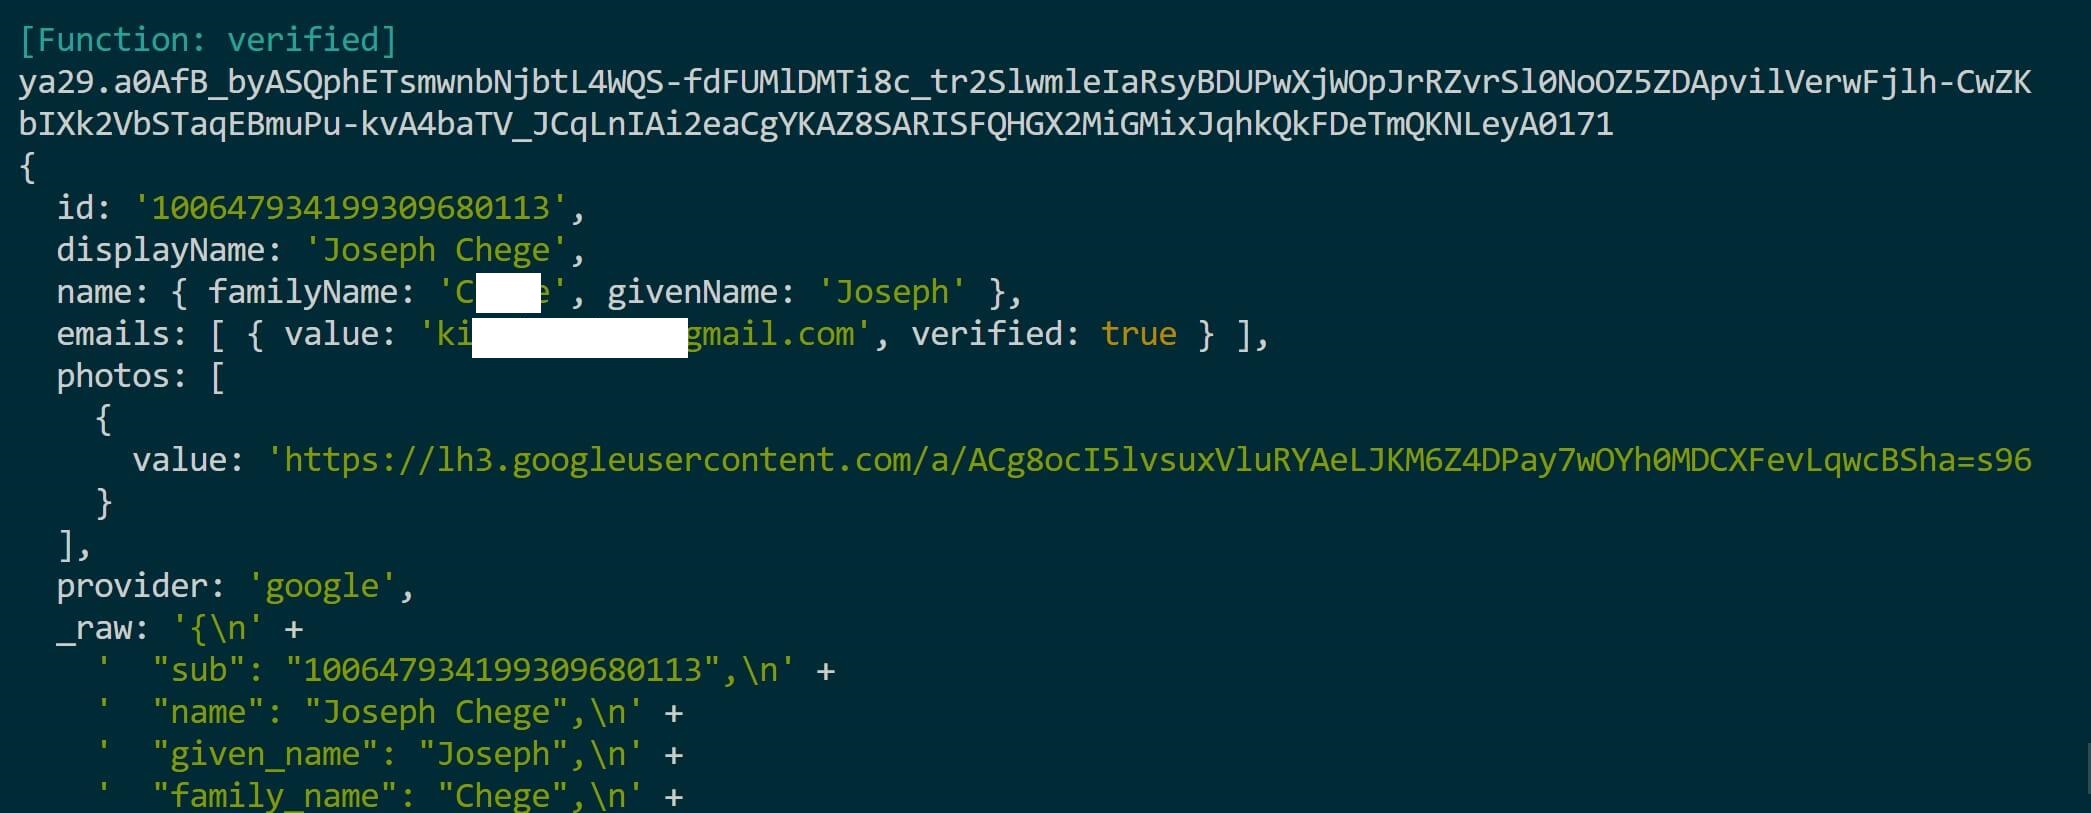
In this app, we are getting the user ID, email, and displayName. They should be saved in your database as follows:

You have successfully built a NestJS oauth2 Server with Passport FT Google 2.0 Example. Check the code used in this tutorial on this GitHub repo.
Conclusion
In this comprehensive NestJS oauth2 Server, you have learned:
- To set up Google OAuth2.0 API and access authorization Keys.
- The right way to set up Google OAuth2 with Passport AuthGuard within Nest.js.
- How to save Google OAuth2 API user credentials to a database.
- Using TypeORM integrations alongside Google OAuth2.0 and Nest.js.
Happy coding 🚀🌌💥
Written By: