Guide to NodeJS Cluster Module; A Scaling Instance Solution
Posted December 7, 2023

This guide teaches clustering in Node.js and how it benefits your applications to scale. You will use the cluster module to fork Node.js to create cluster instances. You will learn:
- Why you need clustering as a strategy for scaling Node.js apps.
- How to create and scale Node.js Cluster with Native and PM2 modules using express.
- Scaling comparisons between a clustered and non-clustered Node.js app.
- Load test a Node.js cluster as a performance monitoring approach.
- What you need to know if Node.js clustering doesn’t fit your app design.
Introducing Node.js Clustering: The Ultimate Scaling Strategy
Node.js is a single-threaded runtime by default. This means a running Node.js only utilizes a single core (CPU unit) of your machine, even though any computer will have multiple processors. If, for example, you are running a Node.js app on a 4-processer machine, you are only using one. However, Node.js allows you to use clustering, take full advantage of multi-core processors and scale your Node.js app to new levels.
Getting Started with Scaling Node.js with Cluster Module
Take four processers computer as an example. Node.js will only utilize 25% of its processing power. Node.js runs a worker Node to execute all your Node.js functions. This strategy will take a hit if you have intensive tasks running within your app. The worker Node will be blocked until the heavy task is processed.
The concept of a Node.js cluster creates multiple instances of your Node.js application (workers). This creates a cluster of the same application with a distributed load across available CPU cores. In this case, as your heavy task is being processed, your cluster module will spawn any consecutive tasks to the remaining processers. In a nutshell, clustering will enhance the performance and scalability of your app.
Let’s dive in and learn how you can add clusters of Node.js workers and take advantage of the full processing capacity of your machine.
The Two Clustering Strategies to Scaling Node.js
If you are looking to add clustering to Node.js, there are two ways to do that:
- Using the Native Cluster module.
- Using process managers such as PM2.
- Native Cluster
Node.js comes with a built-in cluster module. It allows you to manually fork your worker to available processors. This way, Node.js will distribute incoming requests across multiple child processes to enhance scalability.
- Clustering with PM2
PM2 is a production-grade process manager. Like the native cluster module, PM2 has built-in clustering support. However, it inherently comes along with other production-related elements, such as:
- Zero-downtime deployments.
- App monitoring.
- Log and metrics management.
- Automatic application restarts.
Example of Node.js Applications Benefiting from Clustering
Now that you understand Node.js clustering and the methods you can use to achieve it let’s demonstrate how clustering benefits your apps regarding scalability. You will create two simple examples, one with no clustering and one using clustering, and use imaginary users to simulate and scale tests to compare the performance.
Node.js Without Clustering: A Not Scaling Principle
Since Node.js is single-threaded, it must finish executing one task before attending to the other within that application. This concept is all about Node.js single-threaded aspect that only uses one computer processor.
To demonstrate how this works, you can use Express and create a simple Node.js app as follows:
const express = require("express");
const PORT = 3000;
const app = express();

// Simulate a time-consuming task
app.get("/compute", (req, res) => {
  const startTime = Date.now();
  // Simulate a 10 seconds computation
  const duration = 10000;
  while (Date.now() - startTime < duration) {}
  res.send("Computation complete!");
});

// Serve a simple HTTP request
app.get("/hello", (req, res) => {
  res.send("Hello from a worker process!");
});

app.listen(PORT, () => {
  console.log(`App is listening on port ${PORT}`);
});
The above example creates two GET requests:
- A simple GET request that sends a basic request
- A simulated GET request that executes for 10 seconds to return the user request
The hypothetical simulated 10-second task now represents any heavy, time-consuming function you can execute. Based on how Node.js works, if you send a request to execute localhost:3000/compute, Node.js will be locked to the single processor and unable to execute any other task.
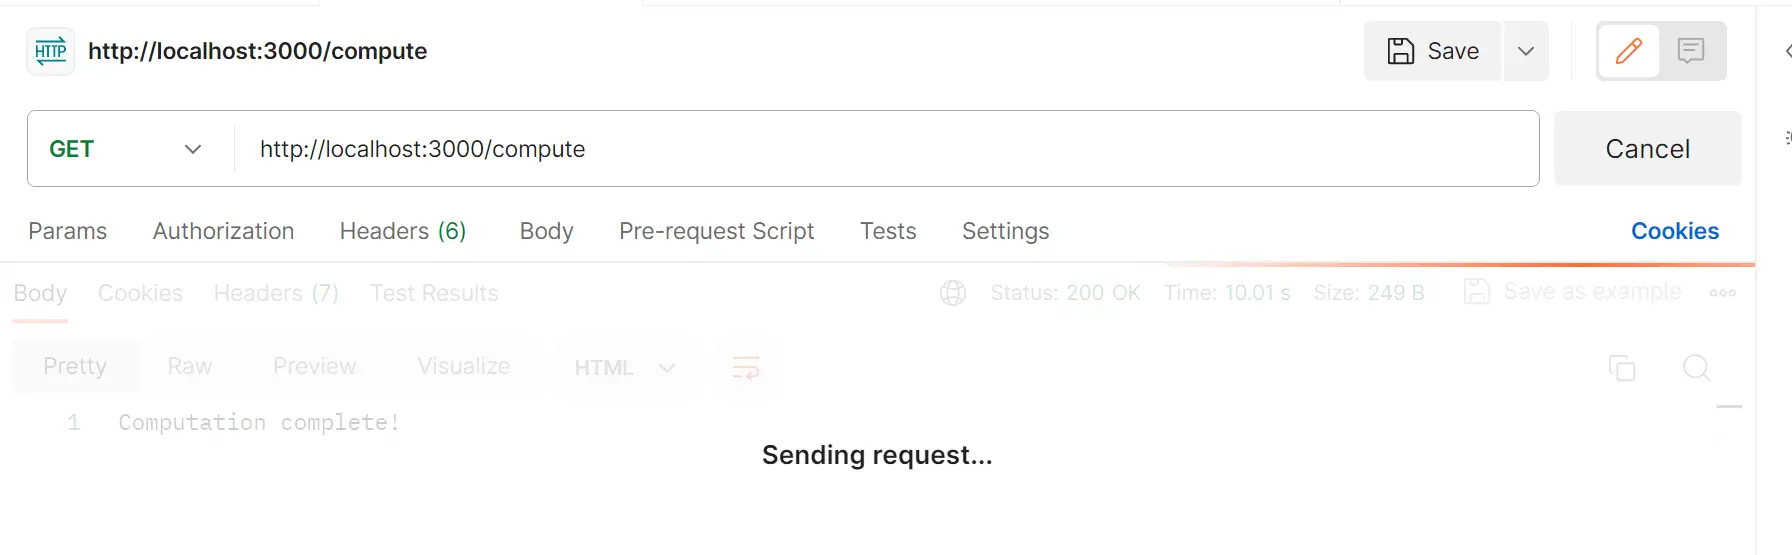
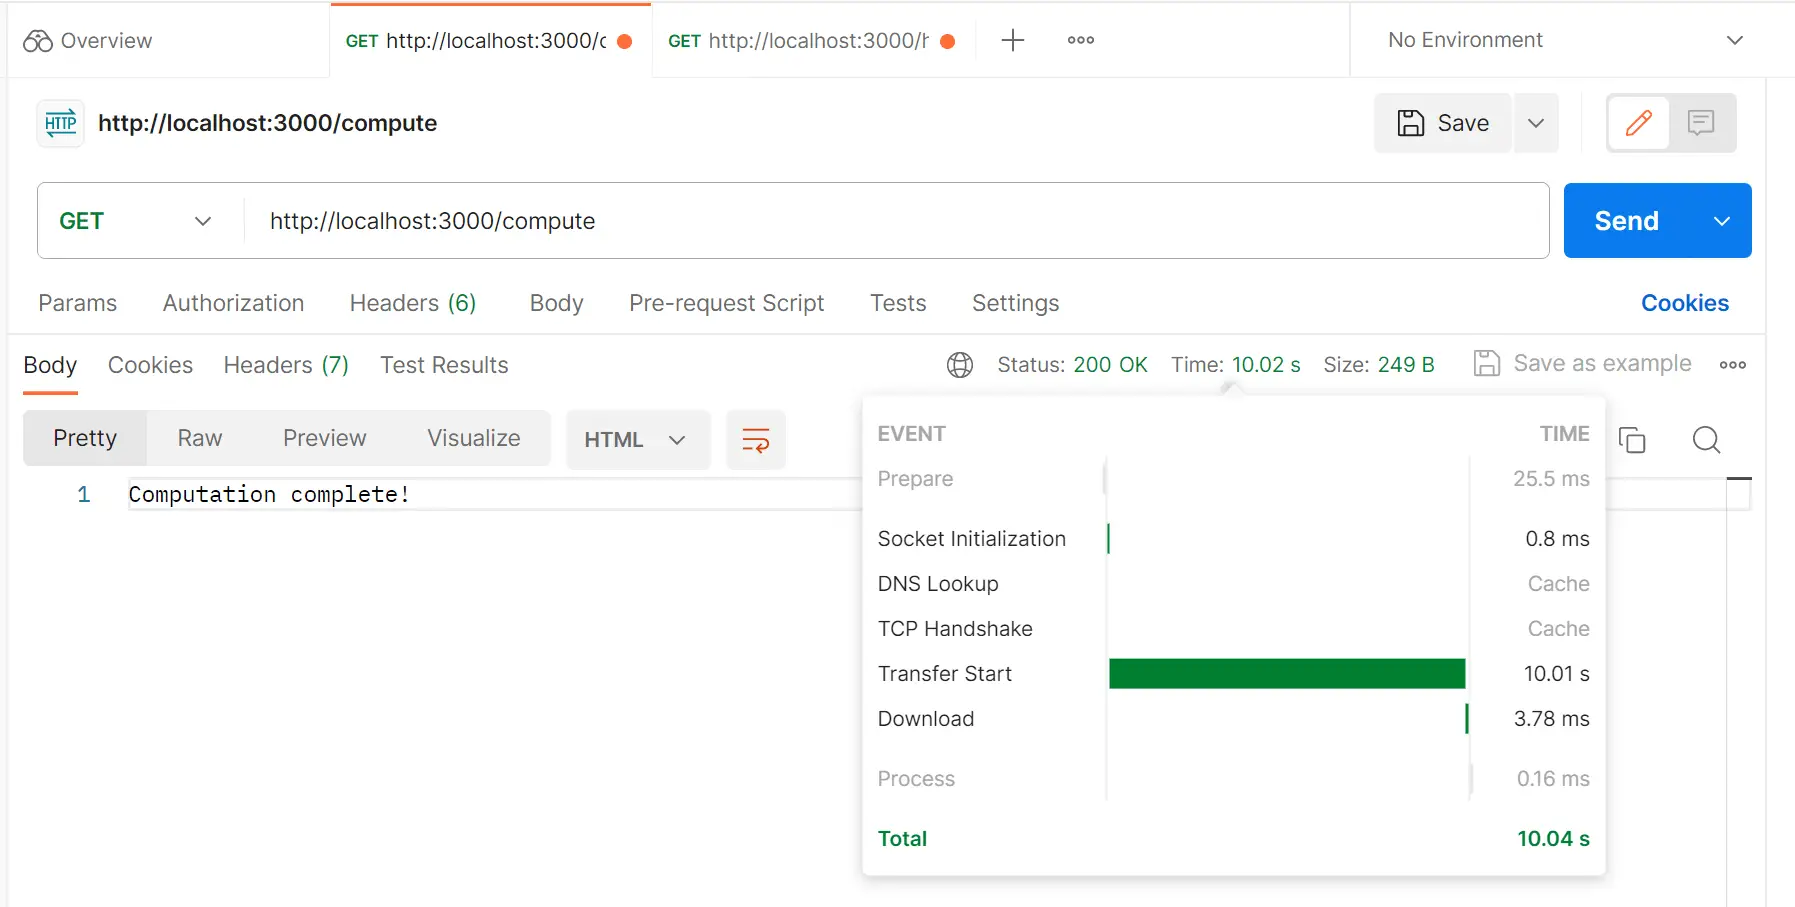
This task will take 10 seconds and lock your compute resources until its computation is complete:
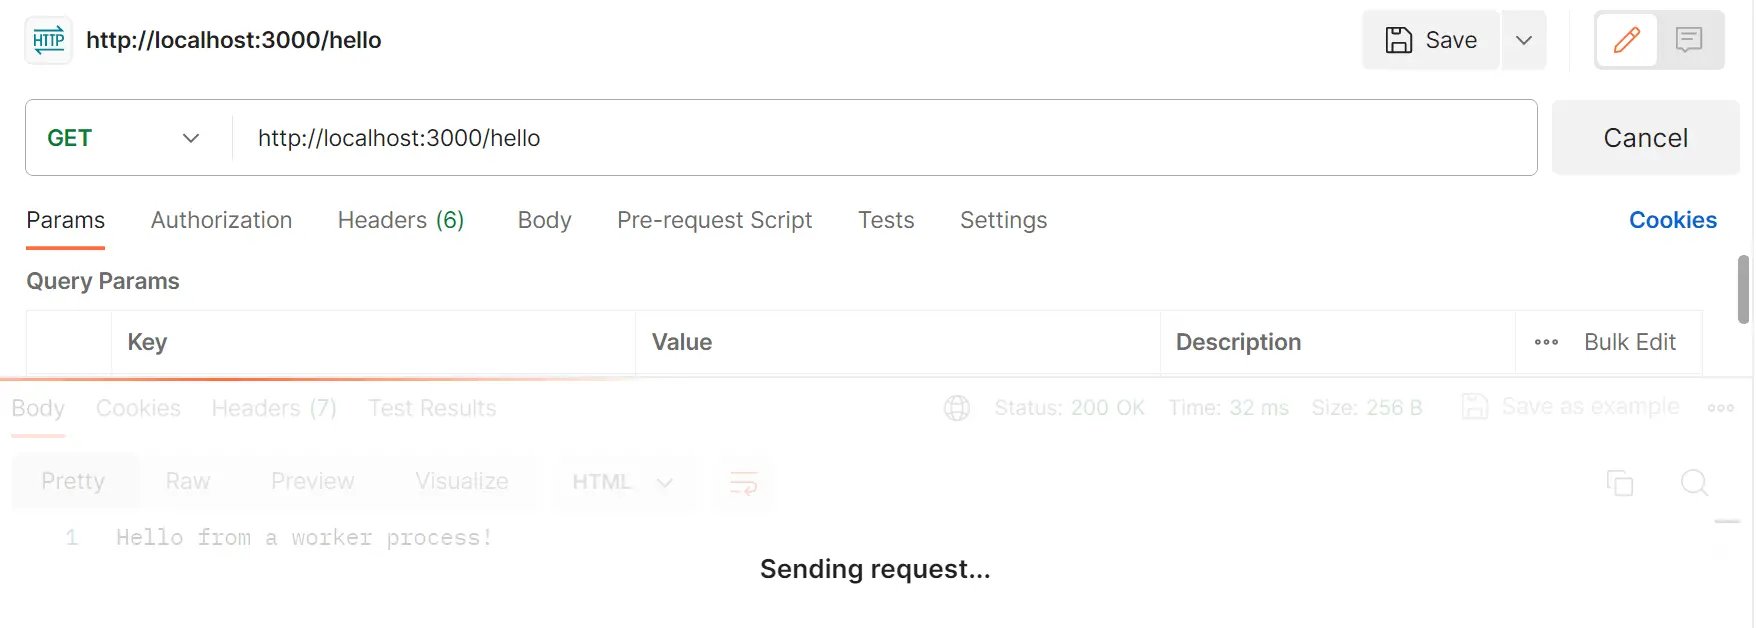
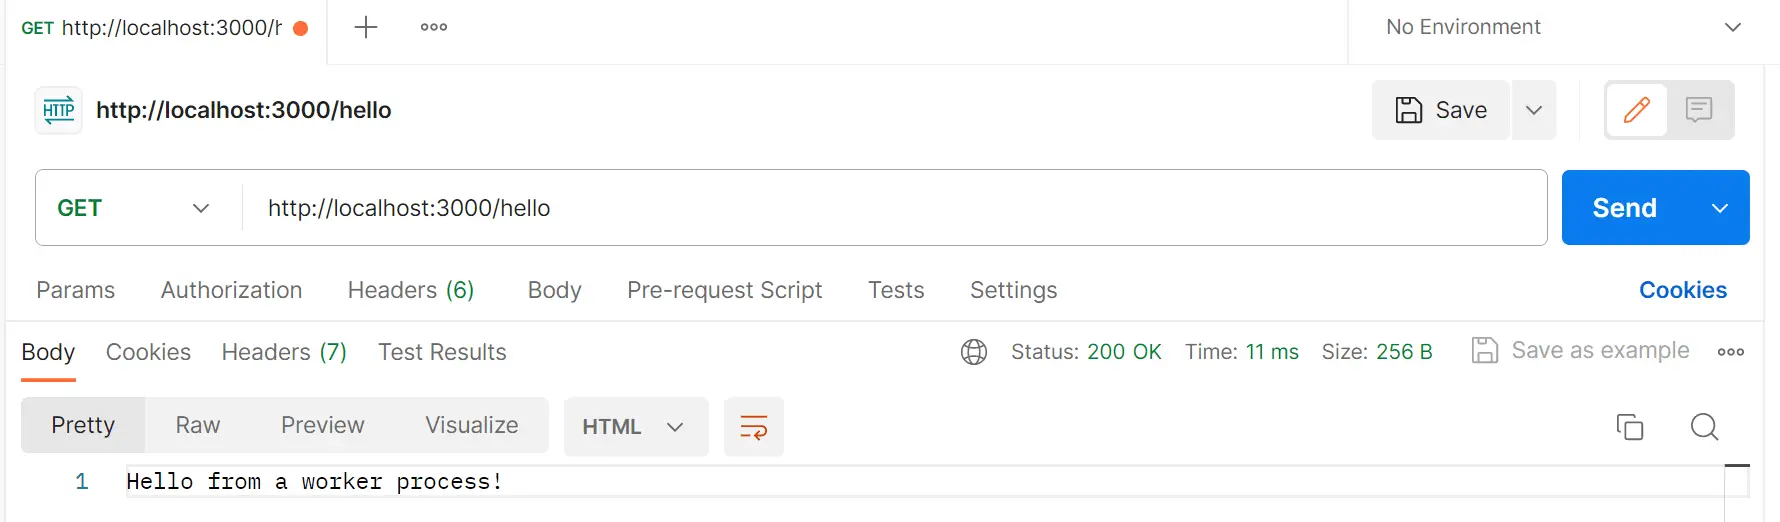
This means If you execute localhost:3000/hello while localhost:3000/compute is running, localhost:3000/hello can’t return its response, even though it’s a simple GET request:
Considering this simple approach, a production Node.js app will certainly have a number of time-consuming functions. You don’t work such scenarios to lock other processes from being executed. To solve this, Node.js can create forks of the same app, duplicate them to every available processor, and create a cluster of concurrent executions.
Clustering in Action: A Scaling Node.js App
Using the above non-cluster example, here is how you can introduce Node.js clustering to the same application:
- Import the cluster module to your app. At the same time, use the OS module so you can access your machine’s operating system-specific constants, such as CPU core:
const express = require("express");
const cluster = require("cluster");
const os = require('os');
const PORT = 3000;
- Check if the current process runs as master. This way, the Node.js cluster module will be able to get the number of available CPU cores, and fork them as worker processes:
if (cluster.isMaster) {
  // Get the number of available CPU cores
  const numCPUs = os.cpus().length;

  // Fork worker processes for each CPU core
  for (let i = 0; i < numCPUs; i++) {
    cluster.fork();
  }

  // Listen for workers as they exit and replace them
  cluster.on("exit", (worker, code, signal) => {
    console.log(`Worker ${worker.process.pid} died. Restarting...`);
    cluster.fork();
  });
}
Note that the cluster will fork all the available processors. If one processor is busy, Node.js will assign any available core to handle the proceeding task. If the previous worker completes its task, that worker will be killed, restarted, and added back to the cluster so it can be assigned other tasks if available.
- Once the current process is checked and is not the master process, create your app and run it in the worker process:
else {
  const app = express();
  // Log when a worker is starting
  console.log(`Worker process ${process.pid} is starting...`);
  // Listen to the worker process 'exit' event
  app.use((req, res, next) => {
    res.on("finish", () => {
      console.log(`Worker ${process.pid} is exiting and is being restarted...`);
    });
    next();
  });

  // Simulate a time-consuming task
  app.get("/compute", (req, res) => {
    console.log(`Worker ${process.pid} is handling a /compute request.`);
    const startTime = Date.now();
    // Simulate a 10 second computation
    const duration = 10000;
    while (Date.now() - startTime < duration) {
    }
    res.send("Computation complete!");
  });

  // Serve a simple HTTP request
  app.get("/hello", (req, res) => {
    console.log(`Worker ${process.pid} is handling a /hello request.`);
    res.send("Hello from a worker process!");
  });

  app.listen(PORT, () => {
    console.log(`Worker process ${process.pid} is listening on port ${PORT}`);
  });
}
It’s that simple. Your app will divide the workload among available worker processes. Below is an example of this application running on a 4-core machine.
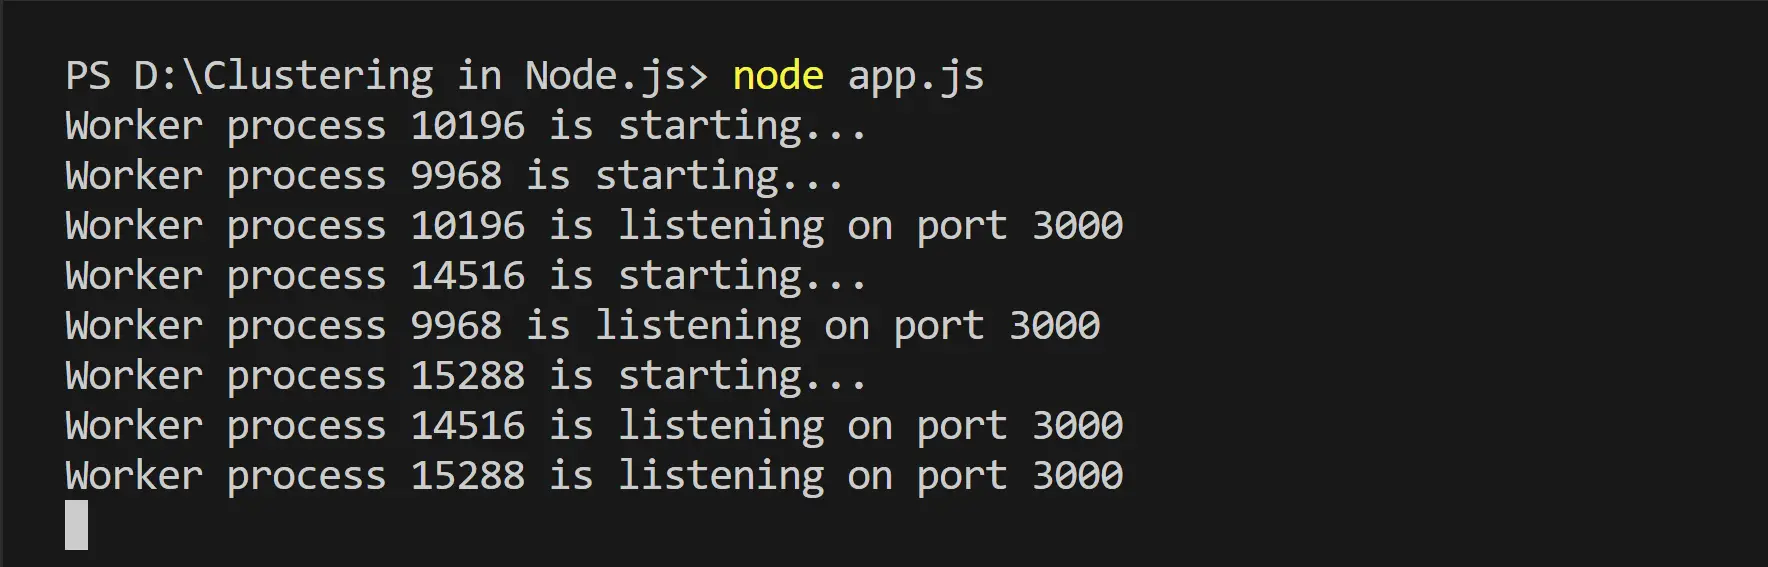
Now if you execute localhost:3000/hello while localhost:3000/compute is running, you should get your request sent without being locked out of resources:
Each worker will be assigned a unique ID so Node.js can know which workers need to be killed, restarted, and added.

Load Testing the Two Examples: Which One Scales Best?
Let’s now dive in and perform load testing on the Node.js servers with and without clustering. This will help you gauge the best scaling approach between the two. As you may have learned so far, clustering utilizes multiple CPU cores, making this option performant. Let’s define test scenarios using concurrent users and request rates. This will simulate traffic and monitor performance parameters such as response times and error rates.
This test will use a simple prime number calculator from 0 to 10000. Create an isPrime.js file as follows:
const isPrime = (num) => {
  if (num <= 1) return false;
  if (num <= 3) return true;
  if (num % 2 === 0 || num % 3 === 0) return false;
  for (let i = 5; i * i <= num; i += 6) {
    if (num % i === 0 || num % (i + 2) === 0) return false;
  }
  return true;
};

module.exports = isPrime;
- Your Node.js server without clustering:
const express = require("express");
const port = 3001;
const process = require("process");
const isPrime = require("./isPrime");

const app = express();
console.log(`Worker ${process.pid} started`);

app.get("/", (req, res) => {
  console.time("findPrimes");
  const maxNumber = 10000;
  const primes = [];

  for (let num = 2; num <= maxNumber; num++) {
    if (isPrime(num)) {
      primes.push(num);
    }
  }

  console.timeEnd("findPrimes");
  console.log(`Found ${primes.length} prime numbers on process ${process.pid}`);
  res.json({ primes });
});

app.listen(port, () => {
  console.log(`App listening on port ${port}`);
});
- Your Node.js server with clustering:
const express = require("express");
const port = 3000;
const cluster = require("cluster");
const totalCPUs = require("os").cpus().length;
const process = require("process");
const isPrime = require("./isPrime");

if (cluster.isMaster) {
  for (let i = 0; i < totalCPUs; i++) {
    cluster.fork();
  }
  cluster.on("exit", (worker, code, signal) => {
    cluster.fork();
  });
} else {
  const app = express();
  app.get("/", (req, res) => {
    console.time("findPrimes");
    const maxNumber = 10000;
    const primes = [];
    for (let num = 2; num <= maxNumber; num++) {
      if (isPrime(num)) {
        primes.push(num);
      }
    }
    console.log(
      `Found ${primes.length} prime numbers on process ${process.pid}`,
    );
    res.json({ primes });
  });

  app.listen(port, () => {
    console.log(`App listening on port ${port}`);
  });
}
Run your two servers. The cluster app will be exposed on port 3000, and the other example will run on 3001.
To test them, you can use several benchmarking tools such as Vegeta, Apache JMeter, load test, or autocannon. This guide will use autocannon. Run the following command to get it installed:
npm i autocannon -g
Once both servers are running, use autocannon as follows:
# without clustering
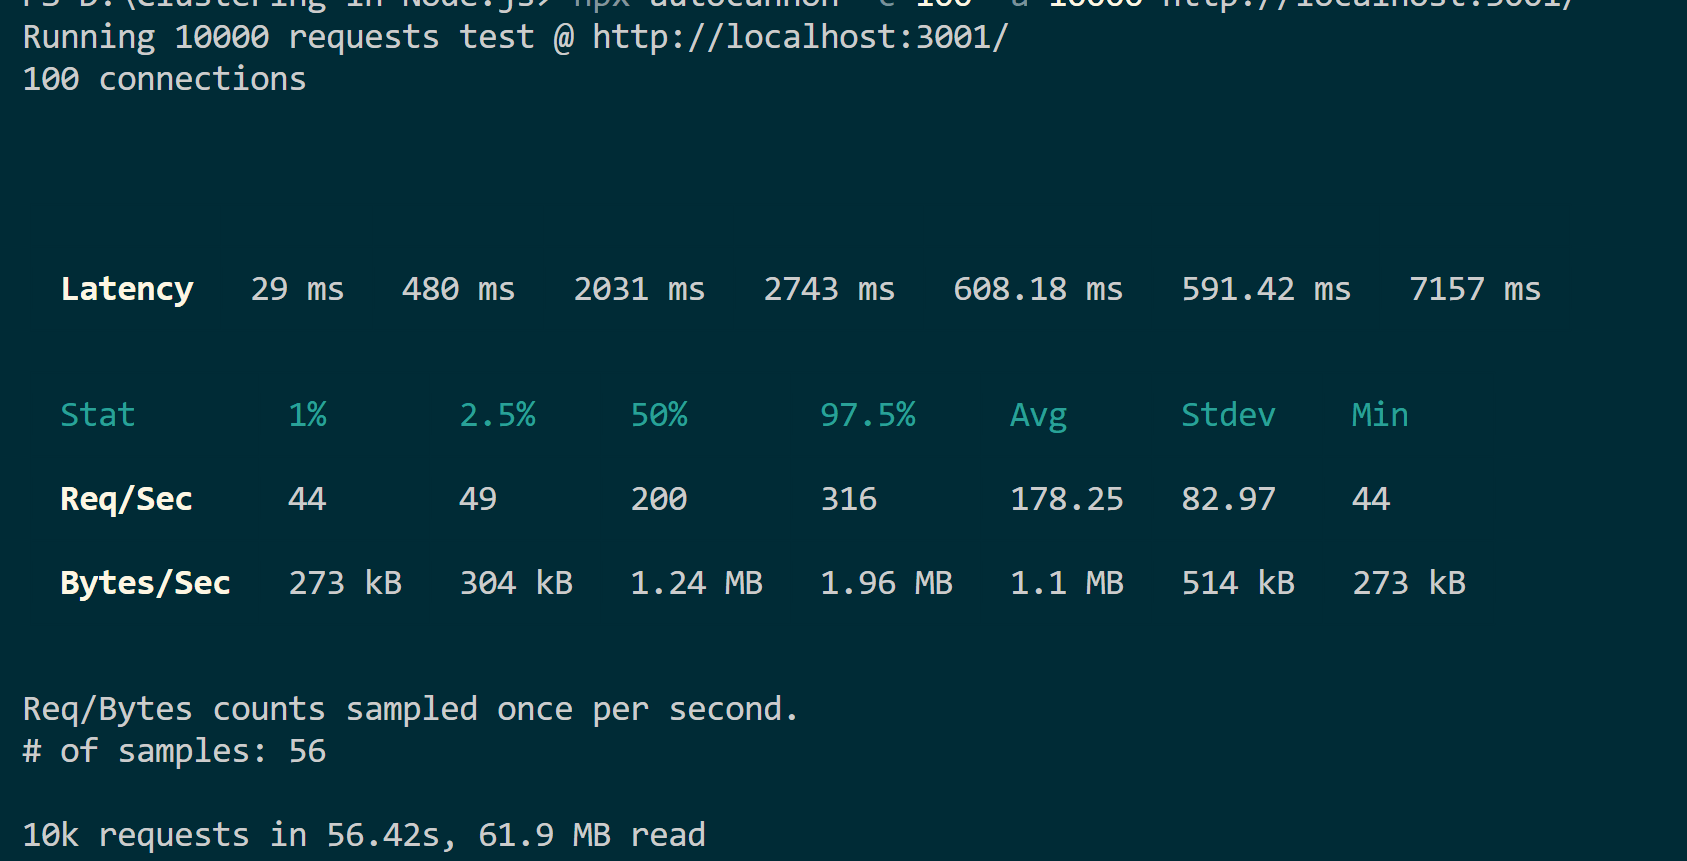
npx autocannon -c 100 -a 10000 http://localhost:3001/
# with clustering
npx autocannon -c 100 -a 10000 http://localhost:3000/
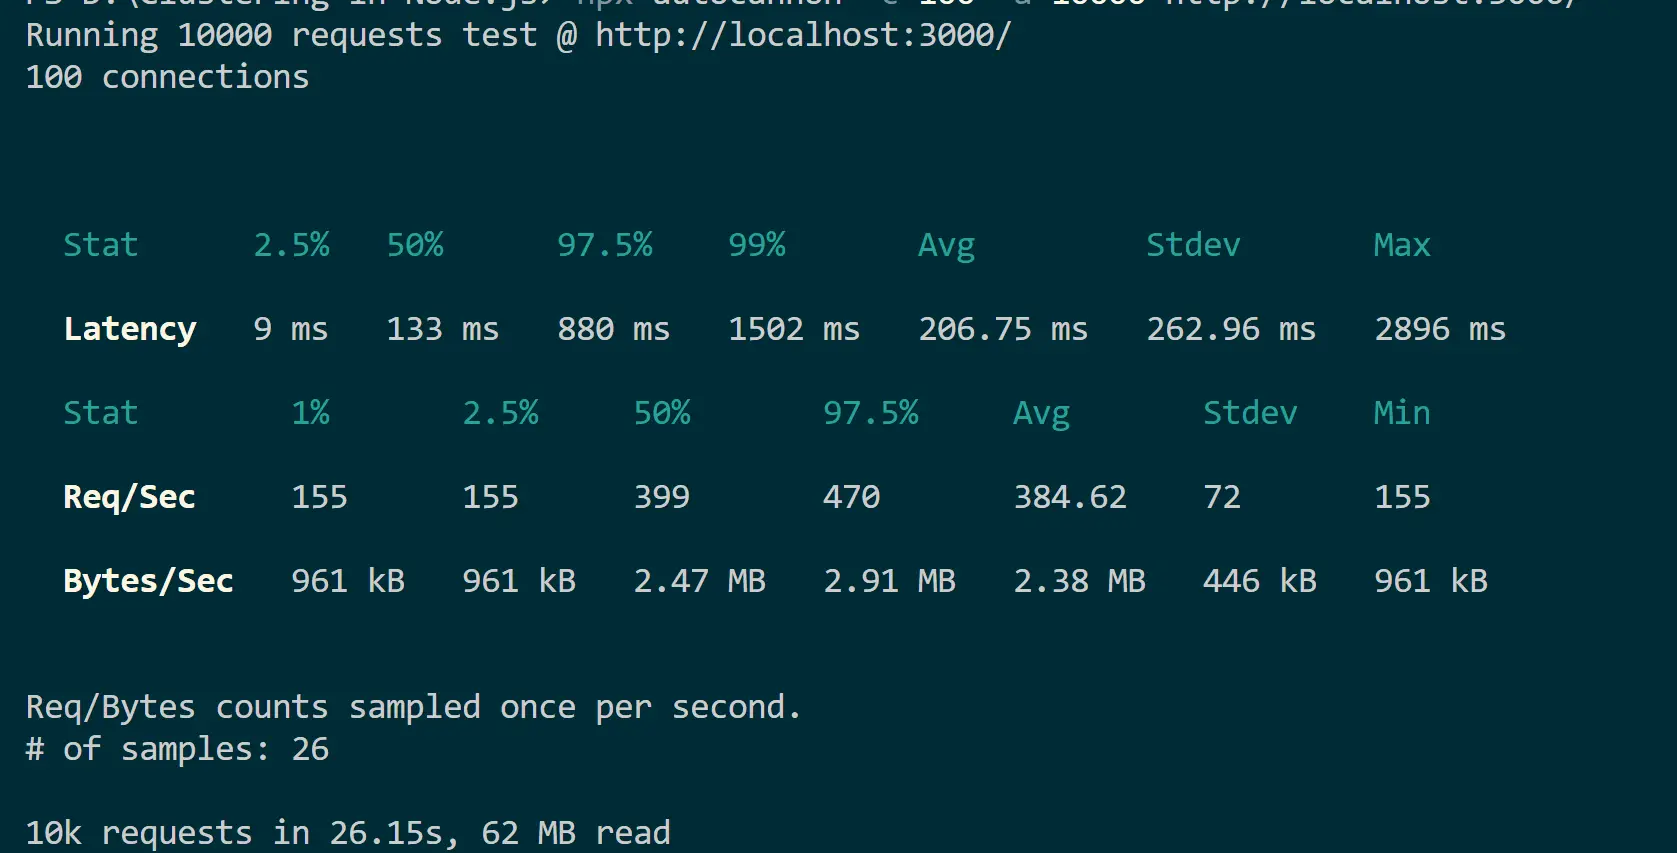
Based on these tests, each server receives 10,000 requests from 100 users. The application with clustering takes 26 seconds compared to 56 seconds for a normal Node.js server.
They both have the same workloads. However, the latency and the time it takes to serve the given request varies. This shows how clustering helps your Node.js server to utilize resources and improve scalability.
The Clustering Limitation to Acknowledge: When Not to Scale Node.js with Clustering
Now, what happens if you get more calls than the available CPUs? This means If your app receives more requests than there are worker processes, you may experience blocking. Each worker process will only handle only one request at a time. Having time-consuming requests that exceed your cores means added performance bottlenecks.
In case you have an application that must address this challenge, Here is what you need to do:
- When running your app on production, use a load balancer. A load balancer can distribute and scale incoming requests evenly to the available worker processes/instances. This way, your app handles more requests concurrently.
- Add queues using brokers and enqueue incoming requests. Workers will then pick up tasks from the queue as they become available while avoiding overloading any worker.
- Node.js has worker threads that execute CPU-bound tasks concurrently without blocking the main event loop. Threading will offload CPU-intensive tasks from the main thread and keep the main thread open to incoming requests.
- Take advantage of container technologies such as Docker and Kubernetes. They allow you to scale up instances to meet the demand. The fun part is that you can instruct them t scale automatically based on the workload the application is handling at any given time.
Conclusion
Clustering a Node.js server distributes the workload across multiple child processes to scale your apps. This extensively utilizes your server hardware resources. However, clusters are only sometimes necessary. A simple app may not see significant benefits of cluster scaling. However, when handling many requests, a more resource-demanding application will utilize the full benefits of clustering. You learned the following:
- Why you need clustering as a strategy for scaling Node.js apps.
- How to create and scale Node.js Cluster with Native and PM2 modules using express.
- Scaling comparisons between a clustered and non-clustered Node.js app.
- Load test a Node.js cluster as a performance monitoring approach.
- What you need to know if Node.js clustering doesn’t fit your app design.
Related
Written By: