Easy TypeORM with Nest.js and MongoDB Example Tutorial
Posted January 29, 2024

TypeORM became popular for its support for the relations database. Now, with Node.js and Nest.js, you can use TypeORM to model your NoSQL MongoDB databases with code.
MongoDB is a NoSQL database. It commonly uses Mongoose as its ORM. However, for a developer who loves TypeORM, you no longer need to switch to TypeORM whenever you are working with MongoDB.
This Example guide teaches you how to build a Nest.js app while using TypeORM to connect to your MongoDB database.
You will learn:
- How to use Nest.js and TypeORM Entities to model a MongoDB database collection.
- How to connect to MongoDB using TypeORM and Nest.js.
- Using TypeORM MongoDB connection and creating a CRUD Nest.js API.
Ready? Dive in and explore the unlimited TypeORM support for MongoDB NoSQL db while using Nest.js.
If you are using TypeORM with MongoDB Atlas, Check this How to Connect TypeORM with MongoDB Atlas using TypeScript guide first and get ready for a working MongoDB Atlas working connection.
Why TypeORM Matter when using MongoDB and Nest.js
You already have the Mongoose ORM. It works perfectly with MongoDB. However, there are some reasons will justly to adore TypeORM over Mongoose when working with a MongoDB database:
- Your overall application design may have multiple databases. It’s not possible to use MongoDB and SQL with Mongoose. TypeORM remains your best option.
- You don’t have to learn other ORM designs. TypeORM is already your choice.
- TypeORM is built with TypeScript in mind. A combination of TypeORM and Nest.js accelerates your TypeScript.
- Unlike Mongoose, TypeORM has Migration Support. You can version control your database schema changes and apply them in a structured manner.
Creating your First Nest.js TypeORM MongoDB NoSQL App
Let’s now dive in and create a TypeORM app that will Support TypeORM and MongoDB. You first need to get the Nest.js CLI ready and create your Nest.js app as follows:
# Get Nest CLI Ready
npm i -g @nestjs/cli
# Use this command to Get your APP
# (May Fail to work on Powershell)
nest new nest-mongodb
The command nest new nest-mongodb should create a new folder nest-mongodb containing a basic Nest.js APP. Now, you need to install TypeORM and MongoDB dependencies in this project. First, change the directory and point to:
cd nest-mongodb
Now, you will need TypeORM installed in your project and the MongoDB driver for TypeORM:
npm install --save @nestjs/typeorm typeorm mongodb
Lastly, create a resource based on the app you want to create. For example, if you want TypeORM MongoDB set up with posts, use the following command:
nest g resource posts --no-spec
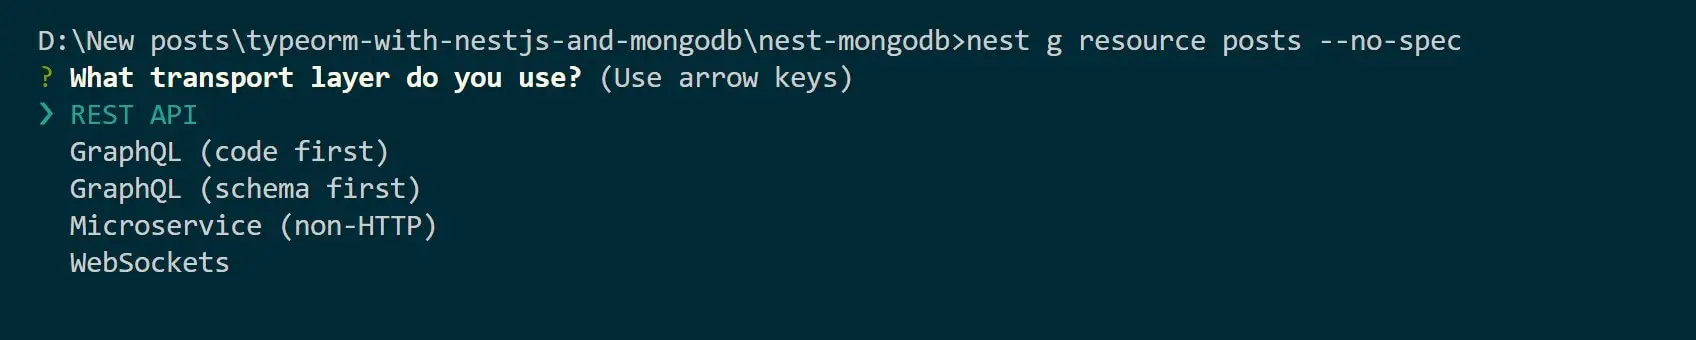
Check your project. You should have a posts module ready.
Creating TypeORM MongoDB Entities using Nest.js
Entities represent your database. You are using TypeORM. This means your database is represented using code using Entities. An entity is the blueprint of your MongoDB database (collection). It dictates TypeORM how Nest.js will execute your app and pullulate your given Entity as a collection on MongoDB.
Navigate to src\posts\entities\post.entity.ts. This file will use TypeORM to craft a MongoDB collection representing your posts module as follows:
import { Column, Entity, ObjectId, ObjectIdColumn } from 'typeorm';

@Entity()
export class Post {
  @ObjectIdColumn()
  id: ObjectId;

  @Column()
  title: string;

  @Column()
  content: string;

  @Column({ default: false })
  isPublished: boolean;

  @Column({ type: 'timestamp', default: () => 'CURRENT_TIMESTAMP' })
  createdAt: Date;

  @Column({ type: 'timestamp', default: null, nullable: true })
  updatedAt: Date;
}
You will note that:
- If you use SQL, you need the
PrimaryGeneratedColumnTypeORM decorator to have a primary key Column. However, when using MongoDB, you will useObjectIdColumnif you use Nest.js classes. - Each
@Column()decorator represents a characteristic of your MongoDB collection—for example, thecontentof the type string.
Connection MongoDB with TypeORM and Nest.js
Once your Nest.js is ready, use TypeORM and create a collection on MongoDB. You need to ensure you have a valid connection to the MongoDB server.
First, your posts module will require some changes. Go to the src\posts\posts.module.ts file and add a TypeOrmModule import. This way, your module will have access to your Entity before attempting to create a MongoDB connection. Update this file as follows:
imports: [TypeOrmModule.forFeature([Post])],

Now, to create a MongoDB connection with TypeORM, you must:
- Ensure the MongoDB server is up and running.
- Have the database ready.
- Get the MongoDB server port and host
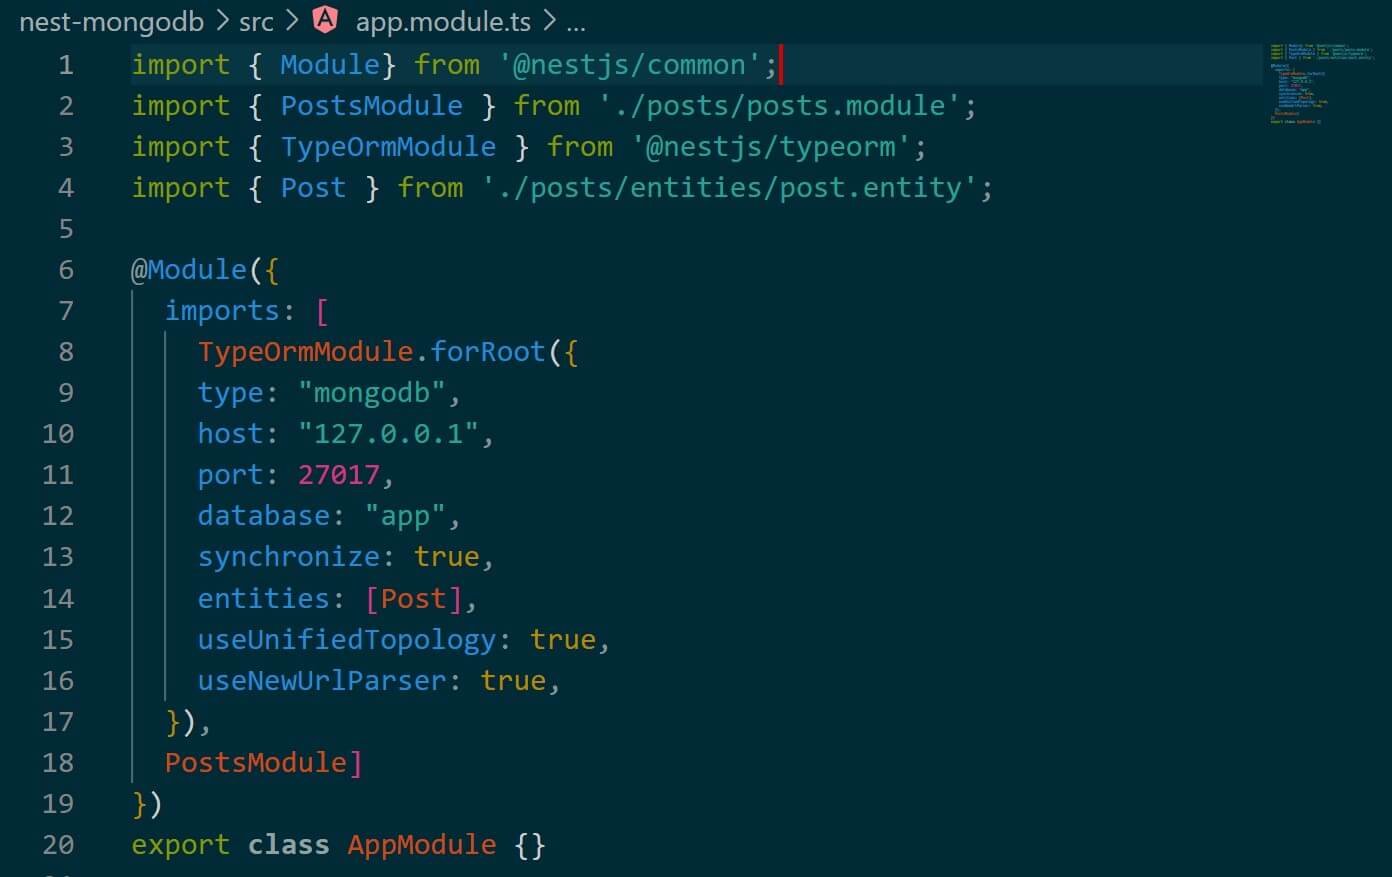
You will then navigate to the src\app.module.ts file and use TypeOrmModule.forRoot as follows:
    TypeOrmModule.forRoot({
    type: "mongodb",
    host: "127.0.0.1",
    port: 27017,
    database: "app",
    synchronize: true,
    entities: [Post],
    useUnifiedTopology: true,
    useNewUrlParser: true,
  }),
You must:
- Use the type of MongoDB.
- Get the Host post.
- Note that I’m using
127.0.0.1. If that doesn’t work for you, uselocalhost. - Ensure you have
entities: [Post]This will tell TypeORM to execute the Entity Post and populate its content on MongoDB.
If your database uses a password and username, you must update them as such:
    TypeOrmModule.forRoot({
    type: "mongodb",
    host: "127.0.0.1",
    port: 27017,
    database: "app",
    synchronize: true,
    username: 'add-the-username',
    password: 'fill-with-your-password',
    entities: [Post],
    useUnifiedTopology: true,
    useNewUrlParser: true,
  }),
Up to this point, TypeORM should be able to use Nest.js and establish a connection to MongoDB.
Adding data to MongoDB using TypeORM and Nest.js
With the connection ready, why not now use TypeORM to create data for MongoDB? You will start by ensuring you have a MongoDB repository. The Repository is used to manage MongoDB documents from TypeORM.
Go to src\posts\posts.service.ts, add Repository and a method to create a new item as follows:
import { Injectable } from '@nestjs/common';
import { InjectRepository } from '@nestjs/typeorm';
import { Repository } from 'typeorm';
import { Post } from './entities/post.entity';

@Injectable()
export class PostsService {
  constructor(
    @InjectRepository(Post)
    private readonly postRepository: Repository<Post>,
  ) {}

  async create(post: Post): Promise<Post> {
    return this.postRepository.save(post);
  }

}
Here:
- You are making
MongoRepositoryready for your TypeORM entity. - add a
createmethod to create a new post on MongoDB using Nest.js - To save the details of the new post, use
save()from TypeORM.
At the same time, you will find a new function that allows you to fetch available data/added items on MongoDB. Use findAll() as follows:
  async findAll(): Promise<Post[]> {
    return this.postRepository.find();
  }
Updating TypeORM Controller
To access the above functions, you will need Controllers. A Controller excutes HTTP methods and the respective functions while exposing the routes to access them. Update the posts.controller.ts file as follows;
import { Controller, Get, Post, Put, Delete, Param, Body } from '@nestjs/common';
import { PostsService } from './posts.service';
import { Post as PostEntity } from './entities/post.entity'

@Controller('posts')
export class PostsController {
  constructor(private readonly postsService: PostsService) {}

  @Get()
  findAll(): Promise<PostEntity[]> {
    return this.postsService.findAll();
  }

  @Post()
  create(@Body() post: PostEntity): Promise<PostEntity> {
    return this.postsService.create(post);
  }
}
Testing MongoDB TypeORM and Nest.js Connection
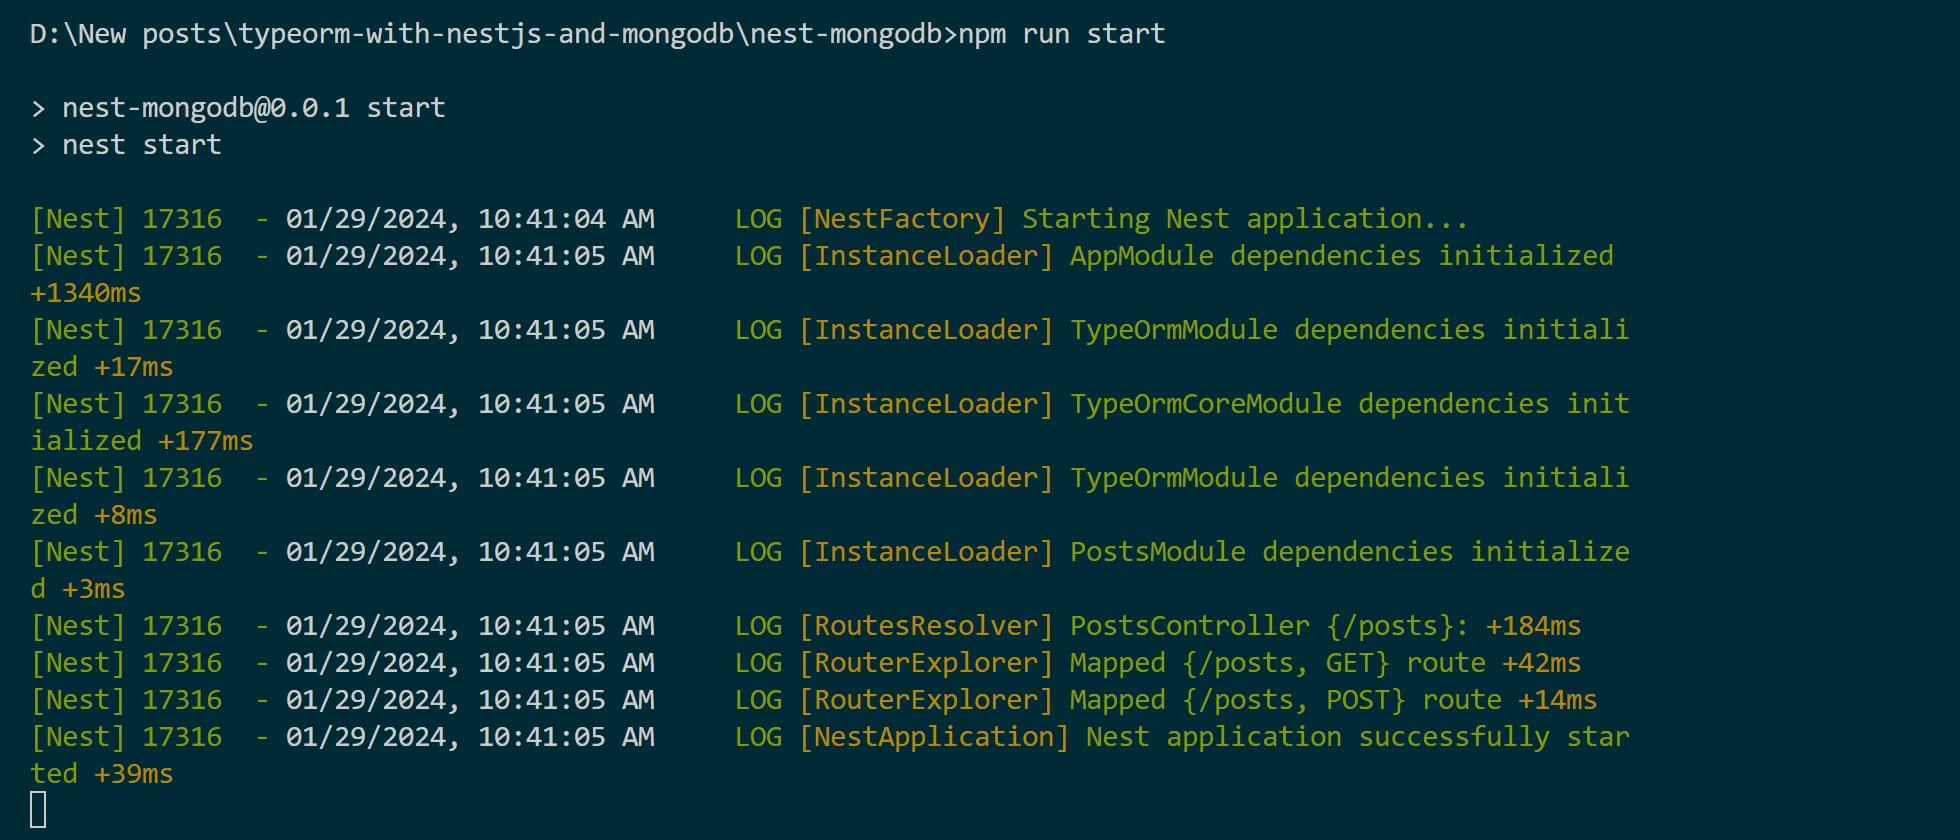
In your TypeORM with MongoDB and Nest.js project, use the following command to start the server:
npm run start
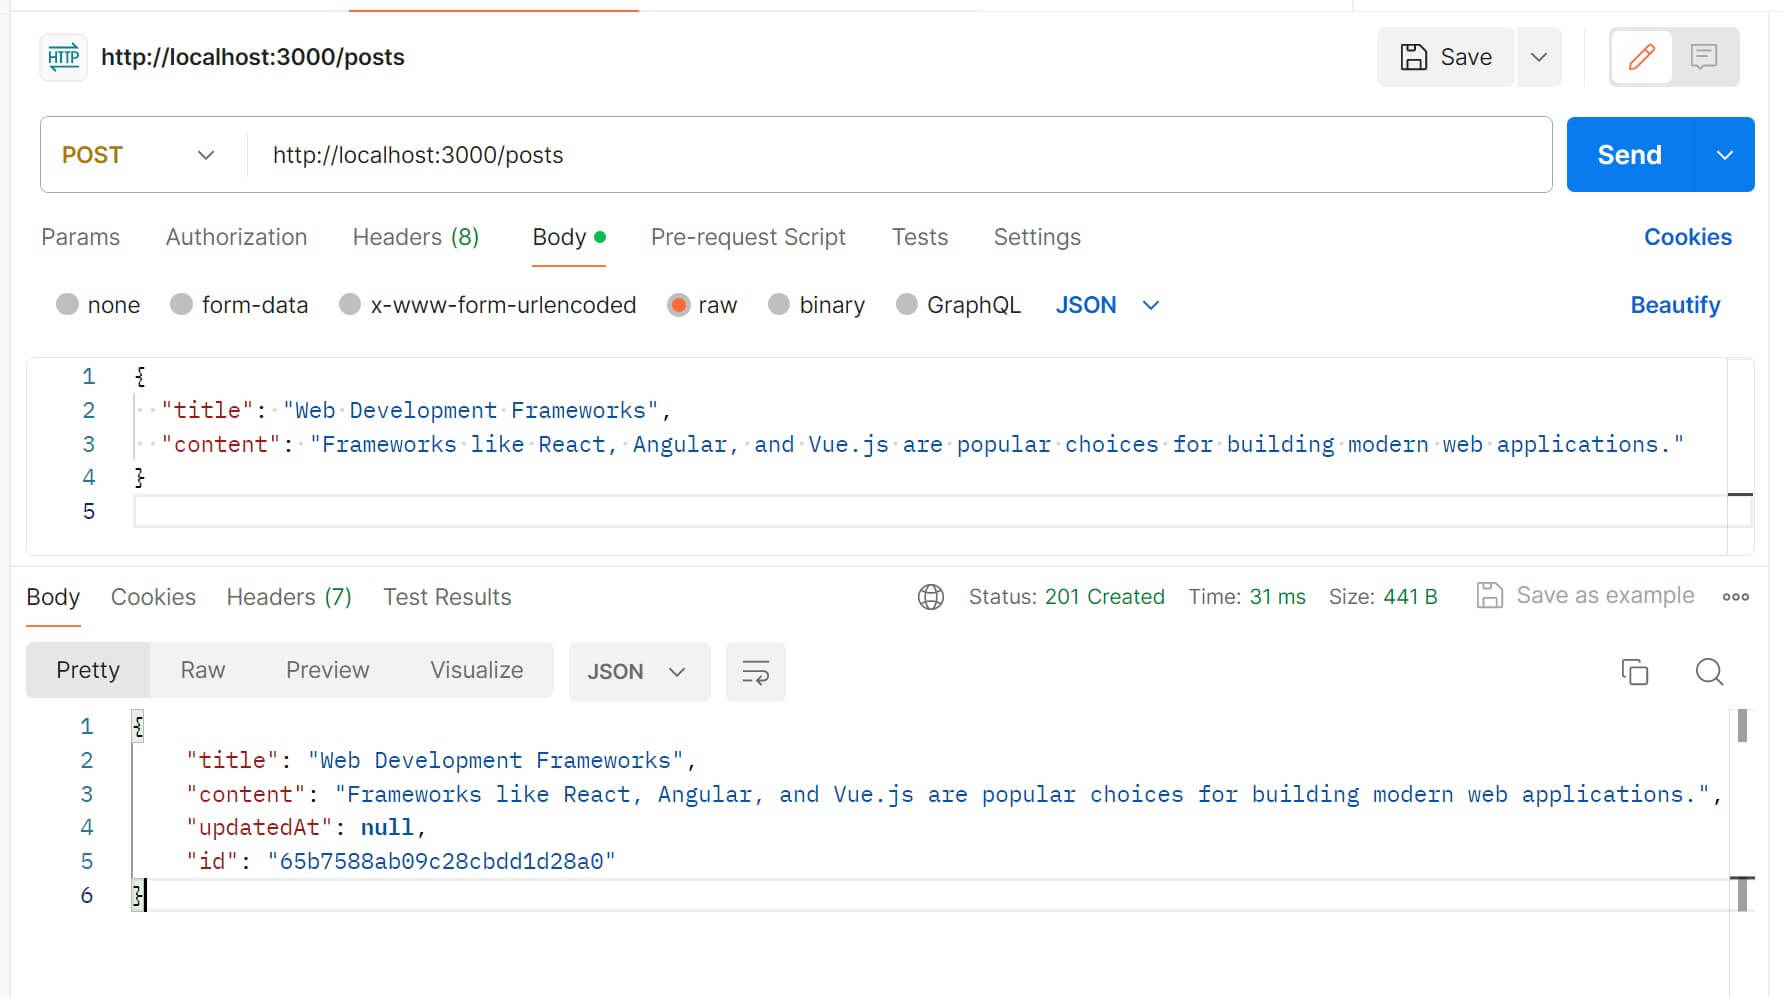
To create a new item, use Postman and send a POST request to http://localhost:3000/posts as follows:
{
  "title": "Web Development Frameworks",
  "content": "Frameworks like React, Angular, and Vue.js are popular choices for building modern web applications."
}
At the same time, send a GET request to http://localhost:3000/posts and check if the data was added:
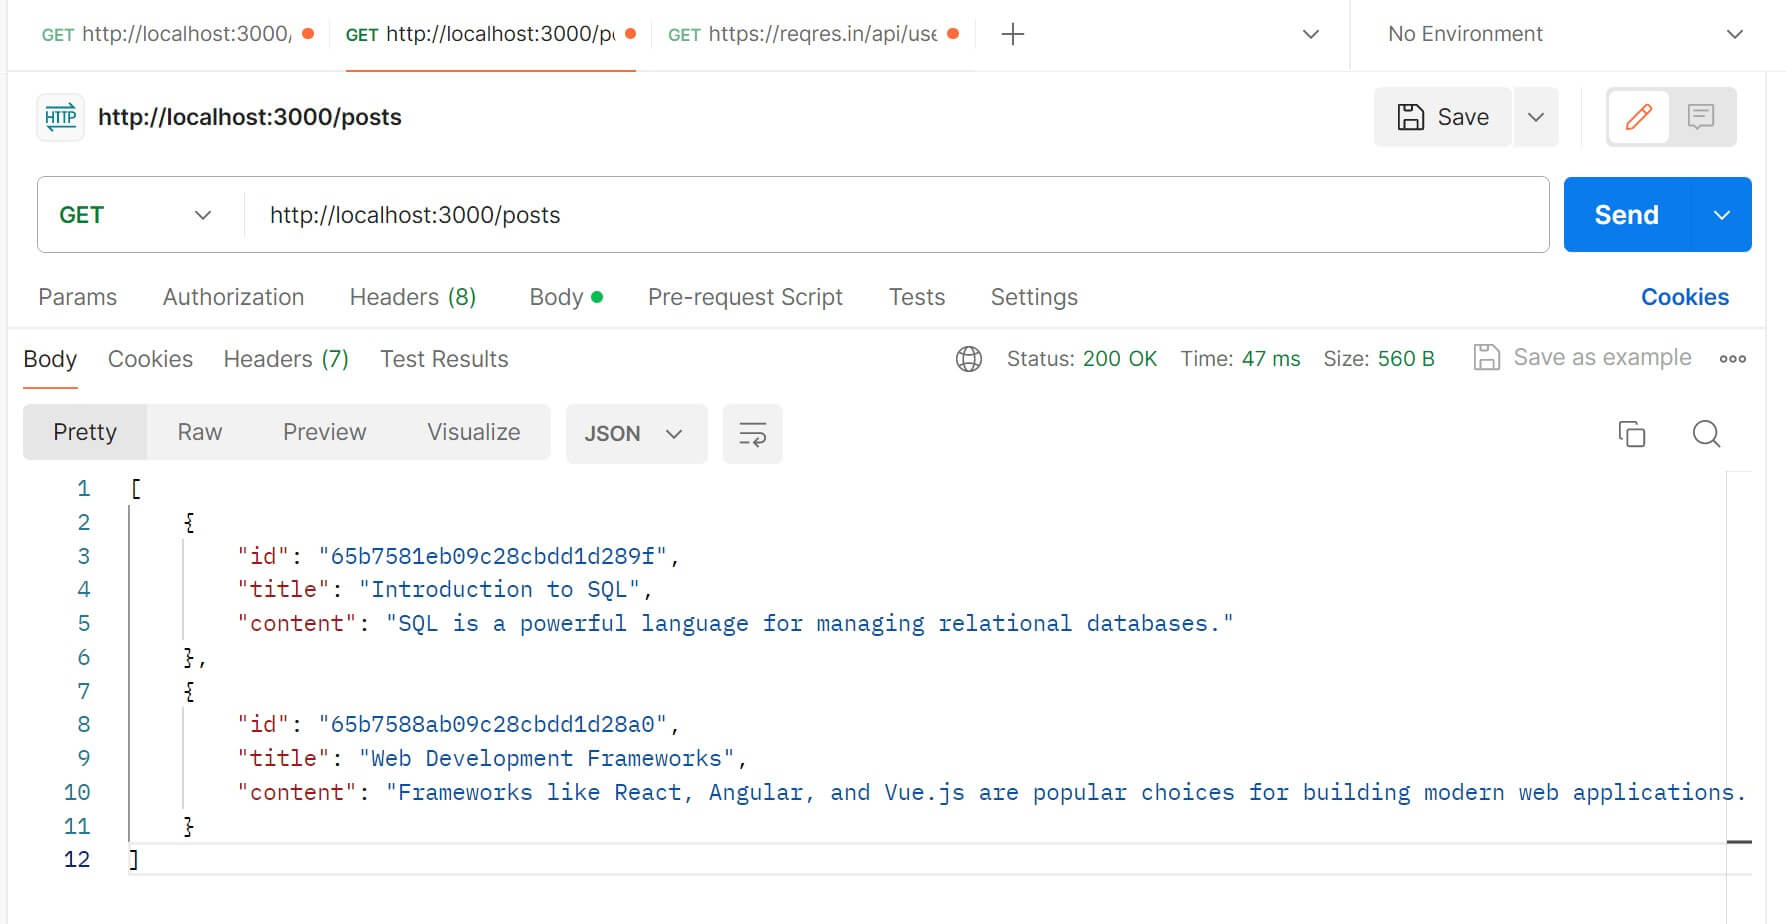
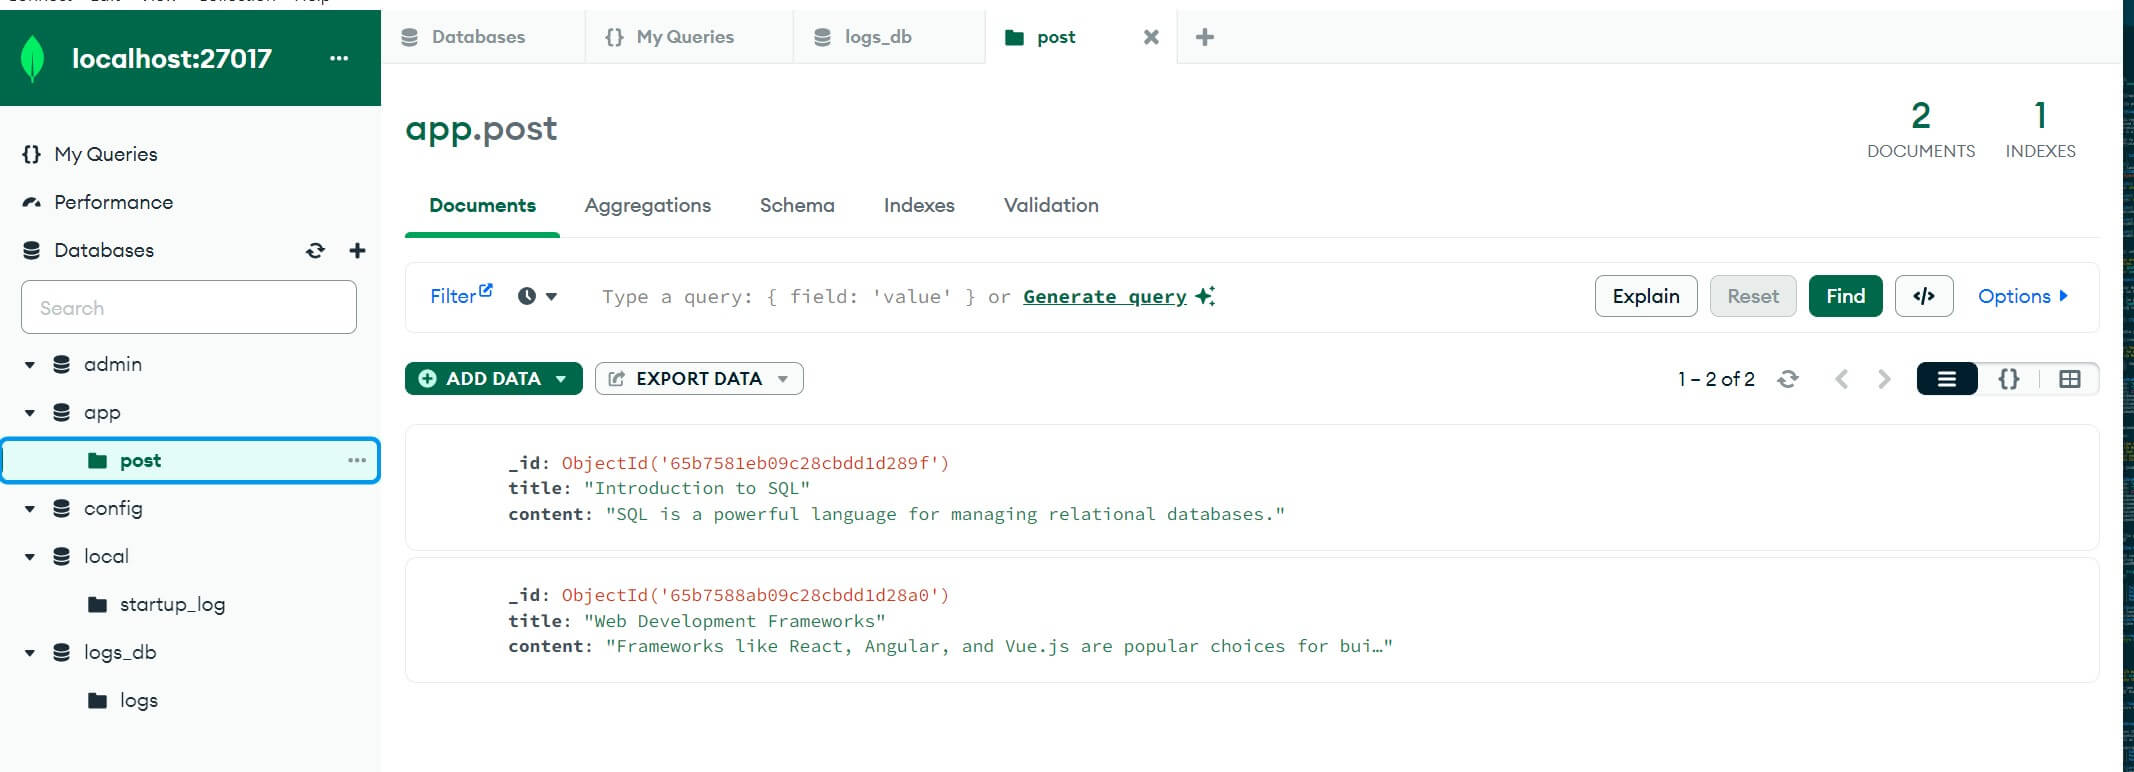
Go to MongoDB and confirm you have the added items. This will ensure that your TypeORM Nest.js and MongoDB app works as expected.
To create UPDATE and Delete methods, check this TypeORM Nest.js guide for more details.
Conclusion
Along this example guide, you have learned an Easy TypeORM with Nest.js and MongoDB Example Tutorial. I hope you can now leverage TypeORM and get its advantages on Nest.js to utilize the NoSQL MongoDB database.
Written By: