Guide To TypeORM SQLite With Nest.js and Typescript
Posted October 2, 2023

Unlock the power of TypeORM, SQLite, Nest.js, and TypeScript. You’ll create a Nest.js TypeORM SQLite example and use SQLite in memory with Nest.js
TypeORM allows you to create ORMs for both TypeScript and JavaScript. SQLite is a perfect relational database that uses an in-memory disk to save and manage data. This gives you a perfect database interaction through TypeScript classes and decorators.
In this comprehensive guide, you’ll set up TypeORM and SQLite within Nest.js. Dive and learn how SQLite works with TypeORM.
Prerequisites
To dive in and create a Nest.js TypeORM SQLite example app, ensure you have the following:
-
Node.js installed on your machine.
-
Basic Knowledge of Nest.js will be great.
Related: Guide to TypeORM with NestJS, Postgres, MySQL, Multer, Docker, and Docker Compose
-
Check and ensure Nest.js CLI is installed globally:
npm install -g @nestjs/cli
Related: Guide To TypeORM SQLite with Nest.js and Typescript
Let’s now get into this guide and create a TypeORM SQLite CRUD API.
Creating a Nest.js app with TypeORM and SQLite
The first step is to ensure you have the Nest.js app ready.
nest new nestjs-typeorm-sqlite
Change the directory to the nestjs-typeorm-sqlite folder:
cd nestjs-typeorm-sqlite
You can test your app running npm run start, and you should be served with the Hello World Nest.JS app on http://localhost:3000/.
Let’s now get TypeORM SQLite with Nest.js CRUD app and running. But first, you will need some libraries:
- TypeORM and @nestjs/typeorm as your ORMs packages
- SQLite client SQLite drivers
- Class-validator for creating decorator validations
Install the above packages using the following command:
npm i typeorm @nestjs/typeorm sqlite class-validator
It’s time to create your CRUD API, so run the following commands to generate menu modules:
nest g module menu
nest g service menu --no-spec
nest g controller menu --no-spec
This should generate a src/menu folder with menu.module.ts, menu.service.ts, and menu.controller.ts files. So, let’s now create the app logic.
Creating a TypeORM Entity Class for SQLite dB
An entity is the blueprint for your database table. TypeORM will use entities to generate your database tables and populate them with columns and properties.
To set up an entity:
Create a file named menu.entity.ts in your src/menu folder. Here’s an example of how you can create an Entity:
- Import entity properties you want from TypeORM:
import { Entity, PrimaryGeneratedColumn, Column } from 'typeorm';
- Create your table as an entity:
@Entity('menus') // maps the Menu entity to the 'menus' table in the SQLite database
Note: parameter
menusis used to map your database and create amenustable.
- Add decorators to create your table columns as follows:
export class Menu {
  @PrimaryGeneratedColumn()
  id: number;

  @Column({ name: 'name', length: 70, nullable: false })
  name: string;

  @Column({ name: 'description', length: 180, nullable: false })
  description: string;

  @Column({ name: 'imageUrl', nullable: false })
  imageUrl: string;

  @Column({name: 'rating', type: 'float', nullable: true})
  rating: number;
}
Here:
- You are creating a table with ID, imageUrl, name, description, and rating representing a menus table.
- The
PrimaryGeneratedColumndecorator tells TypeORM to instruct SQLite that the Column ID is your primary key. - Each entry is created using the
@Columndecorator. For example,ratingis of type integer, and it cannot be NULL, so@Column({ name: 'imageUrl', nullable: false })will do the job
Below is a complete overview of your complete Entity code in your src/menu/menu.entity.ts file:
import { Entity, PrimaryGeneratedColumn, Column } from 'typeorm';

@Entity('menus')
export class Menu {
  @PrimaryGeneratedColumn()
  id: number;

  @Column({ name: 'name', length: 70, nullable: false })
  name: string;

  @Column({ name: 'description', length: 180, nullable: false })
  description: string;

  @Column({ name: 'imageUrl', nullable: false })
  imageUrl: string;

  @Column({name: 'rating', type: 'float', nullable: true})
  rating: number;
}
Creating your TypeORM SQLite Connection with Nest.js
This entity sets the structure of your table on the SQLite. TypeORM needs to establish a connection to your database. Let’s implement this step.
- First, ensure your
Menumodule can access your entity. Update thesrc/menus/menus.module.tsfile as follows:
import { Module } from '@nestjs/common';
import { MenuService } from './menu.service';
import { MenuController } from './menu.controller';
import { TypeOrmModule } from '@nestjs/typeorm';
import { Menu } from './menu.entity';

@Module({
  imports: [TypeOrmModule.forFeature([Menu])],
  controllers: [MenuController],
  providers: [MenuService],
})
export class MenuModule {}
- Head over to Nest.js entry point
src/app.module.tsfile and add your database connection as follows:
import { TypeOrmModule } from '@nestjs/typeorm';
import { DataSource } from 'typeorm';
import { Module } from '@nestjs/common';
import { AppController } from './app.controller';
import { AppService } from './app.service';
import { MenuModule } from './menu/menu.module';
import { Menu } from './menu/menu.entity';
- Create TypeORM Sqlite connection with NestJs as follows:
@Module({
  imports: [
    TypeOrmModule.forRoot({
      type: 'sqlite',
      database: 'db/sql',
      synchronize: true,
      entities: [Menu],
    }),
    MenuModule,
  ],
  controllers: [AppController],
  providers: [AppService],
})
export class AppModule{}
SQLite is in memory management. You must add database: 'db/sql'. TypeORM will create db/sql as your database in this case.
The type: 'sqlite' tells TypeORM to use SQLite. This connection will execute entities: [Menu]
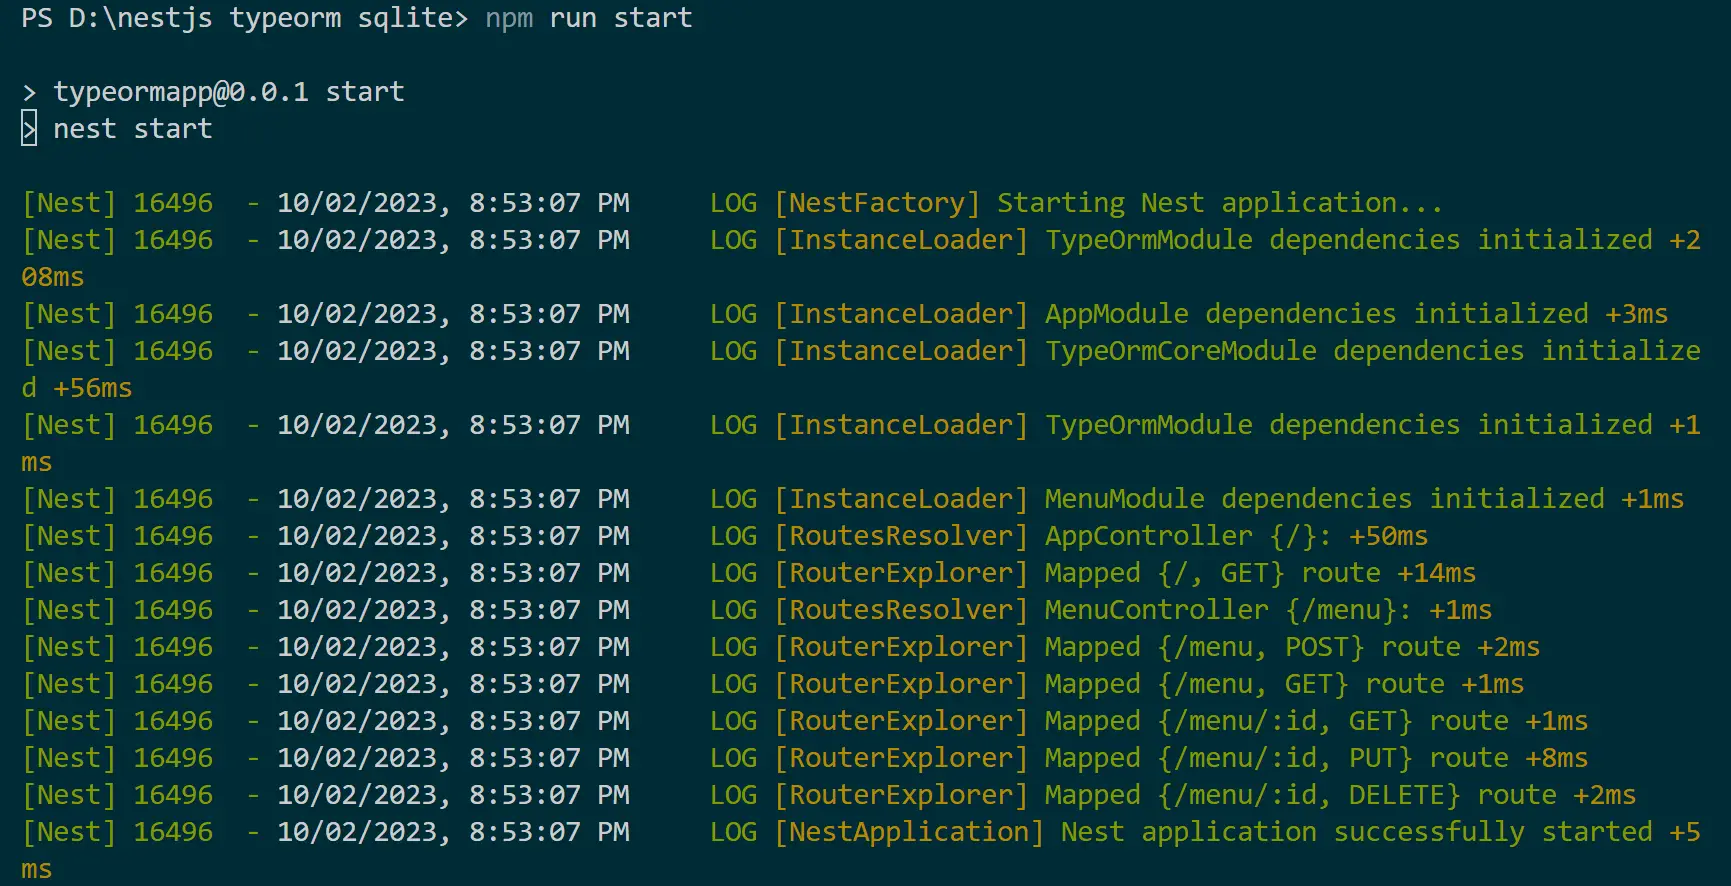
To confirm your database Configuration is working, run the following command:
npm run start
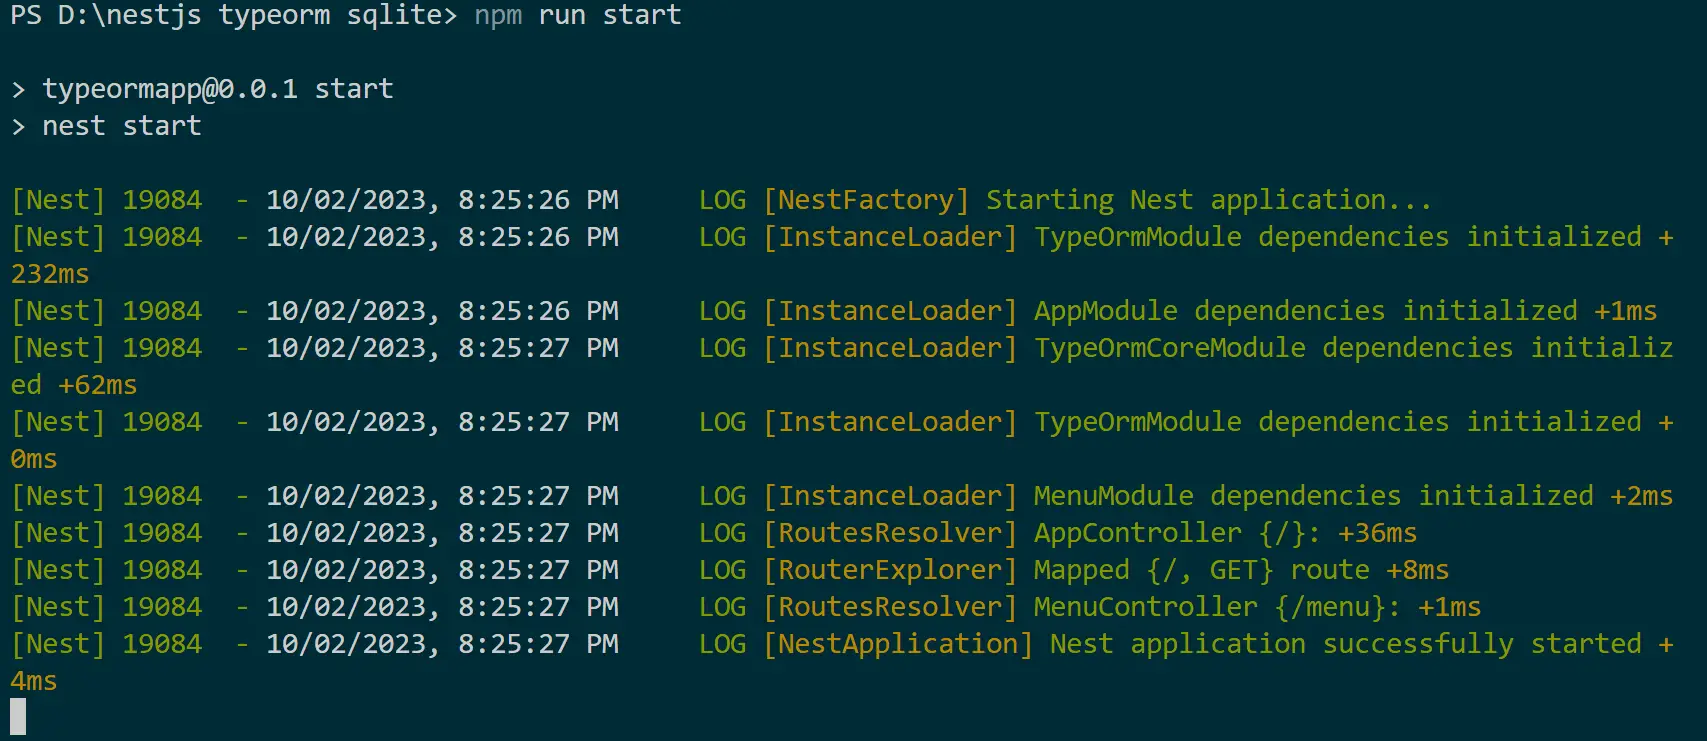
This should be enough to create a table menu and its related fields on your SQLite. You can check your database using SQLite viewer for Visual studio code.
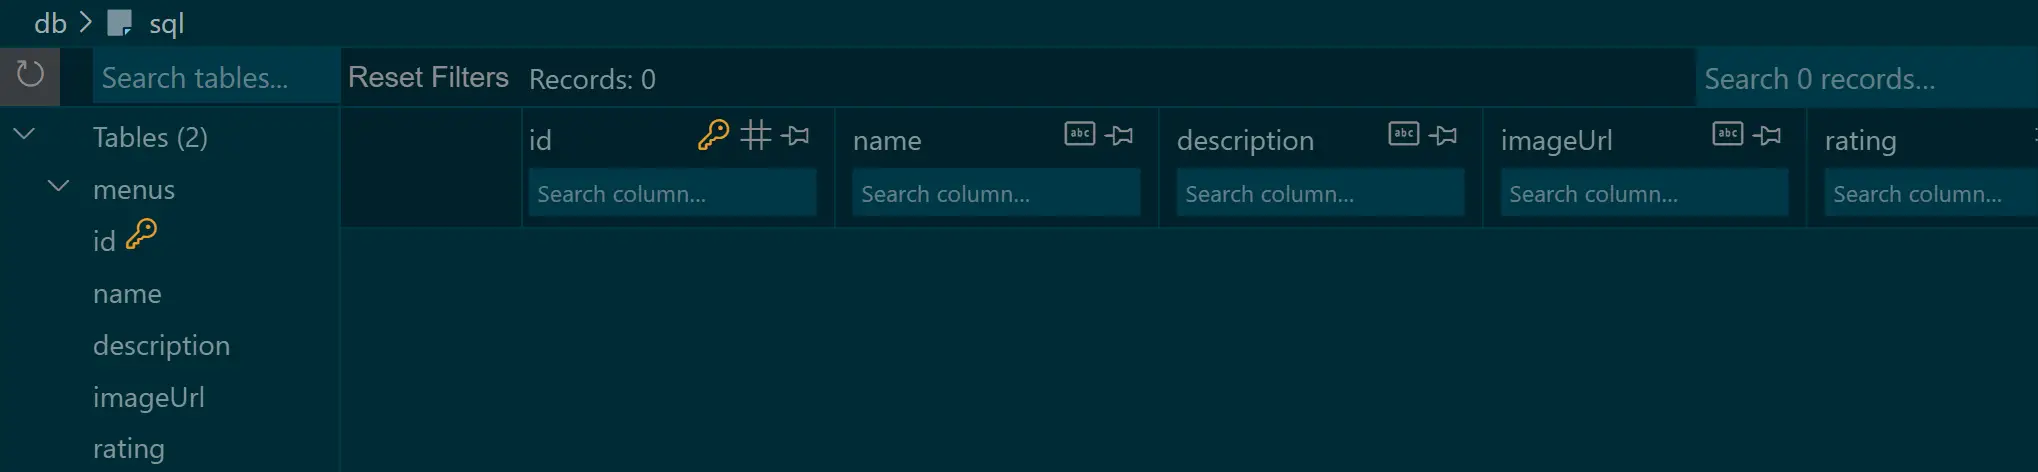
Congratulations! Your TypeORM SQLite connection is working. Now, why not dive deeper and add data to this database? Let’s create a TypeORM SQLite Nest.js-inspired CRUD API to do so.
Setting up TypeORM SQLite DTO
DTOs tell TypeORM the fields required in a request. In this context, you’ll create DTOs for adding and creating a menu. This helps serve the correct GET and POST request data objects.
To set this up, navigate to your src/menu folder and create a dto folder within it. Then add two files as below:
create-menu.dto.ts
// create-Menu.dto.ts
import { IsNotEmpty, IsString, IsInt, IsPositive } from 'class-validator';

export class CreateMenuDto {
  @IsNotEmpty({ message: 'Field name must be added' })
  @IsString()
  name: string;

  @IsNotEmpty({ message: 'Field description must be added' })
  @IsString()
  description: string;

  @IsNotEmpty({ message: 'Provide an image URL' })
  imageUrl: string;

  @IsNotEmpty({ message: 'Rating must be added' })
  @IsInt({ message: 'Rating must be of type number' })
  @IsPositive()
  rating: number;
}
update-menu.dto.ts
// update-menu.dto.ts
import { IsString, IsUrl, IsNotEmpty,IsOptional, IsNumber, IsPositive } from 'class-validator';

export class UpdateMenuDto {
@IsNotEmpty({ message: 'field name must be added' })
  @IsString()
  name?: string;

  @IsOptional()
  @IsString()
  description?: string;

  @IsOptional()
  @IsUrl()
  imageUrl?: string;

  @IsOptional()
  @IsNumber()
  @IsPositive()
  rating?: number;
}
These DTOs use a class-validator to ensure your request payload has the required fields.
Implementing TypeORM SQLite CRUD Methods
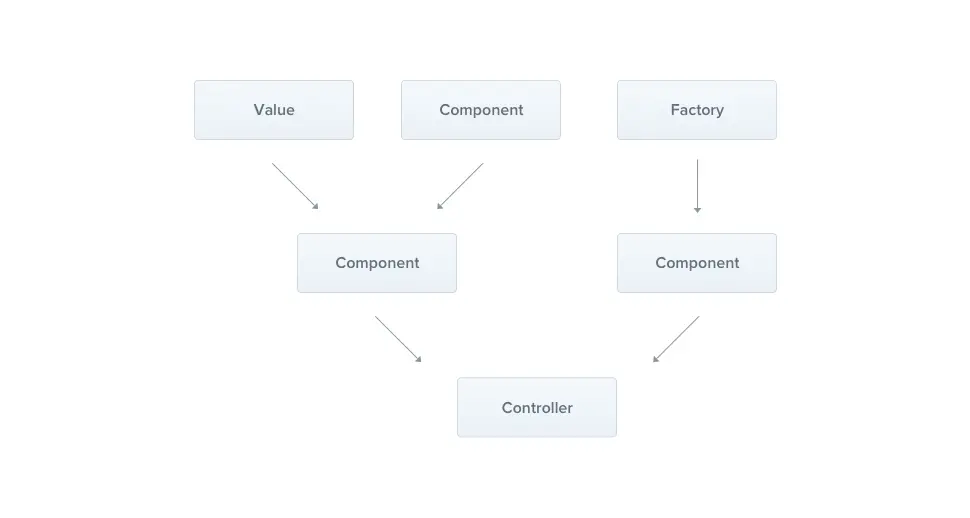
TypeORM utilizes the repository design pattern to fetch the database data source specific to your current context.
This approach uses Providers to establish a repository housing all the CRUD operations you intend to use.
You’ll then have Controllers dedicated to handling HTTP requests as your Providers take charge of handling more complex tasks.
To implement this, navigate to src/menu/menu.service.ts and create your providers as follows:
- Add your imports:
// menu.service.ts
import { Injectable, NotFoundException } from '@nestjs/common';
import { InjectRepository } from '@nestjs/typeorm';
import { Repository } from 'typeorm';
import { CreateMenuDto } from './dto/create-menu.dto';
import { UpdateMenuDto } from './dto/update-menu.dto';
import { Menu } from './menu.entity';
- Modify your Repository with
@Injectable()decorator as follows:
@Injectable()
export class MenuService {
  constructor(
    @InjectRepository(Menu)
    private readonly menuRepository: Repository<Menu>,
  ) {}
  // Add CRUD operations you intend to use here
}
This way, all the next CRUD logic you create will be added in the above Repository (// Add CRUD operations you intend to use here)
- Fetch all menus
  async findAll(): Promise<Menu[]> {
    return await this.menuRepository.find();
  }
- Fetch a single menu by ID
  async findOne(id: number): Promise<Menu> {
    const menu = await this.menuRepository.findOne({ where: { id: id } });
    if (!menu) {
      throw new NotFoundException(`Menu with ID ${id} not found`);
    }
    return (menu);
  }
- Add a new menu to SQLite
  async create(createMenuDto: CreateMenuDto): Promise<Menu> {
    const menu = this.menuRepository.create(createMenuDto);
    return await this.menuRepository.save(menu);
  }

  async findAll(): Promise<Menu[]> {
    return await this.menuRepository.find();
  }
- Update a menu by ID with new data
  async update(id: number, updateMenuDto: UpdateMenuDto): Promise<Menu> {
    const menu = await this.findOne(id);
    Object.assign(menu, updateMenuDto);
    return await this.menuRepository.save(menu);
  }
- Remove a menu by ID from SQLite
  async remove(id: number) {

    const result = await this.menuRepository.delete(id);
    if (result.affected === 0) {
      throw new NotFoundException(`A menu "${id}" was not found`);
    }
    return { message: 'Menu successfully deleted' };
  }
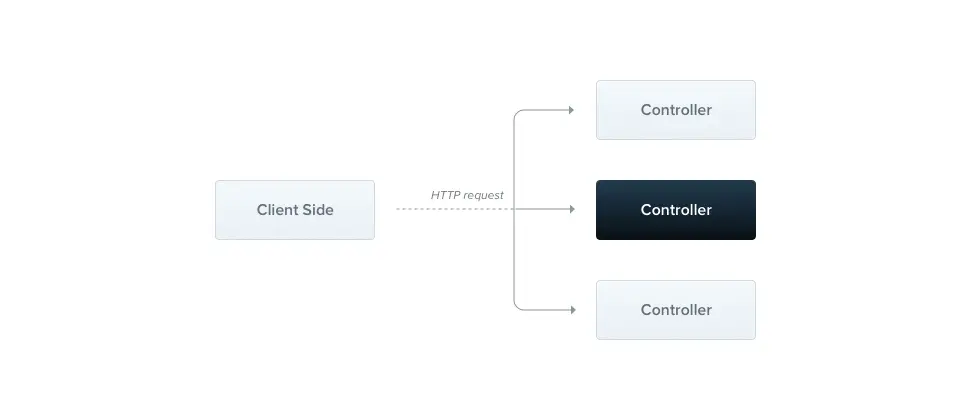
Creating TypeORM SQLite HTTP Routing
To make these methods accessible over HTTP, you’ll need to create a controller. The controller manages the routing mechanism when your application receives requests. This handles the execution of CRUD HTTP methods like GET, POST, DELETE, and PUT.
Navigate to src/menu/menu.controller.ts and create your controllers as follows:
// menu.controller.ts
// Import necessary modules and dependencies
import { Controller, Get, Post, Put, Delete, Param, Body } from '@nestjs/common';
import { MenuService } from './menu.service';
import { Menu } from './menu.entity';
import { UpdateMenuDto } from './dto/update-menu.dto';
import { CreateMenuDto } from './dto/create-menu.dto';

@Controller('menu') // Define the base route for this controller
export class MenuController {
  constructor(private readonly menuService: MenuService) {} // Inject the MenuService instance

  @Post() // Handle HTTP POST requests to create a menu
  create(@Body() createMenuDto: CreateMenuDto): Promise<Menu> {
    return this.menuService.create(createMenuDto);
  }

  @Get() // requests to retrieve all menus
  findAll(): Promise<Menu[]> {
    return this.menuService.findAll();
  }

  @Get(':id') // requests to retrieve a menu by ID
  findOne(@Param('id') id: string): Promise<Menu> {
    return this.menuService.findOne(+id);
  }

  @Put(':id') // PUT requests to update menu by ID
  update(@Param('id') id: string, @Body() updateMenuDto: UpdateMenuDto): Promise<Menu> {
    return this.menuService.update(+id, updateMenuDto);
  }

  @Delete(':id') // HTTP DELETE requests to remove a menu by ID
  remove(@Param('id') id: string) {
    return this.menuService.remove( +id);
  }
}
Now you will be able to access your API over http://localhost:3000/menu
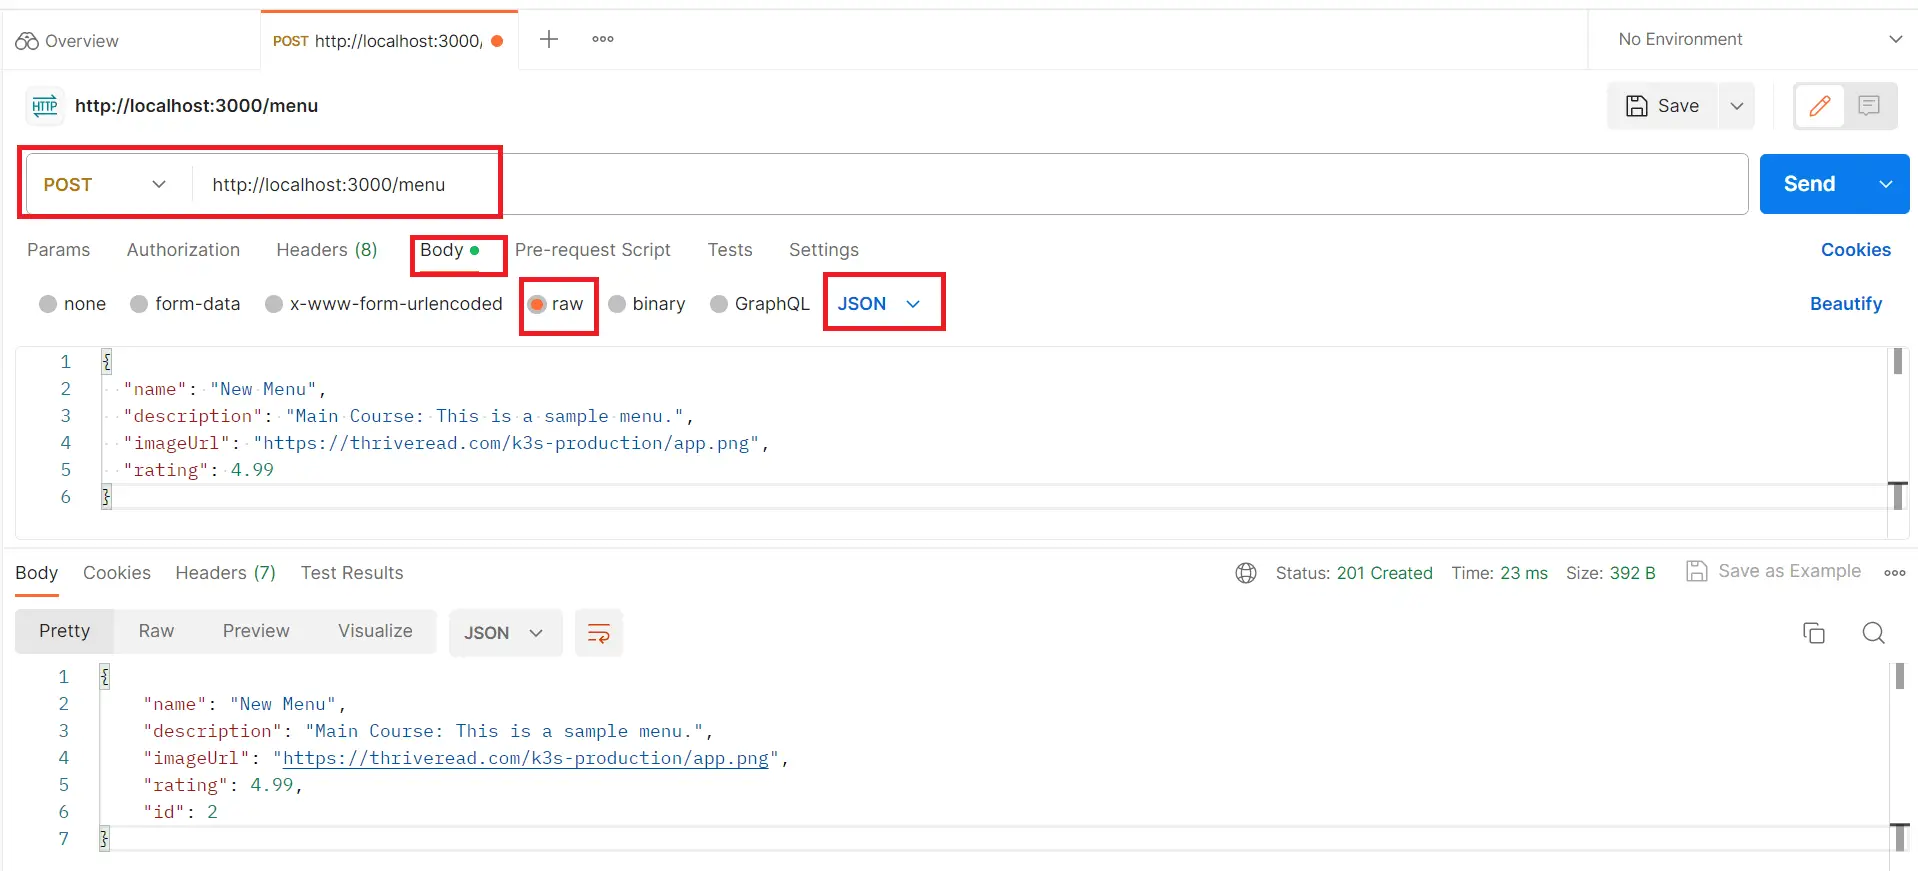
Testing TypeORM SQLite Nest.js Integration with Postman
Now, let’s put what we’ve built to the test. Open Postman and send your first POST request by running the following command:
npm run start
Your JSON payload should be ready as follows:
{
  "name": "New Menu",
  "description": "Main Course: This is a sample menu.",
  "imageUrl": "https://thriveread.com/k3s-production/app.png",
  "rating": 4.99
}
SEND your POST request to http://localhost:3000/menu as follows:
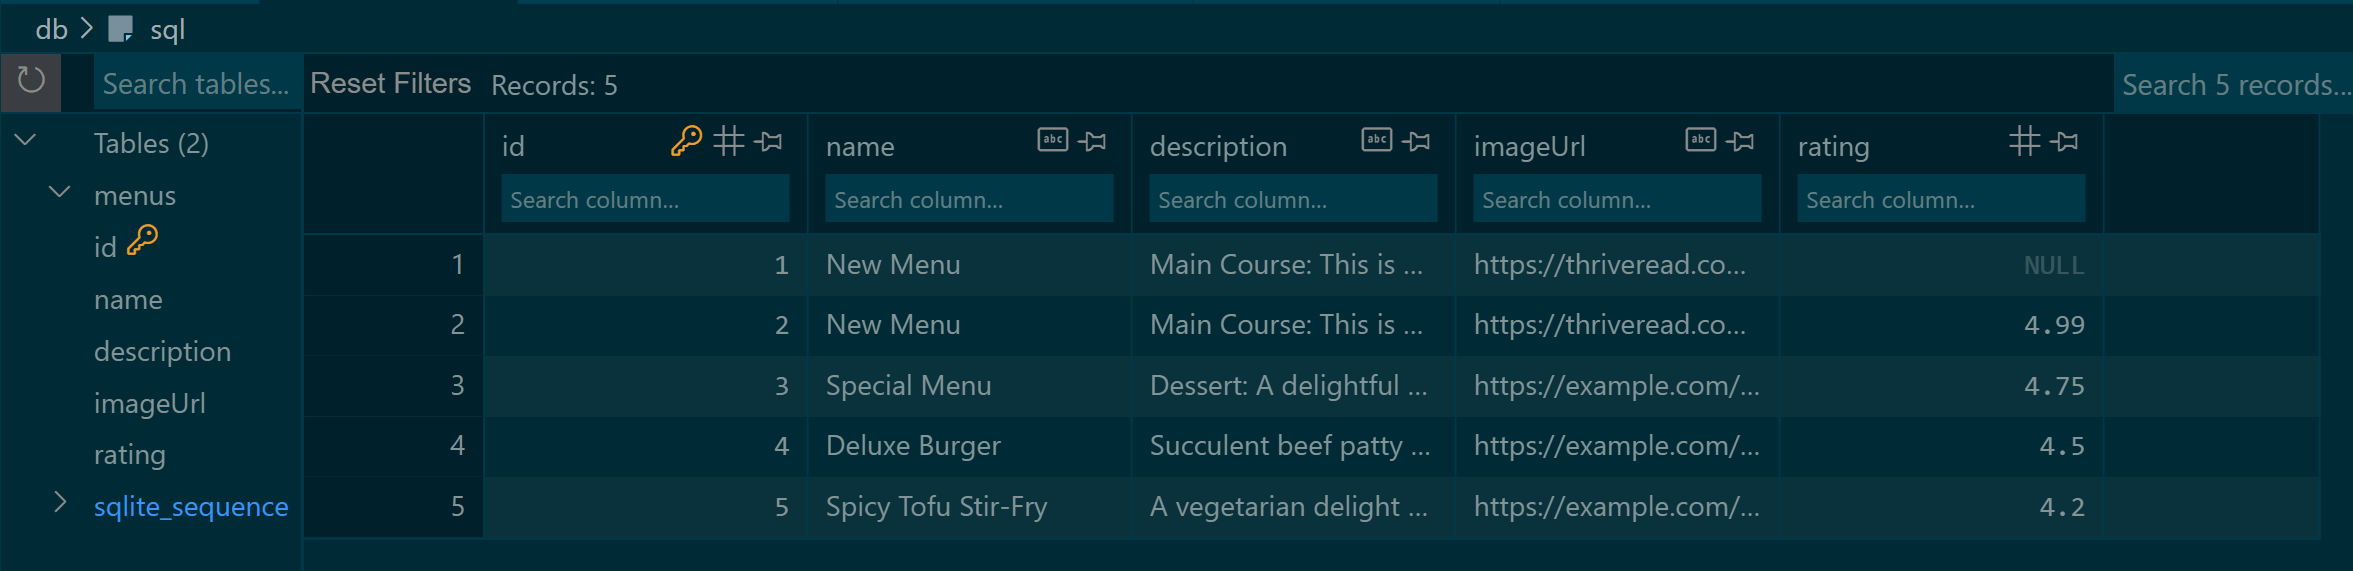
Go ahead and add different items using a POST request. The changes you add should be reflected on your SQLite:
Now you can go further and send requests to the other methods (ID should be replaced with the menu ID. ):
- To get all menus:
http://localhost:3000/menu - To fetch one menu:
http://localhost:3000/menu/id - Update a menu:
http://localhost:3000/menu/id - Delete a menu:
http://localhost:3000/menu/id
Conclusion
This guide successfully taught you how to set up TypeORM and SQLite in a Nest.js app using TypeScript to handle all database operations.
All code used to create this Nest.js TypeORM SQLite tutorial is hosted on GitHub Repository
Written By: